About UI Framework
- 5-6 minutes to read
Here, you will find the information you need to get started with the UI Framework. It gives you a high-level explanation of how to work with it, as well as some links to the documentation and useful resources.
Why UI Framework?
Different personalization processes require different workflows. A user interface that works great for ordering mugs is not very good for direct mail or photo books. That's why it is not practical to create a universal editor for all kinds of scenarios.
On the other hand, creating a separate editor for each product category may make the integration quite complicated. What you really need is a way to describe all your ordering workflows (i.e. editor) as a configuration file. It will allow you to load different types of editors in a unified way.
This is where UI Framework comes in.
How does it work?
To use the UI Framework configuration, you need to create the config files in JSON format. To run them and get the editor on your screen, you need a few things:
- Prepare a
<div>element that will host the editor somewhere on your screen. - Load a JSON to the page.
- Load our JS library, then insert some JS code that loads all necessary libraries and initialize the editor.
Where can I find JS libraries and config examples?
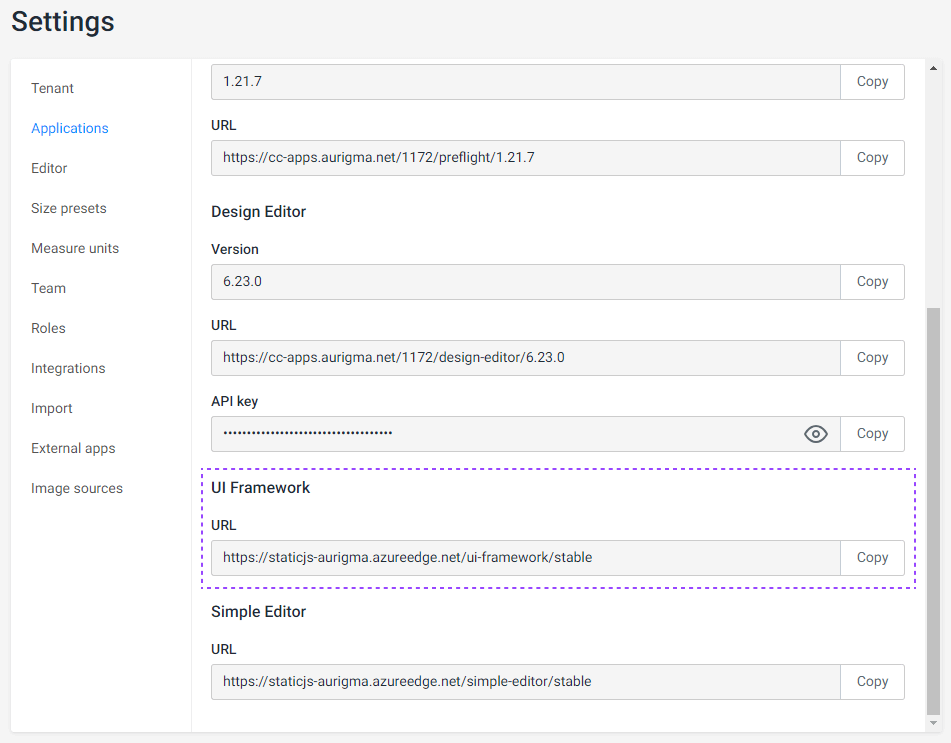
If you already have a Customer's Canvas account, you may find a link to UI Framework located on our CDN in the Settings > Applications tab in your account.

If you prefer to have a local copy, you can find it in our npm repository.
npm install @aurigma/ui-framework
Documentation
The documentation for UI Framework includes a quick start guide, the syntax reference, the widget reference, and a lot of other information that will help you use it efficiently.
Sample configs
You can find some sample configs in this Github repository:
https://github.com/aurigma/CCSample-UIFramework
Tip
We recommend you to read this article to the end before you start experimenting with UI Framework.
UI Framework configs structure
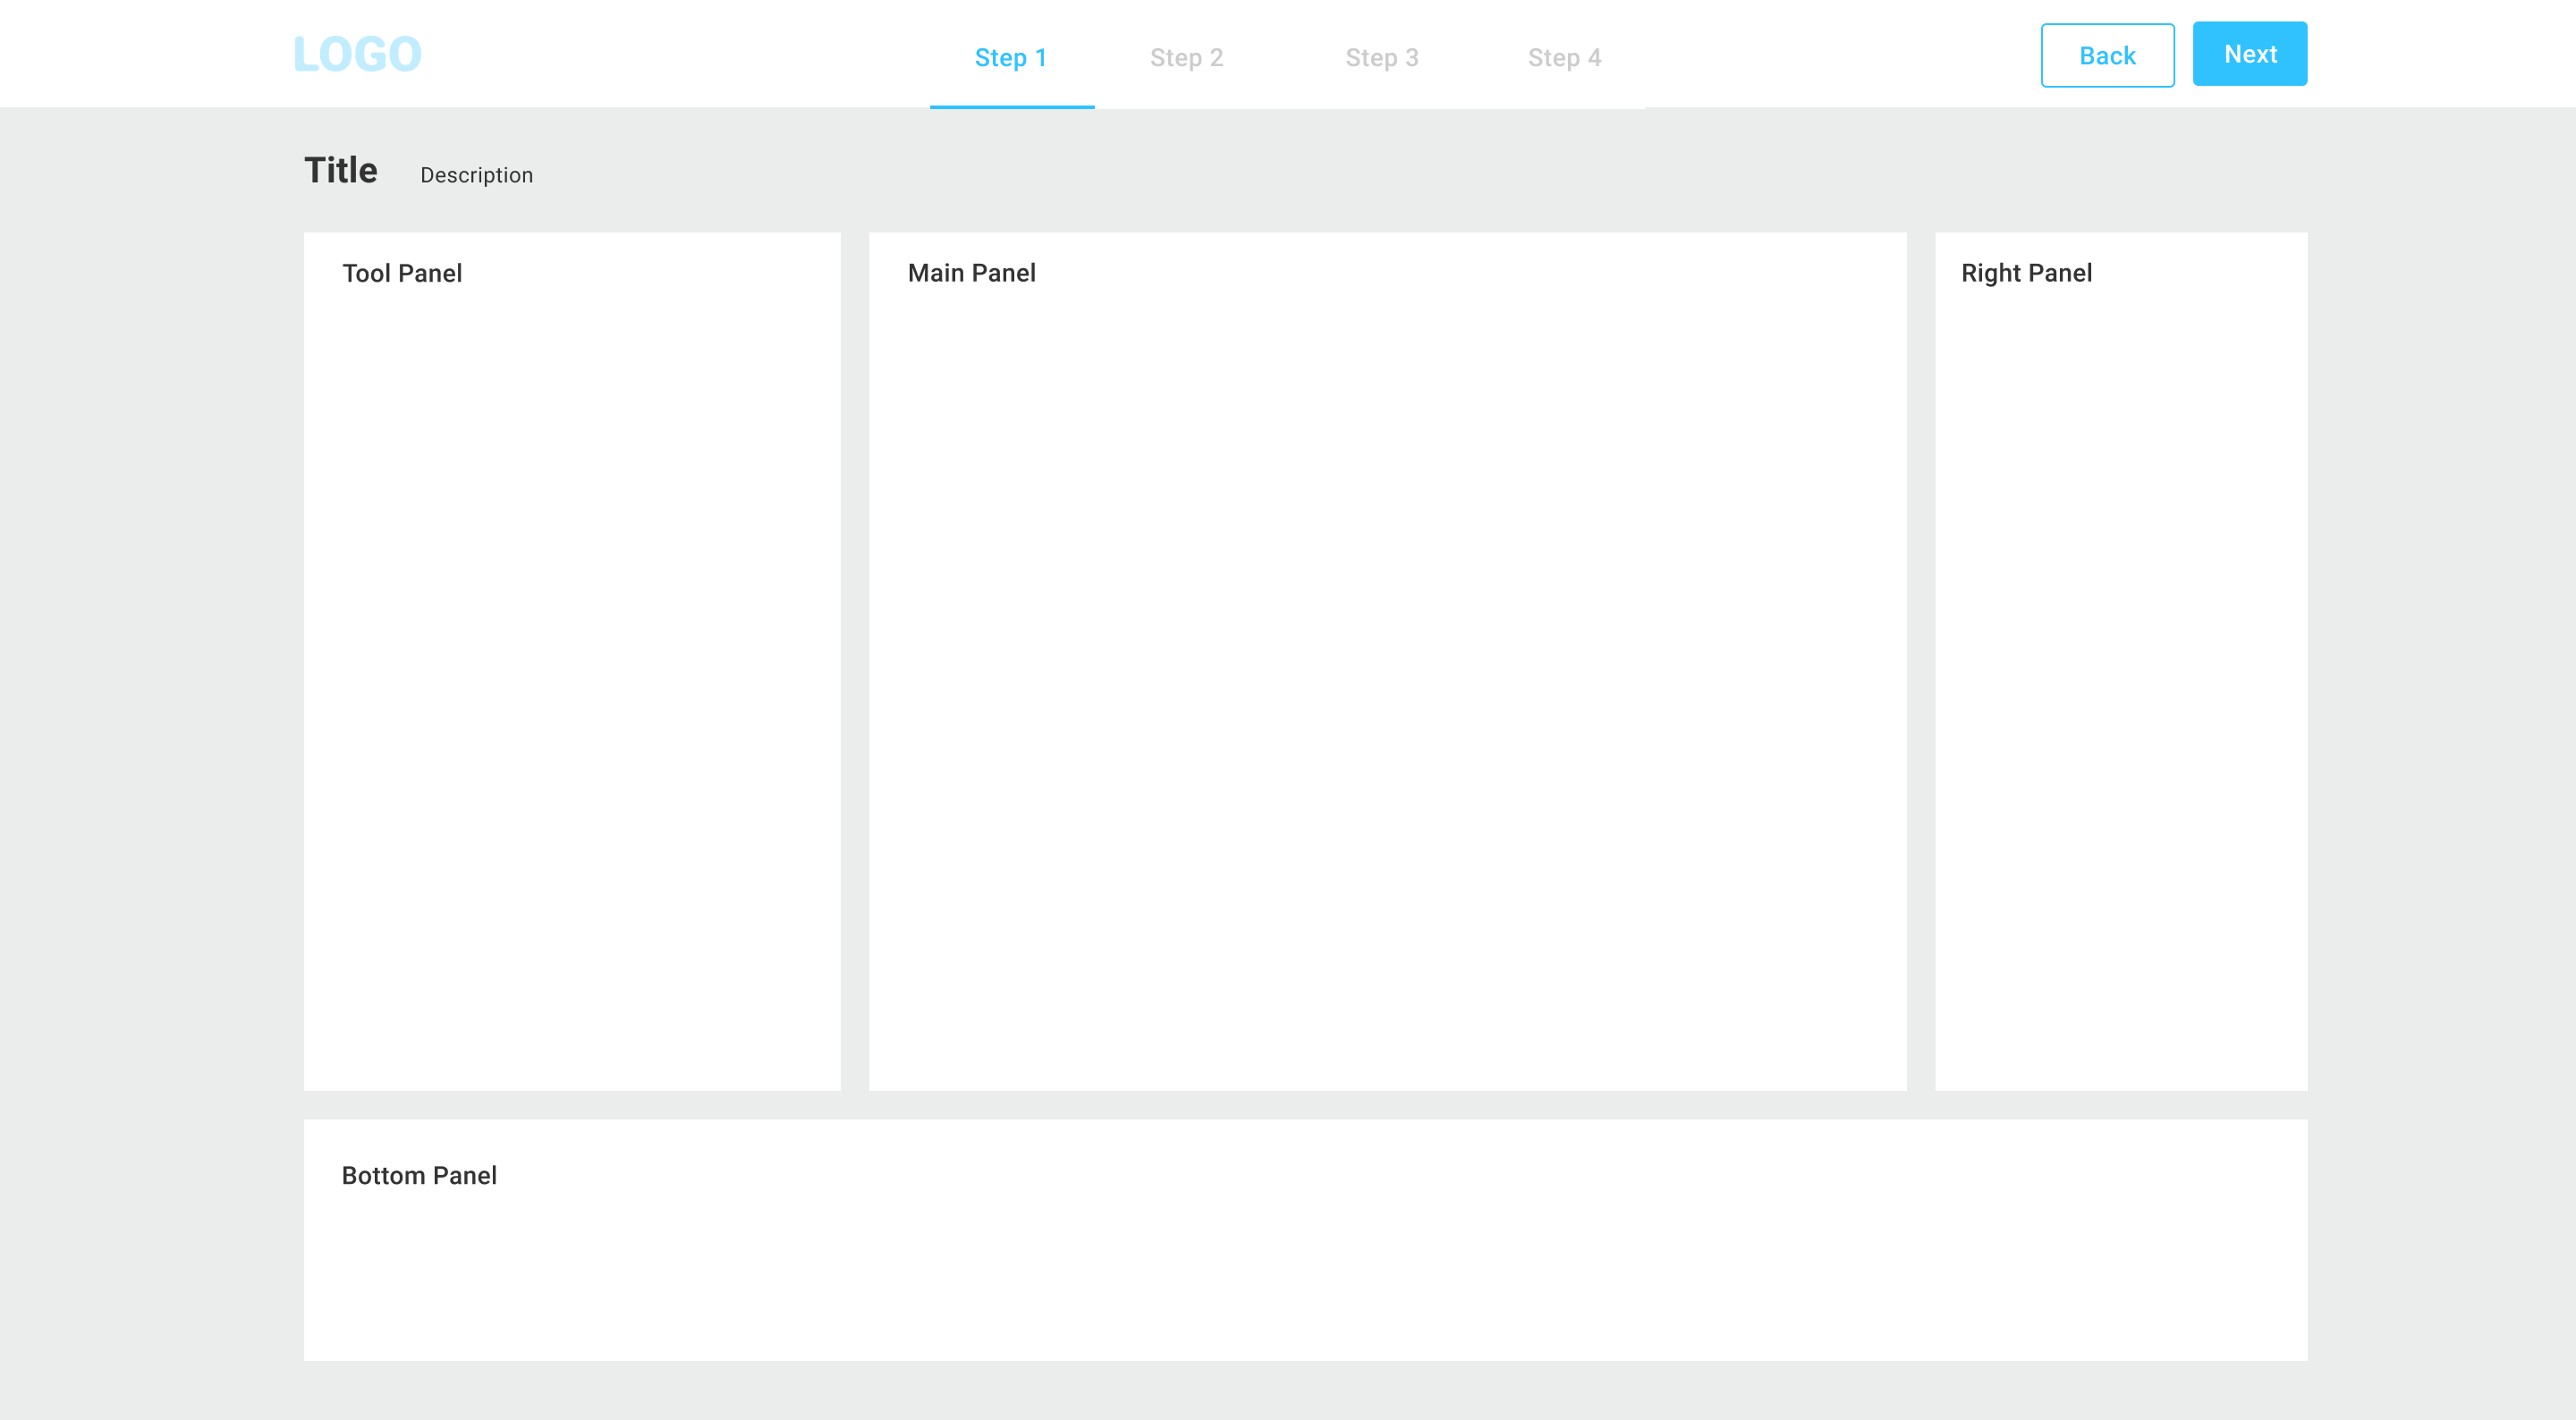
The idea of the UI Framework config is simple. You are describing your order process in steps. For example:
- Step 1 - Edit a front side of a product.
- Step 2 - Edit a back side of a product.
- Step 3 - Review a proof image and approve the result.
Or:
- Step 1 - Choose a postcard template from a list.
- Step 2 - Personalize a template.
- Step 3 - Personalize an envelope.
- Step 4 - Review a proof image and approve the result.
Each step consists of panels.

You may insert widgets to these panels. If a panel is empty, it is automatically collapsed.
Examples of widgets are:
- Design editor
- Preflight tool
- List of images
- Buttons, checkboxes, input elements, etc.
- Groups
- Options
- ...
For each widget, you may add parameters that can be either static or dynamic (i.e. depending on other widgets). When the value of a dynamic parameter changes, the config is automatically updated and re-applied to a widget. For example, let's imagine that you have a dropdown list with design variations. You can setup the editor to re-load a design every time a user chooses a different value in the dropdown list.
It is also possible to call JavaScript methods, make API calls to web services, and many other functions that make UI Framework a powerful platform for implementing even quite complicated ordering workflows.
JSON format
UI Framework config is just a JSON file. Here is an example of the simplest "hello world" config file:
{
    "showSteps": false,
    "widgets": [
      {
        "name": "text",
        "type": "static-text",
        "params": {
          "text": "Hello world"
        }
      }
    ],
    "steps": [
      {
        "name": "main",
        "mainPanel": {
          "name": "text"
        }
      }
    ]
  }
It may include some dynamic expressions inside double curly braces:
{
  "showSteps": false,
  "widgets": [
    {
      "name": "widget-1",
      "type": "input-text",
      "params": {
        "defaultValue": "Hello world"
      }
    },
    {
      "name": "widget-2",
      "type": "static-text",
      "params": {
        "text": "{{ $['widget-1'].value}}"
      }
    }
  ],
  "steps": [
    {
      "name": "main",
      "toolPanel": {
        "name": "widget-1"
      },
      "mainPanel": {
        "name": "widget-2"
      }
    }
  ]
}
The dynamic expressions may be more complicated. They support a handlebar-like template syntax with loops and conditions. Inside the expressions, you may insert JavaScript code. For example:
{
  "name": "widget-2",
  "type": "html",
  "params": {
    "template": {
      "<>": "ul",
      "html": {
        "{{#if $['widget-1'].value != ''}}": {
          "{{#each $['widget-1'].value.split(',') as element}}": {
            "<>": "li",
            "html": "{{element}}"
          }
        },
        "{{#else}}": "None"
      }
    }
  }
}
Parameterizing configs
After reading the previous sections, you may notice that it's convenient to store config files separately from your code. This may make you wonder if you have to create a separate config for every single situation, even if the only change is, for example, the name of a template.
Thankfully, this is not the case. You may use two approaches to do this.
Modify configs on the fly
The first method is to modify the JSON file programmatically. As you might have noticed, the config file is always valid JSON. Therefore, it is pretty easy to modify a config "on the fly" before you pass it to the editor loader.
Of course, searching for the specific widgets and changing their parameters is an awkward practice that may make the process of config editing appear very challenging. To avoid this, you may use a special section in the config, called vars, where you can put any JSON values. You may use those vars using the dynamic expression, like this:
{
  "showSteps": false,
  "vars": {
    "foo": "bar"
  },
  "widgets": [
    {
      "name": "widget-1",
      "type": "input-text",
      "params": {
        "defaultValue": "{{vars.foo}}"
      }
    },
  ],
  "steps": [
    {
      "name": "main",
      "mainPanel": {
        "name": "widget-2"
      }
    }
  ]
}
If you modify the value foo inside vars before opening the editor, your changes will be automatically applied to the config.
Attributes
If you need a stricter model of the input parameters, which is typically the case when you are integrating it with an online store, you may use attributes. We are using this approach in the config files stored inside Customer's Canvas.
It requires you to use a separate JS module called e-commerce driver. It is an abstraction layer between UI Framework and your online store. Discussing the e-commerce driver is out of scope of this introductory article but the general idea is the following:
- When loading a product page, get the information about parameters (e.g. a design file name) from your backend.
- Describe a list of attributes as a list of key-value pairs and pass them to the e-commerce driver.
- After that, you may access them through dynamic expressions using a special object available in the scope of the expression
{
    "designFile": "{{product.attributes.find(a=>a.title==='Template').value}}"
}
You may read more about using the e-commerce driver in the Working with the E-commerce Driver article.