PSD Files
- 7 minutes to read
The Dynamic Image API has been developed so that the designer creating mockups or templates to be processed with this API can work in the usual way. Despite this, it does not support 100% of Photoshop's functionality. In this article, you can find out what features can be used for creating mockups or templates in Photoshop.
Photoshop versions
In general, Dynamic Image works with files created in any modern version of Photoshop. However, from time to time Adobe may introduce significant changes to the PSD file format, and some of the functionality may degrade.
The latest Photoshop version that we have tested Dynamic Image with is Photoshop 2021 (version 22). The oldest one is Photoshop CS6.
Note that PSD files created in older versions of Photoshop may take a long time to process when they contain numerous Document Ancestors Metadata. If you are experiencing this issue, try to delete it or copy the layers like this:
- Select all layers.
- Duplicate the layers in a new document.
- Save this new document.
If you encounter any problems with PSD files created in newer versions, please contact our support team.
Element Types
Layer Types
You can create Image Layers, Text Layers, and Shape Layers as well as combine them into Group Layers.
For text elements, you can set all properties on the Character and Paragraph tabs. Dynamic Image can replace text while keeping these settings.
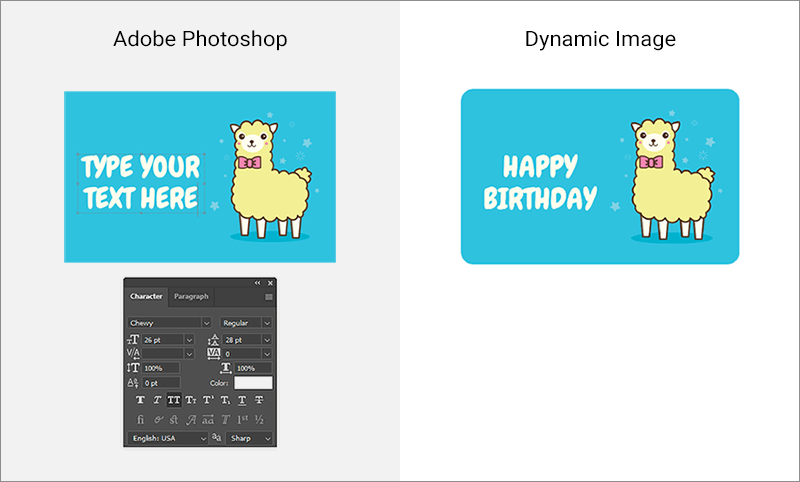
For Shape Layers, you can define the fill and stroke. It supports not only solid fills but also gradients and pattern fills.
Smart Objects
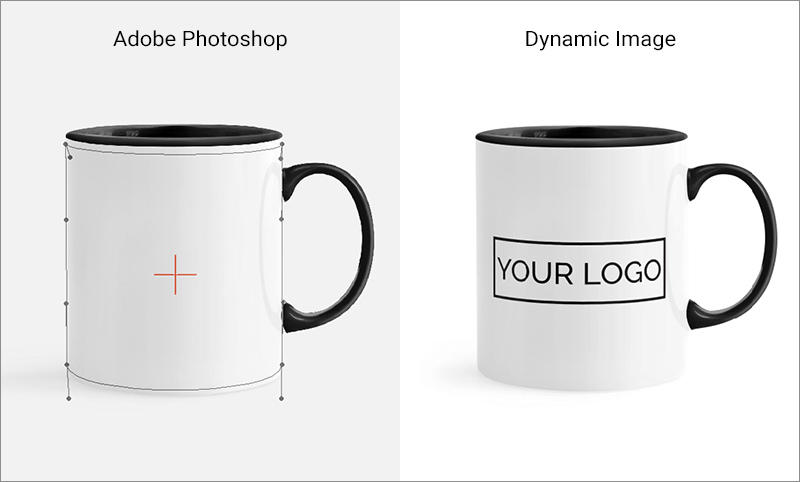
In addition to the regular layers, you can create Smart Objects. When you transform such an object using, for example, a warp, distort, or perspective tool, Dynamic Image inserts an image into the smart object and applies all these transformations to the new content.
You can apply the following transformations to smart objects to render them with the Dynamic Image API:
- Scale
- Rotate
- Skew
- Distort
- Perspective
- Warp
For example, a smart object with the applied warp transform may be rendered as follows:
Note
Starting from Photoshop 2020 (version 21), the Warp tool has been changed. By default, it now has only angular grips and lines, which are the boundaries of the object (the same as the Resize or Scale tool), and internal lines, which are separators that allow you to create a grid inside the object, and can now be added separately. At the moment, Dynamic Image does not support a customized grid, so the Warp tool can only be used with Default settings (without internal lines) in the same manner as it worked before Photoshop 2020 (where they were drawn by two horizontal and two vertical lines). Also, pay attention to Warp presets - after using any preset, you need to set back the value to Custom.
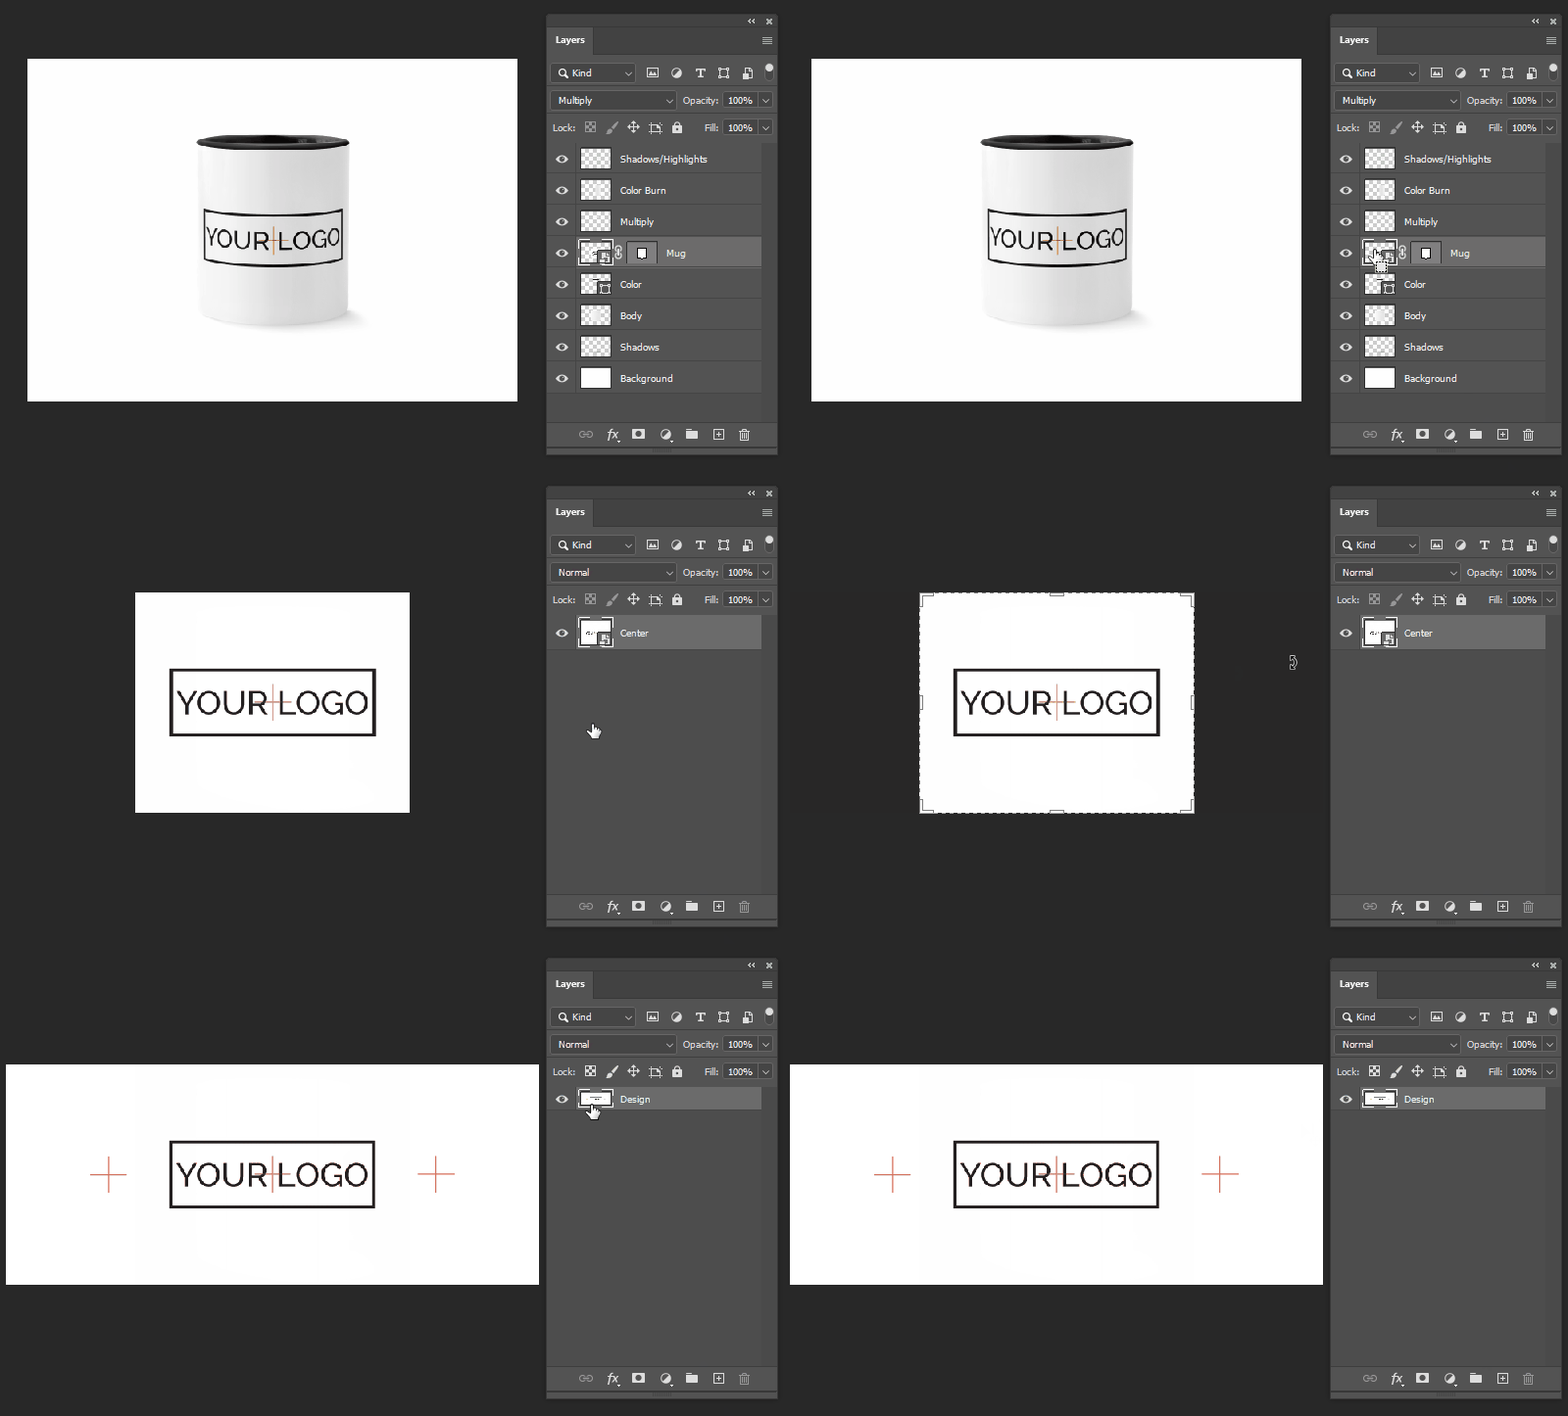
Normally, when content is inserted into a smart object, its top left corner will be located in the top left corner of the smart object. However, there are some scenarios where you need to shift it within the smart object. For example, you may you need to display different parts of a design on a product with a complicated surface, like a canvas or a mug with a 360-degree design.
In such scenarios, you may add another smart object inside the placeholder and position it so that the portion of an image you want to make visible appears in the outer smart object.
Groups with Alternatives
As noted above, you can use grouped objects for your convenience. However, grouping provides another useful feature: Dynamic Image allows for switching a visible layer inside a Group Layer.
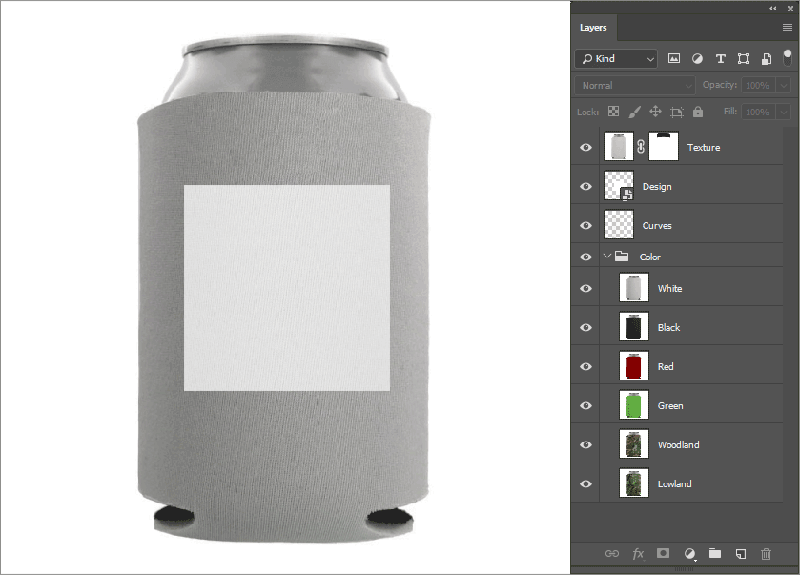
While designing, you may use the eye icon in Photoshop to hide or show these layers for your convenience. Once a developer sends the appropriate command to Dynamic Image, the requested layer will automatically show while the other layers will be hidden.
Such groups may contain not just regular layers but can also be nested and hold other groups and smart objects.
Blending Options and Effects
Blending options
In the General blending section of the layer settings dialog, you can apply opacity and blending modes to both regular layers and smart objects. For example, you can apply textures or shadows to a layer using the blending mode Multiply.
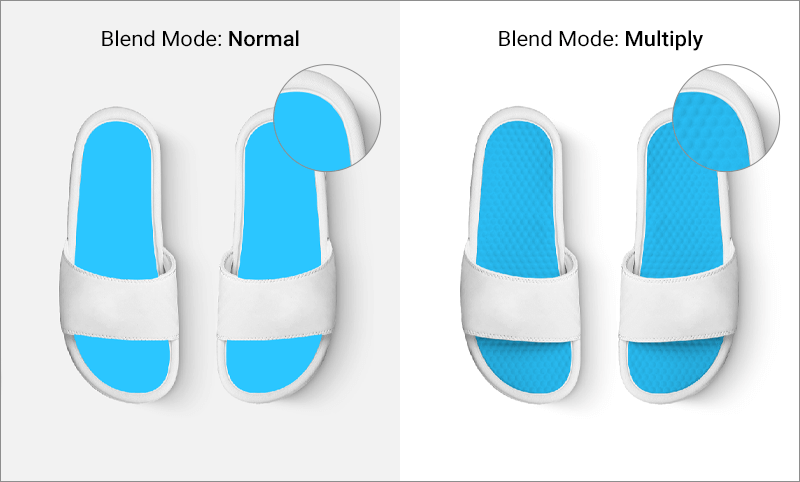
Not all blending modes are supported at the moment. You can currently use the following modes:
- Color Burn
- Color Dodge
- Darken
- Difference
- Exclusion
- Hard Light
- Lighten
- Linear Burn
- Multiply
- Normal
- Overlay
- Screen
- Soft Light
Effects
Only three layer effects are currently supported. The following table shows how full this support is.
| Effect name\Layer type | Text | Image | Shape |
|---|---|---|---|
| Stroke | full | - | - |
| Drop Shadow | full | partial | - |
| Color Overlay | - | full | - |
When you apply the Stroke and Drop Shadow effects to text layers, these effects will work for both the text originally added to the PSD file and the updated content in those text layers.
The partial support means that the Drop Shadow effect will only work for images and smart objects originally added to the PSD file. However, after updating the content in these layers, the effect will not persist.
The Color Overlay effect is applied to the original and replaced raster images and smart objects.
Warning
Take note that some settings for blending modes may be ignored. For example, a shadow may look a bit different than in Photoshop although the main shadow settings are used.
No other effects are supported at this time.
Masks
In order to clip images and smart objects, you can use vector masks or layer masks.
For example, you can insert a business card layout, which has a bleed zone. You will definitely want to cut this out in the preview. In this case, you can apply a vector mask to perform this.

What's Not Supported in Dynamic Image
Adobe has been developing Photoshop for decades, and they invest a lot of money in its functionality. Dynamic Image is not that old so all the features are unfortunately not yet supported. Below are some of the features you shouldn't count on yet.
- Layer effects other than Color Overlay, Drop Shadow, and Stroke
- Advanced blending options
- Adjustment layers
- Smart filters
Try to avoid them or, if possible, rasterize them. If any of these features are extremely important to you, please contact us at info@aurigma.com. We will be happy to discuss your use case, and perhaps we could add support for certain features of the PSD format.
Recommendations
Smart Object Content
If you are creating mockups with the Warp or Distort transform, it may be important to see how it will change the image. We recommend preparing some simple technical images for this kind of smart objects, for example, a simple grid. It makes sense to mark bleed/trim zones with guidelines as well.

Layer Names
When creating layers, pay attention to their names. While it doesn't make much difference to Dynamic Image how you name your layers, it's important to have a clear and consistent naming system for your layers when developing an application. For example, when making many similar mockups, it makes sense to give the smart object where the designs will be inserted the same name in all PSD files.
It is recommended to avoid non-standard characters in the names. For example, a slash may cause problems because developers use the groupName/layerName syntax to refer to layers within a group or smart object.
Choose a Reasonable Size
If you are making a mockup that will be used to produce a small 800px preview, there is no point in saving the PSD in high resolution. The larger the PSD file, the slower image generation will be, so choose a proper size. We recommend sizing up to twice the target image size (for adequate display on Retina screens), and no larger. If you will display it as an 800x800 image, for example, save the PSD file as 1600x1600.
Merge static layers
By creating realistic effects such as shadows and highlights, designers tend to add a lot of items with different settings (blending mode and others). However, having to merge dozens of layers with each request can have a negative impact on performance. So whenever possible, try to merge layers, for example, all shadows into one layer and all highlights into another.
Keep source file separately
The previous tips are aimed at increasing the performance of Dynamic Image. However, we realize that a designer needs a large source file with layers divided into parts. In such a case, we recommend working with a PSD file of the original size with all layers and preparing a separate file for Dynamic Image by using Photoshop macros and scripting to get optimized PSD files.