Element names
- 2 minutes to read
The Design Editor allows you to specify a name for every design element being added to the canvas.
You can use these names to modify design elements through the IFrame API as well as post-process products created in the Design Editor, for example, to personalize them through the Web API. You can also display these names on the canvas and in the Object Inspector to improve the user experience.
There are two ways to define item names in the editor:
- Predefine a name when configuring design elements.
- Enable a dialog box to allow your users to type in unique names when editing products.
You can use the former method when you know in advance what elements should be added to the product. The latter method does not limit the number of unique names and requires your users to specify item names. In both cases, you need to configure the Toolbox.
For more details about configuring design elements, refer to Custom Design Elements. Now, let us see how to configure a dialog box to name items.
Creating New Items
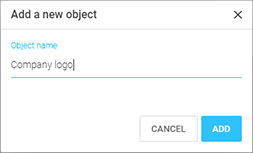
When the user clicks a button in the Toolbox to create a new design item, the following dialog box appears to specify the name of this item.
To enable this dialog box for a single button, set the nameDialogEnabled property to true in clientConfig.json as follows:
{
    "widgets": {
        "Toolbox": {
            "buttons": [
                {
                    "translationKey": "Toolbox.ADD_TEXT",
                    "translationKeyTitle": "Toolbox.TITLE_ADD_TEXT",
                    "nameDialogEnabled": true,
                    "iconClass": "cc-icon-add-text",
                    "action": "Text"
                },
                {
                    "translationKey": "Toolbox.IMAGE",
                    "translationKeyTitle": "Toolbox.TITLE_ADD_IMAGE",
                    "nameDialogEnabled": true,
                    "iconClass": "cc-icon-add-image",
                    "action": "Image"
                }
            ]
        }
    }
}
Displaying the Item Names
By default, the Design Editor does not display names of design items. However, you can enable these names both on the canvas and in the Object Inspector.
On the canvas, text labels appear above the rectangle bounding the design element when the user hovers the mouse over it.

To enable these labels, set the canvas.canvasItemHoverEnabled property to true in clientConfig.json.
{
    "canvas": {
        "canvasItemHoverEnabled": true
    }
    ...
}
In the Object Inspector, these names appear as layer names.
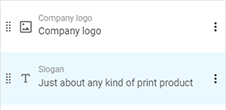
To enable these labels, set the widgets.ObjectInspector.showItemName property to true.
{
    "widgets": {
        "ObjectInspector": {
            "showItemName": true
        }
        ...
    }
}
Changing the Item Names
You can also change item names through the Item Menu. By default, the Rename command is disabled in the menu but you can enable it as follows:
{
    "widgets": {
        "ItemMenu": {
            "renameEnabled": true
        }
        ...
    }
}
This configuration allows you to rename items by right-clicking them on the canvas as well as clicking the More button in the Object Inspector.
To disallow your users from renaming group names in the Object Inspector, you can set the widgets.ObjectInspector.groupRenameEnabled property to false.