Localization
- 7 minutes to read
The UI Framework allows for the localization of custom text, standard widgets, and config elements. Some complex widgets have separate localization files.
Translation descriptions in localization files have the JSON format and may contain several objects of key-value pairs. The object names represent two-letter codes of languages. Translation descriptions may look as follows:
{
  "en": {
    "common.loading.waiting": "Please wait ...",
    "common.loading.preload": "Loading, please wait...",
    "editor.buttons.finish": "Finish",
    "editor.buttons.next": "Next",
    "editor.buttons.back": "Back",
    "editor.buttons.help": "Help",
    "widgets.uploader.uploading": "Uploading...",
    ...
  },
  "nl": {
    "common.loading.waiting": "Even geduld aub ...",
    "common.loading.preload": "Bezig met laden...",
    "editor.buttons.finish": "Af hebben",
    "editor.buttons.next": "Volgende",
    "editor.buttons.back": "Terug",
    "editor.buttons.help": "Helpen",
    "widgets.uploader.uploading": "Uploaden...",
    ...
}
When you define a new localization, you can use any string as the language identifier. However, it's recommended to stick to ISO 639-1 codes. You can add as many custom translations as you want. Just follow the key naming conventions:
- Reflect the translation purpose in the key.
- Separate words by a dot, for example,
"module.component.somekey". - Use standard module names and component names, for example,
"editor.buttons.","widgets.option.","steps.finish_button.", and so on.
Defining custom translations
There are three ways to enable the UI Framework:
- Install it locally through npm or get it as part of another application.
- Use it from Azure CDN (Content Delivery Network) when running a deployed application.
- Install it in BackOffice.
Depending on which method you use, you can define your translations as follows:
| Local instance | CDN | BackOffice | |
|---|---|---|---|
| Changing the locales.json file |  |
||
| Passing localizations to JavaScript methods | |
|
|
| Adding localizations to the config | |
|
|
For the local instance, you should edit the locales.json file with translations. When you take the framework from CDN or implement custom integration with BackOffice, it's better to define translations through JavaScript. If you edit the config through BackOffice, then define the translations through the config as well.
In locales.json file
When you have deployed the UI Framework locally through npm or within other applications, like Preflight, then you have access to the locales.json file. To change translations on local deployment, you can just open and edit this file, which can be found in this path:
`/ui-framework/<version-number>/locales.json`
At the moment, the UI Framework provides the locales.json file with the English (en), Dutch (nl), German (de), French (fr), and Russian (ru) languages.
Such widgets as design-editor or preflight have separate localization files with different sets of languages. For example, the Design Editor provides the English (en), Spanish (es), French (fr), and Russian (ru) languages, whereas the Preflight widget provides only English (en), Dutch (nl), and Russian (ru). When a localization or a single translation string is missing, then the UI Framework uses English.
Through JavaScript
When you are working with an on-premises instance of the UI Framework, you have access to JavaScript methods, which allow for changing the translations.
To initialize your e-commerce driver, you call driver.init() with the following parameters.
// Initialize an e-commerce driver.
const ecommerce = await driver.init( product /* product definition */,
                                     editor /* editor instance */,
                                     config /* configuration */,
                                     settings /* data returned from the editor */,
                                     order /* order number, `null` to skip */,
                                     quantity /* quantity of items, if needed */,
                                     user /* user properties */,
                                     backOffice /* BackOffice settings */,
                                     themeSettings /* UI theme */,
                                     localization /* string resources of UI */
                        );
This method accepts the localization array, which may contain a single definition or a set of definitions for different modules.
const localization = [{
    "app": "ui-framework",
    "data": {
        "en": {
            "editor.buttons.next": "Next step",
            "editor.buttons.back": "Previous step"
        },
        "nl": {
            "editor.buttons.next": "Volgende stap",
            "editor.buttons.back": "Vorige stap"
        }
    }
}];

const ecommerce = await driver.init(
                  product, editor, config, settings, null, quantity, user, ...[,,], localization
);
In this example, we changed the captions of the Next and Back buttons in the UI Framework. Here, the data object redefines translations for both English and Dutch.
Now, let's assume that we have created the uif.json and preflight.json files with localization and put them into the translations folder on your server. In this case, you can specify links to different localization files within an array as follows:
const localization = [
    {
        "app": "ui-framework",
        "url": "http://<your-instance-url>/translations/uif.json"
    },
    {
        "app": "preflight",
        "url": "http://<your-instance-url>/translations/preflight.json"
    }
];

const ecommerce = await driver.init(
                  product, editor, config, settings, null, quantity, user, ...[,,], localization
);
Here, the app property specifies the application to which the new localization will be applied. You can specify one of the following values: "ui-framework" or "preflight".
Preparing a separate file is not always convenient, and when you need to change only a few captions in the current language, you can pass key-value pairs in localization.data.
const localization = {
    "app": "ui-framework",
    "data": {
        "editor.buttons.next": "Next step",
        "editor.buttons.back": "Previous step"
    }
};

const ecommerce = await driver.init(
                  product, editor, config, settings, null, quantity, user, ...[,,], localization
);
In config file
If your only option is to edit configs, then you can change translations through the localization array in the same way as you define it through JavaScript. This array may contain a single definition or a set of definitions for different modules, for example:
{
    "localization": [{
        "app": "ui-framework",
        "data": {
            "en": {
                "editor.buttons.next": "Next step",
                "editor.buttons.back": "Previous step"
            },
            "nl": {
                "editor.buttons.next": "Volgende stap",
                "editor.buttons.back": "Vorige stap"
            }
        }
    }],
    ...
}
Note
In BackOffice, you must first create a custom workflow, make the changes there, and then use this custom workflow when defining a product specification.
When changing the config, you can only use identifiers (keys) of translations that are already defined in locales.json. To add new translations to the UI Framework, you must change the locales.json file.
If you don't allow your users to change the language of the UI, then you can use another format of data that will apply translations to the current language. For example:
{
    "localization": [{
        "app": "ui-framework",
        "data": {
            "editor.buttons.next": "Volgende stap",
            "editor.buttons.back": "Vorige stap"
        }
    }],
    ...
}
When you need to not only correct a couple of captions but also redefine a significant part of translations, you can organize them into a separate file and specify a local path or an external link to this file in the localization.url property in your config.
Let's assume that you created a uif.json file with localization and put it into the same folder as config.json. In this case, you can expand locales.json with uif.json as follows:
{
    "localization": [{
        "app": "ui-framework",
        "url": "uif.json"
    }],
    ...
}
Selecting a language
To change the language of the user interface, you can use the language property in your config. For example, for the Dutch interface, set:
{
   "language": "nl",
   "localization": [...],
   "widgets": [...],
   "steps": [...]
}
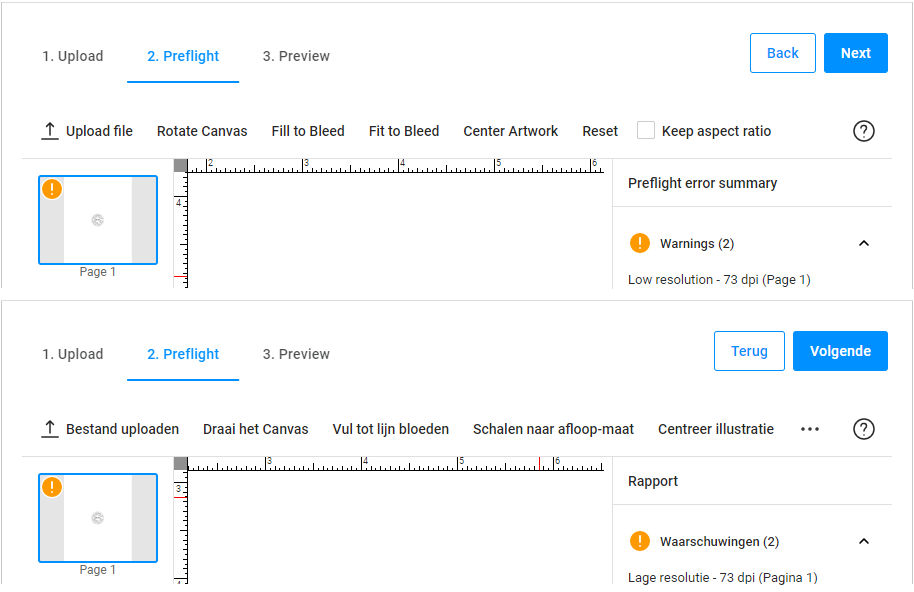
This is how the English and Dutch interfaces will look.
Localizing custom text
To use a newly created translation in your config, you can use the #localize operator. For example, let's learn how you can translate the hard-coded names of the editor's steps in the Preflight Tool.
First, open /ui-framework/<version-number>/locales.json and add the following translations to the end of "en" and "nl" objects.
{
    "en": {
        ...
        "steps.upload.name": "Upload",
        "steps.preflight.name": "Preflight",
        "steps.preview.name": "Preview"
    },
    "nl": {
        ...
        "steps.upload.name": "Uploaden",
        "steps.preflight.name": "Preflight",
        "steps.preview.name": "Voorbeeld"
    }
}
Now, you can use these translations in the user interface: open config.json, search for the "steps" section, and change the step names as follows:
"steps": [
    {
      "name": "1. {{#localize steps.upload.name }}",
      ...
    },
    {
      "name": "2. {{#localize steps.preflight.name }}",
      ...
    },
    {
      "name": "3. {{#localize steps.preview.name }}",
      ...
    }
]
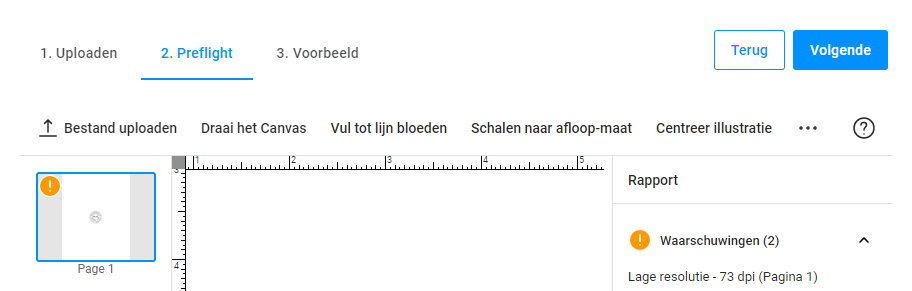
As a result, step names will look as follows.
Localizing preflight
Translations of the preflight widget are defined in the separate file locales.json. Depending on the UI Framework deployment, you can find this file in the following path:
When using a local instance:
/ui-framework/<version-number>/static/preflight/locales.jsonWhen using CDN or BackOffice:
https://staticjs-aurigma.azureedge.net/ui-framework/<version-number>/static/preflight/locales.json
Note
To find out which version is used in your BackOffice tenant, you can navigate to Settings, click the General tab, and copy the URL of UI Framework.
To see the content of the localization file, you can just paste its link into the address bar of your browser.
To change the localization, you can use the same three methods as described for the UI Framework, but specify "preflight" in the app property. For example, you can pass localization through JavaScript as follows:
const localization = {
    "app": "preflight",
    "data": {
        "topToolbar.uploadButton": "Upload",
        "uploader.errorTitle.back": "Error!"
    }
};

const ecommerce = await driver.init(
                  product, editor, config, settings, null, quantity, user, ...[,,], localization
);
Localizing design-editor
The Design Editor widget has its own localization engine, and the UI Framework uses localization files deployed in your Design Editor instance. To localize this widget, you can refer to the Design Editor localization article.