This feature is available only upon request. To enable it in your account, contact our support team.
Creating 3D mockups for packaging
- Last updated on September 24, 2024
- •
- 1 minute to read
Customer's Canvas allows you to create 3D models in your tenant in the Mockups section. This functionality is available to tenants with the Packaging module enabled.
Video tutorial
The following video summarizes this article. Feel free to watch it in addition to reading the text below.
Creating a new mockup
First, open the Creating new mockup dialog box:
- Navigate to the Mockups section in your Customer's Canvas account.
- Open a destination folder where you want to create a design.
- Click the New button in the top left corner, and then click Mockup file.
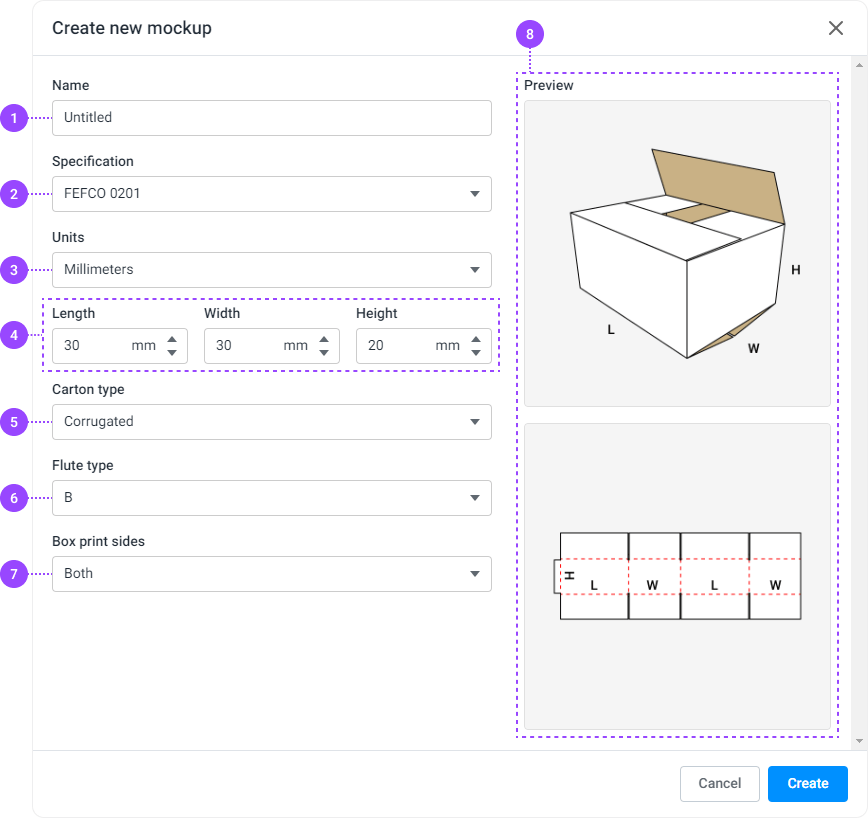
When the dialog box opens, fill in the fields.

The mockup name.
The box specification code.
Measurement units for the mockup size.
Mockup dimensions (for some specifications, one of the dimensions may be skipped).
Box material type:
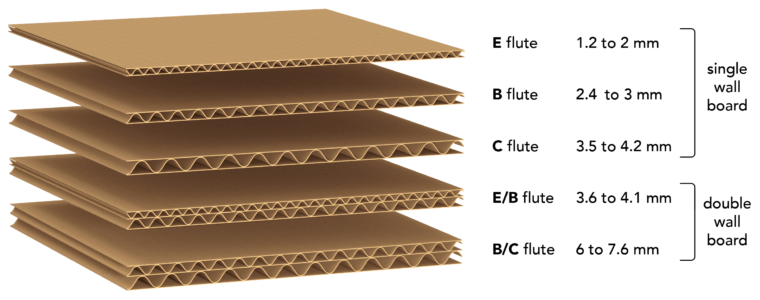
Corrugated is one of several cardboard types (flute).

Single-ply is a single-layer dense material using only the thickness dimension.
Depending on the box material type, this drop-down list contains Flute types for Corrugated carton and Material thickness for Single-ply.
Location of the design print area:
- Front is the outside of the box.
- Back is the inside of the box.
- Both is for both sides.
Preview window contains schematic images of the model box and the folding.
Validation of input values takes place while filling in the fields. For some specifications, the dimensions may be subject to certain conditions. For example, for FEFCO 0201, W <= L must be set. If such a check fails, the corresponding error message will be displayed at the bottom of the form.

When you have entered all the parameters, click Create.