This feature is available only upon request. To enable it in your account, contact our support team.
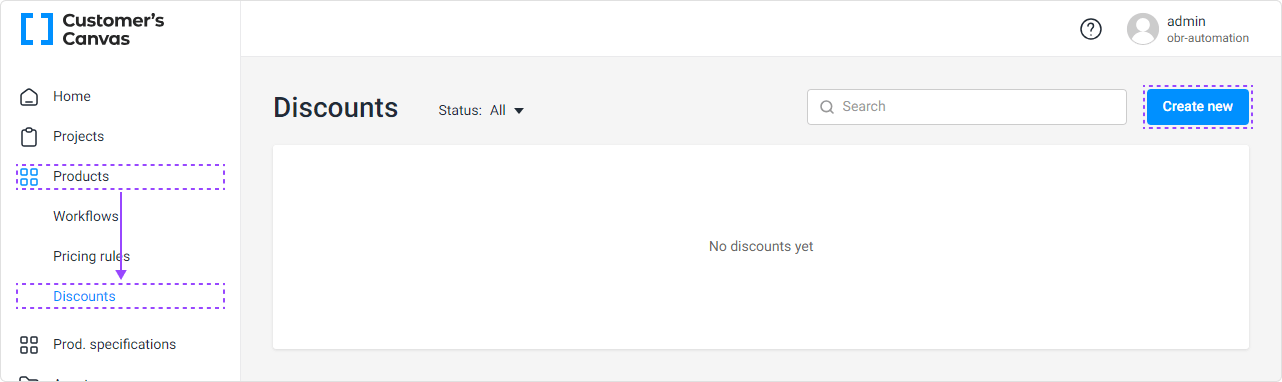
Discounts
- Last updated on March 16, 2026
- •
- 4-5 minutes to read
This article describes setting up Discounts in a PIM product. To access PIM and Discounts, the following features must be enabled in your tenant edition:
- PIM module
- Price Management module
Creating a Discount Rule
In the Discounts section, click Create New.
When the form Create discount rule opens, specify the following:
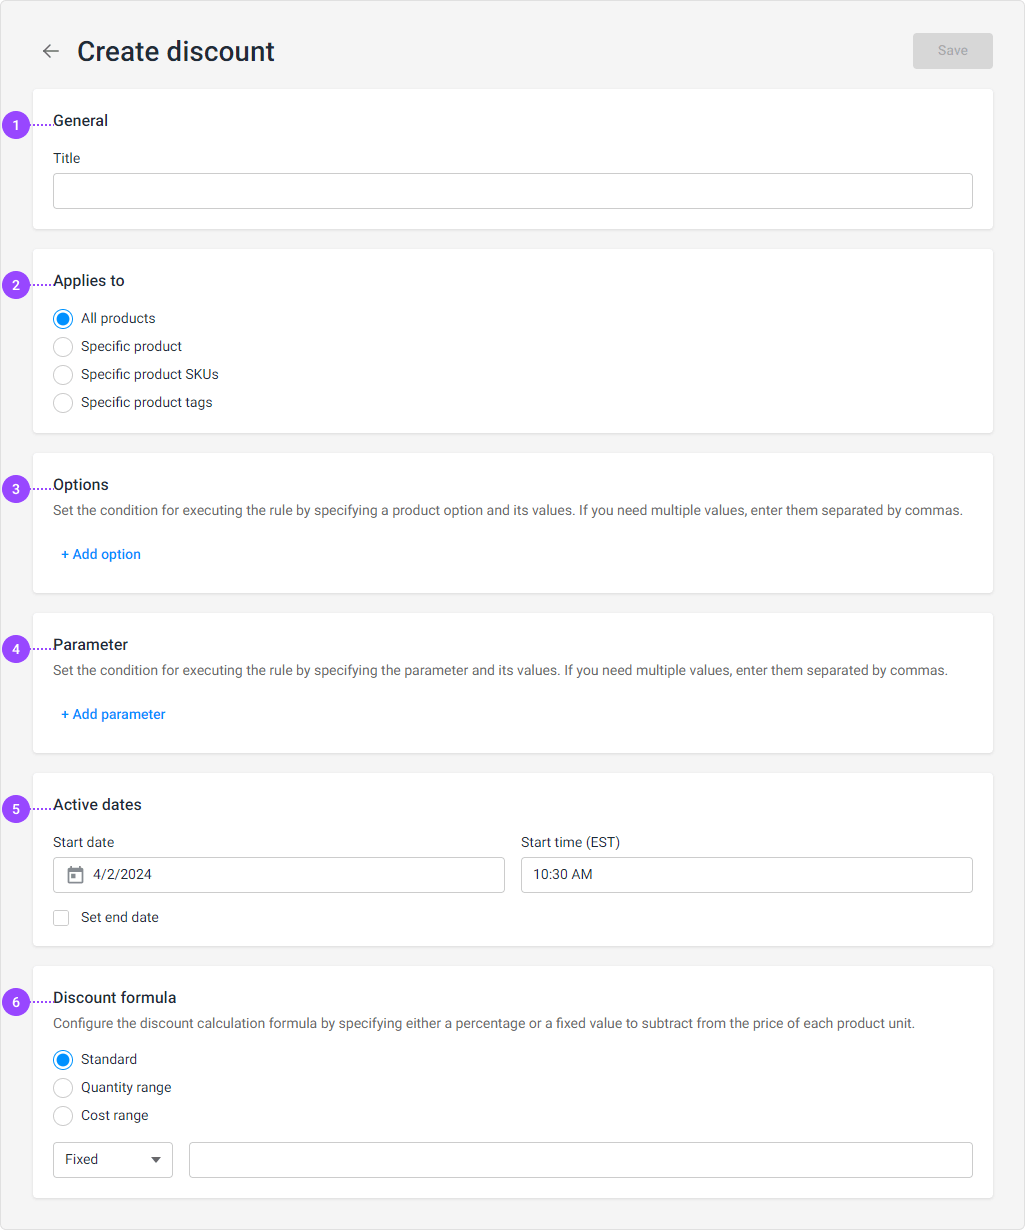
General: Specify the discount Title.
Applies to: A filter to specify what the rule applies to. It can apply to all products, specific products, or products with specific SKUs or tags.
Options: An additional filter to specify particular product option values:
Parameters: Configuration of values from external systems. Multiple parameters can be added, for example,
widthandheightvalues for boxes: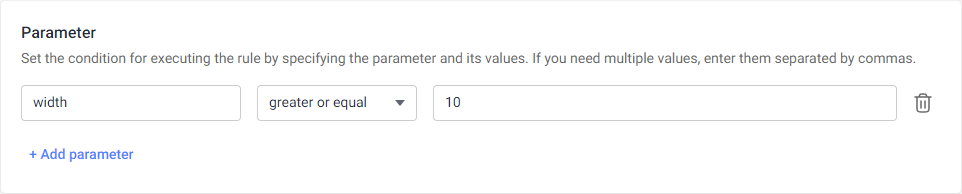
Active Dates: Specifies the time period when the discount should be applied. By default, the current date and time are set as the start of the rule's validity.
Price formula: Here, you define the formula that supports variables from external systems and reserved values (currently only
price). There are three formula types:Standard
Quantity range
Cost range
Let's take a closer look at some sections.
General
In this section, unlike pricing rules, there is no Break calculation at this rule checkbox. Discounts do not have the concept of execution order. First, all applicable discounts are calculated, and then their sum is subtracted from the cost.
Applies to
All products
This item is selected by default, so the rule will apply to all available products.
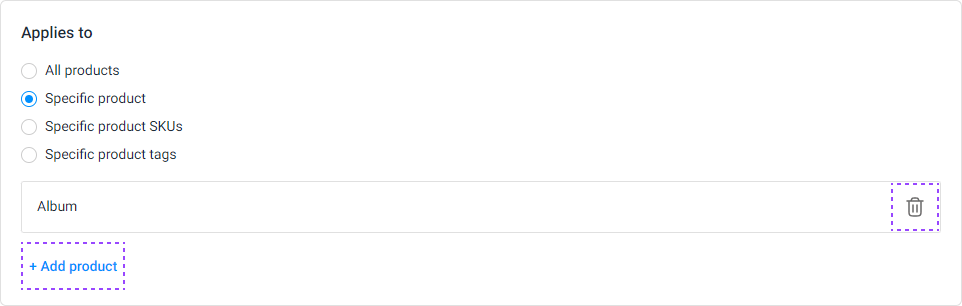
Specific product
This item allows you to select one or more products to which the rule will apply. To select a product, click Specific product and then click the Add product button. When a product selection window opens, select the desired product(s) and click Apply:
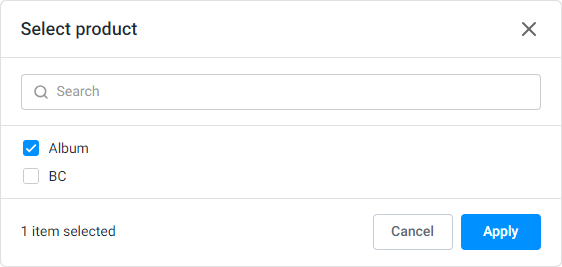
The selected product will be displayed on the form. You can remove it using the trash can button or add another product using the Add product button:
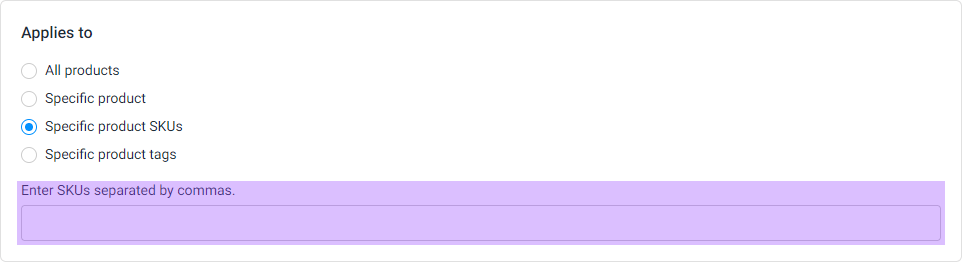
Specific product SKUs
This item allows you to manually enter the SKUs of the products to apply the rule to them. Since SKUs are tied to specific variants, this filter can be considered as a variant filter.
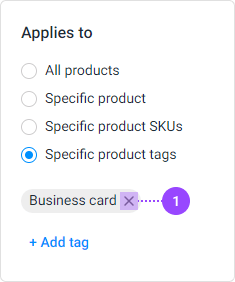
Specific product tags
This item provides a list of tags associated with your products to apply the rule to them. Clicking the Add tag button opens the tag selection dialog:
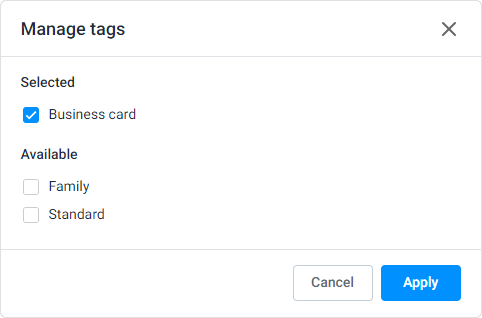
After selecting the tags, click Apply. The list of selected tags will be displayed above the Add tag button, which can be used to edit the tag list. You can also click the cross on the tag chip (1) to remove it.
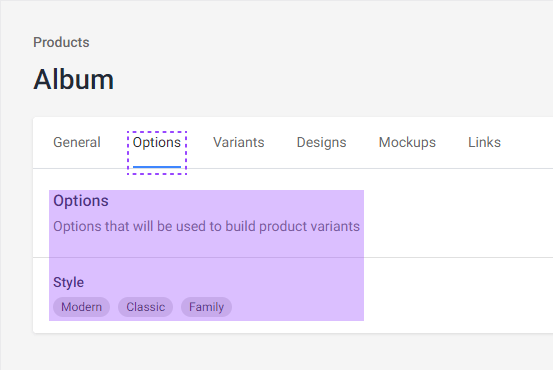
Options
This section filters the product options and can be used to determine the discount for only specific variants that include a certain option value.
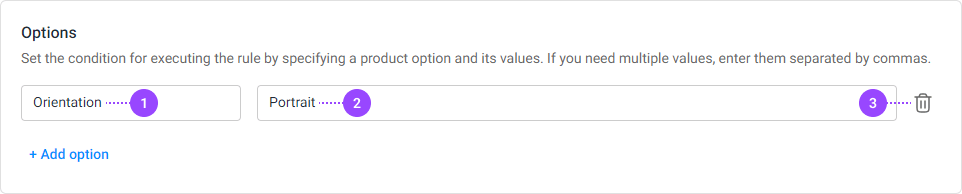
- Option name
- Option value
- Delete row button
Parameter
Unlike the previous item, this section deals with values from external services (for example, from Shopify Adapter). Clicking the Add parameter button adds a line for entering the parameter name, condition operator, and parameter value.
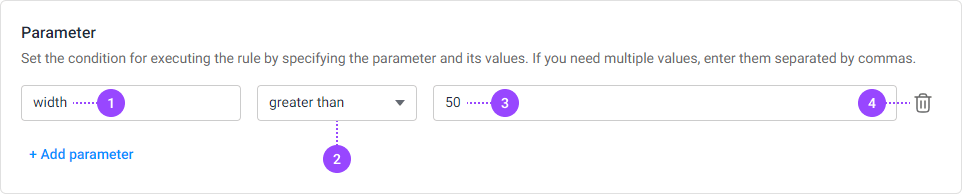
- Parameter name
- Condition operator
- Parameter value
- Delete row button
Active Dates
This section specifies the active time period for the discount.
By default, the start time is set to the time the discount rule is created. However, you can change this date to schedule discounts in the future. In this case, the status of the active rule will be Scheduled. When the date arrives, it will change to Active.
Additionally, using the Set end date checkbox, you can set an end date for the discount. Then, after the end of the period, the Active status will change to Expired.
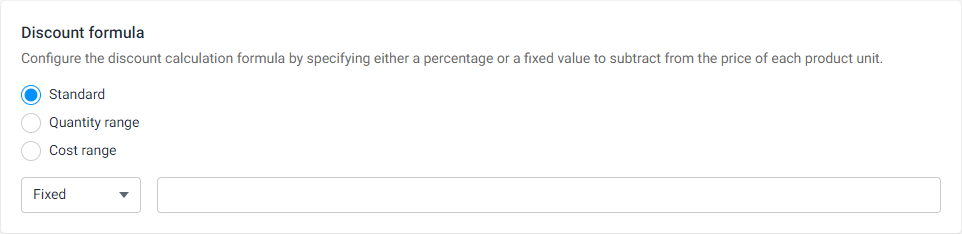
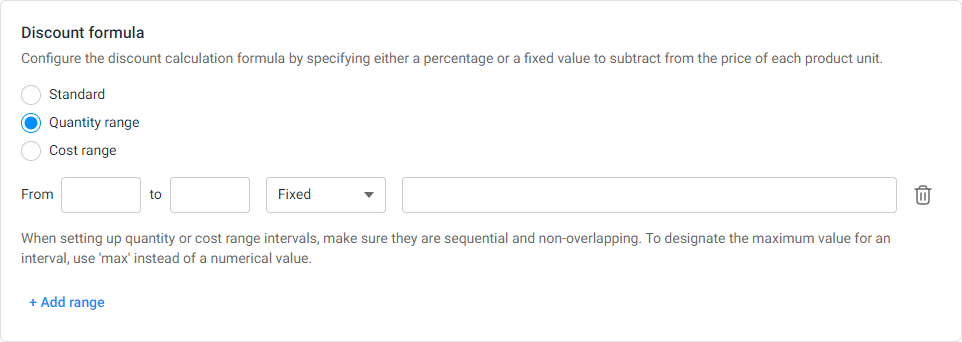
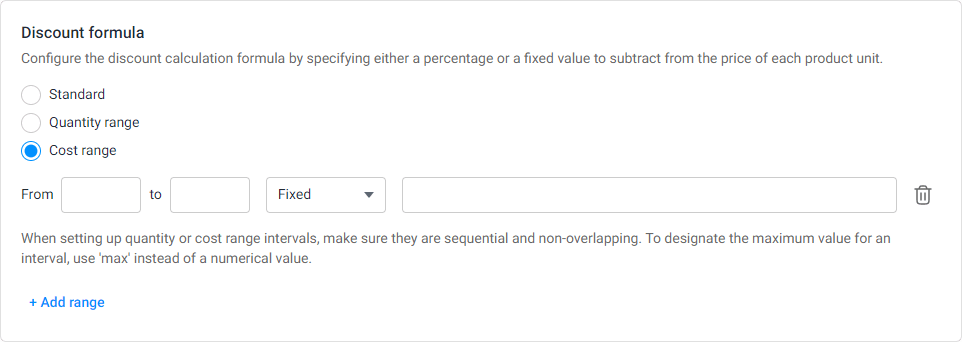
Discount formula
The formula can be set in three ways:
Standard: one formula applies to any quantity of products.
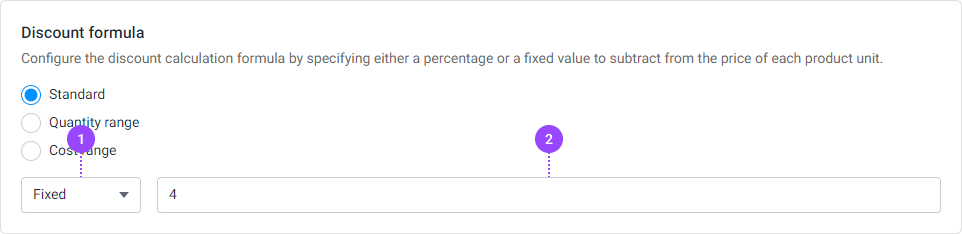
- Expression type (Fixed — discount value in monetary units, Percentage — value will be used as a percentage of the cost).
- Discount amount.
Quantity range: the formula is set for different quantities of products, which is indicated as a range.

- Initial quantity for which the rule applies (start of the range).
- Final quantity for which the rule applies (end of the range).
- Expression type (Fixed — discount value in monetary units, Percentage — value will be used as a percentage of the cost).
- Discount amount.
- Delete button.
Cost range: the formula is set for the cost of products, which is indicated as a range.
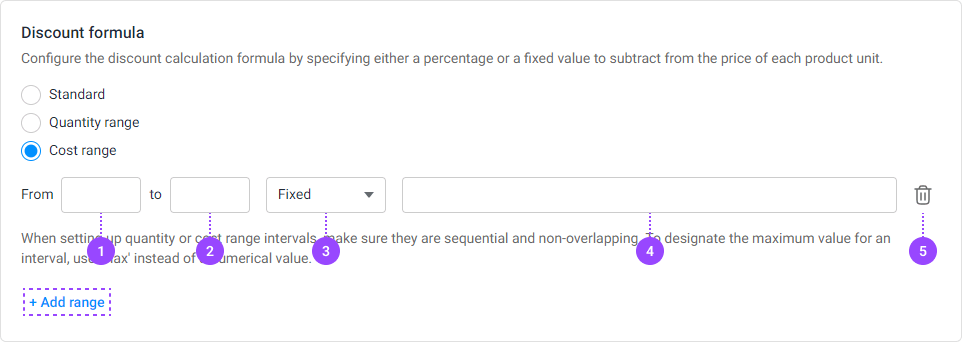
- Initial cost for which the rule applies (start of the range).
- Final cost for which the rule applies (end of the range).
- Expression type (Fixed — discount value in monetary units, Percentage — value will be used as a percentage of the cost).
- Discount amount.
- Delete button.
Rule Status
Discount rules can have four statuses:
- Inactive: will not be applied. This status is set by default. To activate the rule, save it (click Save) and then click Activate. When duplicating a rule, this status is also set.
- Active: will be applied to products according to settings. To disable the rule, click the Deactivate button.
- Scheduled: the rule will become active in the future when the Active dates arrive.
- Expired: the rule will not be applied because the Active dates are in the past.
List of Rules
Rule Order
Each rule has a context menu that appears after clicking the ellipsis with the commands:
- Edit: opens the rule for editing.
- Duplicate: creates a copy of the rule, with the status set to Inactive.
- Delete: deletes the rule.
Filter and Search
Unlike pricing rules, you can filter discounts by status and a search field.