Downloading print files
- Last updated on February 7, 2025
- •
- 3 minutes to read
The process of downloading print files depends on the project processing mode that means the way we receive the personalized print file. There are two options: rendering of a design on demand and queued generation of a print file via rendering pipeline. The mode is selected during the Customer's Canvas BackOffice configuration based on your tasks.
Your workflow may be quite simple and consists of quickly receiving a design file by clicking the Download button. Besides, if the resulting files are lightweight, and there is no need for additional processing, then the On demand rendering will work well enough for you.
On the other hand, when the design files are large, it takes a lot of time to create them, and further manipulations may be required. In this case, the Queued rendering mode is a better match for you.
Either way, if you realize that a different mode is more suitable for your needs, please, feel free to contact our support team.
Let's consider the process of downloading print files in terms of these two modes.
On demand rendering
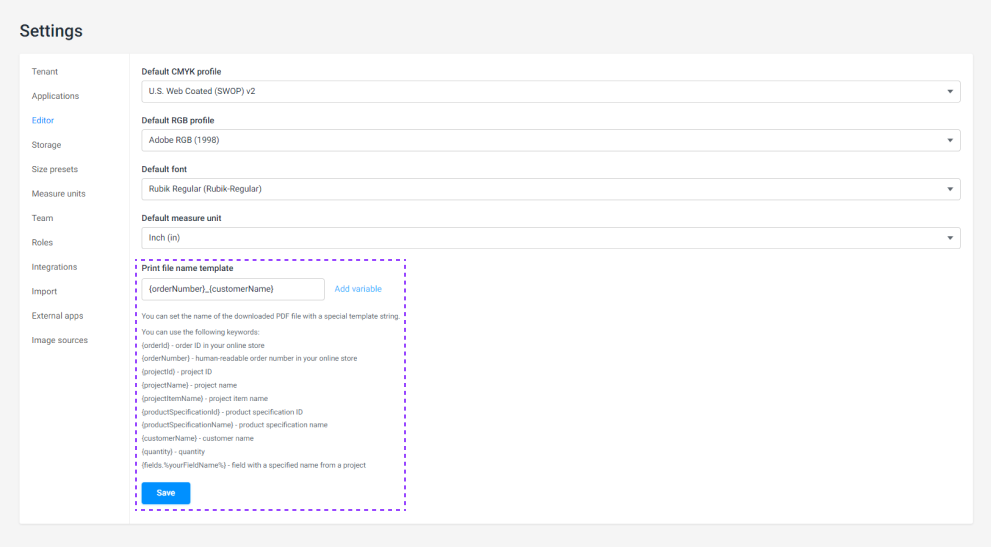
In the previous article, we have already described the process of downloading files in a few words. It is quite simple in the On demand rendering mode. You need to click the Download button near a link to the resulting PDF file. The downloaded file has a default name. You can change it by changing the print file name template.
To do this, click the Settings tab in Customer's Canvas BackOffice. At the bottom, you will see the Print file name template label and the field containing variables. To make the template, click the Add variable button and choose the necessary keywords. For convenience, there is an explanation below.

Queued rendering
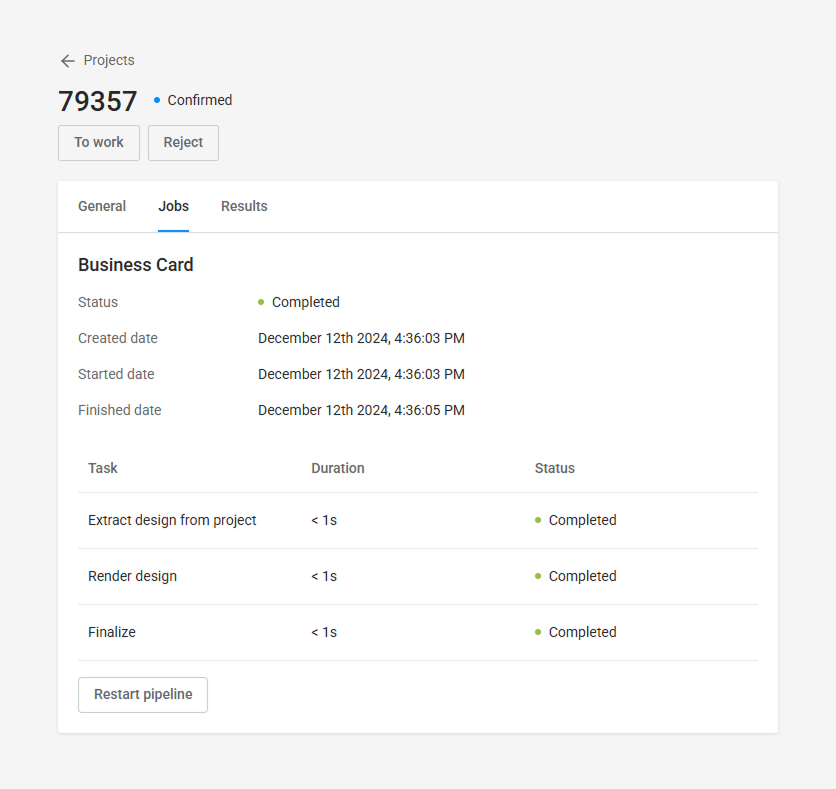
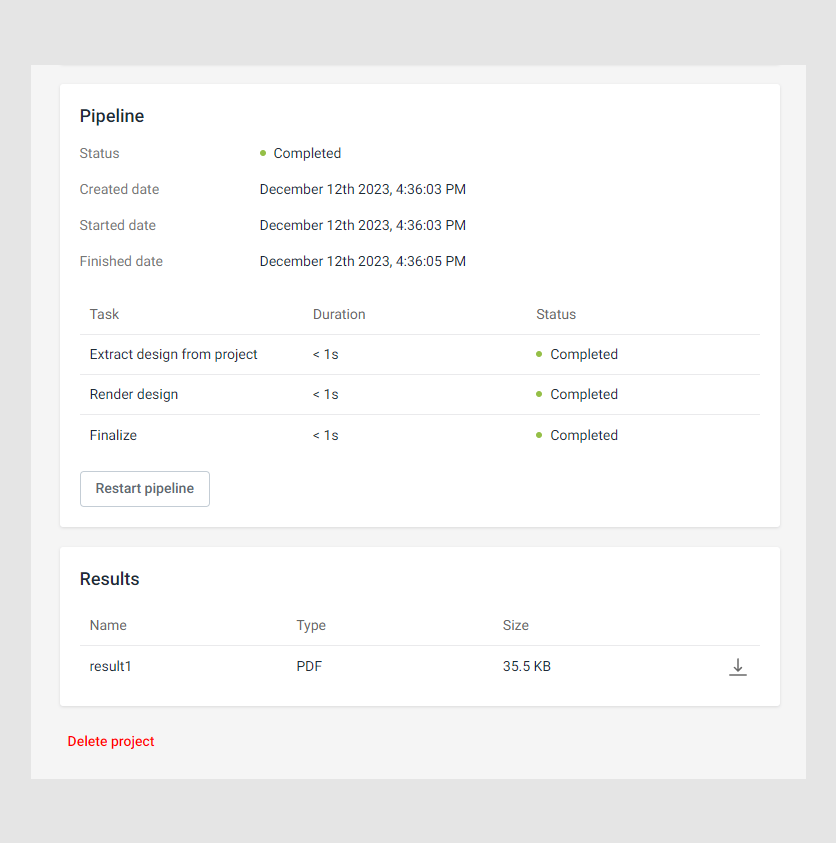
While working in the Queued rendering mode, you will need to wait until the job is finished to download the print file. Once it is completed, you will see the Download button on the Results tab. Another way to find the resulting files is the Jobs interface, where you can find a pipeline status and the list of tasks.
The Jobs interface describes the workflow for processing the project. On this tab, you can find the following details:
- Status
- Created date, Started date, and Finished date
Then, you can see a table with Task, Duration, and Status.

The tasks represent the stages of the pipeline's execution. More specifically, they describe the actions on the project that are necessary to get the proper resulting files. There is a list of tasks with their names, duration, and status, so you can track each of them. Let's consider possible task statuses, which are similar to pipeline statuses:
- In progress — the task is under implementation.
- Completed — the task is finished successfully.
- Failed — the task is finished with errors and needs to be recovered or restarted.
If something went wrong, the job and task statuses would change to Failed. Thus, you can see the exact task where the error occurred. In this case, you can restore the pipeline by clicking the Restart pipeline button. The execution will continue from the task where it previously stopped.
When all the tasks are completed, the resulting files will appear on Results tab for further downloading. You can download them by clicking the Download All button or download any of them separately.

Sending print files to external systems
In some cases, you may need to send the print files automatically to third-party systems, e.g., order processing, systems like Zapier, or other systems. We have technical tools that allow you to do this through additional tasks. For example, you can upload print files to FTP or call your webhooks for custom processing the results.
For more details, refer to the Delivering results tasks.