Garment preview mockup
- Last updated on December 29, 2023
- •
- 5 minutes to read
In this tutorial, you will learn how to create preview mockups for a garment in Adobe Photoshop. As a result, you will get a PSD mockup file with a single design area. It will also include several alternative T-shirt layers that can be switched using the Dynamic Image module (requires additional programming).
Video tutorial
The following video summarizes this article. Feel free to watch it in addition to reading the text below.
Prerequisites
A preview mockup should be created with Adobe Photoshop. Customer's Canvas is tested with Photoshop 2021 (version 22) and older. The oldest supported version is Photoshop CS6.
You also need the product images. They may be the images prepared by a vendor or you may take your own photos. The images of a product in different colors should have the same size and T-shirts and their print areas should be located at the same coordinates.
For this tutorial, you may download the source images.
Step 1. Prepare a design placeholder image
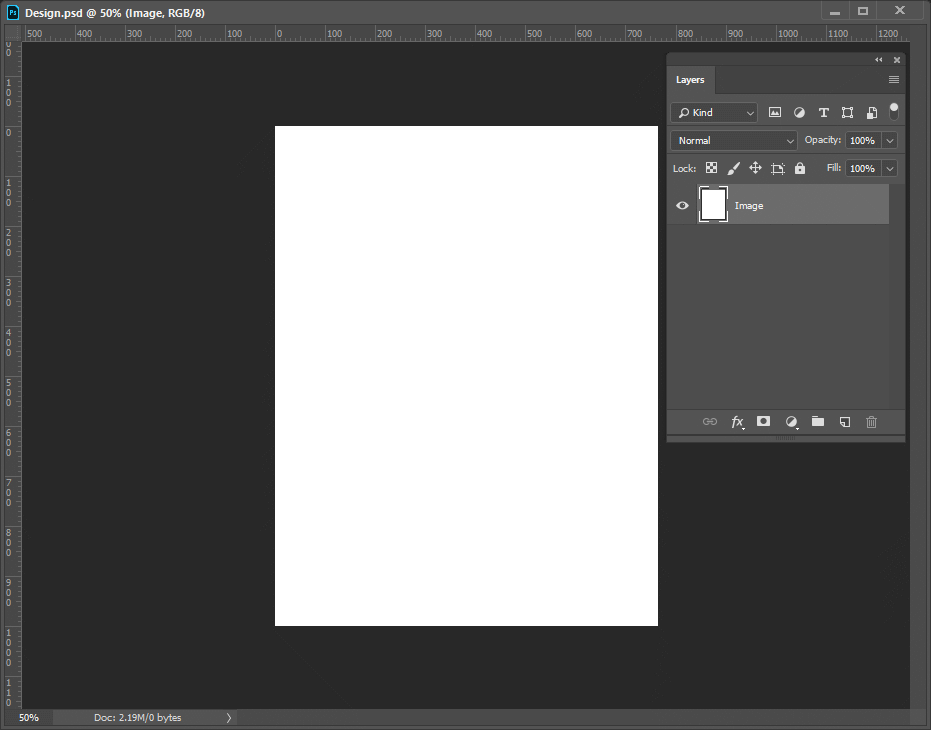
Before we start working on a mockup image, let's prepare an image that we will use as the foundation for a smart object, which will be a design placeholder. It should have the same aspect ratio as the original design, a small file size, and be easy to understand the boundaries of the design when we build a mockup. Sometimes you may want to have a real design or a grid image, but for this particular tutorial, a solid white rectangle will suffice.
The quickest way to achieve this would be the following:
Open one of the original designs that meet the printer's specifications.
Optimize the size and color space:
- In the main menu, click Image > Mode > RGB color
- Click Image > Image size and set:
- Resolution to
72 - Height to
1000pixels
- Resolution to
Make the image solid white:
- Click Create a new layer.
- In the main menu, click Edit > Fill, set Contents to
White, and click Ok. - Rename this layer to
Image. - Delete all other layers.
Save the PSD file with the name
Designor another name you would like to set for the smart object.
Step 2. Prepare preview mockup file
To create a mockup, we need a realistic image of a product and a good idea of its size and print area. We will place a smart object above this image as a design placeholder, and then we can decorate our mockup with shadows, highlights, and texture.
Create a new PSD file. Go to File > New document and set:
- Width to
1000pixels. - Height to
1000pixels. - Resolution to
72. - Color mode to
RGB color.
- Width to
Rename the background layer - a default layer added by Photoshop automatically:
- Double-click it on the Layers panel.
- Change its name to
Background. - Click Ok.
Add the product photo. For example, an image of a white T-shirt:
- Drag an image from the file explorer to Photoshop.
- Adjust its size and position to fill the mockup entirely.
- Press
Enter.
Add a smart object:
- Drag Design.psd created during Step 1 from the file explorer to Photoshop.
- Adjust its size and position to fit the print area.
- Press
Enter.
Add a product texture. The easiest way to do it is the following:
- Add a copy of the layer with the white T-shirt at the top of the layer list.
- Right-click a layer and choose Blending Options.
- In the General blending section, set the Blend Mode to
Multiplyand Opacity to50%. - Rename this layer
Texture.
Save the result as a PSD file.
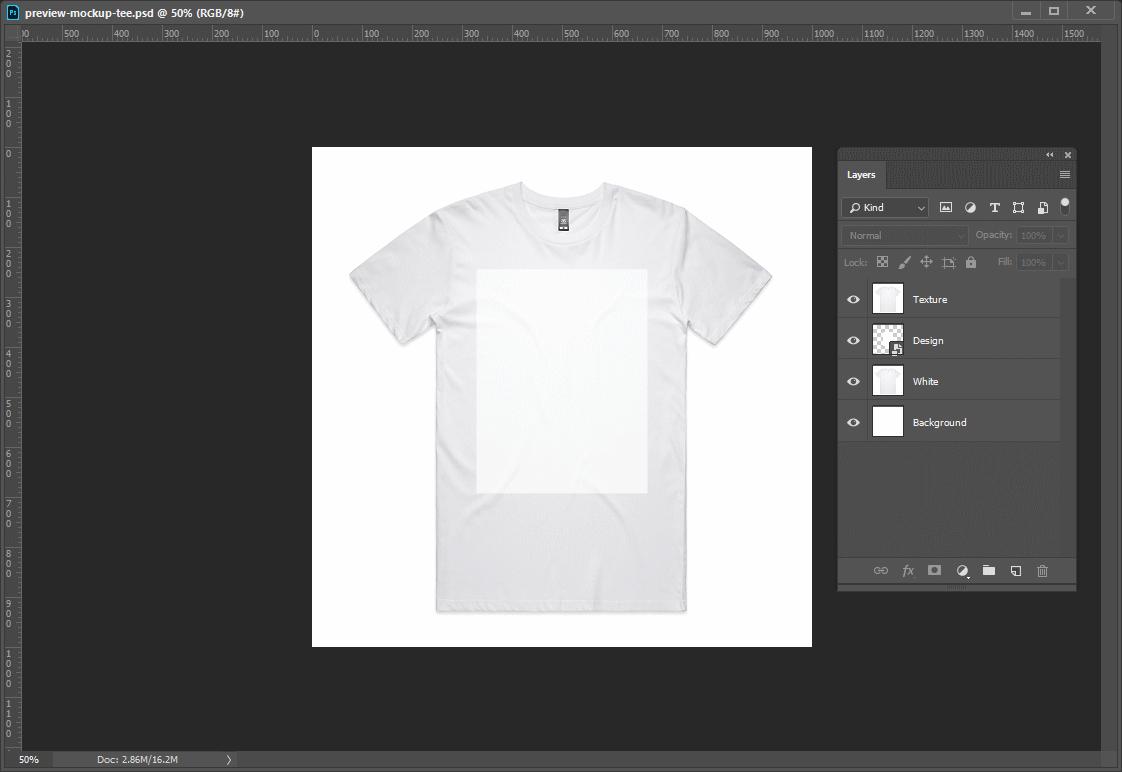
Your mockup is ready to be uploaded. The only thing you need to jot down is the name of athe smart object where you want to insert the design. If you did not rename it, it will be the same as the name of the file used to create the smart object. You will need it to configure this mockup in Customer's Canvas.
Step 3. Add alternative product images
The mockup we have created during Step 2 is ready to be used with Customer's Canvas. However, it represents only a single color of a T-shirt of. Usually, you will probably want to offer T-shirts of several different colors. Let's see how to modify our mockup to support multiple product colors.
Note, it is assumed that you are linking these colors to the product option in your online store. To simplify things, it is highly recommended to follow the naming convention for the layer names. In this tutorial, we will assume that the product option is called Color and it has the values White, Dark Red, and Black.
Add the remaining product images for each color one by one:
- Drag an image of a dark red T-shirt from the file explorer to Photoshop.
- Adjust its size and position.
- Press
Enter. - Do the same for the black T-shirt image.
Arrange layers and their names in the Layers panel:
- Ensure that all product images, including the one we have added on Step 2, are arranged next to each other.
- Make the group element names the same as your color options -
White,Dark Red, andBlackcorrespondingly.
Combine these layers to a Group Layer:
- Hold the
Shiftkey and select all these images in the Layers panel. - If you have added any effects to some of these layers, right-click the selection and click Rasterize layers.
- Right-click the selection again, click Group from layers.
- Change the group name to
Color(same as the option name).
- Hold the
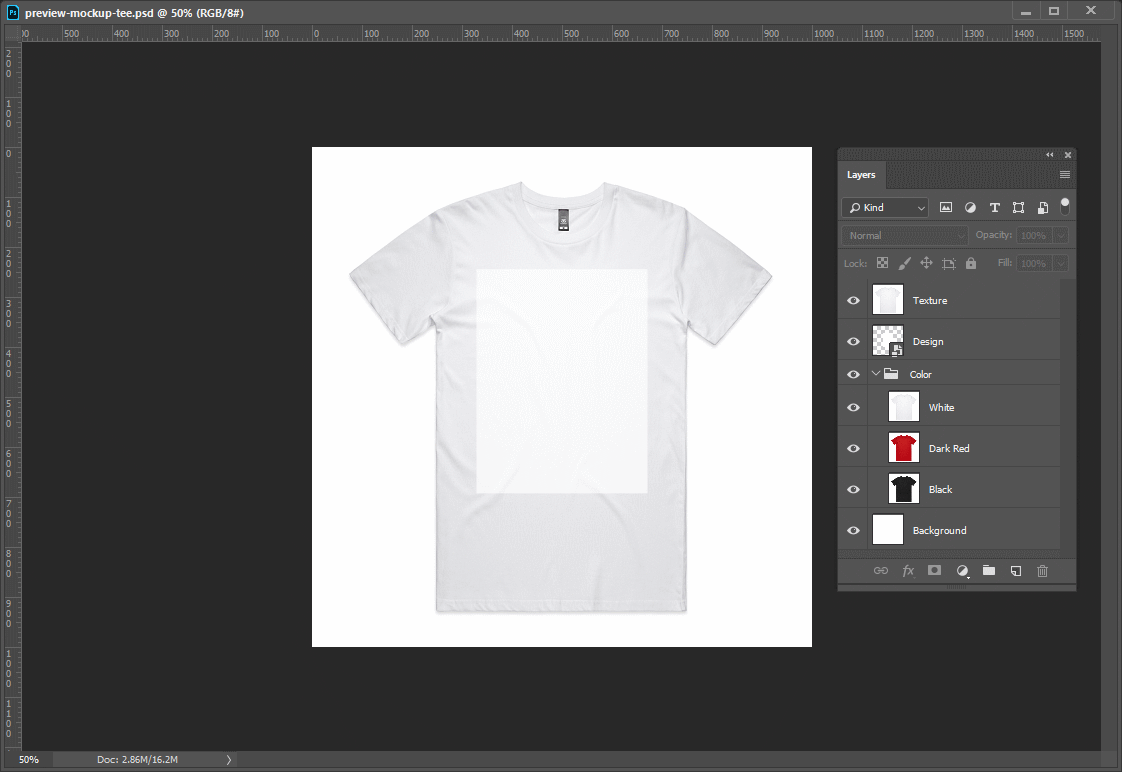
Result
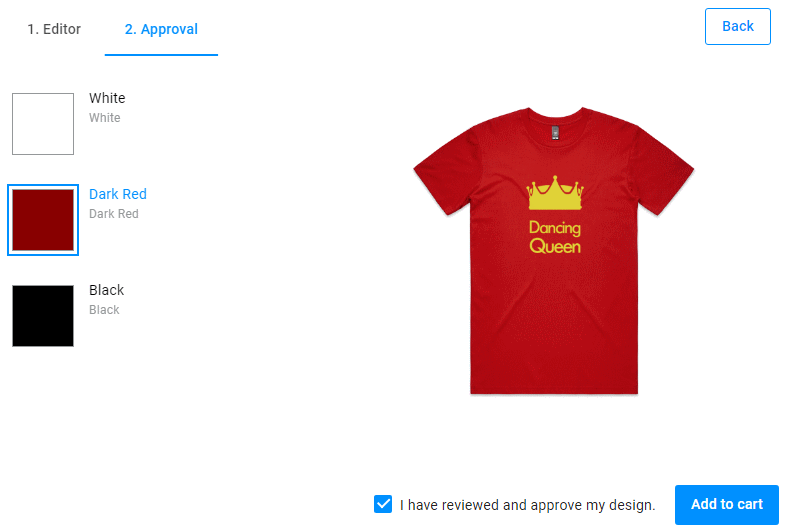
When you complete all the steps, you will get a PSD file like this:
Once you set it up in Customer's Canvas, the result may look like this: