Color picker
- Last updated on March 28, 2025
- •
- 4 minutes to read
For working with colors, the Template Editor has a special component called the Сolor picker, which allows you to work with RGB and CMYK colors as well as specify Spot colors. This article describes how you can work with colors in the Template Editor.
Working with the Color picker
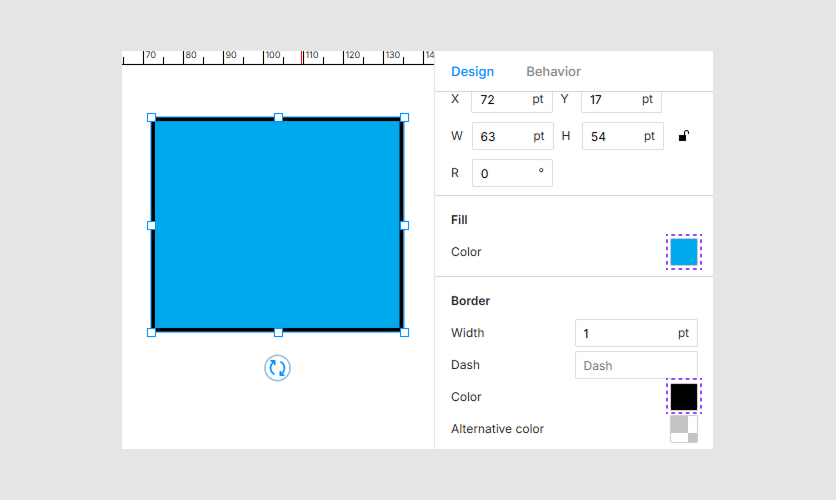
To open the Color picker, select an element for which you want to change the color and click the color box for the corresponding property in the Design panel. For example, if you have created a rectangle and you want to change its fill or border color, click this rectangle and scroll the Design panel to the Fill or Border properties.
When the Color picker pop-up window opens, it displays the following controls:
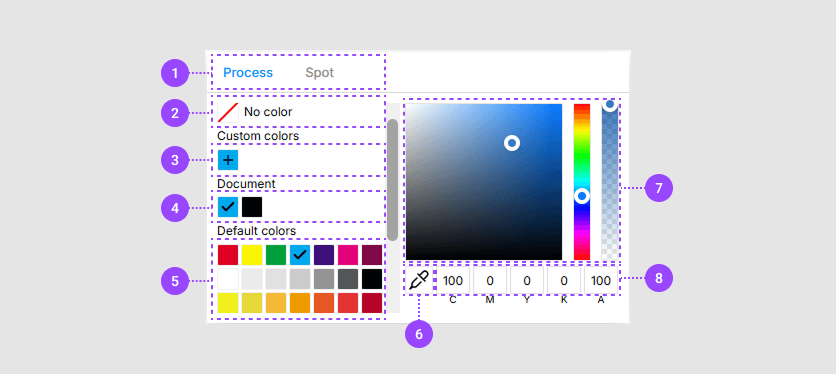
- Color Model Tabs: Process and spot colors
- Transparent Color: Option for no color
- Custom User Colors: User-defined color swatches
- Template Colors: Colors used in the template
- Standard Colors: Predefined color palette
- Eyedropper: Tool for picking colors from the template
- Color Field: Area to select colors visually
- Input Field: Area to enter color values manually
To select a color, you can click one of the standard colors, click a point in the color field, or type in the channel values in the input field. The selected color will then be applied to the element.
Custom colors
The picker allows you to store custom swatches.
To add a color to the list of custom colors, select it in the palette or color field and then click the color box with the plus sign (+) inside. This will save the color, allowing you to switch between custom colors easily. You can also create multiple color options to quickly compare them.
This color list is stored while the editor is open and is available even if you select another element or property.
Document colors
The picker displays colors used in the template, making it convenient when you need to reuse the same colors on different elements within the same template.
Entering color values manually
When you know the CMYK or RGB values, you can enter them in the input field.
Eyedropper
You can use the eyedropper to select a color from the template. Click the eyedropper icon and then click on the area of the template from which you want to pick the color. An enlarged area will be displayed next to the mouse pointer to help you select the desired pixel.

Warning
When using the eyedropper with a CMYK template, the eyedropper takes the RGB values visible on the screen and converts them to CMYK. This may differ from the desired result.
Color spaces
The Template Editor allows you to work with templates in two color spaces: CMYK and RGB. The choice of color space depends on the kind of products you are designing. If you are creating a template for commercial printing, you will almost always use CMYK. The RGB space can be used for alternative printing techniques, such as sublimation printing, as well as for digital images.
The color space is configured for the entire template in Settings on the Main tab.
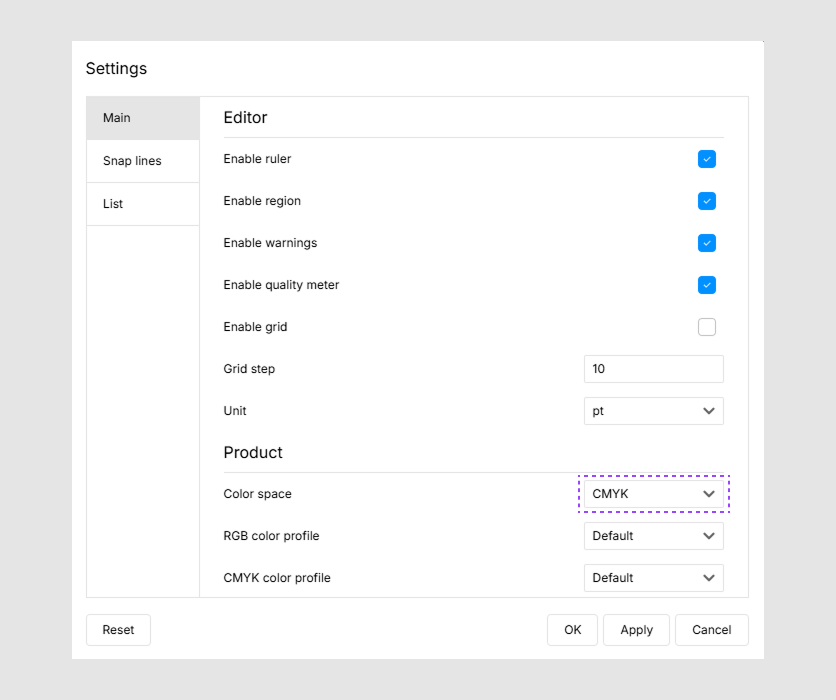
In addition to the color space, you need to select the color profiles that will be used for transformations from RGB to CMYK and vice versa.
After selecting RGB or CMYK, this format will be used to edit all the color properties of the template.
Technically, the same template may contain elements in both the CMYK and RGB color spaces. This may happen as a result of importing or if you first started editing the template in one space and then switched to another. In such cases, you may notice the difference between the color that you have chosen in the color picker and the color that will actually be applied. This is due to the color conversion between CMYK and RGB.
Spot colors
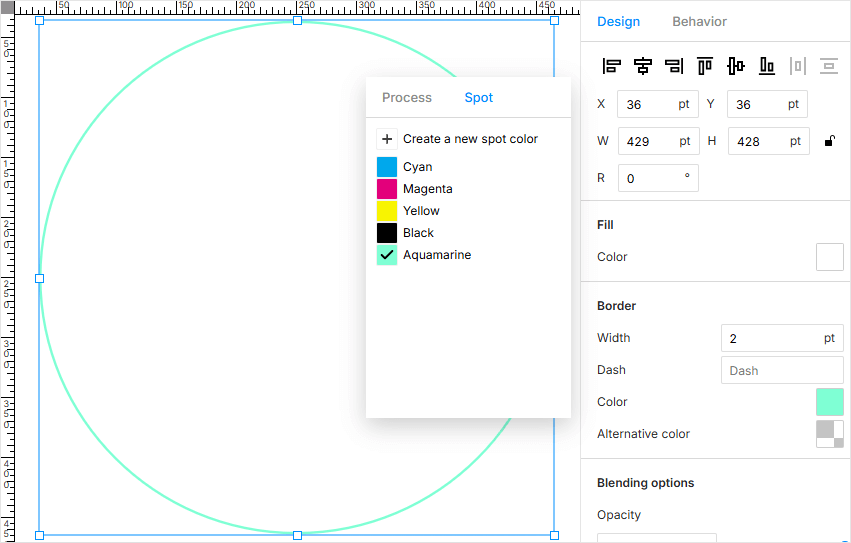
You can create spot colors. To do this, switch to the Spot tab.

Here, you can click the Create a new spot color button, then enter its name and the color that will be used to visualize it in the editor.
Important
This preview color does not affect the print file. It is used exclusively in the editor.
Once created, this spot color can be selected and applied. You can reuse this color for other elements in the template.
For example, let's assume we want to set a cut line in the template. To do this, we will create an ellipse, remove its fill color, and make the outline with a spot color called CUTLINE, giving it a magenta color for visualization. The result may look as follows:
Now, let's go further and learn how you can apply blending modes in the Template Editor.