Installing the nopCommerce plugin
- 2 minutes to read
Aurigma has implemented the Personalization plugin for nopCommerce 4.5 and earlier (3.9 - 4.4). At the moment, the current Customer's Canvas distribution does not include this plugin. Please contact our support team for the actual version of this plugin.
To implement a personalization workflow, this plugin uses additional editors based on the UI Framework. You can also request a zipped package of the UI Framework from our support team.
Note
To run the plugin, you need a deployed Customer's Canvas instance - either the cloud or on-premises version will work.
Installing the Aurigma Personalization Plugin
To install the Personalization plugin
- In your nopCommerce account, click Administration.
- In the Administration panel, navigate to Configuration > Local plugins.
- Click Upload plugin or theme and upload the zip file with the plugin.
- Find the Aurigma Personalization Plugin, click the Install button, and then click Configure.
- Change the Customer's Canvas URL to your instance URL and click Save.
- Click the Edit button and verify that the Is enabled check box is selected.
- In the upper-right corner, click Gears > Restart application.
Note
As an alternative to the third step, you can manually create the Widgets.CustomersCanvas subfolder in the <Your NopCommerce Folder>\Plugins\ folder and unzip the plugin to this subfolder. After that, in the Administration panel, you can click Reload list of Plugins to display the plugin.
To install the editors
- In the Administration panel, navigate to Plugins > Personalization Plugin Editors.
- Click Upload editor and upload the zip file with the UI Framework.
Verifying the Aurigma Personalization Plugin
To make sure that the installation was successful, you need to enable Customer's Canvas for a product and verify that the Personalize button, which opens the editor, appears near this product.
To enable the plugin, in the nopCommerce admin panel, navigate to Catalog > Products > Edit > Customization Settings, select the config and version of the editor, and then click Apply. For more details, you can refer to the Setting Up a Product topic.
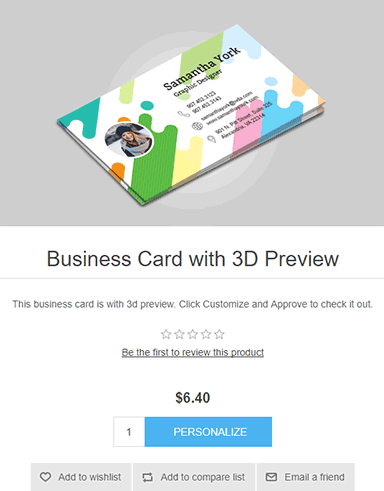
You can verify that the plugin is enabled by navigating to Catalog > Products > Edit > Preview. As a result, a product page will appear as follows:

In this screenshot, you can see that the Personalize button is displayed for this product.
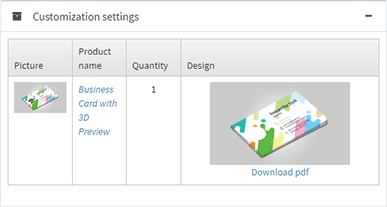
To verify the editing process, click Public store and select a product, click Personalize, click Finish, and then click Approve. You can see that the order has appeared in the basket. If you simulate a checkout, you can observe preview images and a link to the resulting PDF file.
When you open the order details in the admin panel, you can find both the preview and the URL that links to hi-res images in the Customization settings panel.
