Installing the WooCommerce plugin
- 2 minutes to read
To enable the Aurigma Personalization Plugin on your WooCommerce site, you need to install the plugin and associate WooCommerce products with your Customer's Canvas instance. This topic describes how you can perform this.
Installing the plugin
The current Customer's Canvas distribution does not include the Personalization plugin. Please contact our support team for the actual version of this plugin.
Note
To run the plugin, you need a deployed Customer's Canvas instance - either the cloud or on-premises version will work.
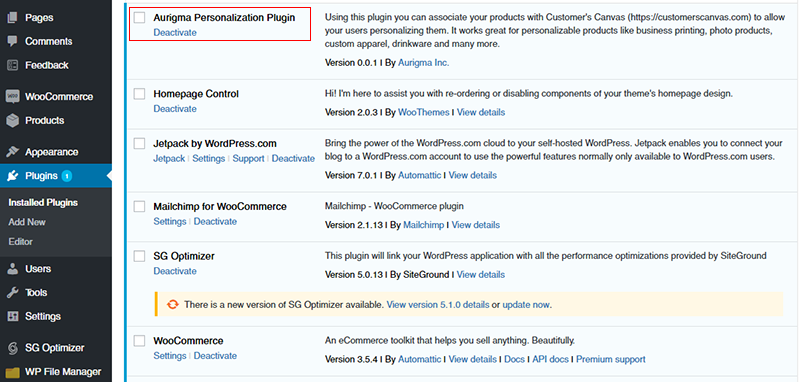
In the WooCommerce control panel, click Plugins.
Install and activate the Aurigma Personalization Plugin.
Click Settings > Personalization Plugin > Editors.
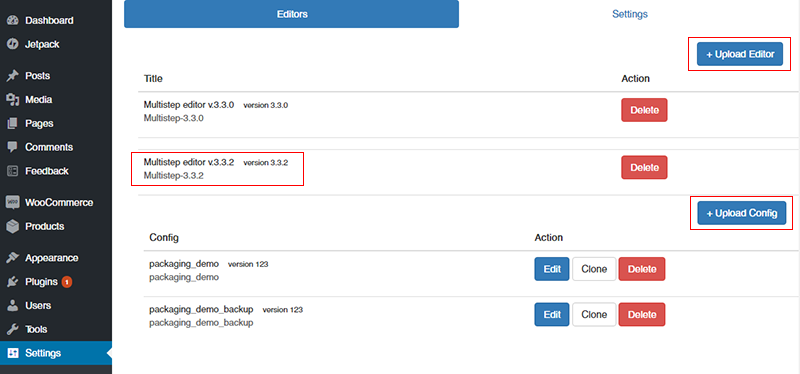
Click Upload Editor and upload the
UI-Framework_x.x.x.zipfile.Click the uploaded editor in the list.
Click Upload Config and upload the JSON file.
Click the Settings tab.

Copy and paste the URL of your Customer's Canvas instance.
Copy and paste your Customer's Canvas API Key.
Click the Save button.
For details about editor configs, you can refer to the UI Framework Tutorials.
Getting the API key
To get your API Key and Customer's Canvas URL, log in to your cloud control panel and click the** AppSettings.config** tab.
In AppSettings.config, your API Key is the value of the ApiSecurityKey parameter.
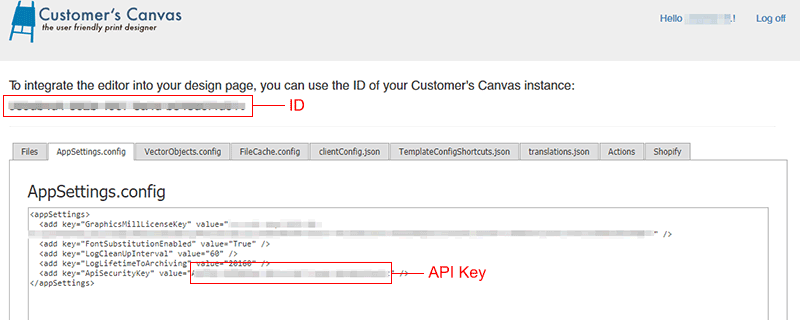
If the following line is commented, uncomment it:
<add key="ApiSecurityKey" value="CustomerSecurityKey" />
Then, you need to replace the value CustomerSecurityKey with your unique key (for example, you can generate a Globally Unique Identifier (GUID)).
To get the URL of your Customer's Canvas instance, replace <yourId> with the ID of your instance in the following link:
https://portal.customerscanvas.com/Users/<yourId>/SimplePolygraphy
Associating products with Customer's Canvas
In the WooCommerce control panel, click Products and then click Personalize.
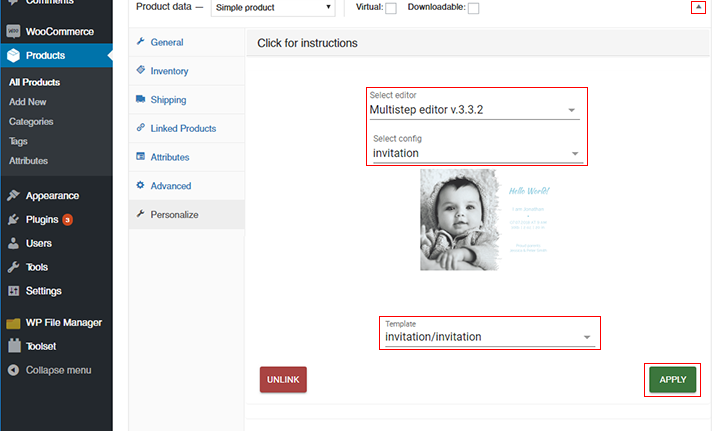
Select an editor and config.
Select configuration attributes (templates and mockups).
Click the Apply button.
Most of the plugin configs require you to choose a design and mockup file. The Personalization plugin searches for these files on your Customer's Canvas instance. Just place them in the \ProductTemplates\designs\ and \ProductTemplates\mockups\ folders respectively, and these files will appear in the drop-down lists.
To verify that Customer's Canvas is integrated with your WooCommerce store, you can navigate to a product view and click the Personalize button to open the editor.
If you want to remove the connection between your WooCommerce product and the editor, click Unlink.
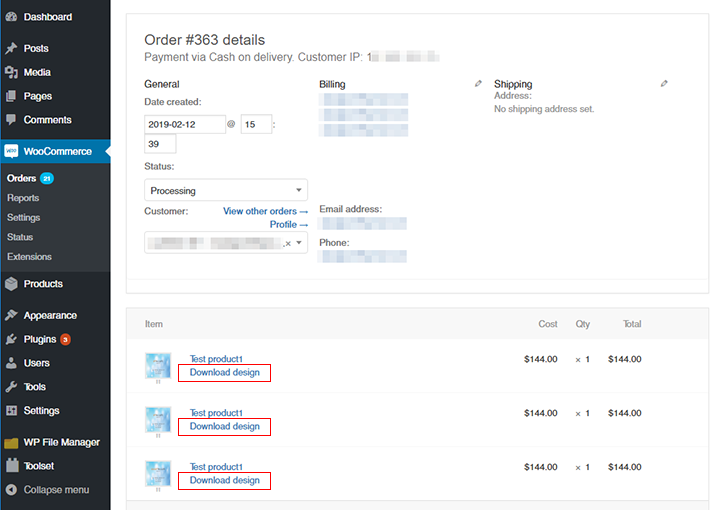
Downloading high-resolution outputs
To download the resulting PDF files for an order, click WooCommerce > Orders. Then, open the order details and click Download design.