Rich text editor
- 8 minutes to read
Products like books, magazines, booklets, etc. may contain large text areas. Large plain texts are boring, and they make catching the main idea at first sight difficult. So, if your users want to create eye-catching products that attract attention, they can use rich formatted text. This text type provides such formatting options as style (bold, italic, and underline), font, size, and color.
If you are using the the classic text engine the only way to customize such text is to the Rich text editor. You can configure it in different ways as described by the IRichTextDialogConfig structure. This article explains settings of the Rich text editor as well as its usage.
Using Rich text editor
The Rich text editor interface contains text formatting elements.
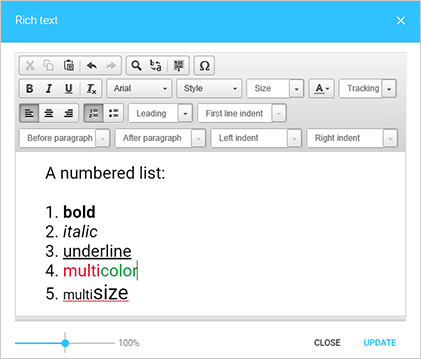
Let us go through these formatting elements:
- The first line: text editing, find and replace, and special characters.
- The second line: font style, name, size, color, and character spacing.
- The third line: text alignment, lists, leading, and first line indent.
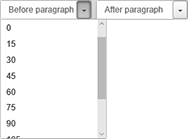
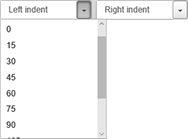
- The fourth line: before and after paragraph spacing, left and right indents.
To change a value of a formatting element, you can select one from a drop-down list. If the element defines a numeric value, you can type it in.

Cut, Copy, Paste, Undo, and Redo
The first button group in the Rich text editor contains the following buttons (from left to right): Cut, Copy, Paste, Paste as plain text, Paste from Word, Undo, and Redo.

Also, some of these operations can be done using the following key combinations:
- Cut:
Ctrl+X - Copy:
Ctrl+C - Paste:
Ctrl+V - Undo:
Ctrl+Z - Redo:
Ctrl+Y
Find, Replace, and Select All
The second button group in the Rich text editor contains the following buttons (from left to right): Find, Replace, and Select All.

Special Characters
The last button in the upper row is Insert Special Character.

It opens the Select Special Characters dialog shown in the following image.
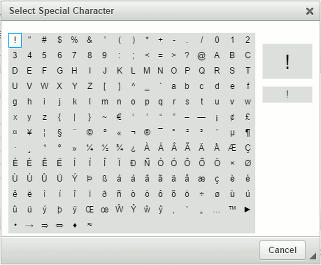
This dialog closes after you select a character.
Font Style
To emphasize some words or sentences, you can use bold, italic, and underline font styles or any combination of them. The last button in this group clears all formatting for the selected text.

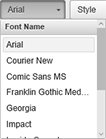
Font Name
To change a font, select text, click the Font drop-down list, and then select a new font.
For details on how to add custom fonts to the Design Editor, you can refer to the Font list topic.
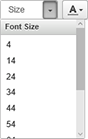
Font Size
To change a font size, select text, click the Size drop-down list, and then select a value (in points). Also, you can type your own value of the font size. If you need to disable the input of custom values, use the IShowInputSettings interface.
Font Color
To change a font color of a selected text, click Text Color.
There is a palette with the predefined color set on the left side of the Text Color dialog, and the color field on the right side of the dialog box. You can select a color from the palette or directly from the color field. To find out how to set up the palette, refer to the Color picker topic.
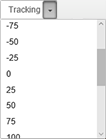
Tracking
Tracking is the spacing between characters. Negative values make text narrower, positive values make it wider, and 0 is the default tracking of the font.
Text Alignment
The following text alignment options are available: Left, Center, and Right.

Note
Text alignment is applied to all text in the Rich text editor, not to a single paragraph.
Lists
The Rich text editor allows for creating numbered and bulleted lists.

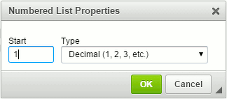
To change a list style, right-click on any element in the list. For numbered lists, you can set a number to start the list with and select a list type.
For bulleted lists, you can change the bullet style.
Nested Lists
Also, you can create lists with hierarchy:
- To demote the item to a lower numbering level (move the item to the right), press
Tab. - To promote the item to a higher numbering level (move the item to the left), press
Shift+Tab.
Leading
Leading is the spacing between base lines. The leading is measured in points. You can select its value from the predefined list or type in your own value.
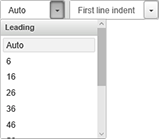
If a leading value is lesser than a font size, then the text lines will overlap.
Note
Leading is applied to all text in the Rich text editor, not to a single paragraph.
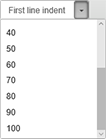
First Line Indent
First line indent is an indentation that determines the distance of a paragraph's first line from the left margin. It is sized in points. You can select one of the predefined values or type in your own value.
Before and After Paragraph Spacing
Before and after paragraph spacing is sized in points. You can select a value from the predefined list or type in another value.
Left and Right Indent
Paragraph left and right indents are sized in points. You can select a value from the predefined list or type in another value.
Configuring Rich Text Editor
The Apply-to-All Mode
The Rich text editor supports a text mode in which formatting is applied to a whole rich formatted text field despite a text selection. This is the apply-to-all text mode. If you enable this mode, then the First Line Indent, Before paragraph indent, After paragraph indent, Left indent, and Right indent drop-down lists hide in the toolbar of the Rich text editor. Set the applyToAllTextMode property to true to enable this mode.
// Define the RichTextDialog configuration.
configuration = {
    widgets: {
        RichTextDialog: {
            bgColor: "grey",
            applyToAllTextMode: true
        }
    }
}

// Load the editor with an empty product.
CustomersCanvas.IframeApi.loadEditor(
    // An iframe where CustomersCanvas editor should be loaded.
    document.getElementById("editorFrame"),
    {   // The empty product size.
        surfaces: [{ width: 720, height: 360 }]
    },
    // The editor configuration.
    configuration
);
The Character Count
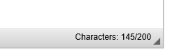
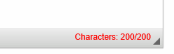
You can limit the number of characters that the user can enter in text fields. The <TCL_n> marker limits the character count for rich text layers in PSD templates. For example, <TCL_200> allows your users to enter up to 200 characters.
The character count is shown in the lower-right corner.
Hints
You can define whether to show hints in drop-down lists or not. By default, the editor shows hints. If you need to disable some of them, set corresponding properties of the showHint object to false. The following example shows how you can disable hints for all drop-down lists.
configuration = {
    widgets: {
        RichTextDialog: {
            showHint: {
                font: false,
                style: false,
                size: false,
                tracking: false,
                leading: false,
                firstLineIndent: false,
                paddingTop: false,     // Before paragraph
                paddingBottom: false,  // After paragraph
                paddingLeft: false,    // Left indent
                paddingRight: false    // Right indent
            }
        }
    }
}
As a result, the values will be displayed instead of hints.

Multicolumn Text
The Design Editor supports multicolumn text if you set the createMultiColumnText property to true.
configuration = {
    widgets: {
        RichTextDialog: {
            bgColor: "grey",
            createMultiColumnText: true
        }
    }
}
This property enables the Columns drop-down list in the Top Toolbar for formatted text elements. So, your users can create rich formatted texts in the editor and then set the column count using this drop-down list.
The Special Character List
You can set up the Special character list defining the ckeditorConfig property.
configuration = {
    widgets: {
        RichTextDialog: {
            ckeditorConfig: {
                specialChars: [""", "’", [ "@", "Custom label" ] ]
            }
        }
    }
}
Here, the specialChars array defines three special characters: two quotation marks and the at symbol. Also, we defined the Custom label hint for the third symbol: ["@", "Custom label"].
You can add characters to this list:
- as they are (
"#","1","G") - using HTML names (
""", "’") - using Unicode (
"Ŵ", "Ŷ")
If you define such an array, it overrides the default character list.
The Toolbar Configuration
You can configure the toolbar by using the toolbarConfig array. Every element in this array represents a button group or a row separator. For button groups, specify a group name and an array of buttons. The following example demonstrates how you can set the text editing and text style buttons on the toolbar.
configuration = {
    widgets: {
        RichTextDialog: {
            toolbarConfig: [
                { name: "clipboard", items: ["Cut", "Copy", "Paste", "-", "Undo", "Redo"] },
                "/",
                { name: "basicstyles", items: ["Bold", "Italic", "Underline", "-", "RemoveFormat"] }
            ]
        }
    }
}
Here, "/" is a row separator, and "-" separates buttons in a group. In the MdLight theme, this toolbar takes available space despite the row separators. You can find the default toolbar configuration in the API Reference.
The WYSIWYG Mode
To adjust text in the Rich text editor as close as possible to the appearance on the canvas and zoom the text at the same time, you can enable the WYSIWYG mode. By default, the editor appears in the common view regardless of the content.
configuration = {
    widgets: {
        RichTextDialog: {
            wysiwygMode: true
        }
    }
}
Zoom
If your users edit texts with extremely large or small font sizes in the Rich text editor, it can become a problem. The text can either be too small to see, or too big to fit in the editor window. To improve the user experience, you can enable resizing of the content in the window.
Move the slider in the lower-left corner to change the zoom level.

You can configure the slider and enable the auto-zoom feature in the following way.
// Define the zoom configuration.
configuration = {
    widgets: {
        RichTextDialog: {
            zoom: {

                // Enables the zoom slider in the Rich text editor.
                enabled: true,
                minZoomPct: 10,
                maxZoomPct: 500,

                autoZoom: {
                    // Enables auto-zoom at opening the text editor.
                    enabled: true,
                    // Auto-zooms the text in if the text font size is less than this threshold.
                    minFontSizeThresholdPt: 12,
                    // Auto-zooms the text out if the text font size is more than this threshold.
                    maxFontSizeThresholdPt: 36
                }
            }
        }
    }
}