Roles and teams
- Last updated on June 26, 2024
- •
- 4 minutes to read
You can access your tenant along with your teammates: create a separate user for each person with their own personal credentials. This approach allows you to avoid sharing your own personal credentials with others.
You can manage what settings are available in your tenant for teammate's credentials. For this, you assign a role to teammate's credentials.
Roles have different permissions. They allow a user to manage all or part of the tenant settings within your tenant.
In this article, you will learn:
- What roles are and what permissions they provide.
- How to assign a role to a user.
- How to manage user's settings.
Roles
In this paragraph, you will learn about roles in detail.
| Name | Permissions | Can you assign this role to someone's credentials? | Who is this role for? |
|---|---|---|---|
| User | Managing assets and products, editing workflows and pipelines, working with projects | Yes | Teammates: designers, content managers, etc. |
| Admin | All the user's permissions + changing tenant settings and managing tenant users | Yes | Administrator |
Note
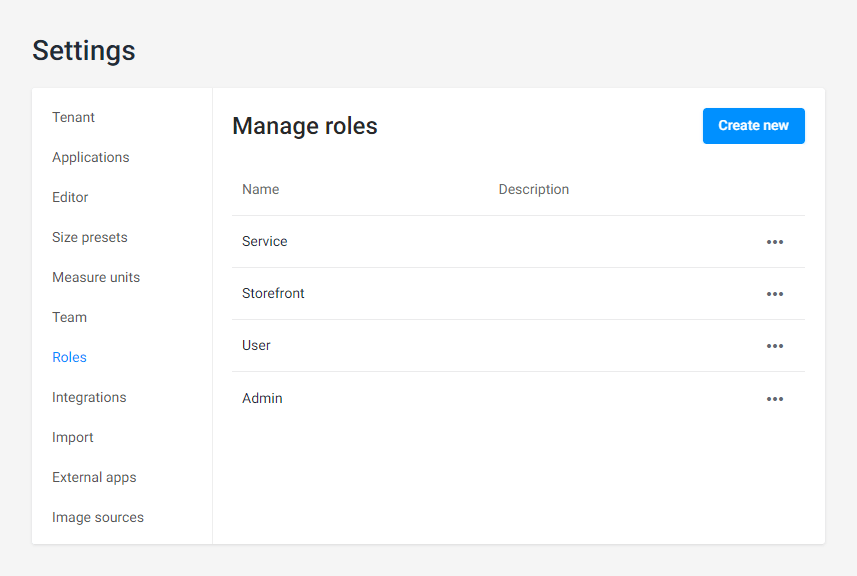
There are also the Storefront and Service roles that the system uses for technical purposes.
Team
To see all the users that can log in to this tenant, go to Settings > Team. Let's consider this list.
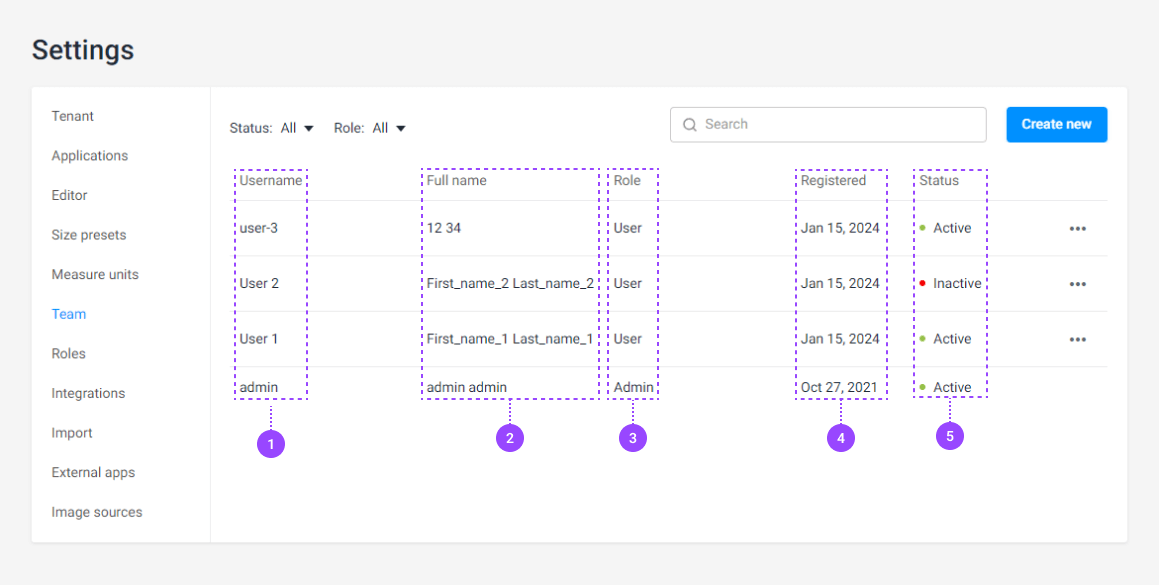
- Username. A user enters this name when logging in to your tenant.
- Full name. The first and last names of a person.
- Role. The assigned role, either User or Admin.
- Registered. The registration data.
- Status. Active means the user can log in, while Inactive means the user cannot.
Creating a new user
To create a new user, navigate to Settings > Team, click Create new, and fill out the form.
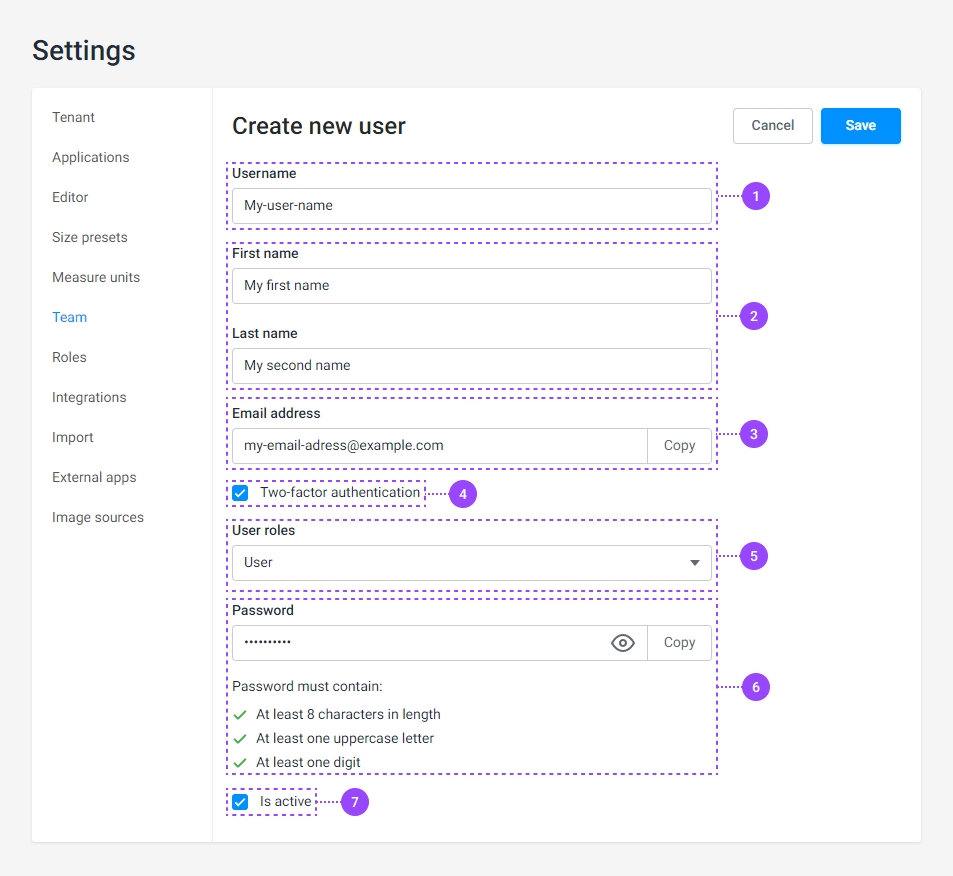
Username. This is the name that they use then log in to the tenant.
First name and Last name. They represent the user's full name.
Email address. This is the user's email address. A user can use this email address to log in to the tenant and to reset the password.
Two-factor authentication. This checkbox enables the sending of special codes via email that the user enters when logging in to the tenant.
User roles. One or more roles assigned for this user. Read more in the Roles paragraph.
Password. Here, you can define a password with requirements for new passwords for this user. Read more in the Password paragraph.
Is active. This checkbox confirms that a person can log in with this username.
Changing user data
To change user data, navigate to Settings > Team, click ellipsis in a user's row and select Edit. At the Edit user page, make the necessary changes.
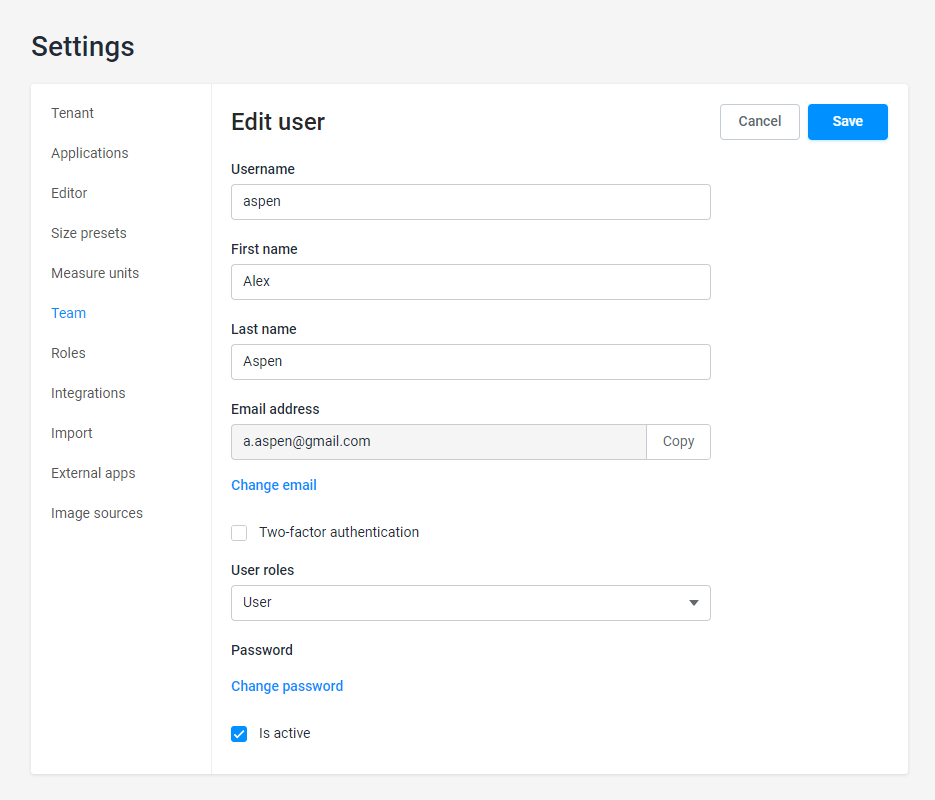
For the email address, ensure that it is valid because a confirmation email will be sent to this address in two cases:
- If you have enabled two-factor authentication in this form for a single user or in the tenant settings for all users.
- If you have enabled email address confirmation in the tenant settings for all users.
When defining a password, it must meet the conditions defined for the selected user roles.
When finished editing, click the Save button to apply the changes.
Blocking a user
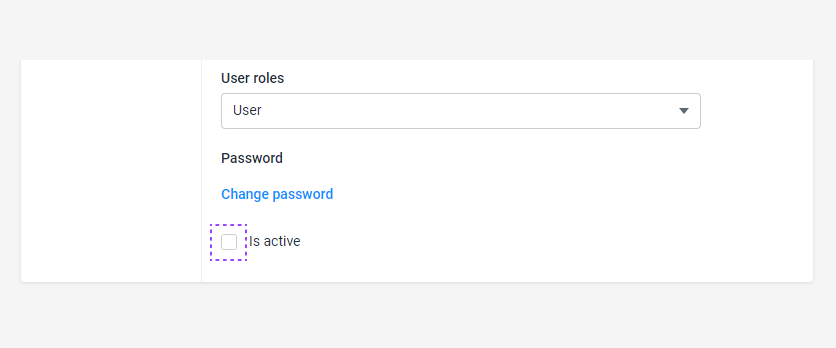
Active users are allowed to log in and work in the Customer's Canvas tenant. To block a user, make them inactive. To do so, navigate to Settings > Team, click ellipsis in the user's row and select Edit. At the Edit user page, unselect the Is active checkbox.
Deleting a user
To delete a user, navigate to Settings > Team, click ellipsis in a user's row and select Delete.
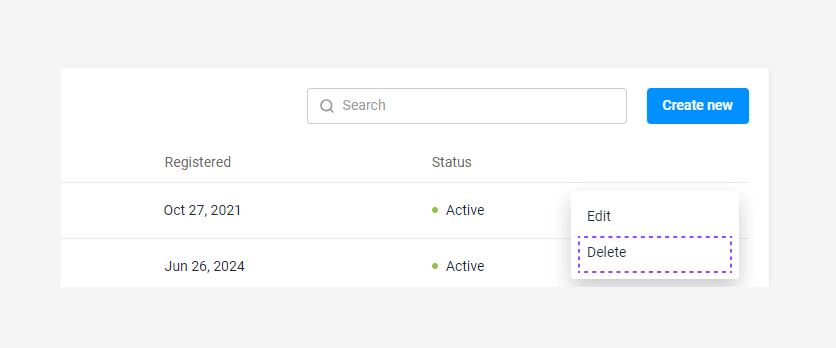
When the confirmation window opens, click Delete again.
Changing a password
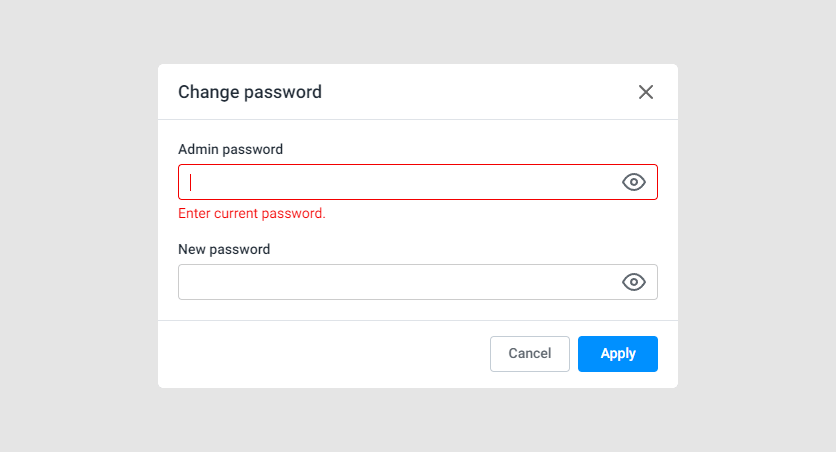
To change a user's password, at the Edit user page, click Change password. Then, type in an admin password and a new user password.
Defining password requirements
When defining a user role, an admin can make the password requirements more or less strict. To change the password requirements, navigate to Settings > Roles and click either Create new or the ellipsis next to the role description. In the Edit role form, you can change the password requirements using the following fields.
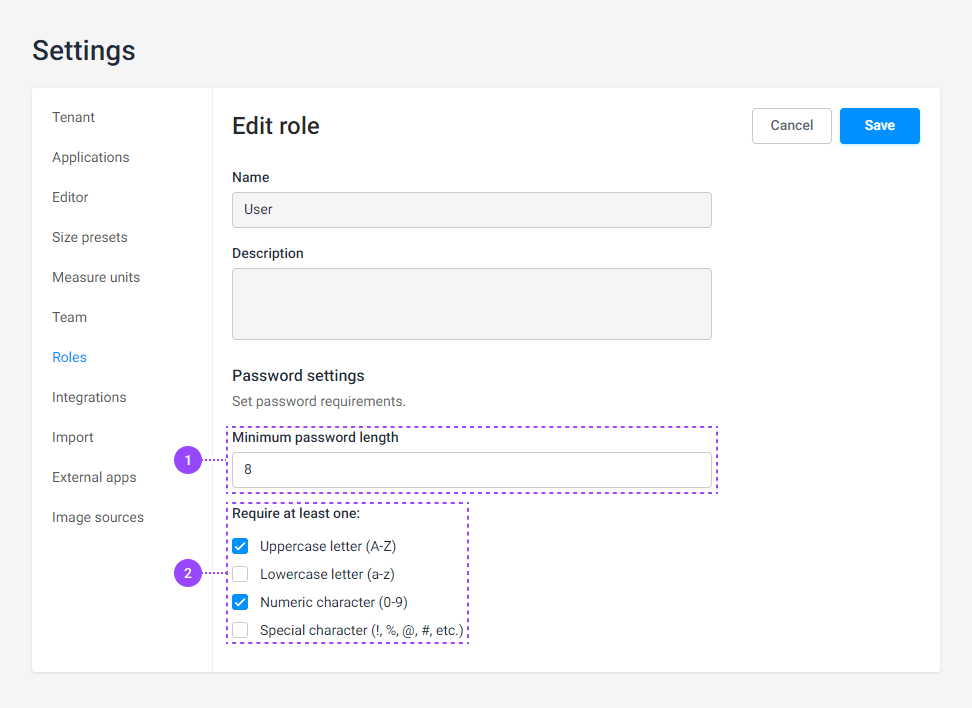
- Minimum password length defines how many symbols a password contains.
- Require at least one: any combination of Uppercase letter (A-Z), Lowercase letter (a-z), Numeric character (0-9), and Special character (!, %, @, #, etc.) checkboxes defining the password requirements.
Activating two-factor authorization
If two-factor authentication is enabled for your account, after entering your credentials, you will be asked for a verification code, which is sent to the email address you specified at the registration.
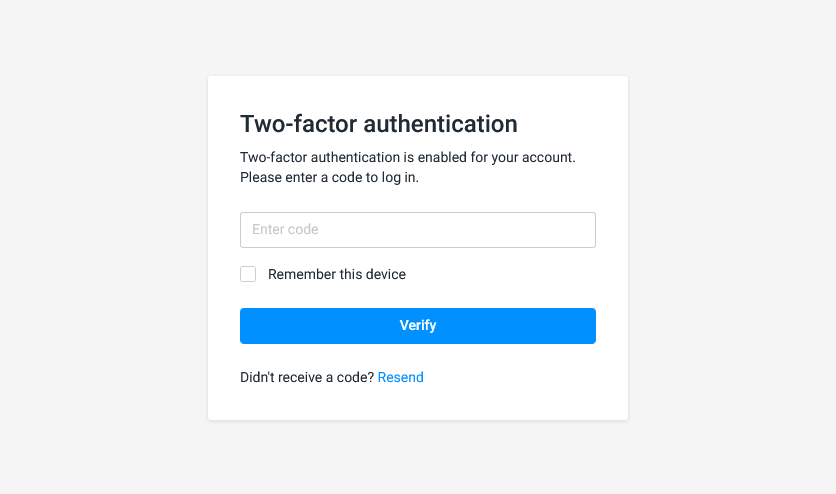
Open your email client and find the last email with the Your verification code title. Fill in the six-digit code and click Verify.
To approve your device and not receive emails on further logins, select Remember this device checkbox.
You can enable two-factor authentication both when creating and editing a user. To do so, select the Two-factor authentication checkbox.
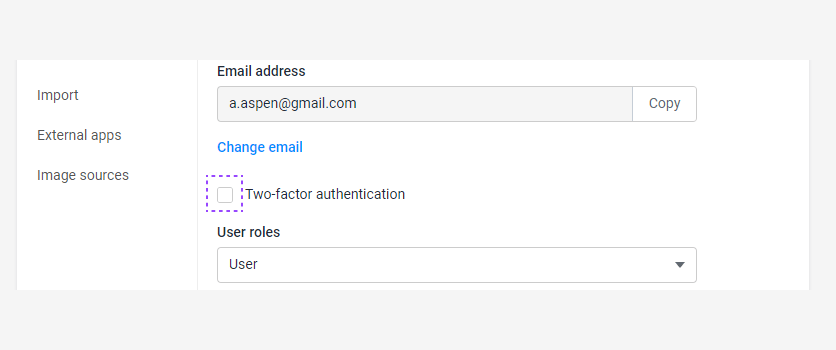
This checkbox takes the default value from the Enable two-factor authentication for new users setting on the Tenant page.