Back to Website
Show / Hide Table of Contents

Creating and editing workflows

  • 5 minutes to read

When you configure a personalization process for a product, you need to create a workflow. It is described in a workflow file in JSON format.

Note

If you have some experience in integrating Customer's Canvas into your site, you will interact with UI Framework JS library. To know more, read the What is UI Framework?

In this article, you'll know, how to create and manipulate workflow files in Customer's Canvas. Then, consider a workflow editor.

Creating a workflow file

In Customer's Canvas, you can work with your products using two approaches: The Product Information Management and Product Specification. Read the correspondent sections: Product Information Management and Product specifications to know more about each approach.

If you want to add the PIM module or Product Specification in your tenant, contact our support team.

According to the approach you have, let's consider how to work with workflows. These descriptions are divided into two paragraphs for the PIM module and Product Specification.

Managing workflows for the PIM module

Opening workflow manager

To create a workflow file, navigate to the correspondent section and click Workflow/Pipelines. This section is divided into two parts: Personalization workflow and Processing pipeline.

PIM workflow

Editing workflow

To edit a workflow file, right-click the ellipsis and select Edit. A workflow file is opened in the same browser tab.

PIM workflow editing

Creating new workflow from scratch

To create a new workflow file, click the Create new button and select Personalization workflow. Then, choose your starting point. If you select New blank workflow, you'll describe a workflow from scratch. It opens in the same tab. You can see the blank editor and input the name of a new workflow file. Press Shift + S or the Save button to save the changes.

PIM workflow from scratch

Duplicating workflow file

To create a copy of a workflow file, select a workflow file, click the ellipsis and select Duplicate. A copy of this file appears.

PIM workflow duplicating

Renaming workflow file

To rename a workflow file, click the ellipsis and select Edit. In the Name text box, rename a file and click Save.

PIM workflow renaming

Deleting workflow file

To delete a workflow file, click the ellipsis and select Delete.

PIM workflow delete

Connecting and testing workflow

You can read the Creating products in BackOffice article about the process of connecting a workflow file to a product. Then, read about Testing the connections to test a workflow.

Managing workflows for Product Specification

Opening workflow manager

In the Workflows for Product Specification, you can see a file manager for manipulating workflow files. There are two folders: Standard and Custom.

In the Standard folder, you can see the default workflow files. They have restrictions for manipulating. You can only copy them to the Custom folder to create your own workflow file based on a default one. In the Custom folder, you can create your own workflow files and manipulate them as assets.
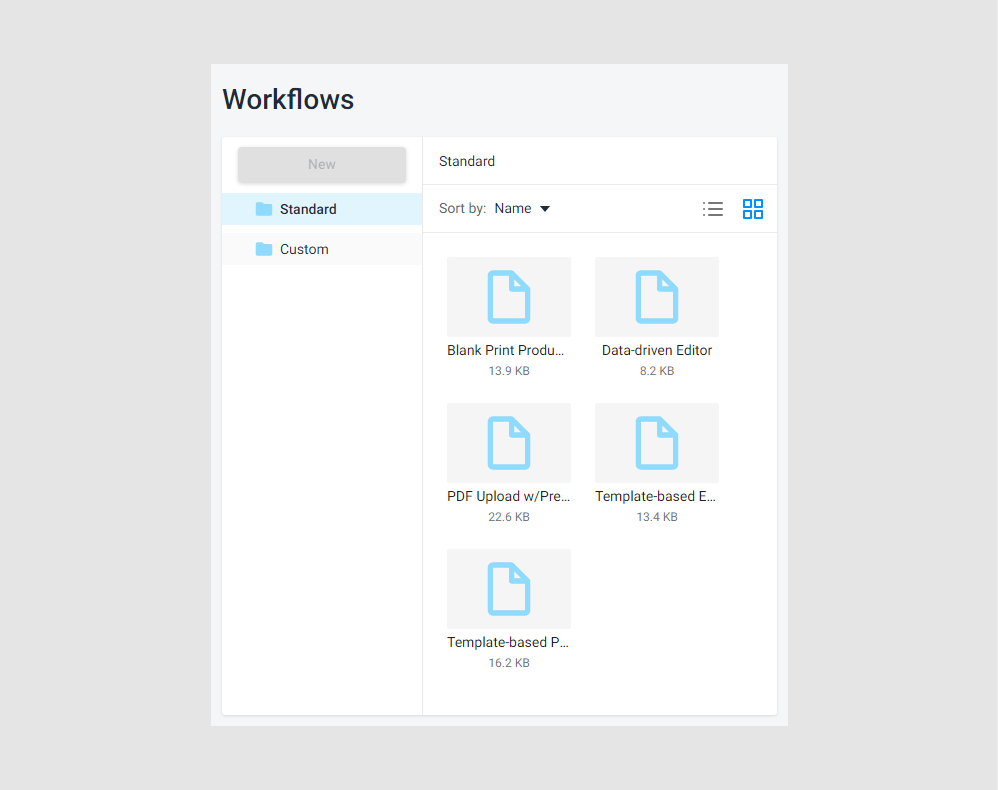
Product Specification workflow manager

Let's consider how you can manipulate files in both folders.

Manipulating workflows in Standard folder

In the Standard folder, you can see default workflows. You can only download and open these workflow files.
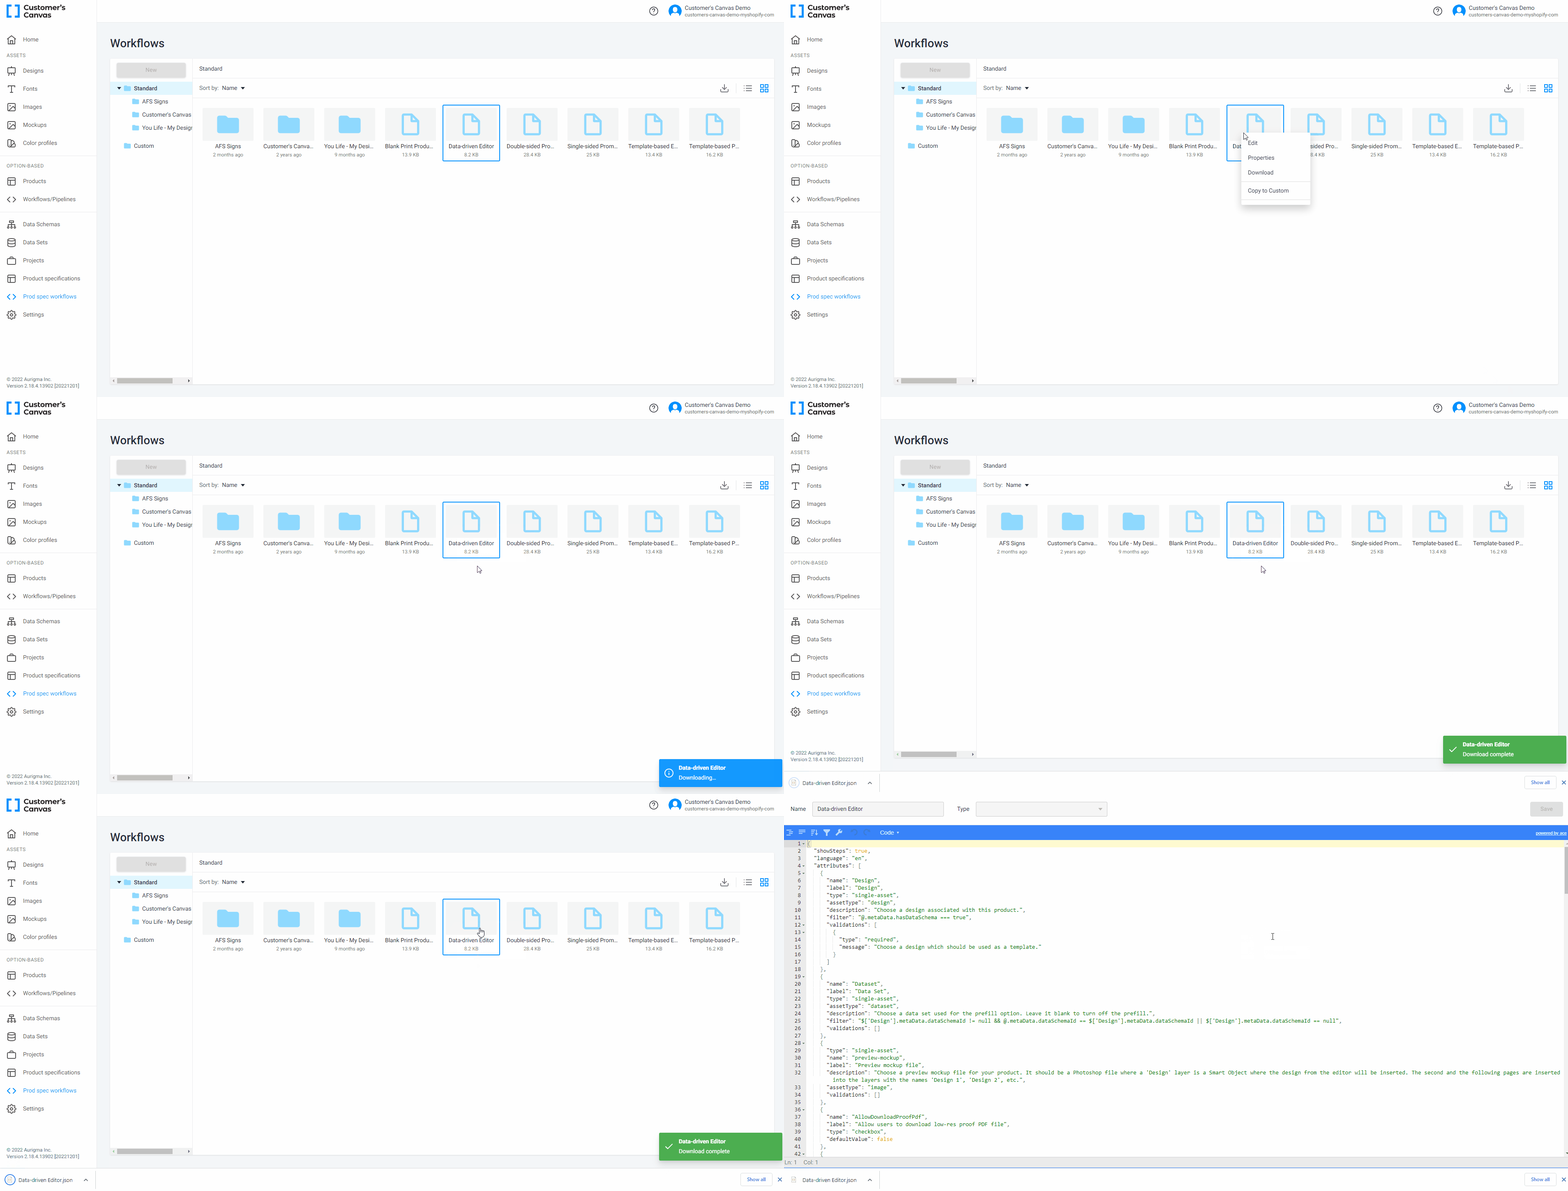
Product Specification standard folder

If you want to change something in a default workflow file, you need to copy this file to the Custom folder and edit the new workflow file.
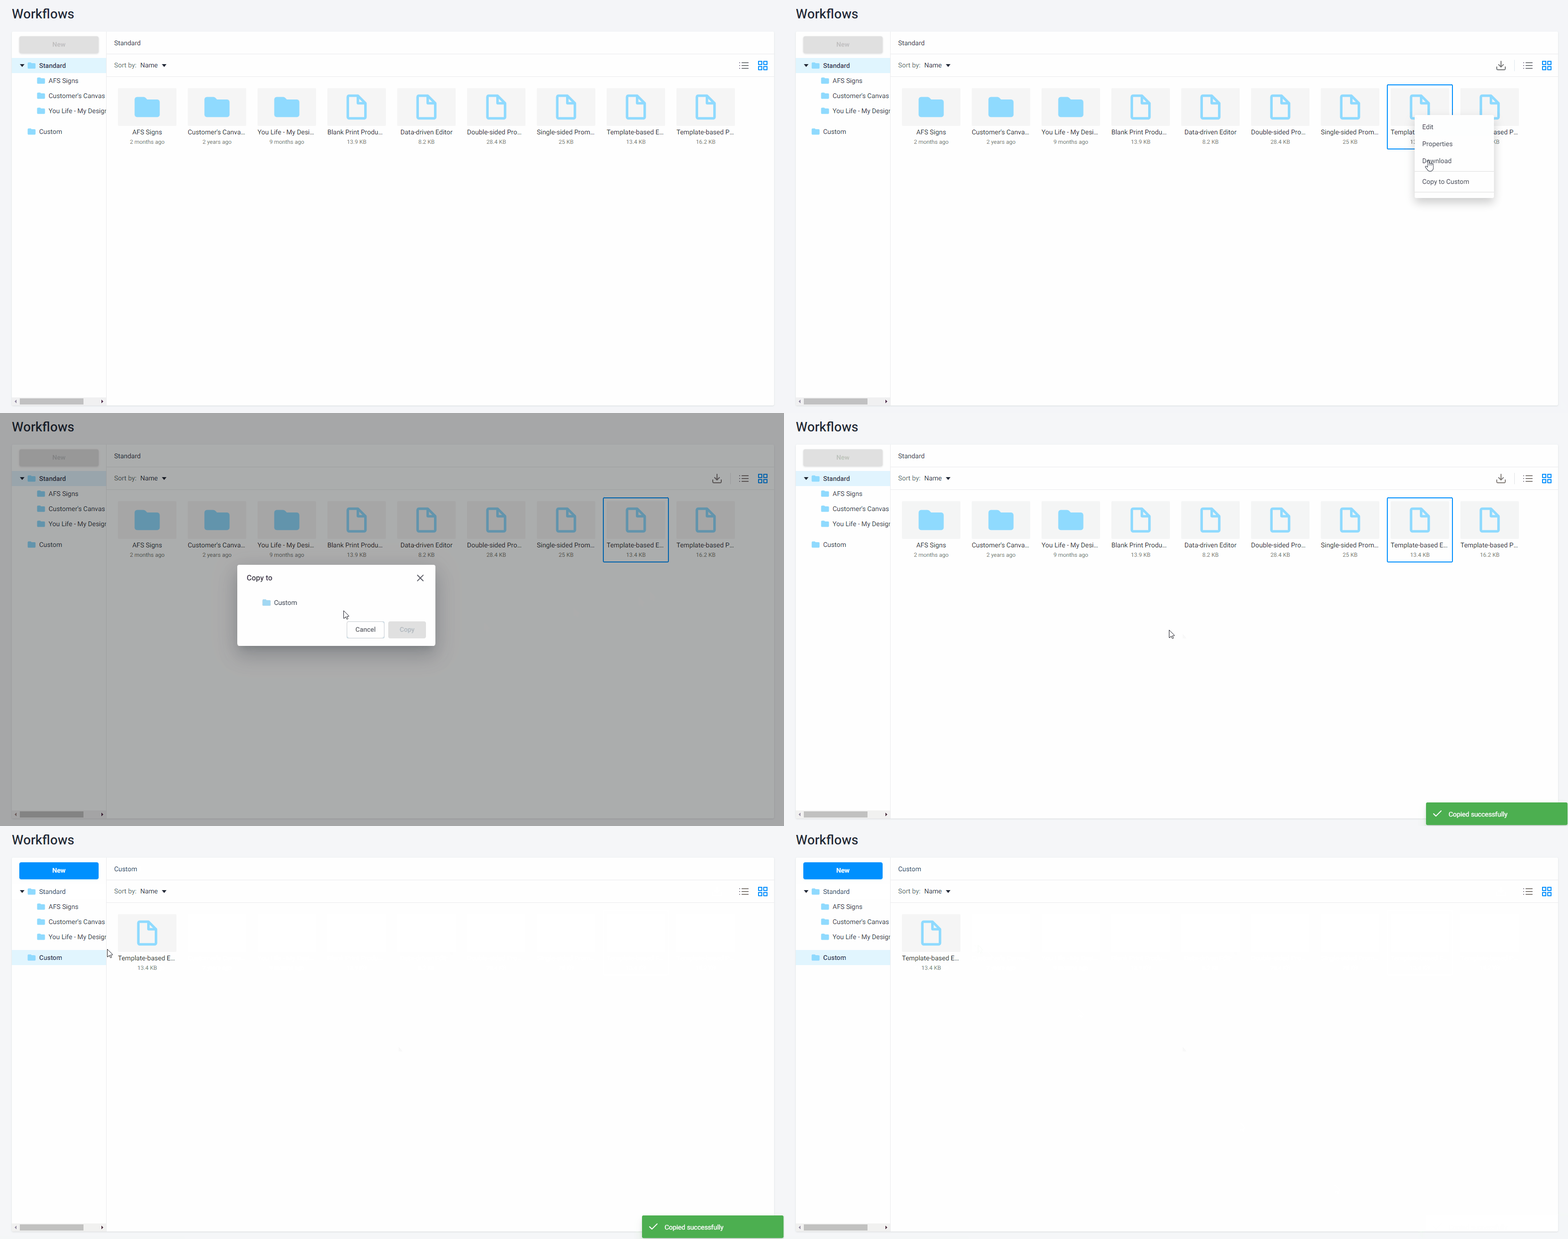
Product Specification custom folder

Manipulating workflows in Custom folder

In the Custom folder, you can manipulate files as assets: download, upload, delete, copy, move, rename, and create from scratch. To know more, read the manipulating assets section. Let's see some of them typical for workflow files.

Creating new file

To create a new file, click the New button > Workflow, or right-click anywhere on a blank space in the file list of the current folder and select Workflow. A blank workflow editor will be opened.
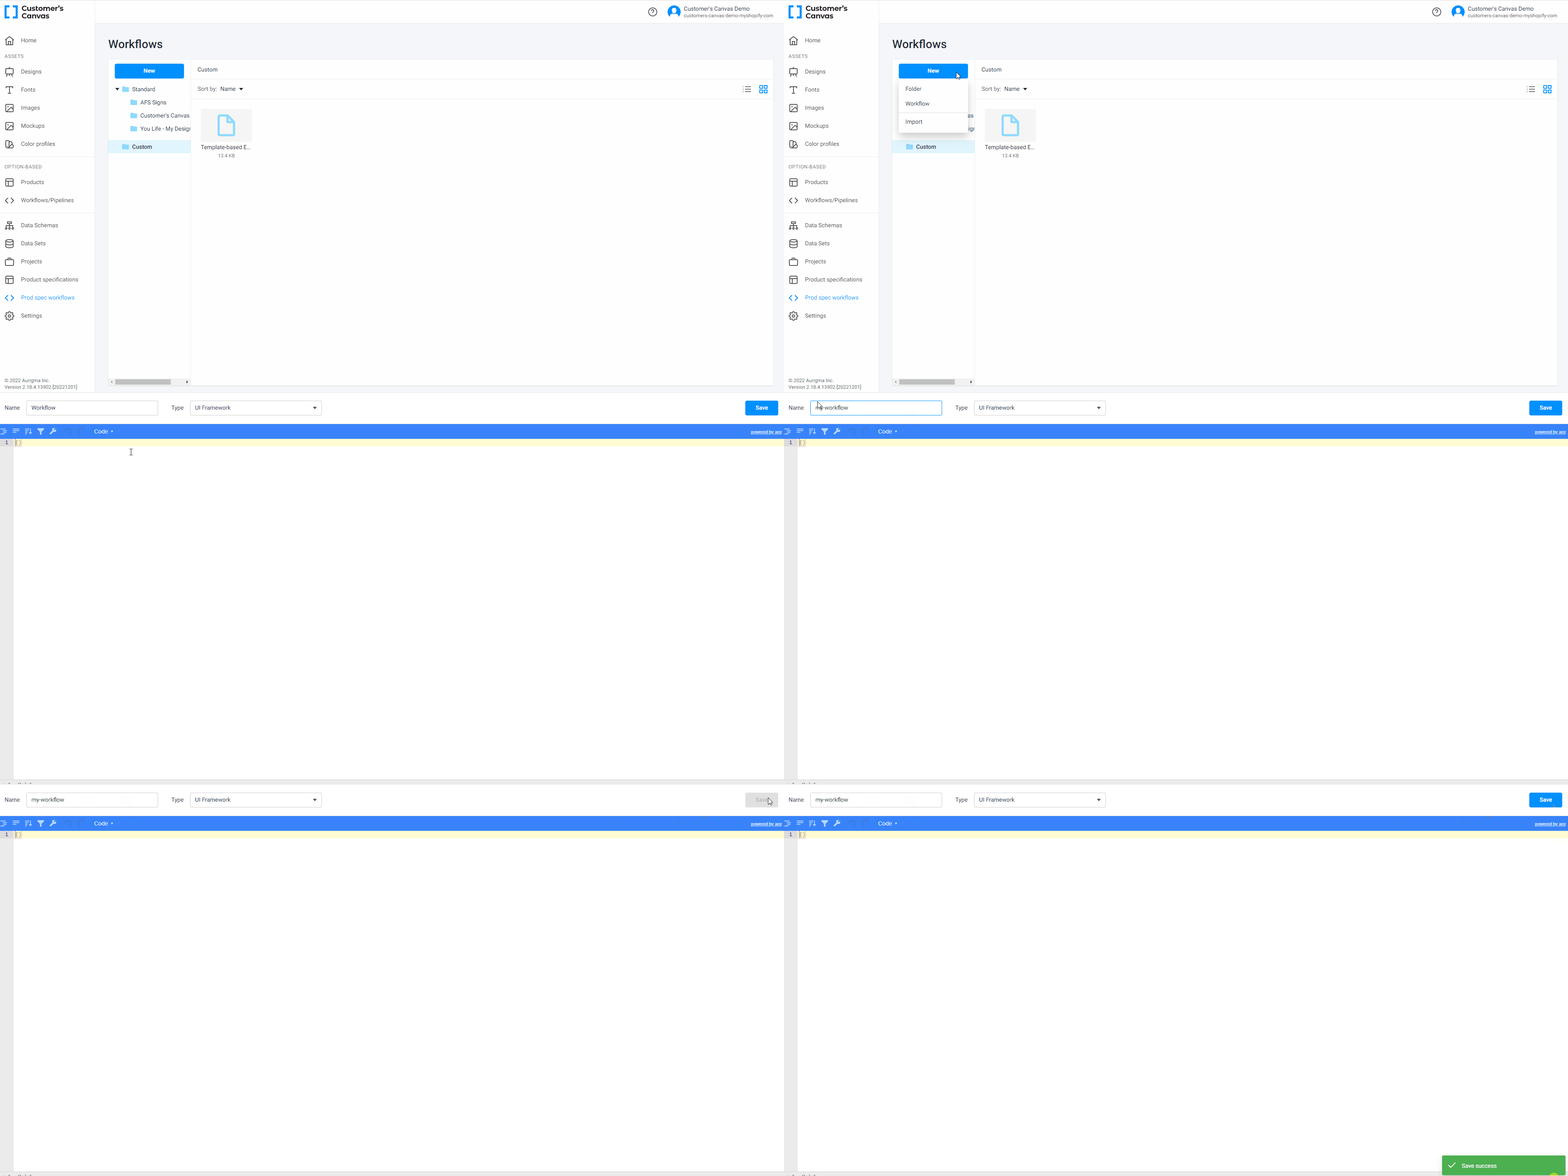
Product Specification creating workflow

Editing workflow file

To edit a workflow file, double-click the item or right-click and select Edit. A workflow file opens in a new window.
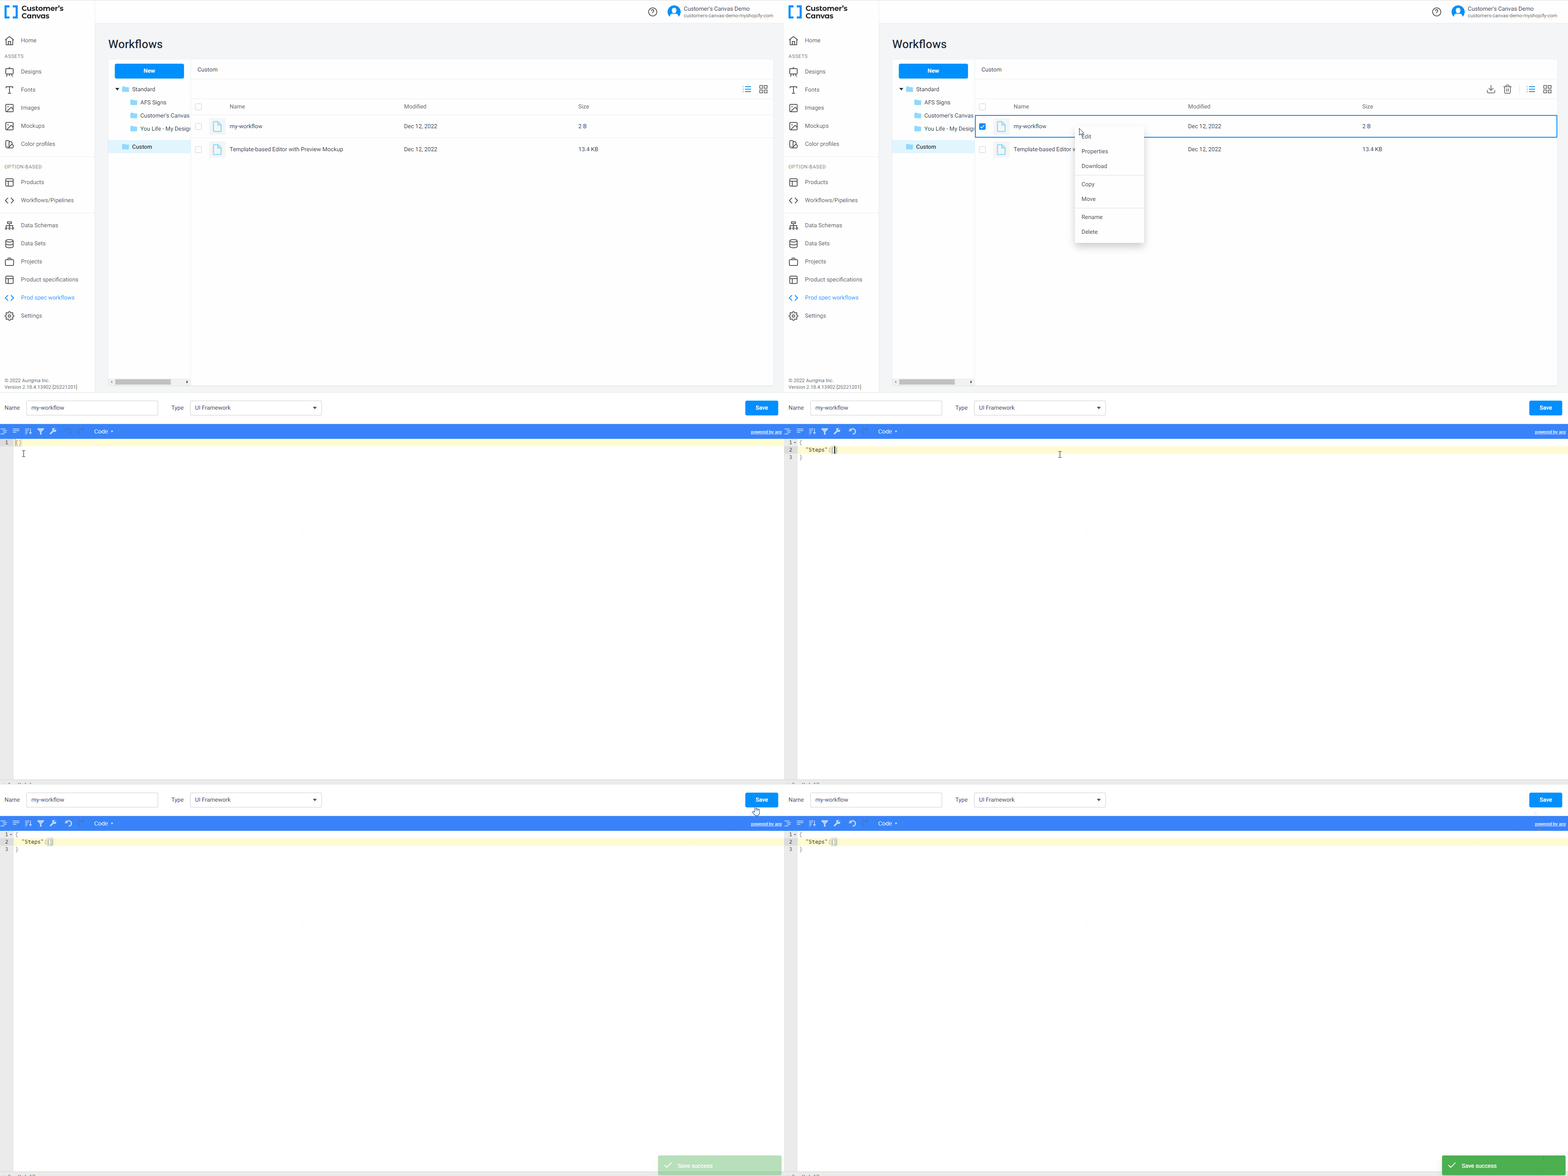
Product Specification editing workflow

Connecting and testing workflow

Before connecting a workflow to a product, you need to make a permission for this. Go to the Custom folder, right-click a file and select Properties. Then, click Actions and select Enable test.
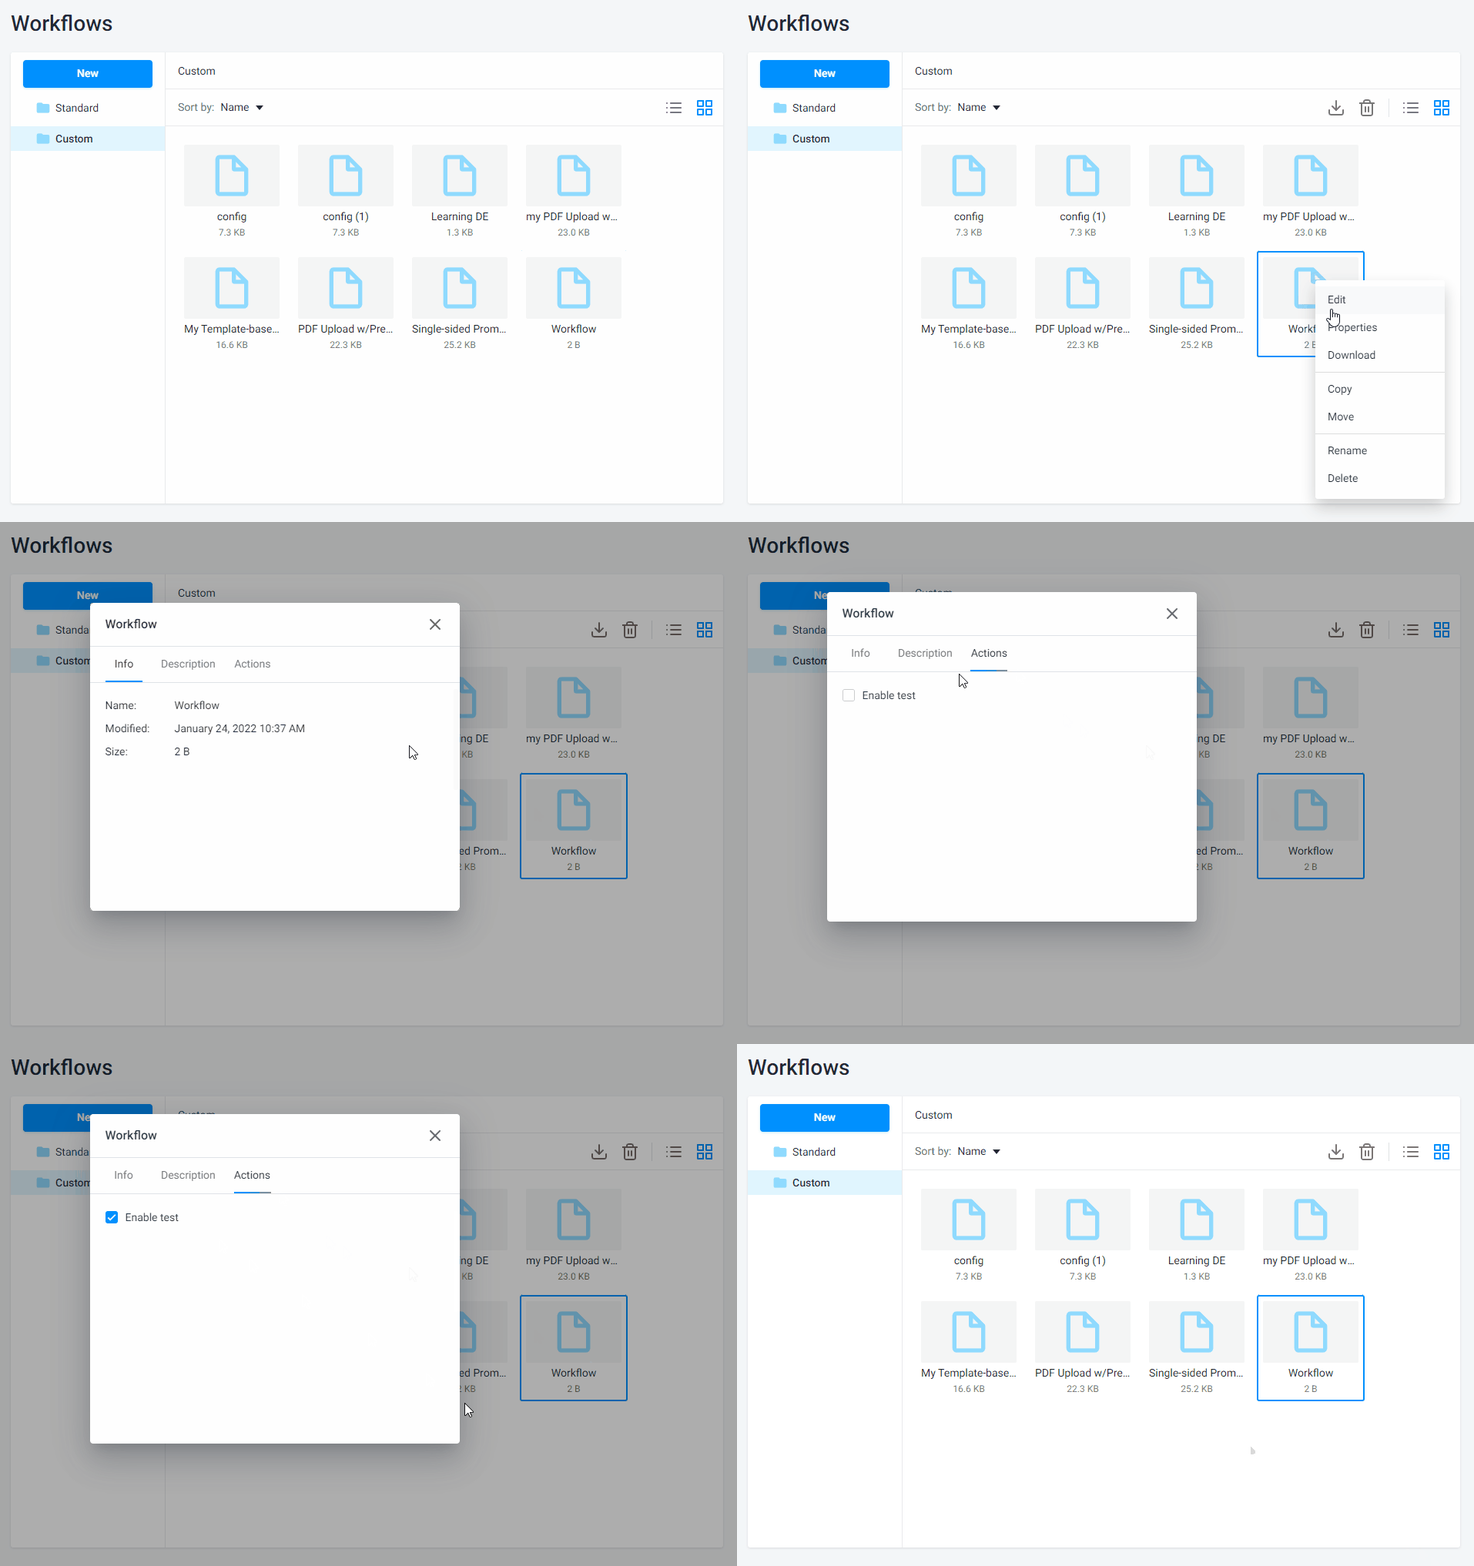
To connect a workflow file to a product in Product Specification, read the Blank Print Product Editor article.

Workflow editor overview

This is a workflow editor. You can write a JSON code there, or just paste it and save the result.

Workflow Editor

In the Name text box, you can rename the file. In the Type drop-down list box, you can select what item you'll create a workflow file for. It can be UI Framework, Simple Editor, or Design Editor.

Let's consider the toolbox below.

Workflow Editor tool panel

Picture Button name Description
Format JSON data, with proper indentation and line feeds (Ctrl + I) create proper indentation and lines
Compact JSON data, remove all whitespace (Ctrl + Shift + I) compact JSON data into one string without whitespace
Sort contents sort the content ascending or descending
Filter, sort or transform contents This functions work by JMESPath
Repair JSON: fix quotes and escape characters, remove comments and JSONP notation, turn JavaScript object intro JSON Repair the data: deleting extra whitespace, comments, turning JS object into JSON. You can use this function when you copy JS code into a workflow file
Undo last action (Ctrl + Z) cancel the action
Redo (Ctrl + Shift + Z) turn back the action
Switch Editor Mode display data as a code, a text, or a tree. In the tree mode, you can expand or collapse all the data by special buttons. In the text mode, keys and values aren't highlighted

Hotkey

Let's consider the full list of functions, which is implemented by hotkeys.

Key Description
Alt+Arrows Move the caret up/down/left/right between fields
Ctrl+Shift+Arrow Up/Down Select multiple fields
Shift+Alt+Arrows Move current field or selected fields up/down/left/right
Ctrl+Del, Del Remove field
Ctrl+Enter Open link when on a field containing an URL
Ctrl+Ins Insert a new field with type auto
Ctrl+Shift+Ins Append a new field with type auto
Ctrl+E Expand or collapse field
Alt+End Move the caret to the last field
Ctrl+F Find
F3, Ctrl+G Find next
Shift+F3, Ctrl+Shift+G Find previous
Alt+Home Move the caret to the first field
Ctrl+Z Undo last action
Ctrl+Shift+Z Redo

Now that you know where to find workflow files, let's take a look at their typical structure in the Structure article.

Was this page helpful?
Thanks for your feedback!
Back to top Copyright © 2001–2022 Aurigma, Inc. All rights reserved.
Loading...
    Thank for your vote
    Your opinion is important to us. To provide details, send feedback.
    Send feedback