Non-rectangular image placeholders
- 5 minutes to read
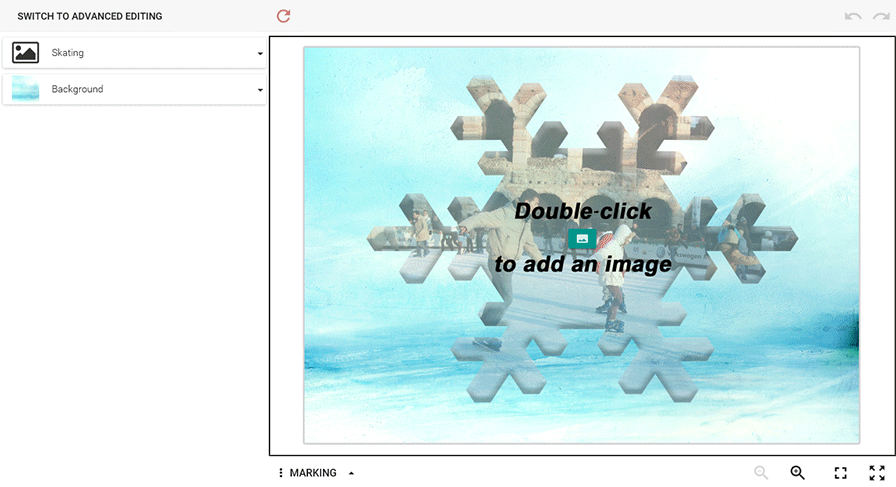
In the Image placeholders article, we found out how to add a placeholder to a product. A user can upload an image in this placeholder, but its shape is always rectangular. What if you want to make it more artistic, for example, an arbitrary shape like on the following picture?
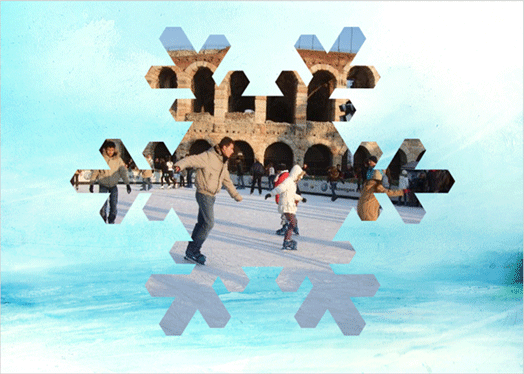
A usual way for this is to put an overlay on top of the image. Graphic designers know how image overlays work. You can cut any shape out of a raster layer using another image sitting on top of it. The images have to be precisely positioned relative to each other, and the overlaying image should be transparent in the areas where the first image is supposed to be visible. This technique can be used to add artistic borders to image layers. However, it requires additional efforts, and for some use-cases, the image overlays are not suitable.
As an alternative, you can use vector masks. In this case, any desired image region can be cut out by a vector shape and placed on the product. By default, image placeholders have rectangular shapes, but it is possible to set up an arbitrary vector shape or a vector mask and use them to crop out a portion of the image. Note that you can also use vector masks to crop out other design elements such as images and text layers.
Let us see how vector shapes and vector masks are used in the Design Editor to create non-rectangular placeholders.
Creating Placeholders from Shape Layers
Non-rectangular placeholders are set up in the same way as rectangular ones, but the <PH> marker is applied to the name of the shape layer rather than the image layer. When a user opens such a template in the Design Editor, they see an empty container of the desired shape and can upload an image to it.
Let us create a simple template with such a placeholder:
Create a new template. On the File menu, click New.
Add a background image. For example, drag it from Windows File Explorer.
Add a shape layer. On the Tools panel, click Shape Tool or press
Uon the keyboard, toggle to a shape tool (rectangle, ellipse, custom shape) and draw a shape with the mouse.Add the
<PH>marker. Double-click the shape layer name on the Layers tab and add the<PH>marker to its name. It should look like this:
Save the result. On the File menu, click Save and choose PSD format
Put the resulting PSD file among Customer's Canvas templates and open it. You will see something like this:
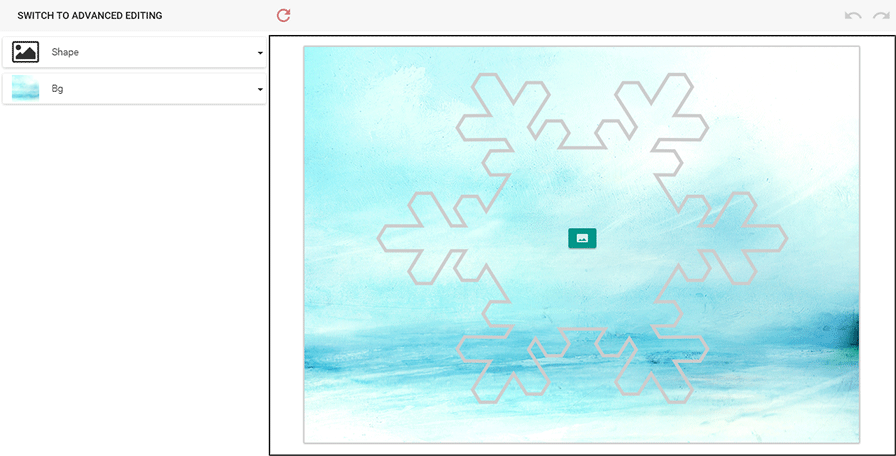
This placeholder does not contain an image, so it appears empty in the designer. When a user uploads an image, the shape is applied to the image.
Changing Shapes of Image Elements
You can make a non-rectangular element not just from an empty placeholder, but also from any image. In order to apply an arbitrary shape to an image, you should insert an image layer into a PSD template, create a vector shape layer defining the mask, and then place them into a single group:
Create a new template. On the File menu, click New.
Add a background image. For example, drag it from Windows File Explorer.
Add an image layer. On the Layers tab, click the menu icon, and then click New Layer.
Add a shape layer. On the Tools panel, click Shape Tool or press
Uon the keyboard, toggle to a shape tool (rectangle, ellipse, custom shape), and draw a shape with the mouse.Group the image layer and the shape layer together. Select the layers, right-click the selection, click Group from Layers.
Add the
<PH>marker. Double-click the group name on the Layers tab and add the<PH>marker to its name. The layers should look as follows: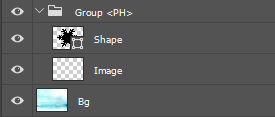
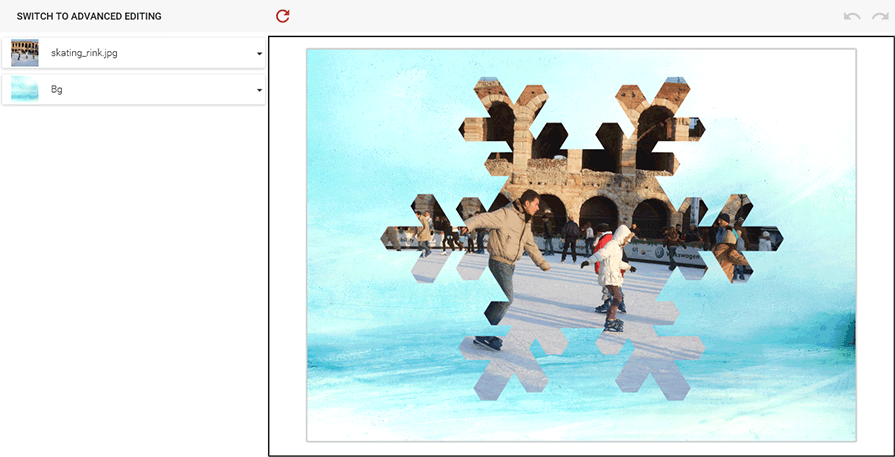
Unlike the previous case, here we can assign a shape to an image, so it will not be hollow. Let us see what this template looks like in the Design Editor. The screenshot below displays the image placeholder masked with the vector shape. From the user perspective, they can select a new image for the placeholder, and it is automatically carved out.
Creating Placeholders from Vector Masks
Also, you can create non-rectangular placeholders using vector masks:
Create a new template. On the File menu, click New.
Add a background image. For example, drag it from Windows File Explorer.
Add an image layer. On the Layers tab, click the menu icon, and then click New Layer.
Add an image or a smart object. Drag an image to the image layer.
Create a vector mask. You can do it by either drawing a path on the image layer or copying a mask:
- To draw a path, select the image layer, click Pen Tool on the Tools panel, and draw a bounded path with the mouse. Right-click the image, and then click Create Vector Mask.
- To prepare and copy a mask, click Shape Tool on the Tools panel, and draw a shape with the mouse. Select the shape path, and copy it with
Ctrl+C. Paste the path onto the image layer withCtrl+V.
Add the
<PH>marker. Double-click the image layer name on the Layers tab and add the<PH>marker. If you apply the mask to a rasterized image, then the layers should look as follows:
When you create non-rectangular placeholders using vector masks, you need to add the <PH> marker with or without a value. You can get the same results as described above with the values:
<PH>enables a placeholder with a mask that applies to an image from a PSD template. Users can replace the image while editing a product.<PH_empty>enables an empty placeholder with a mask. Users need to upload an image in the web-to-print editor. When a user uploads the image, the vector mask is applied to the image.<PH_stub>enables a placeholder with a mask, but the image imported from the template does not show on the hi-res output. You can use it as a message that encourages users to select images.
For example, the <PH_stub> placeholder can look as follows in the editor:
Using these methods, you can create impressive templates containing non-rectangular images without using bulky overlays. Image placeholder vector masks help create sophisticated templates such as puzzles or photo collages.