Transforming and moving items
- Last updated on August 27, 2024
- •
- 2-3 minutes to read
When creating designs, you may want to add fields as well as move, rotate, and resize them.
Let's look at how you can implement these transformations.
Moving items
To move design items, you can just select and drag them on the canvas.

When you are dragging an item, you can see how its coordinates change on the Design panel. You can also edit these coordinates to move the item. You may find it convenient when the precise location is important to you.
Note
The coordinates of an item correspond to the upper-left corner of its frame.
Aligning items
On the Design panel, you can click the alignment buttons to move items to the right, left, top, and bottom bounds as well as to the center of the page or the selection.

These buttons also appear on the context menu when you right-click an item.
Note that alignment works differently for single items, for a selection of items, and for items in a group:
Moving a single item or a group of items to the page bounds.

Moving items inside the bounds of the selection.

Moving items inside a group.

Resizing items
In the Template Editor, you can resize design items both proportionally and arbitrarily using the corner and side grips on the canvas.
To resize the items proportionally, click the item, hold the Shift button, and drag the item's corner grip. To resize the items arbitrarily, click the item and drag its side grip or a corner grip without using the Shift button.

You can also resize items by changing their width and height in the W and H fields on the Designs panel. To resize the items proportionally, click the lock icon next to the W and H fields and change one of these fields.

Rotating items
You can rotate an item to an arbitrary angle using the mouse right on the canvas. To perform this, select the item and drag its round grip.

To rotate items to a predefined angle, you can change the value in the R field.

Measurement units
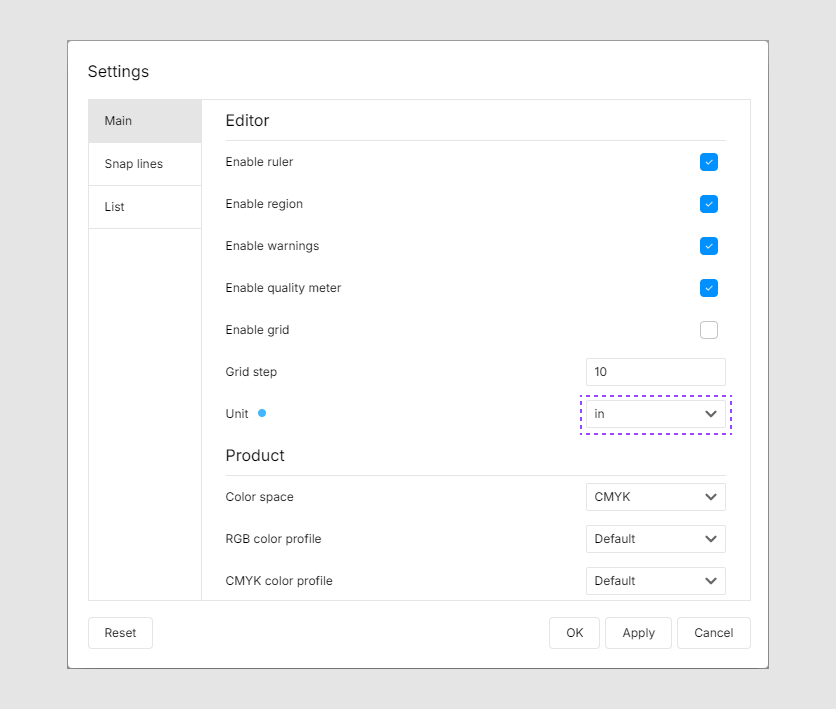
When working with size and coordinates, the Template Editor uses points as default measurement units (1 point = 1/72 inch). For example, to define a product of 10 x 8 inches, you need to set the product width to 720 and the height to 576.
To change the default unit, you can click the gear icon and open the settings. In the Main group, change the value of the Unit to inches, centimeters, or millimeters.
Ruler, grid, and snap lines
To improve the user experience in the workspace, you can enable marking: ruler, grid, and snap lines.

Customer's Canvas allows you to configure different types of snap lines that will cling to design elements, product pages, the grid, regions, and safety lines.
You can also find the coordinates of the mouse pointer in the lower-left corner of the workspace.
Now, let's go further and learn how you can define the fill and border properties in the Template Editor.