Creating a business card design
- 4 minutes to read
In this tutorial, we'll create a simple business card template in the Template Editor from scratch using placeholders for a logo and text fields.
Video tutorial
The video below will help you understand this topic. You can watch it alongside the text instructions.
Prerequisites
You must have an account with Customer's Canvas to complete this task. If you don't have one already, please contact our support team.
You also need to upload the necessary fonts to Customer's Canvas. To do so, go to your account and, in the navigation bar, click Assets > Fonts. Unzip and drag-and-drop them into a folder. You may upload them to any folder in your Fonts section.
Important
We support the most popular font formats: TrueType and OpenType. You normally need to purchase fonts from third-party vendors, but you can download some free fonts from Google Fonts or other sources.
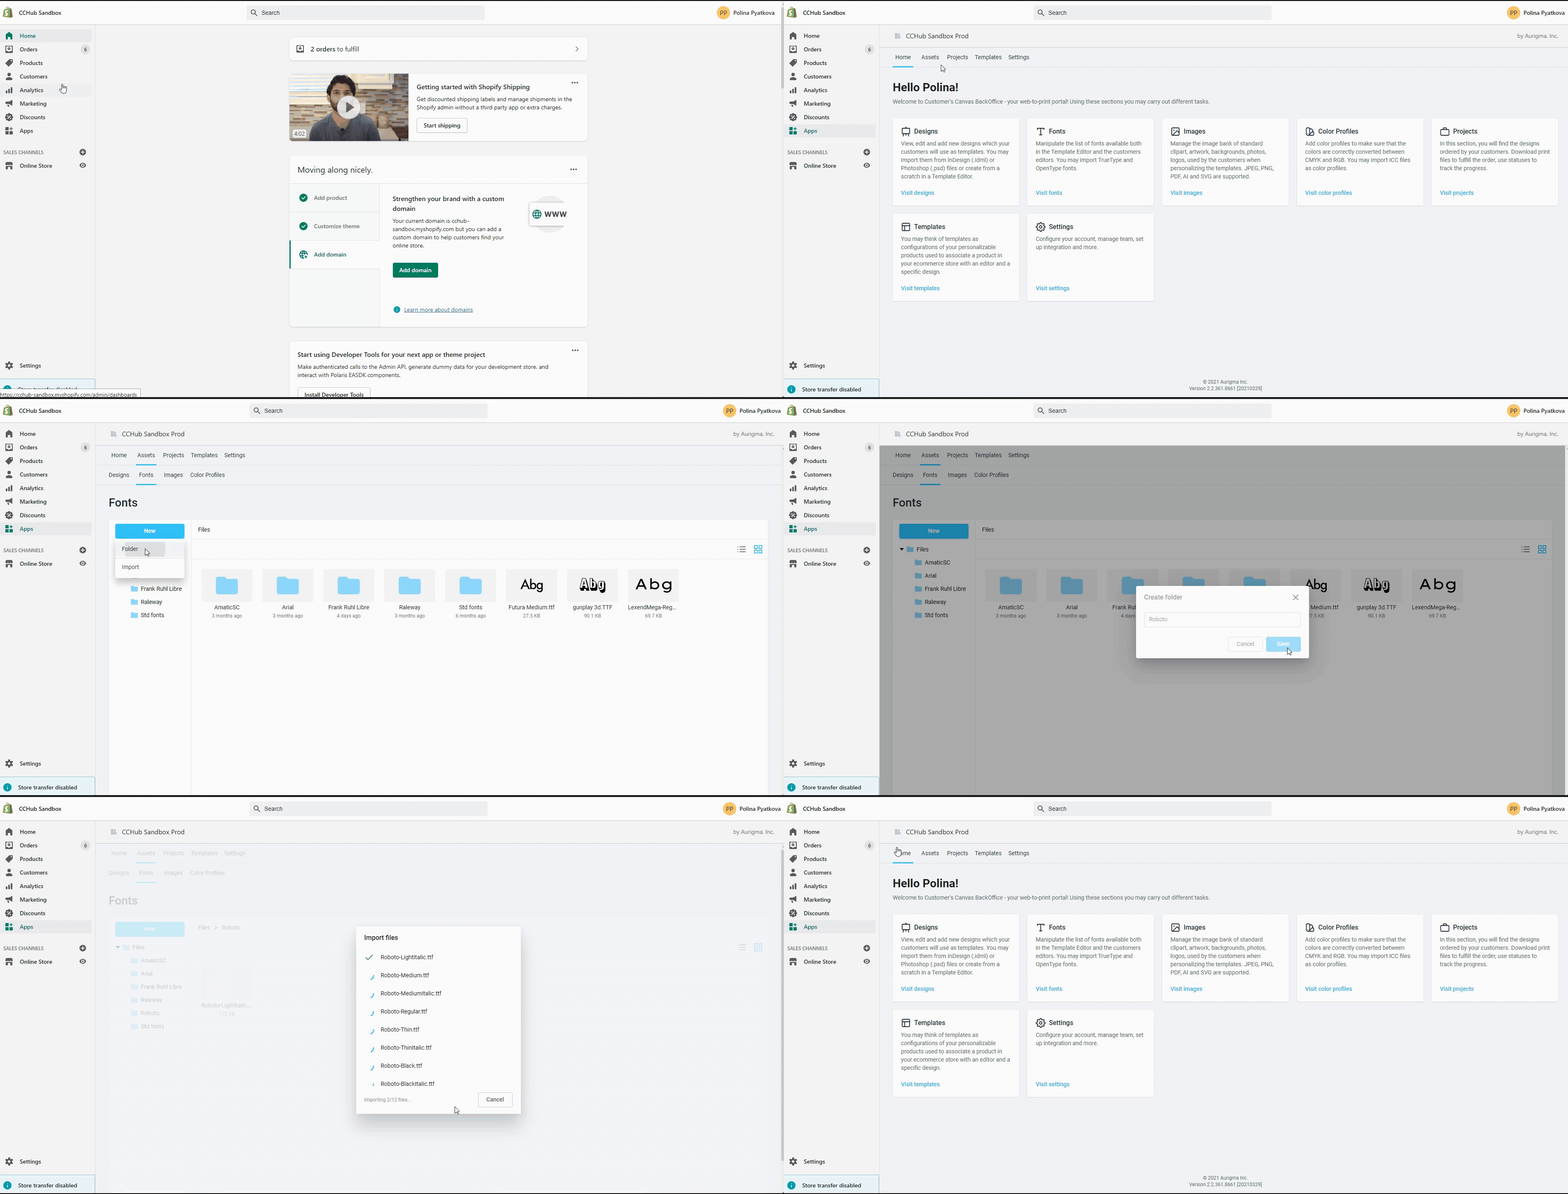
Creating a template with the Template Editor
Step 1. Open Customer's Canvas and create a new design.
Let's start by creating a new brand template! First, you need to make a document that is sized correctly for the new project.
- In the menu bar, select Assets > Designs. Create a new folder Business-Card. Right-click anywhere on a blank space, click Design file, and then set the details.
- Give the product a relevant name. Select the preset size for a business card. Set up the number of pages to
2.
Note
The Customer's Canvas admin panel already includes preset options for products like business cards, ledgers, albums, and other items. If you go to the Settings menu bar, you can add new size presets and edit existing ones.
- Set up a bleed zone. We recommend a standard bleed of
.125" on all sides. Click Create new. - Change the default page names to
Front sideandBack side. - In the right toolbar, click the color box and pick a color. Click Ok.
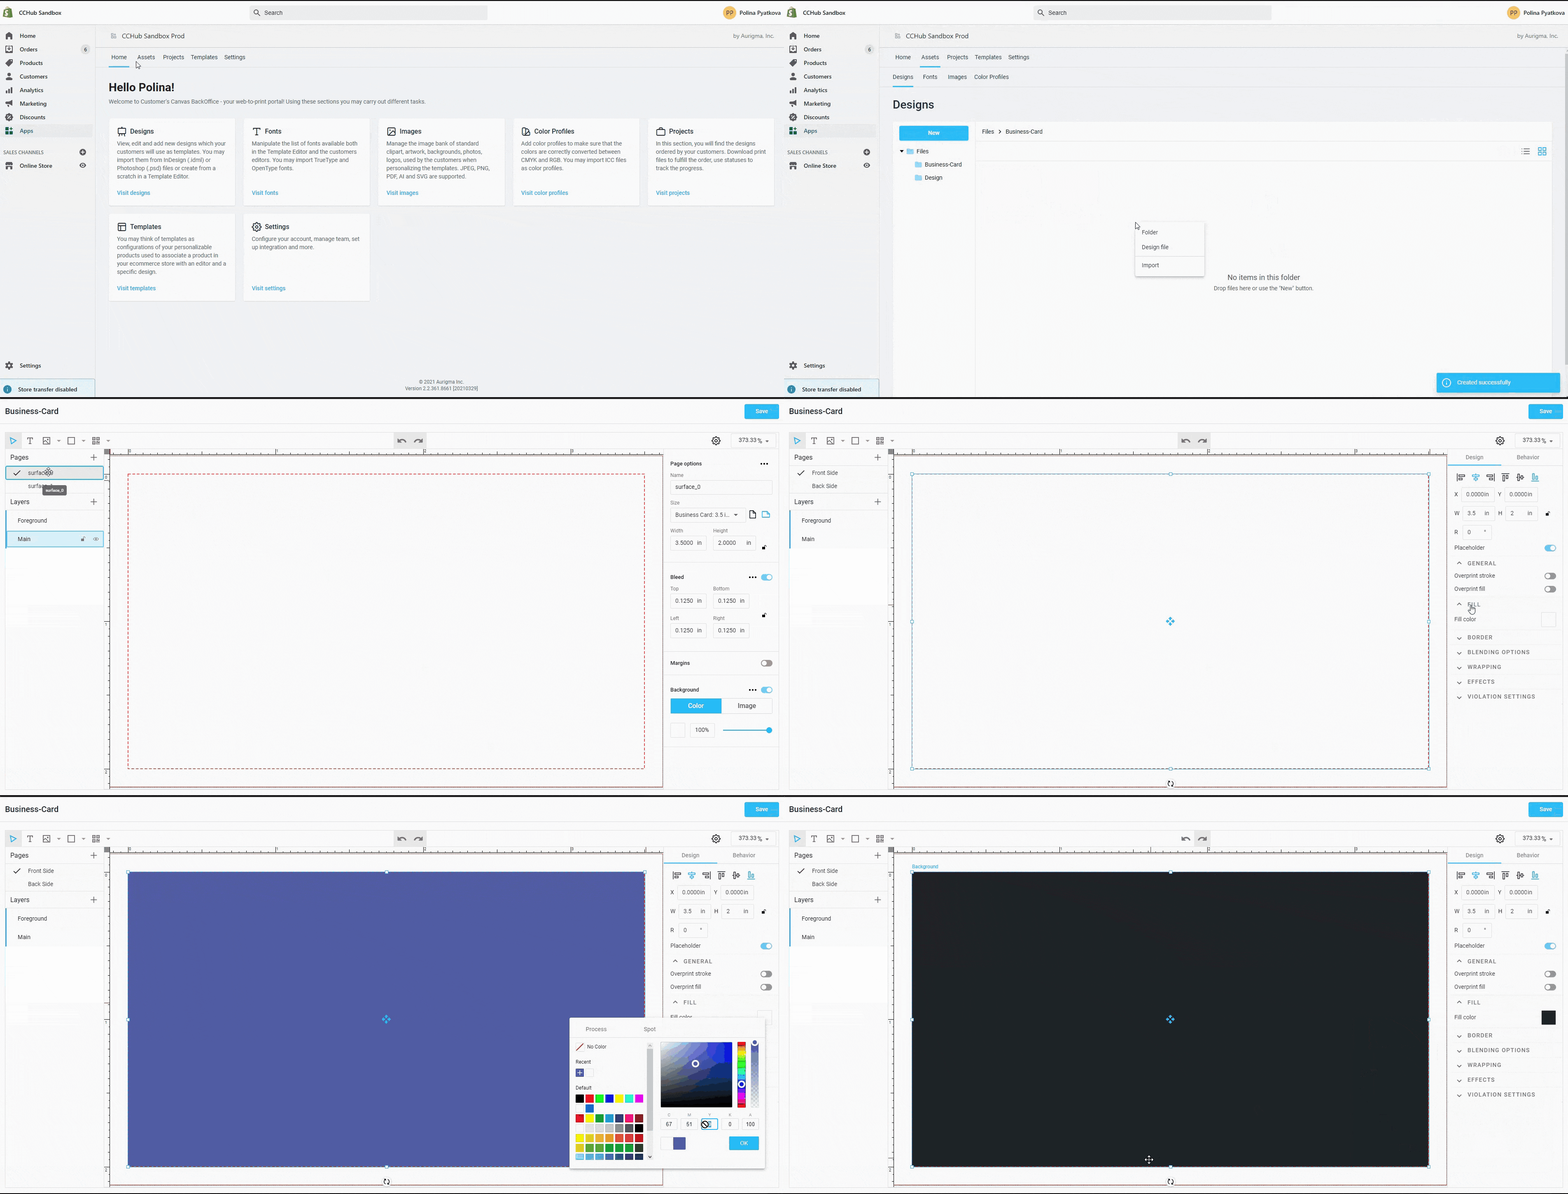
Step 2. Create a placeholder and design elements.
During this step, we'll make a placeholder for a logo and add some design elements to embellish our business card. The purpose of creating a placeholder is to give the user the ability to add or change an image as well as limit the size of the images they use to a box with specific dimensions. This is especially important when it's necessary to preserve a unique brand identity.
- Choose the Main layer and select the Placeholder tool in the toolbar. Create a placeholder of the necessary size, click the upload icon inside the placeholder, and select an image.
Note
Instead of showing an empty placeholder, you can place an image that prompts users to select their own image to replace it. To do so, we use the Stub image button. You can find more details about changing the behavior of placeholders and other design elements in the next tutorial.
- Now, let's add some lines to make our business card look more stylish!
Select the Rectangle Tool on the top toolbar and draw a narrow rectangle. Use the Alignment buttons on the right toolbar to align the element. Expand Fill color and choose the white color. Expand Border and change the border width.
Right-click the resulting line, select Duplicate, and change the size and color.
To work with two lines as a single object, press
Ctrl+Gor select them, right-click the selection, and click Group Selection.
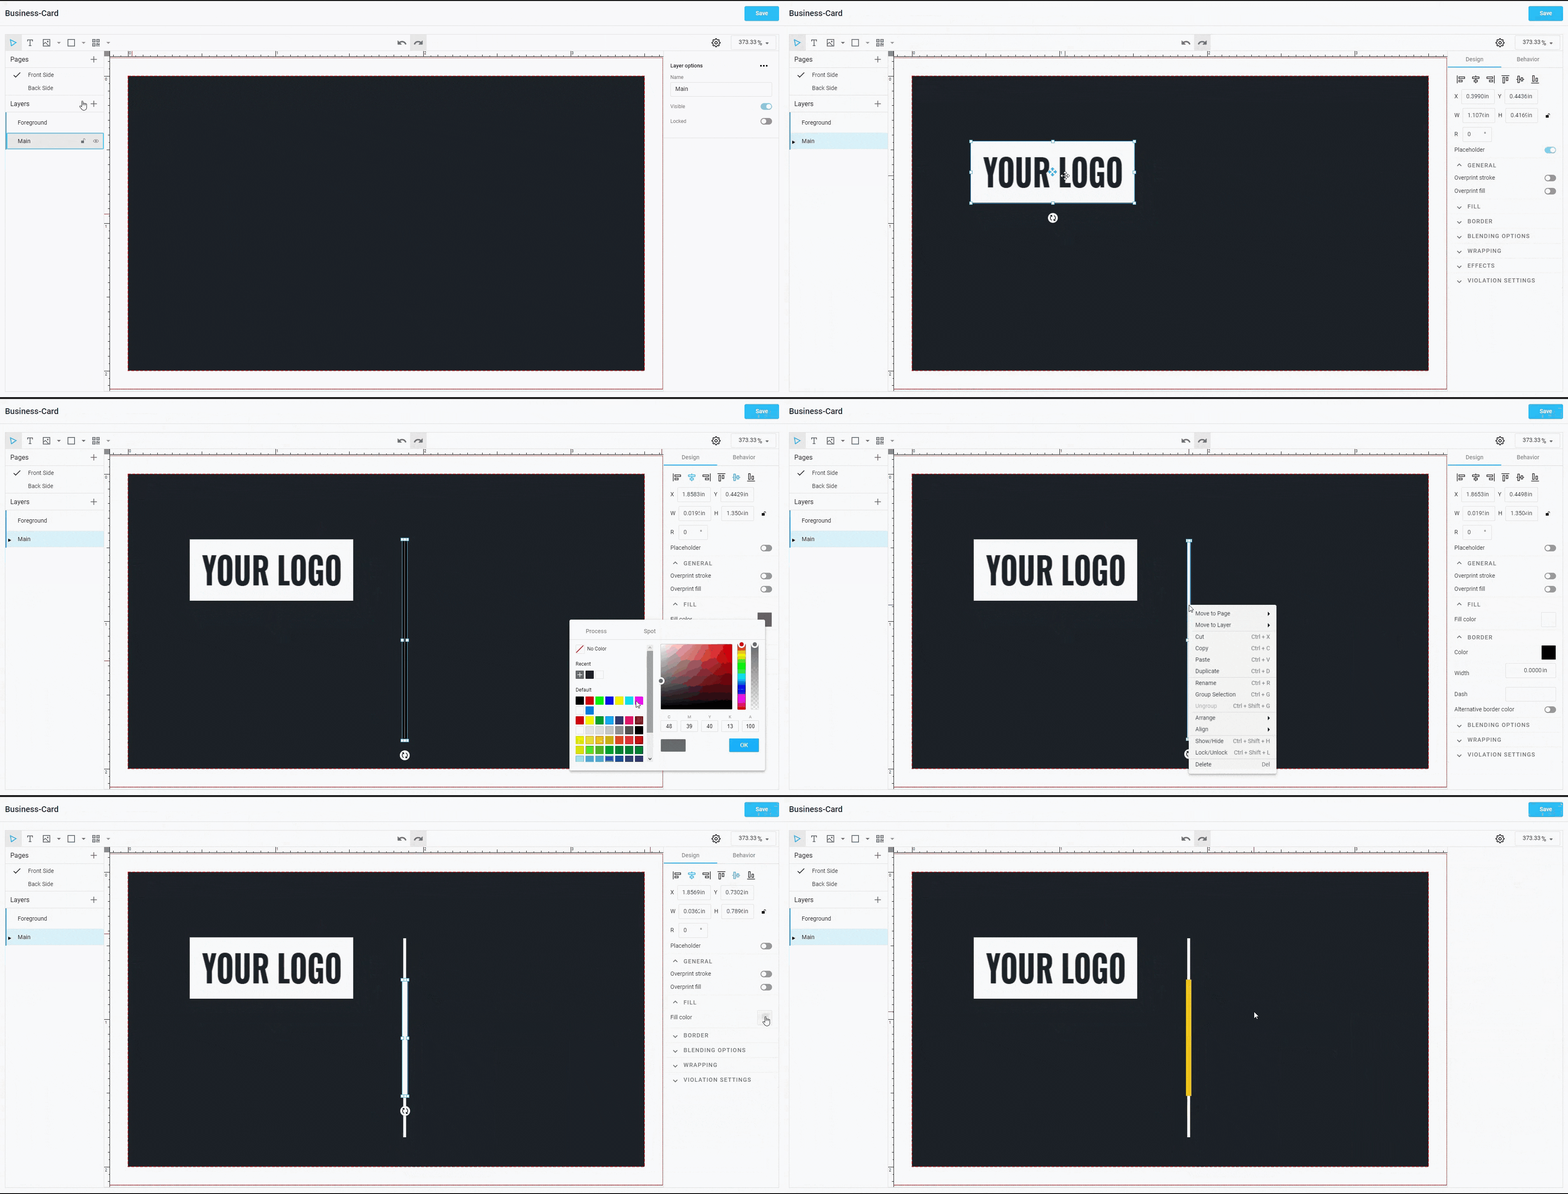
Step 3. Add text fields and configure options.
Our design has some graphics now, but a business card without text fields isn't really a business card at all. Let's add some text!
- Let's first add the Company Name text. Use the Text tool to add the required text fields.
- Change text properties in the Text section of the Design tab: a font, size, and color.
Note
There are three primary methods for selecting a color: 1) Use the color picker, 2) Adjust the CMYK settings, or 3) Select the available swatches.
- Repeat the previous steps for Full Name, Phone Number, Email, and others.
- Press
Ctrlon your keyboard, select the design elements, and align them to the center.
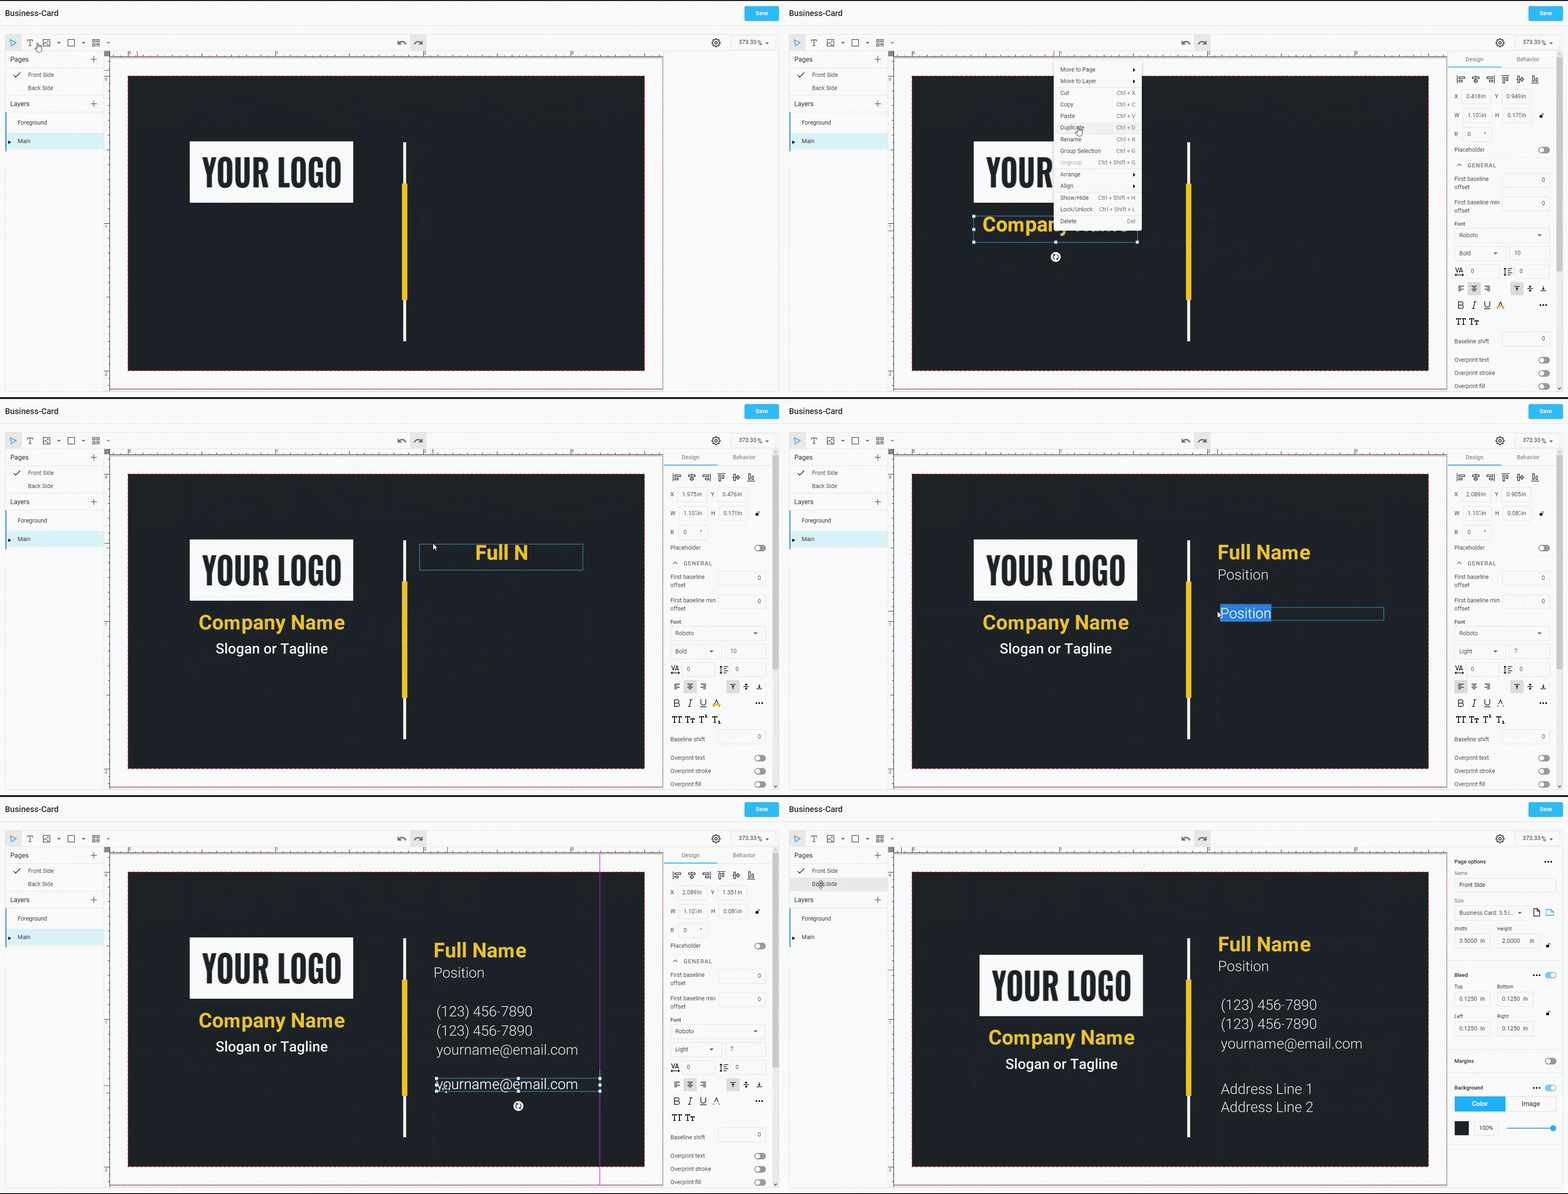
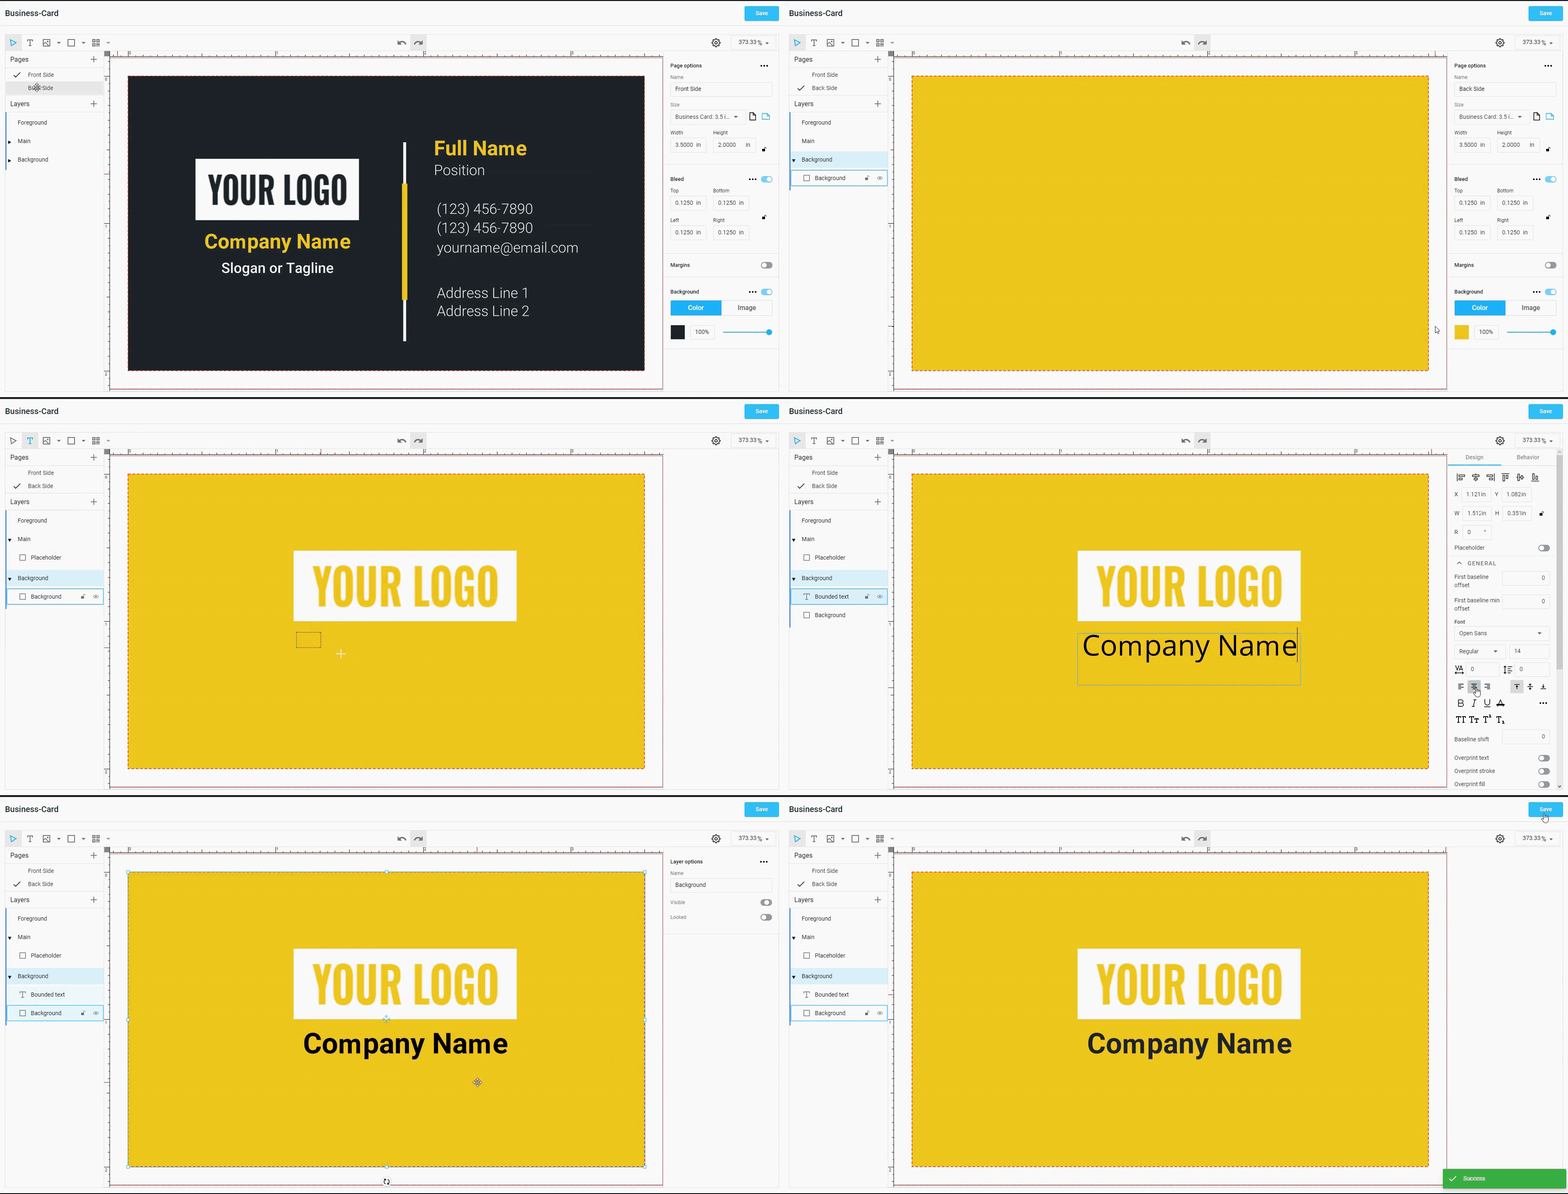
Step 4. Create a back side for your design.
A business card usually contains information on both sides. Let's make a simple design for the back side.
- Open the Back side page of the business card.
- Change the color of the background.
- Add the necessary design elements: a placeholder for a logo and a text field for the Company Name. Click Save.
In the next guide, we'll learn how to set up permissions for design elements, including how to fully and partially block several elements, set up photo insertion into the placeholder, and configure copyfitting.