Setting up products
- 2 minutes to read
To personalize products in Shopify, you need to upload all necessary designs, fonts, clipart, and other elements through the backend, create a product in the Shopify admin panel, and then associate this product with the templates on the Customer's Canvas backend. Let us describe these steps.
Uploading designs
First, you need to create product templates in Photoshop. For testing, you can use the standard PSD templates already pre-uploaded to your Customer's Canvas instance. Creating your own templates in Photoshop is covered in the Photoshop templates section.
After you have prepared PSD templates, go to the Customer's Canvas backend and upload your templates, fonts, and public gallery assets to the appropriate folders by using the File Manager:
- Product templates:
\ProductTemplates\designs\ - Mockups:
\ProductTemplates\mockups\ - Gallery assets:
\PublicGalleryFolder\ - Fonts:
\Fonts\
Note
You can find more details about the cloud version of Customer's Canvas in the Control Panel section. If you have any questions or problems with it, please contact the Aurigma support team.
Creating Shopify products
Now, go to the Shopify admin panel and create a product. If you already have products that you need to customize, you can skip this step.
Specify your product name, price, picture, and other settings that you need. If you face any difficulties in this step, refer to the Shopify documentation.
Associating templates with products
After you have created Shopify products, return to the Customer's Canvas backend and click the Shopify tab. This tab appears after you have associated Customer's Canvas with Shopify. You can find a list of your Shopify products on this tab. If you click a product name in the product list, then the product will open and may look like this:
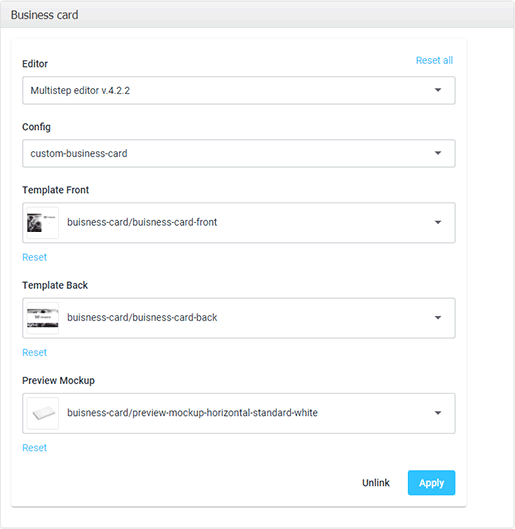
Select an editor and config, and fill out the rest of the fields. Click the Apply button.
If you want to remove the connection between a Shopify product and the editor, click Unlink.
Checking the results
If you have done everything correctly, then Customer's Canvas will now be integrated with your Shopify store. You can verify this through the following steps:
Open the page of the product that you have linked to the Customer's Canvas editor.
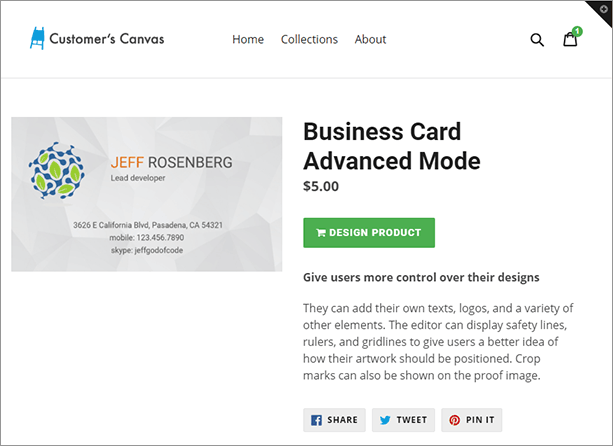
Click the Design product button to open the editor with the selected template.
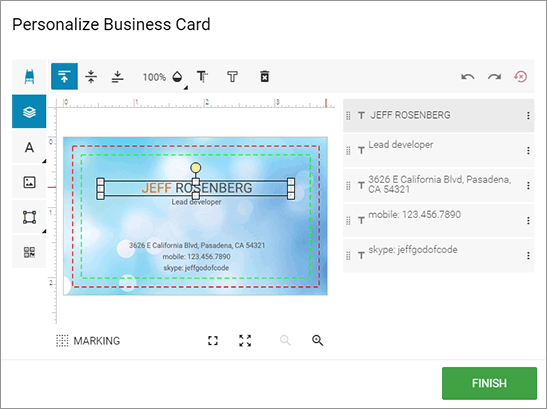
Edit the product, submit an order, and emulate a payment. Note that you do not have to complete the payment. You need to reach the Payment page, where it wants you to enter the credit card details, and then you can quit it.
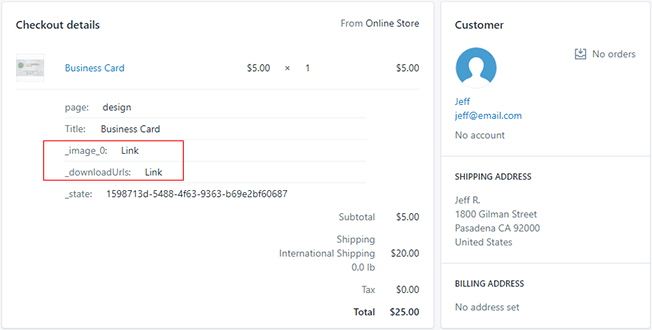
Open the Shopify admin panel and go to Orders > Abandoned checkouts.
Find your order and make sure that it contains links to proof images and a high-resolution PDF file.