Working with projects
- Last updated on May 13, 2022
- •
- 1 minute to read
When a customer personalizes a product in nopCommerce, adds it to a shopping card and proceeds with checkout, a plugin creates a Customer's Canvas equivalent of an order - so-called project. It includes all the information that you need to fulfill the order – a customer's design, some order details, as well as a some custom fields specific to the editor configuration (if any). This tutorial explains how you can work with them.
Prerequisites
To run the personalization, you need:
- A nopCommerce store with installed Customer's Canvas plugin.
- A BackOffice tenant linked to your online store.
- A product connected to Customer's Canvas as explained in the Connecting a template-based editor to a product tutorial.
1. Complete the order
First, you need to personalize a product and place an order for it.
- Open a product you have connected to Customer's Canvas, personalize a design, and add it to shopping cart.
- Go to the checkout page and complete the order.
- Make sure that you see an order confirmation page.
Tip
If this is a test online store, a good idea would be to enable Check / Money Order payment method. This way you can test purchases without having to specify a credit card information.
Now you may go to your nopCommerce admin panel and ensure that the order is created there as usual.
2. Download a print file from a project
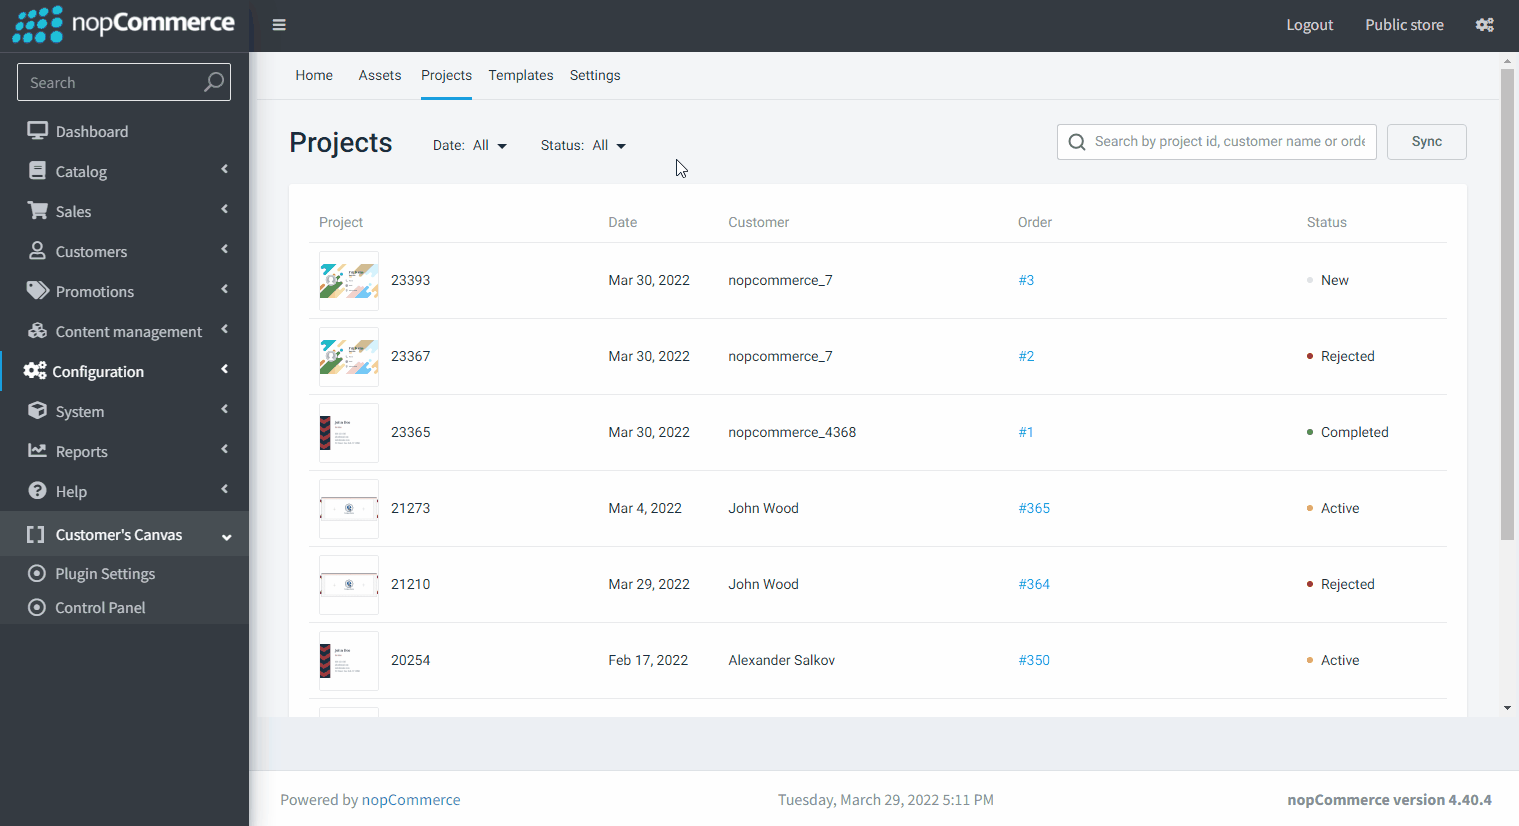
Customer's Canvas automatically creates a project for each order successfully processed by nopCommerce. It contains all necessary information, including the PDF print file.
- In the menu, click Customer's Canvas > Control panel and navigate to the Projects section.
- Click the project with the new personalization.
- Scroll down to the Product info and click the Download link.
3. Changing the project status
To distinguish the projects you have already processed and new projects, you can use the Status field.
- In the Projects section, use the Status filter to show project only in New status.
- Under the project ID, use the buttons to change the project status.
- If the order is correct, click Confirm to change the status to Confirmed.
- If you start processing the order, click To work to change the status to Active.
- If you have fulfilled the order, click Mark as complete to change the status to Completed.
- If you would like to cancel the order processing, use the Reject button.