Placing designs in safety areas
- 2 minutes to read
When you create a design for a product from scratch, you may need to define custom print zones on that product so that the user selects one of them to place the design on. For example, for prints on T-shirts, you may want to define the left chest zone and the right chest zone. Let's learn how you can implement this in Customer's Canvas.
Adding the Position button
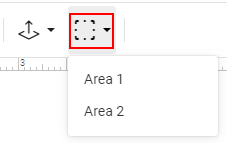
In Customer's Canvas, when you have defined two or more safety lines, the Position button appears in the Top toolbar. When your users select design elements and click this button, it displays a drop-down box with names of defined safety areas.
For example, you can define safety lines as follows:
let productDefinition = {
    defaultSafetyLines: [
        {
            margin: 9, color: "rgba(255,0,0,1)", altColor: "rgba(255,255,255,0)"
        },
        {
            margin: { horizontal: 216, vertical: 144 },
            color: "rgba(0,255,0,1)", altColor: "rgba(255,255,255,0)"
        }
    ],
    surfaces: ["invitation"]
};

CustomersCanvas.IframeApi.loadEditor(iframe, productDefinition);
When no names are assigned to safety lines, they will be displayed as Area 1, Area 2, and so on.

In the editor's config, this feature is enabled using the placeInSafetyAreaButtonEnabled property of the Top toolbar, which is true by default.
Moving design elements
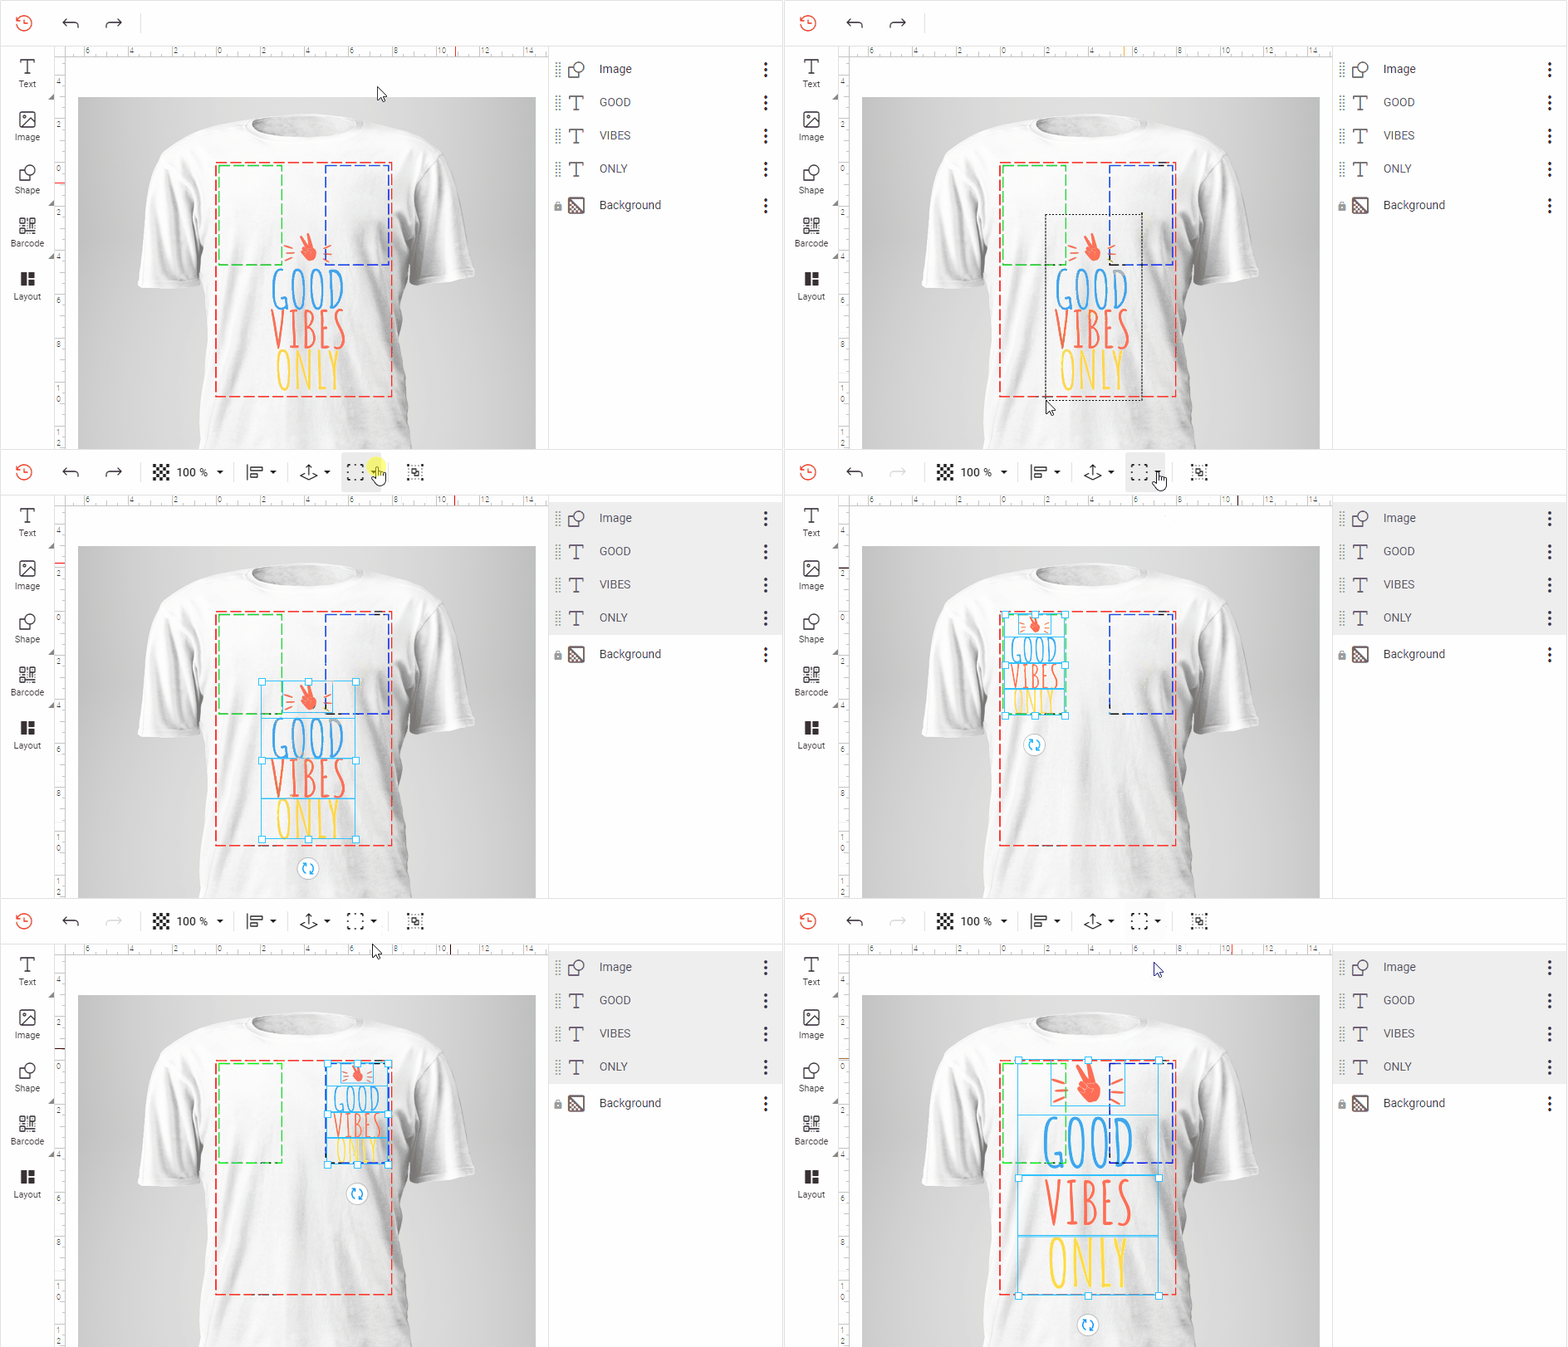
Once a user clicks one of the safety areas in the drop-down box, the selected design element (or their group) will move to the center of the corresponding placeholder and fit into the placeholder's bounds.
You can give custom names to safety areas using the name property, for example:
let productDefinition = {
    "surfaces": [{
        "printAreas": [{
            "designFile": "t-shirt",
            "safetyLines": [
                {
                    name: "Full design", margin: 0,
                    color: "rgba(255,0,0,1)", altColor:"rgba(255,255,255,0)"
                },
                {
                    name: "Right chest", margin: { left:10, top:10, right:360, bottom:432 },
                    color: "rgba(0,255,0,1)", altColor:"rgba(255,255,255,0)"
                },
                {
                    name: "Left chest", margin: { left:360, top:10, right:10, bottom:432 },
                    color: "rgba(0,0,255,1)", altColor:"rgba(255,255,255,0)"
                }
            ],
            "designLocation": { "X": "452", "Y": "216" }
        }],
        "mockup": {
            "down": "white-t-shirt"
        }
    }]
};
As a result, the Full design, Right chest, and Left chest areas appear in the design of T-shirt.

Adding safety areas in the Template Editor
If you are using BackOffice, you can add safety areas in the Template Editor:
- In BackOffice, double-click your design.
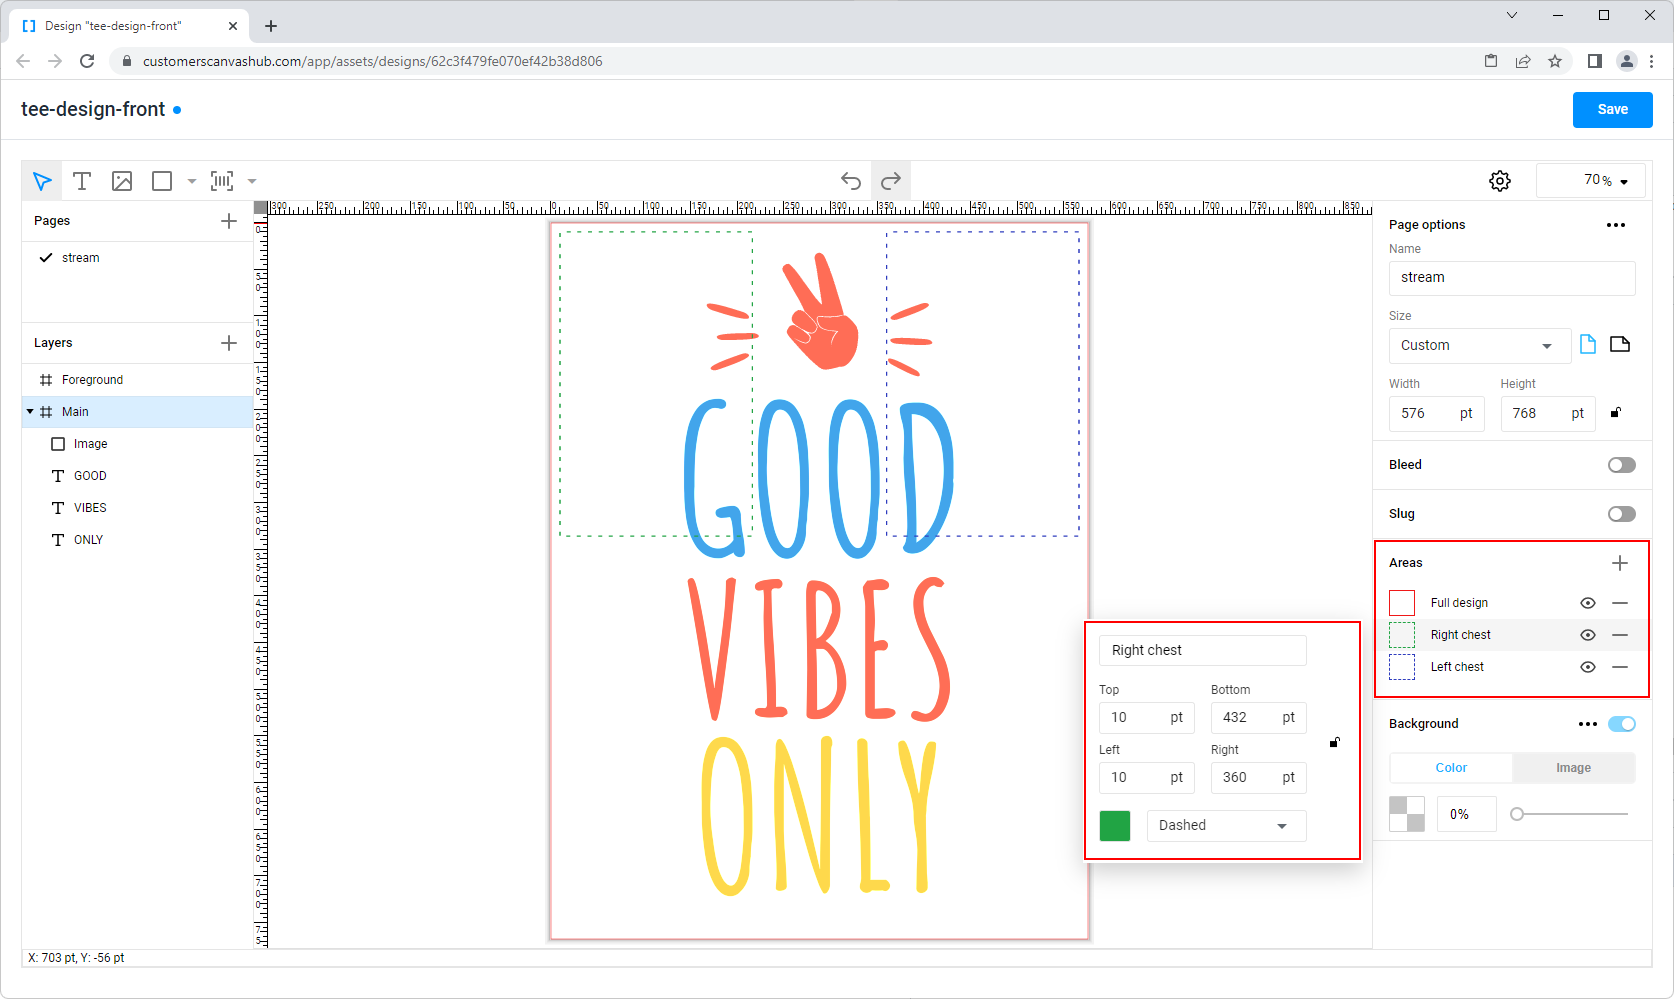
- When the Template Editor opens, in the right panel, click the plus icon in the Areas section.
- Fill in a name, coordinates, and select an area style.
- If needed, add more areas.
- Click Save.

You can find Template Editor tutorials in our Designer's manual. For more details about configuring safety areas for the Design Editor, you can refer to the Bleed and Safety Zones topic.