This section describes an obsolete packaging solution. We recommend using 3D mockups for packaging, which are integrated into the Customer's Canvas cloud.
Installing Packaging Editor
- 3 minutes to read
This sample application demonstrates how you can use Customer's Canvas to implement the following basic operations:
- Loading a die-cut model and building a form with parameters.
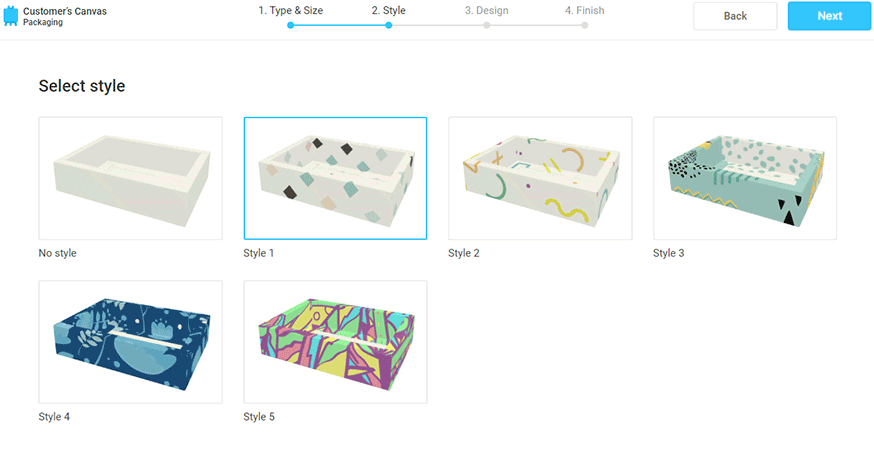
- Selecting a style (the background) of graphics.
- Creating a 2D die-cut template and a 3D model based on the parameters provided.
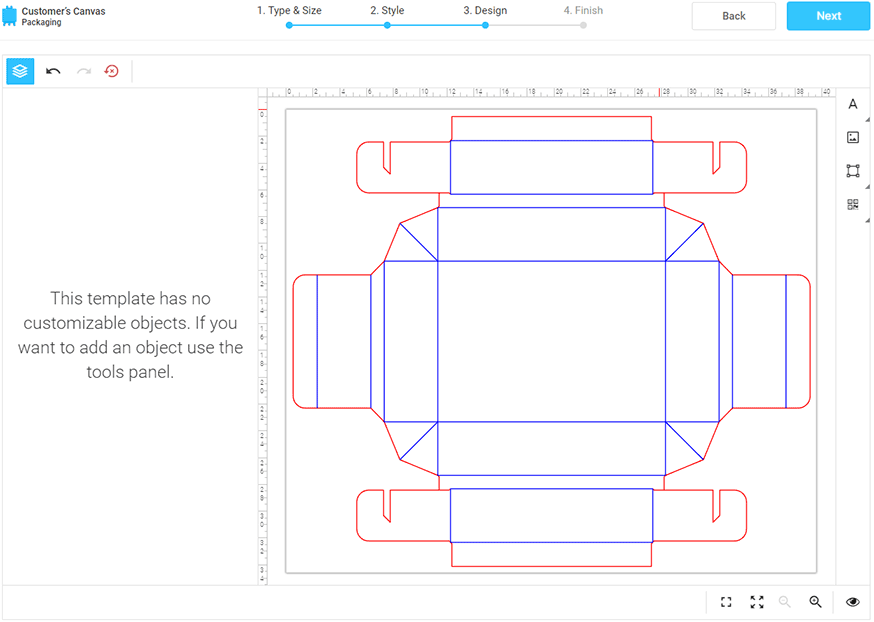
- Editing graphics in the Design Editor.
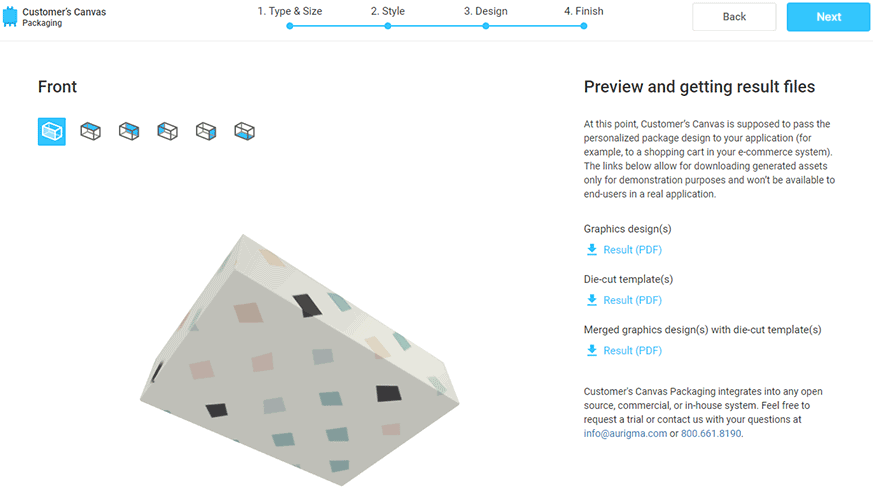
- Displaying a 3D preview.
Prerequisites
If you are installing this application to a clean Windows Server, make sure you have installed the following components:
- IIS installed with ASP.NET 4.5 or higher (server roles .NET Extensibility 4.5 and ASP.NET 4.5).
- Microsoft .NET Framework 4.8 or higher.
- Both Microsoft Visual C++ Redistributable Package x86 (latest supported) and Microsoft Visual C++ Redistributable Package x64 (latest supported).
Distribution Package
The solution is distributed among two applications:
- Packaging Editor is in Origami.zip.
- Design Editor is in CustomersCanvasServer.zip.
In the Origami.zip file, you can find the sample application in the example folder. This skeleton sample is for demonstration purposes only. You can modify the user interface of this application as well as configure Customer's Canvas.
Deploying the Packaging Editor
The Origami application needs a working instance of Customer's Canvas. You can either use a cloud version on our servers or deploy an on-premises instance from the ZIP file. To deploy the Design Editor from CustomersCanvasServer.zip, you can refer to the Installing Design Editor topic.
Deployment of the Origami to IIS can be done as follows:
In the File Explorer, navigate to the web root directory (for example, D:\inetpub), create a new site's folder under it, for example, packaging, and unzip the content of Origami.zip to this folder.
In the IIS manager, create a new site:
- Right-click Sites and then click Add Website.
- Enter the Site name (
Packaging) and its Physical path (D:\inetpub\packaging) - Click Ok.
Find Packaging in the list of Application Pools, right-click this pool, click Basic Settings, select .Net CLR Version v4, set the Integrated pipeline mode, and click Ok.
Set up permissions for the D:\inetpub\packaging\App_Data folder:
- In the File Explorer, browse to D:\inetpub\packaging, right-click App_Data, and click Properties. On the General tab, uncheck Read-only, then click Apply.
- On the Security tab, click Edit, then click Add. Type in
IIS AppPool\Packaging, click Check Names, and after it finds the account (the account's name should become underlined: Packaging), click Ok. - Select the Modify permission and click Ok two more times.
How to Set Up Customer's Canvas
To use Customer's Canvas on your site, perform the following key steps:
Link the editor's API on your webpage.
<script id="CcIframeApiScript" type="text/javascript" src="https://localhost:443/Resources/Generated/IframeApi.js">
</script>
Specify an iframe element.
<iframe id="cc_frame" allowfullscreen></iframe>Define a configuration and load the editor into this iframe.
var cnv = document.querySelector("#cc_frame");
CustomersCanvas.IframeApi.loadEditor(cnv, conf_product, conf_editor)
    .then(function (editor) {
        ...
When the graphics customization is finished, call the
finishProductDesignmethod to render hi-res output files.editor.finishProductDesign({fileName: "design", proofMaxWidth: 1191, proofMaxHeight: 3373})
How to Run the Application
First, define your settings of the Origami application in web.config.
<appsettings>
    <!-- Location of mockups in Customer's Canvas assets. -->
    <add key="Origami.CustomersCanvasMockupPath" value="..\design-editor\assets\mockups" />
    <!-- URLs that can access the Packaging Editor. -->
    <add key="Origami.CorsOrigins" value="http://localhost:8123" />
    <!-- License key for Graphics Mill. -->
    <add key="GraphicsMillLicenseKey" value="gm.exp:2022-12-31_QLFKa30pFE31wRc/ADiZq2..." />
    ...
</appsettings>
Then, copy the example\assets\backgrounds folder to images in the Customer's Canvas assets. In example\default.htm, specify URLs that link to the Design Editor (customersCanvasUrl) and Package Editor (origamiUrl) :
<script type="module">
    const customersCanvasUrl = "https://localhost:443";
    const origamiUrl = "http://localhost:8123";
    ...
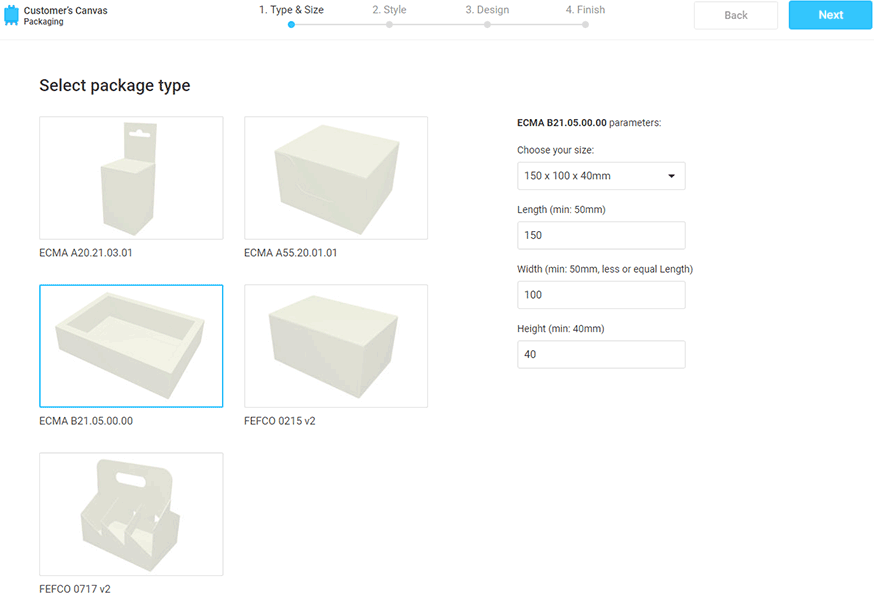
After that, you can browse the Origami website. When the Package editor opens, you can see the following page.

Here, you have to select a package type, then verify and edit the product parameters. Click Next to navigate to the next step to select a mockup.

After you have selected a mockup, click Next to navigate to the design customization process.

At the final step, you can preview the 3D model and download the resulting PDF files.
