This feature is available only upon request. To enable it in your account, contact our support team.
Product links
- Last updated on July 7, 2025
- •
- 4 minutes to read
A product link represents a fixed version of a PIM product with specific filtered options. To start working with product links, you first need to create a product and define relevant options as outlined in the Creating products topic.
Product links enable customization of a PIM product by reusing its base configuration and redefining certain properties. They connect to e-commerce products similarly to how regular PIM products or product specifications are connected.
In this article, you will learn how to create and test product links.
The Product Links section
To view all product links created in your account:
- Navigate to the Products section.
- Click Product links.
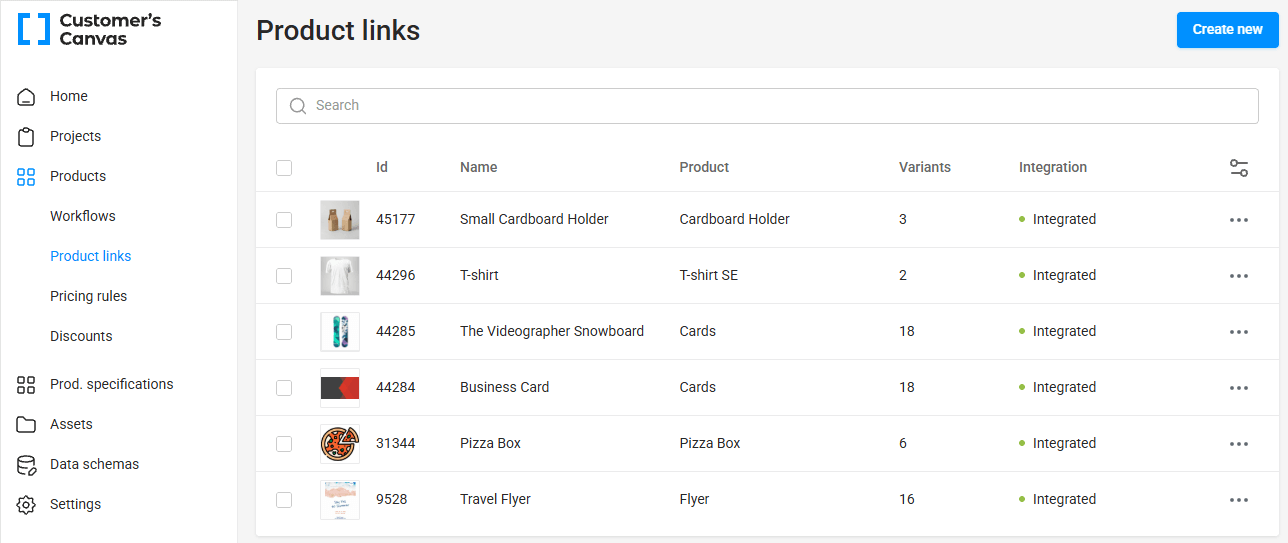
You can adjust column visibility via the Column settings button. The search bar allows filtering links. Within this form, you can manage product links in a similar way to products—edit, preview, or delete entries. Simply click the ellipsis icon (...) next to a product link to reveal the context menu.
Adding a product link
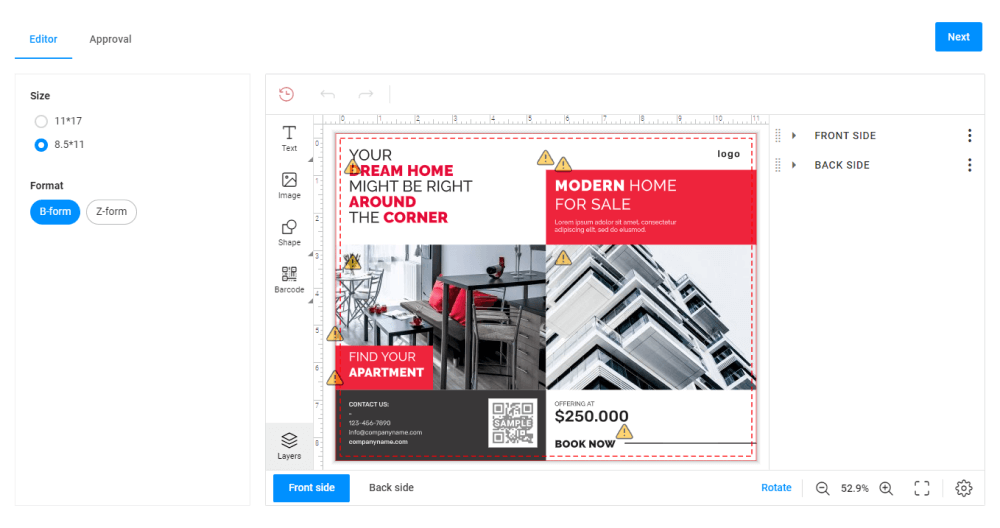
Let's consider a case when we have a Flyer product that uses the Style option with two values: Travel and Real estate. Based on this product, we will create a link that would provide the product on the storefront with a set of options appropriate for travel flyers.
General properties
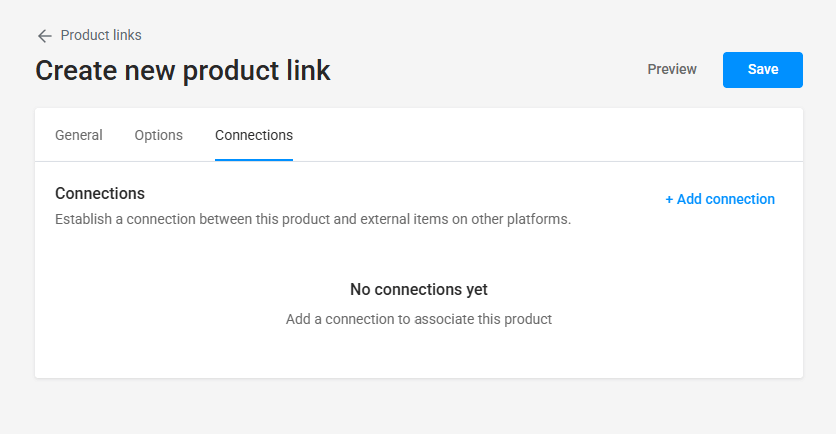
To add a new product link, click Create new. In the Create new product link dialog box, the General tab will open by default. Insert the following fields and click the Options tab.
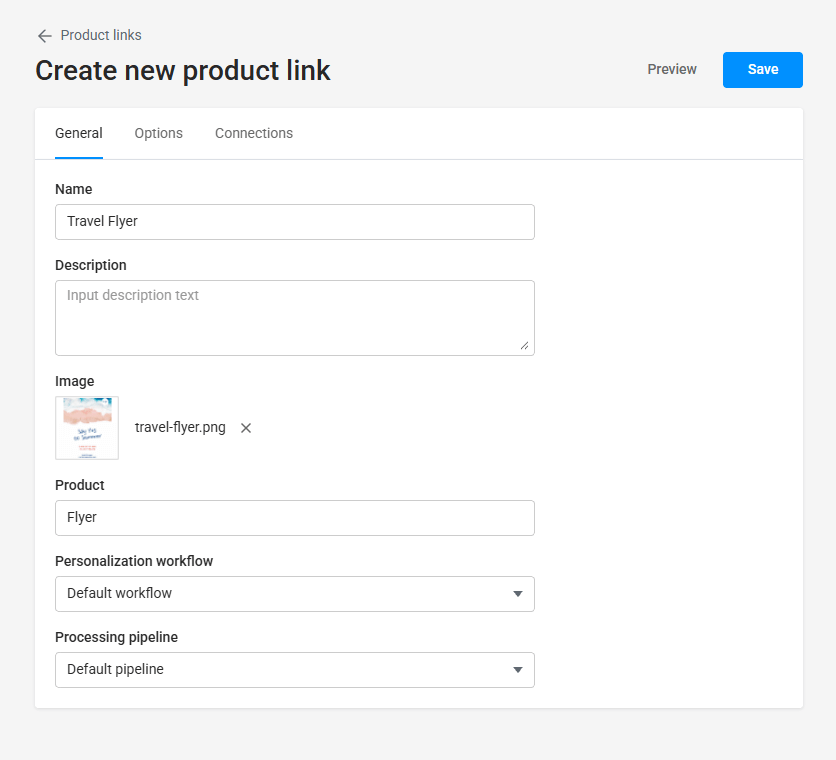
The link name and description only appear in Customer's Canvas, they aren't displayed on your storefront.
When you upload an image, it will be displayed as this product link thumbnail in Customer's Canvas only.
The product specified here will provide options to this link and your storefront.
Options
The Options tab contains all the options from the referenced product.
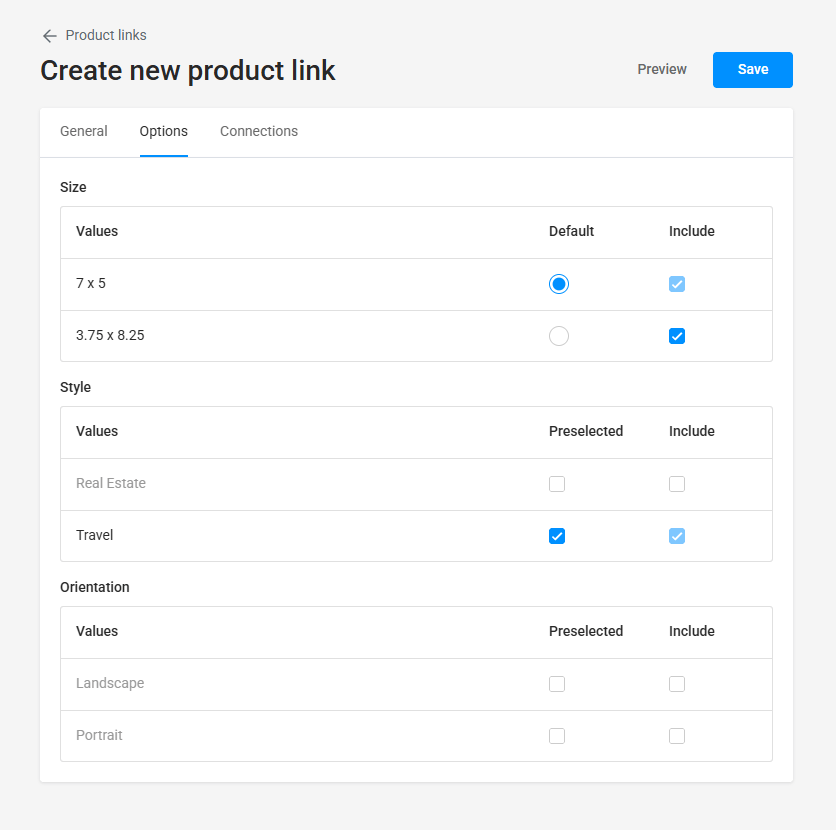
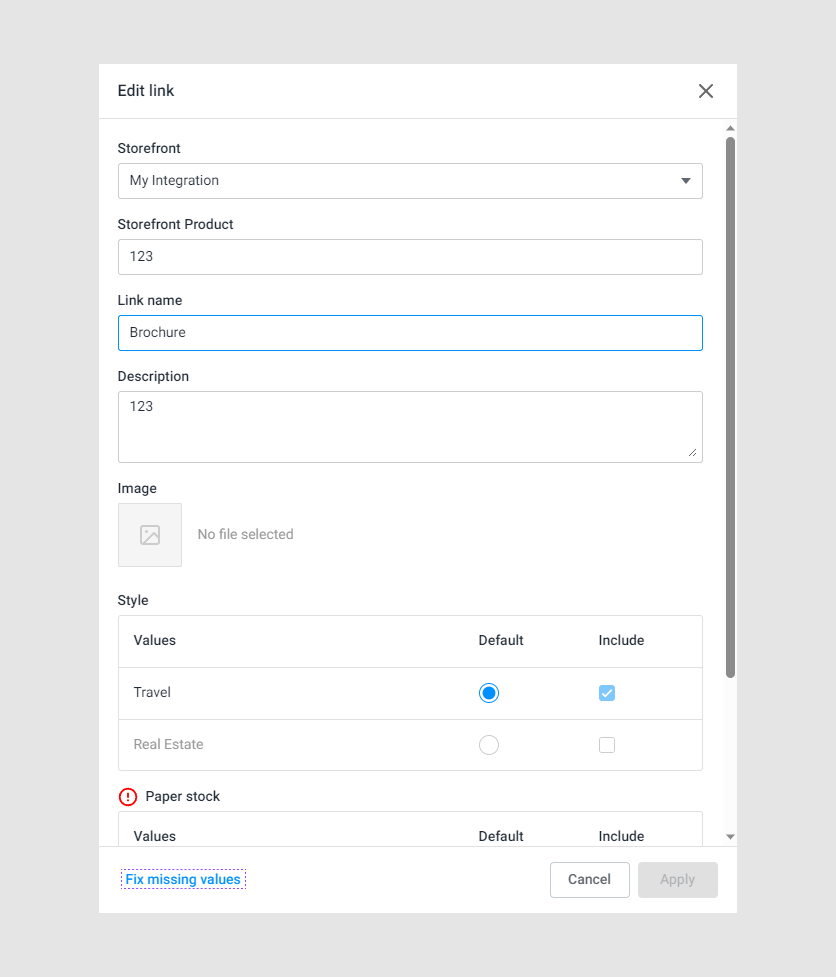
You can manage options and values in a product link by selecting the default value and the values to be included in the option.
In the Default and Preselected column, define what option values will be preselected when the editor page loads.
In the Include column, select what values will be available in the storefront product.
Note
If you select only one value in an option, this option won't be displayed on a page, and this value will be preselected when a page loads.
Let's see an example of including values to manage what options and option values will be available in your storefront.
Imagine that your product is a T-shirt, and you have the following color options and option values:
Red:Scarlet,Rose, andRuby.Blue:Indigo,Navy, andCerulean.Yellow:Lemon,Flaxen, andCanary.
If blue and yellow T-shirts are out of stock right now, you may want to show only red T-shirts.
In this case, you will only include Scarlet, Rose, and Ruby colors. As a result, your storefront will only offer Scarlet, Rose, and Ruby T-shirts.
Connections
Click the Connections tab to specify what product in your storefront will be configured through this product link.
To specify the storefront product, click Add connection. For a custom integration, the following popup window will appear.
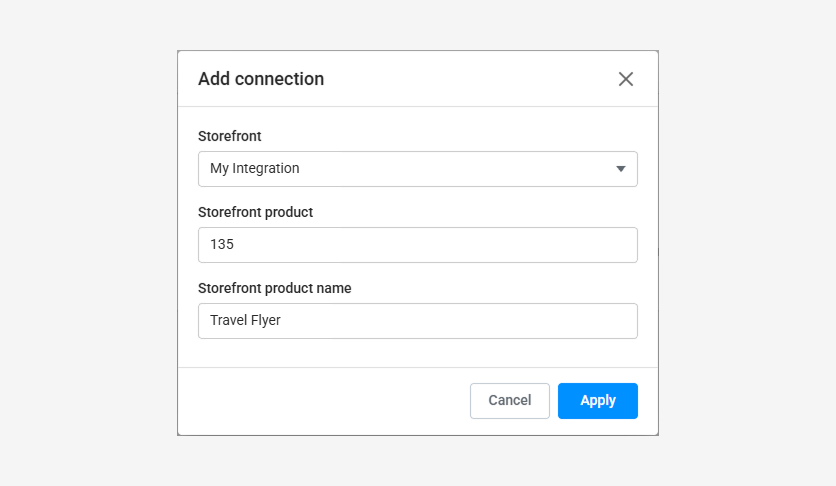
In the Storefront drop-down list, select a storefront integrated to your BackOffice tenant.
In the Storefront Product field, insert the ID of your storefront product.
Multiple links in a PIM product
You may create several product links based on a PIM product. In this case, they will be connected to different storefront products.
Let's see an example, when you created a T-shirt product in Customer's Canvas and have the Red T-shirt, the Blue T-shirt, and the Yellow T-shirt products in your storefront.
You may connect your Customer's Canvas product to your storefront products by different product links.
In each product link, you include corresponding options and values. Let's see the included options for each product link.
- A product link for
Red t-shirtwill includeScarlet,Rose, andRuby. - A product link for
Blue t-shirtwill includeIndigo,Navy, andCerulean. - A product link for
Yellow t-shirtwill includeLemon,Flaxen, andCanary.
As a result, each storefront product will display only included values from a connected product link.
Now let's look at how to identify problems with links and test the result.
Fixing issues
On the Product links page, you will see a warning sign next to the product link if there is any issue.
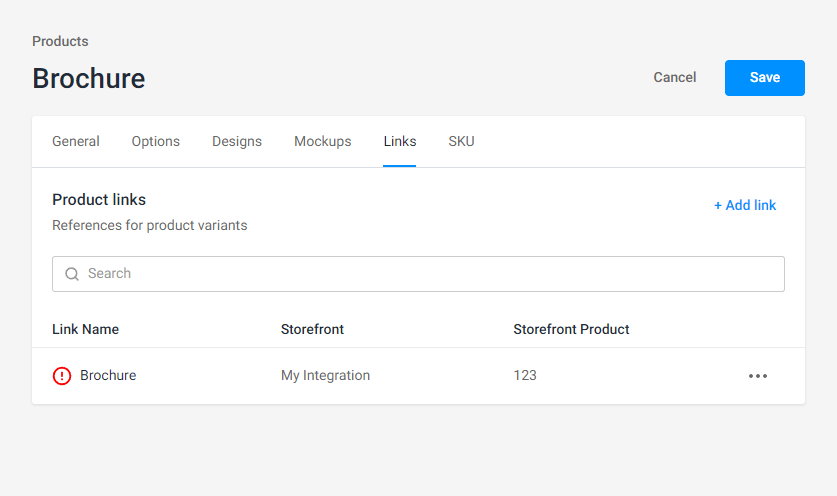
To address the issue, click the product link or click the ellipsis and select Edit. In the Edit link dialog box, you can see the warning message near the problem field. To fix missing config, select another file from the corresponding drop-down list.
Testing links
You can test how your product link will look to customers. This feature is called a preview. You can display product link previews by two ways:
- In the Product links list, click ellipsis in a product link row, and then click Preview in the context menu.
- In a single product link, click Preview in the upper-right corner.
In the preview, you can see your personalization process as a customer.