Dynamic expressions
- Last updated on January 15, 2025
- •
- 13-14 minutes to read
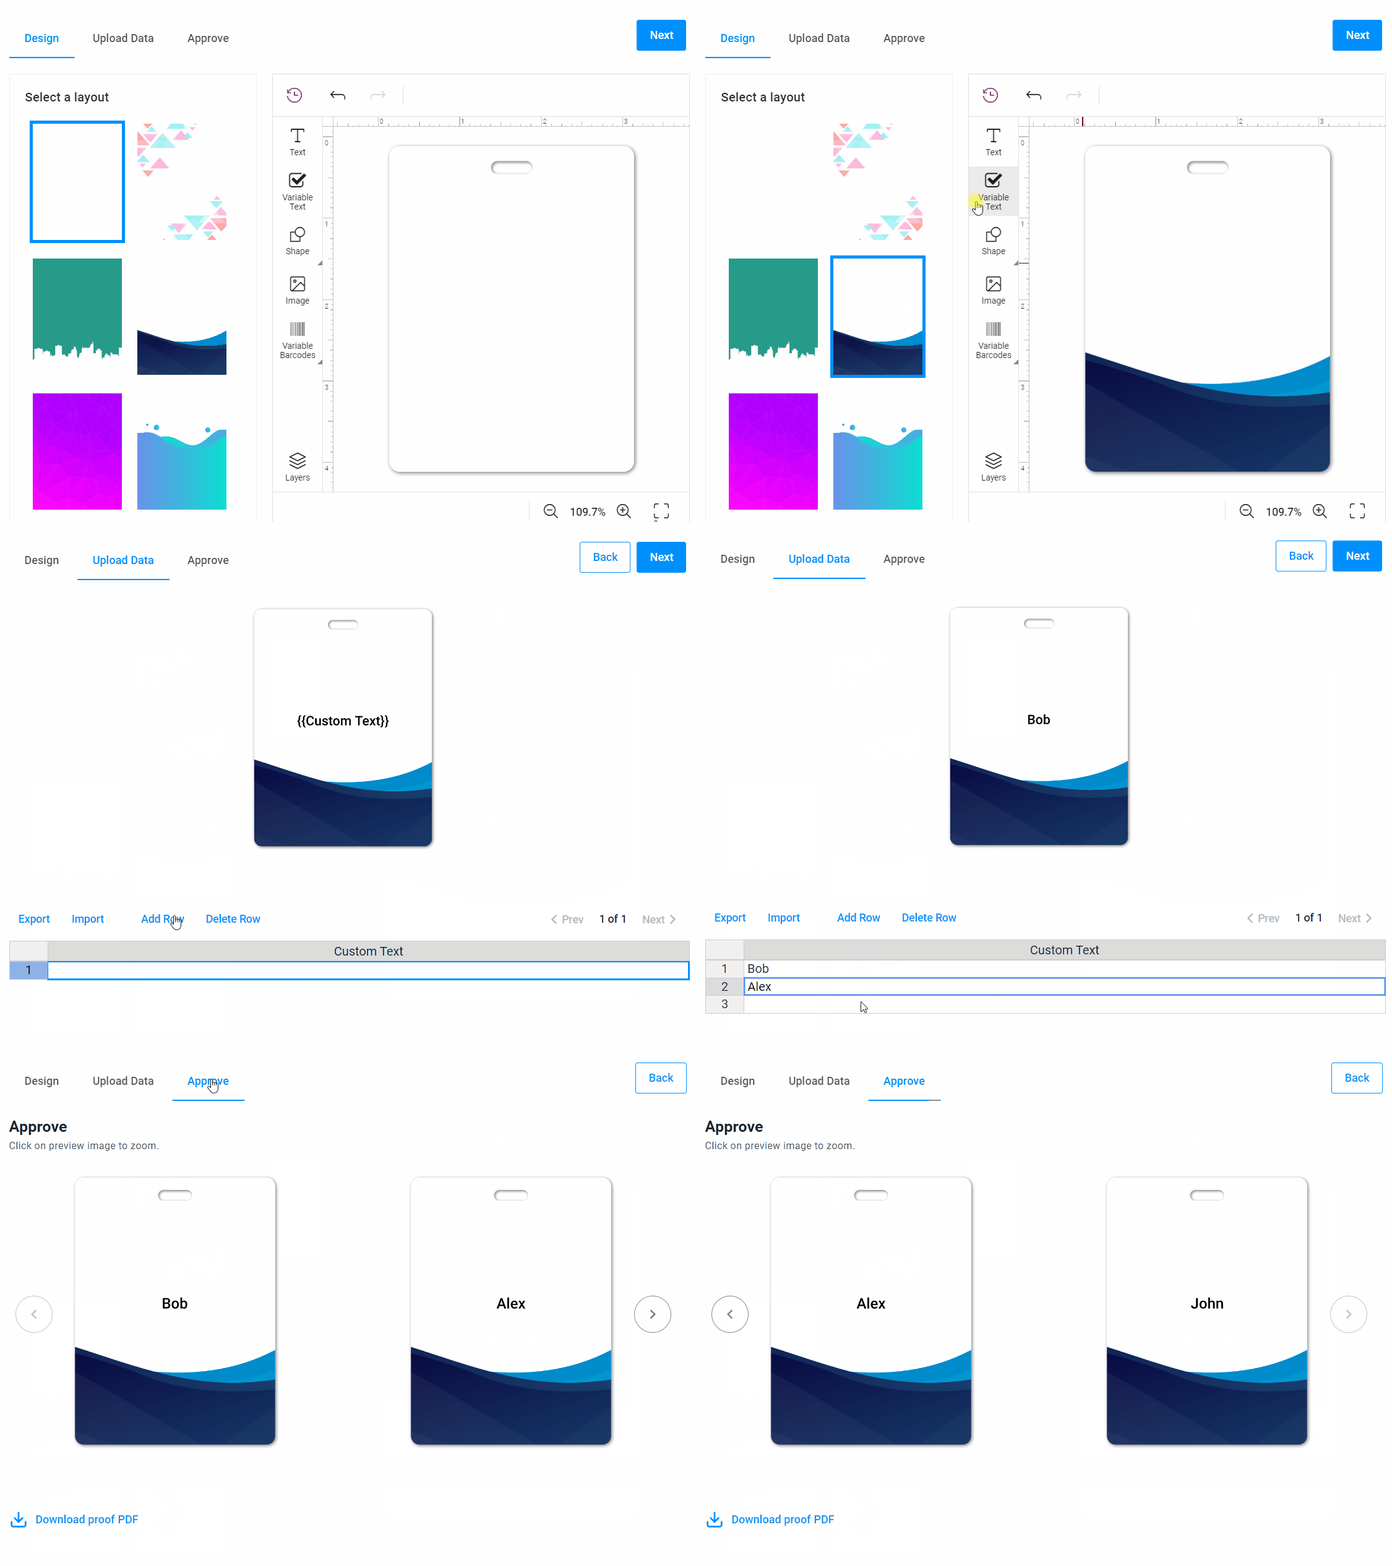
To extend workflow features, you can use JavaScript code in them. This code is called dynamic expressions. They allow you to manage workflows depending on the condition of widgets. For example, when a customer clicks a checkbox, the next step becomes available. Customers select something in a drop-down list, and a design will be changed. JS code also allows customers to see the personalization result and approve it.
Note
In a workflow file, JS code is enclosed in double curly braces
{{...}}.
Let's consider how dynamic expressions work.
Concept
As you read in the Creating and editing workflows article, workflows are defined in the JSON format. This format doesn't allow you to create a self-updating workflow. Nothing will happen, when you select an option or click a button. By adding some JS code to a workflow file, you create interactions between workflow elements, vars, widgets, and so on. For example, when you click an Add image button, an upload dialog box appears, and once an image is selected and uploaded, it is placed in a design.
It works because the system reads a workflow file and tracks all the changes. Although JSON elements aren't changed, dynamic expressions return the result of a function instead. This will happen every time when the customer takes an action.
Note! You can only embed a dynamic expression in the following elements:
- Params of a widget
- Variables
- Name of a step
To learn more about the anatomy of each of these elements, read the Widgets and the Structure articles.
Let's look at examples of dynamic expressions.
In this code, you can see vars and a widget with a dynamic expression. In the expression, you can see a variable var1 with its string Hello and a string world!.
{
    "vars": {
        "var1": "Hello"
    },
    "widgets": [
        {
            ...
            "params": {
                "param1": "{{vars.var1 + ' world!'}}"
            }
        }
    ]
}
The system will resolve this expression to a string and the resulting code will appear as follows:
{
    "vars": {
        "var1": "Hello"
    },
    "widgets": [
        {
            ...
            "params": {
                "param1": "Hello world"
            }
        }
    ]
}
The same works in key: value syntax. In this example, a variable var1 will be replaced with its value MyParamName in params.
{
    "vars": {
        "var1": "MyParamName"
    },
    "widgets": [
        {
            ...
            "params": {
                "{{vars.var1}}": 123
            }
        }
    ]
}
The result is the following.
{
    "vars": {
        "var1": "MyParamName"
    },
    "widgets": [
        {
            ...
            "params": {
                "MyParamName": 123
            }
        }
    ]
}
You can manipulate arrays and objects in dynamic expressions. In the following example, we place an object and an array in params.
{
    "vars": {
        "var1": {
            "a": "b"
        }
    },
    "widgets": [
        {
            ...
            "params": {
                "param1": "{{vars.var1}}",
                "param2": "{{[vars.var1, 123]}}"
            }
        }
    ]
}
This is the result of the expression resolutiton.
{
    "vars": {
        "var1": {
            "a": "b"
        }
    },
    "widgets": [
        {
            ...
            "params": {
                "param1": { "a": "b" },
                "param2": [{ "a": "b" }, 123]
            }
        }
    ]
}
Syntax
You've already seen that JS code is placed in double curly brackets.
{{some JS code}}
You can embed JS code inside.
{{ 1 + 1 }}
This expression can also contain a reference to a variable.
{{ vars.design }}
Referring to widgets
Let's consider how to refer to widgets and get their values.
This example illustrates two widgets: widget1 and widget2. The widget2 contains a dynamic expression. This expression refers to the widget1 and the value of its params1.
The
$symbol refers to a scope. It allows you to refer to a widget defined in the config. To do so, use thenameof a widget. For example:{{ $['my-widget-name'] }}.The
.param1allows you to refer to the parameter in a widget. The.symbol means that you're already in a widget you need and denotes its parameters.
{
    "widgets": [
        {
            "name": "widget1",
            "title": "My widget",
            "type": "...",
            "params": {
                "param1": 2
            }
        },
        {
            "name": "widget2",
            "type": "...",
            "params": {
                "text": "{{$['widget1'].param1}}"

            }
        }
    ]
}
Referring to a widget with a selected value
Let's consider another case. The main conceptual feature of some widgets are values defining these widgets. For example, the main value of the input-text widget is the text, which a customer types.
This example illustrates two widgets: my-option and my-widget. The latter widget refers to my-option to get the value.
To get a selected value, use the .selected syntax, which can be replaced by the ._ alias.
{
  "widgets": [
    {
      "name": "my-options",
      "type": "option",
      "title": "Select the option",
      "params": {
        "type": "radio",
        "title": "This is your options:",
        "values": [
          {
            "title": "Sky blue"
          },
          {
            "title": "Scarlet"
          },
          {
            "title": "Beige"
          }
        ]
      }
    },
    {
      "name": "my-widget",
      "type": "...",
      "params": {
        "text": "{{$['my-options'].selected}}"
      }
    }
  ]
}
This is how an equivalent definition with ._ will look.
{
  ...
  "widgets": [
    {
      "name": "my-widget",
      "type": "...",
      "params": {
        "text": "{{$['my-options']._}}"
      }
    }
  ]
}
Referring to a widget itself
Sometimes you need to refer to another parameter of the same widget. To avoid cycle dependency, you can use the self alias.
In this example, you can see a widget with two params. The param1 has a boolean value, and the param2 gets the value of param1.
{
    "widgets": [
        {
            "name": "widget1",
            "title": "My widget",
            "type": "...",
            "params": {
                "param1": true,
                "param2": "{{self.param1}}"
            }
        }
    ]
}
Referring to variables
As you have already learned, you can refer to variables defined in a separate block in a workflow file. Read the Structure article to learn about defining variables.
{
    "vars": {
        "name": "my-string"
    },

    "widgets": [
        {
            "name": "widget-name",
            "type": "...",
            "params": {
              "param1": "{{vars.name}}"
            }
        }
    ]
}
You can also refer to variables containing arrays or compound objects.
Variables are not only in widget parameters. For example, you can manage the name of a step.
{
  "vars": {
    "condition": true,
    "ifTrue": "True",
    "ifFalse": "False"
  },
  "steps": [
    {
      "name": "{{ vars.condition ? vars.ifTrue : vars.ifFalse}}",
      "mainPanel": {...}
      }
    },
    {
      "name": "{{ !vars.condition ? vars.ifTrue : vars.ifFalse}}",
      "mainPanel": {...}
    }
  ]
}
Referring to attributes
As in the case of variables, you can refer to attributes by using the product object. The following example is taken from a real workflow file.
{
    "attributes": [
        {
            "name": "Design",
            "type": "single-asset",
            "assetType": "design"
        }
    ],
    "vars": {
        "design": "{{product.attributes?.find(x=>x.name==='Design')?.value}}",
    }
}
Expressions
Dynamic expressions can also use some JavaScript expressions through the {{#...}} syntax. Let's see some examples.
Conditions (#if/#elseif/#else)
The #if/#elseif/#else expression adds a conditional logic to your workflow. It looks like this:
{
    "{{#if somevalue}}": "value-1",
    "{{#elseif anothervalue}}": "value-2",
    "{{#else}}": "value-3"
}
Depending on the condition passed to the expression, it will return different result. In the example above, if somevalue is true, the entire object containing this expression will be replaced by value-1.
If somevalue is false, but anothervalue is true, then the object will be resolved to value-2. Finally, if both the conditions are false, the result will be value-3.
You may use any JavaScript instead of somevalue or anothervalue, just like in regular dynamic expressions. In the following example, the result will depend on the var1 value.
{
    "vars": {
        "var1": ...
    },
    "widgets": [
        {
            ...,
            "params": {
                "param1": {
                    "{{#if vars.var1 > 0}}": "var1 is positive",
                    "{{#elseif vars.var1 = 0}}": "var1 is zero",
                    "{{#else}}": "var1 is negative"
                }
            }
        }
    ]
}
Let's see the result. If vars.var1 is 10, the first condition will be true and will return the var1 is positive string.
{
    "vars": {
        "var1": 10
    },
    "widgets": [
        {
            ...,
            "params": {
                "param1": "var1 is positive"
            }
        }
    ]
}
If vars.var1 is 0, the second condition is met:
{
    "vars": {
        "var1": 0
    },
    "widgets": [
        {
            ...,
            "params": {
                "param1": "var1 is zero"
            }
        }
    ]
}
If vars.var1 is -10, the value will be taken from the third expression:
{
    "vars": {
        "var1": -10
    },
    "widgets": [
        {
            ...,
            "params": {
                "param1": "var1 is negative"
            }
        }
    ]
}
It is possible to omit {{#elseif}} or use many of them.
You can also omit {{#else}}. However, when the condition is false, the result will be an undefined value, which is almost always undesired.
Each as
The each expression returns an array formed from element values.
"names": {
   "{{ #each [{first: 'John', last: 'Lennon'}, {first: 'Paul', last: 'McCartney'} as person ] }}": "{{ person.first + ' ' + person.last }}"
}
The result will be as follows:
"names": [ "John Lennon", "Paul McCartney" ]
Let's see another example.
"names": {
   "{{ #each [{id: 0, name: 'Chicago Bears'}, {id: 1, name: 'Washington Redskins'}] as item }}": {
         "id": "{{ team.id }}",
         "title": "{{ team.name }}",
         "price": 0
    }
}
This expression will be resolved to the names array.
"names": [
  {
     id: 0,
     title: "Chicago Bears",
     price: 0
  },
  {
     id: 1,
     title: "Washington Redskins",
     price: 0
  }
]
Let's see how this expression can be used in a real workflow file. In the following example, the slider widget displays proof images and is used at the Approval step.
{
    "name": "preview",
    "type": "slider",
    "params": {
        "style": {
            "--au-widget-background": "#eee",
            "--au-widget-padding": "8px"
        },
        "direction": "tile",
        "rows": 1,
        "columns": "{{Math.min(2,$['editor'].proofImageUrls.length)}}",
        "containerColor": "#eee",
        "images": {
            "{{#each $['editor'].proofImageUrls.map(s=>s[0]) as imageUrl }}": {
                "url": "{{imageUrl}}"
            }
        }
    }
}
In this example, slider shows the personalization result. It doesn't know how many proof images have been created.
"images": {
    "{{#each $['editor'].proofImageUrls.map(s=>s[0]) as imageUrl }}": {
        "url": "{{imageUrl}}"
    }
}
Another example illustrates how you can populate an array of option widget values with values defined in vars.
{
    "vars": {
        "list": {
             ['Apples', 'Orange', 'Pear']
        }
    },
    "widgets": [
        {
            "type": "option",
            "name": "my-options",
            "params": {
                "type": "list",
                "title": "Select an item",
                "values": {
                    "{{#each vars.list }}": {
                        "title": "{{`value=${item}, index=${index+1}`}}",
                        "index": "{{index}}",
                        "value": "{{item}}"
                    }
                }
            }
        }
    ]
}
With as
This expression allows you to create a local variable that will be available in the following piece of code.
"{{#with vars.layouts.find((layout)=>layout.id === $['layouts']._.id) as curLayout}}": {
   "name": "{{curLayout.name}}",
   "teamLimit": "{{curLayout.teams}}"
}
When any changes occur, such a variable will be automatically reevaluated. In the following example from a real workflow file, the productSize will be changed as soon as you change the browser width or height.
{
    "vars": {"sizes": ["Small", "Medium"]},
    ...
    "widgets": [
        ...
        {
            ...
            "params": {
                "...": {
                    "{{ #with $['height-value']._ <= 387 || $['width-value']._ <= 387 ? 'Small' : $['height-value']._ <= 1000 && $['width-value']._ <= 1200 ? 'Medium' : 'Large' as productSize }}": {
                        "title": "{{ productSize }}",
                        "isSupportedSize": "{{ vars.sizes.some(x => x == productSize) }}"
                    }
                }
            }
        }
    ]
}
You can also use this expression in nested objects.
"props": {
    "{{#with 1 + 1 as myValue}}": {
        "value2": {
            "{{#with 2 + 2 as myValue}}": "{{myValue}}"
        },
        "value3": "{{myValue}}"
    }
}
Escape
The #escape expression allows you to apply escaping and use double curly brackets as is without the resolution.
For example, you must use it in the Design Editor for VPD products with interpolated strings. When you enclose such strings in double curly brackets, the system will try to resolve {{UserName}} as a dynamic expression when it should not.
{
    "Header": "Hello {{#escape UserName}}"
}
The result will be a string.
{
    "Header": "Hello {{UserName}}"
}
This expression is constantly used in products where you add variable text. Once a product is designed, these text elements will be located, and a list of their values will populate in a table. Then, a single product will be rendered for every table row.

This is how you can define a Variable Text button in the editor widget to implement this scenario.
{
    "translationKey": "Variable Text",
    "translationKeyTitle": "Add a variable text to the canvas",
    "iconClass": "fa fa-check-square-o",
    "action": "text",
    "itemConfig": {
        "name": "Custom Text",
        "text": "{{#escape Custom Text}}",
        "isVariable": true,
        ...
    }
}
Merge
This expression merges objects.
{
    "{{#merge}}": [
        {
            "name": "John",
            "company": "FooBar, Inc."
        },
        {
            "age": 35
        },
        {
            "name": "John Silver",
            "pictures": ["1.jpg", "2.jpg"]
        }
    ]
}
This expression will result in the following object.
{
    "name": "John Silver", // note, we have overwritten the name
    "company": "FooBar, Inc.",
    "age": 35,
    "pictures": ["1.jpg", "2.jpg"]
}
Concat
The #concat expression concatenates several arrays into one.
In this example, there is one array with two arrays inside. The concat expression unites two arrays into one.
{
    "{{#concat}}": [[1,2,3], [4,5,6]]
}
This results in [1, 2, 3, 4, 5, 6].
You may have an array that contains a nested array and an item inside.
{
    "{{#concat}}": [[1,2,3], 100]
}
In this case, #concat returns the following array: [1,2,3,100].
Now, let's look at an example from a real workflow file. This is the part of the editor widget defining toolbox buttons.
"Toolbox": {
    "buttons": {
        "{{#concat}}": [
            [
                {
                    "translationKey": "Toolbox.TEXT",
                    "translationKeyTitle": "Toolbox.TITLE_ADD_TEXT",
                    "iconClass": "cc-icon-add-text",
                    "buttons": [
                        "Text",
                        "BoundedText"
                    ]
                },
                {
                    "translationKey": "Toolbox.SHAPE",
                    "translationKeyTitle": "Toolbox.TITLE_ADD_SHAPE",
                    "iconClass": "cc-icon-add-shape",
                    "buttons": [
                        "Line",
                        "Rectangle",
                        "Ellipse"
                    ]
                },
                "QrCode",
                {
                    "action": "Image",
                    "translationKeyTitle": "Upload an Image",
                    "iconClass": "cc-icon-uploadable",
                    "tabs": [
                          "My files"
                    ]
                }
            ]
        ]
    }
}
Flatten
The #flatten expression transforms an array to object properties. Why might you need this?
Let's imagine that you have a list of baseball teams:
{
    "vars": {
        "teams": [ "Los Angeles Dodgers", "New York Yankees", "Houston Astros"]
    }
}
Now, let's assume that you need to prepare the following structure, for example, to send it to the server using the ajax widget.
{
    "Team 1": {
        "name": "Los Angeles Dodgers"
    },
    "Team 2": {
        "name": "New York Yankees"
    },
    "Team 3": {
        "name": "Houston Astros"
    },
    "Heading": "2023 MBL",
    "Background": "green-field-01.jpg"
}
You may try to implement this through a combination of #merge, #each or use complicated logic that would involve a lot of #if statements. However, it would be quite challenging.
The #flatten comes to rescue. You can write something like this:
{
    "{{#flatten}}": {
        "_": {
            "{{#each vars.teams as team}}": {
                "{{`Team ${index + 1}`}}": {
                    "name": "{{team}}"
                }
            }
        },
        "Heading": "2023 MBL",
        "Background": "green-field-01.jpg"
    }
}
It will yield the same result as described above.
The #flatten scans the object in the right side of the expression. If it meets a regular property that holds a string, like Heading or Background in our example, it leaves them in the resulting object as is. However, if it meets a property holding an array of objects, it will pull each property of each element and add it to the resulting object.
The name of a property containing such arrays is ignored, which why you may write whatever you want, for example, _ or any other string.
Any non-objects in such an array are ignored.
The #flatten processes only one level. If it meets an object that contains arrays, they are copied to the result as is.
Function
You can implement handling the onClick, onChange, onActivate, and other events in your workflow file. They will execute code only when an event happens.
For example, you add code, which is executed after clicking a button.
The syntax is the following:
{
    "onClick": "{{#function <some js expression> }}"
}
It's important that <some js expression> returns a value. For example, this expression is true.
{
    "onClick": "{{#function $['editor'].getProofImages() }}"
}
The following expression returns an error because console.log is a statement and doesn't return a value.
{
    "onClick": "{{#function console.log('Hello world') }}"
}
If you want to implement several actions in a handler, you can write them as an array of functions.
{
    "onClick": [
        "{{#function <some js expression 1> }}",
        "{{#function <some js expression 2> }}"
    ]
}
The system will execute them one by one. If a function is asynchronous, the next function will run after the previous function is executed.
Debugging
When you are writing a workflow file, something can go wrong. You can use the following keywords for troubleshooting.
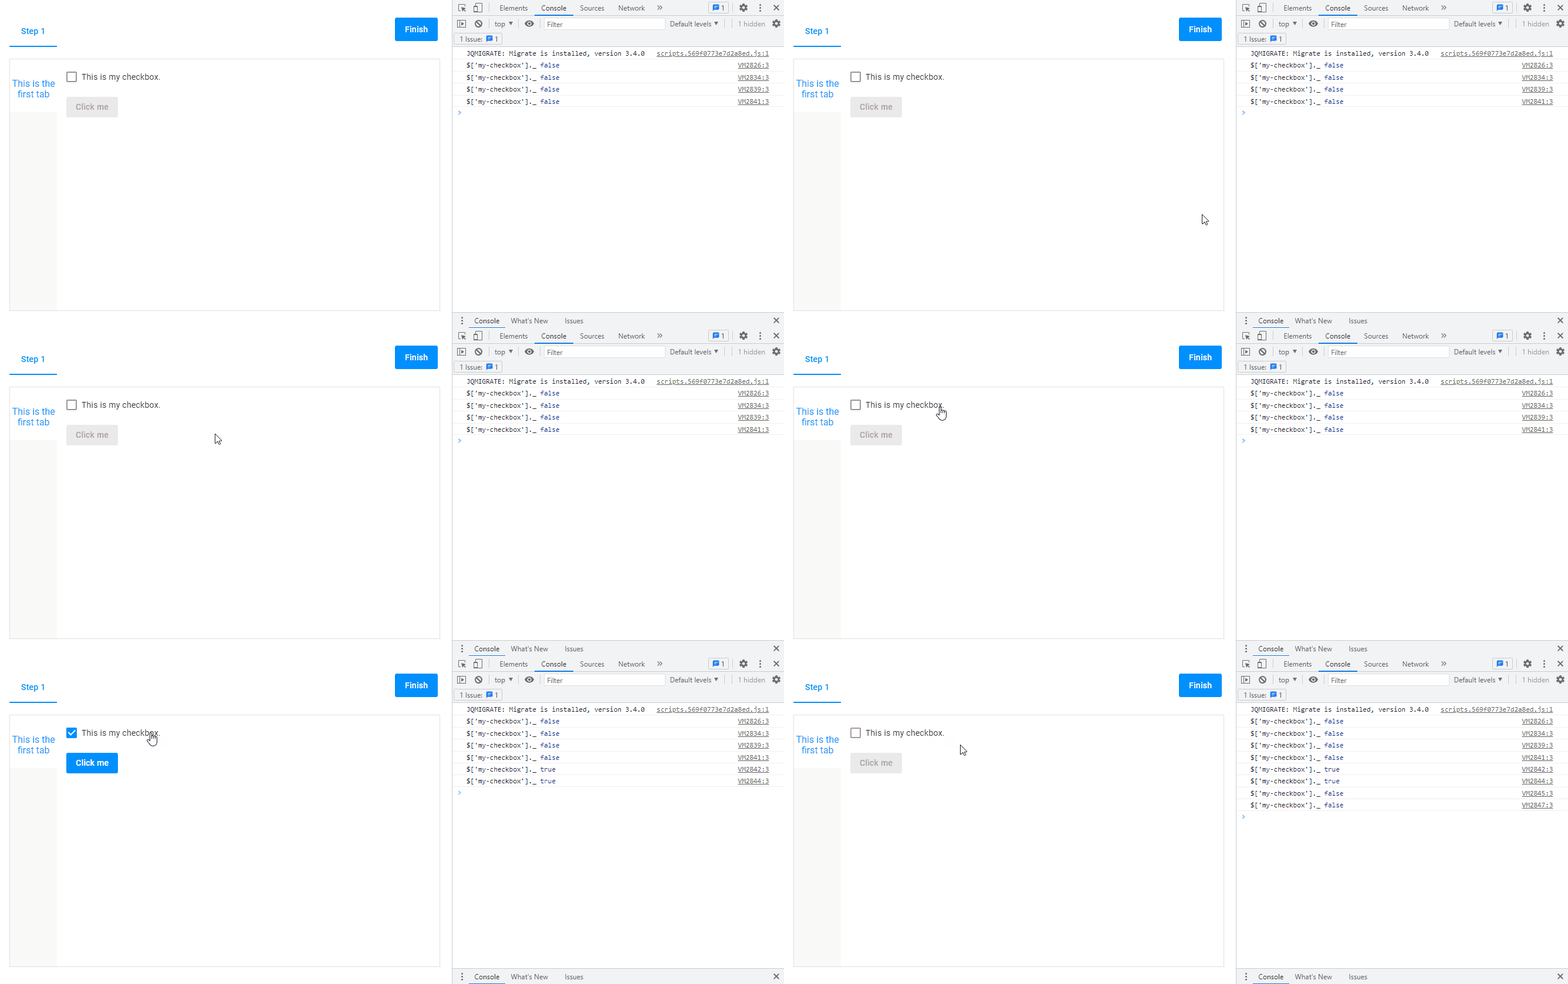
@log
You can add @log to the beginning of a dynamic expression to output its value:

{
    "name": "my-checkbox",
    "type": "checkbox",
    "params": {
        "prompt": "This is my checkbox.",
        "value": false
    }
},
{
    "name": "my-button",
    "type": "button",
    "params": {
        "text": "Click me",
        "enabled": "{{ @log $['my-checkbox']._}}"
    }
}
Every time the system resolves this expression, its result appears in the browser console. To open this console, press F12 and click the Console tab.
@debug
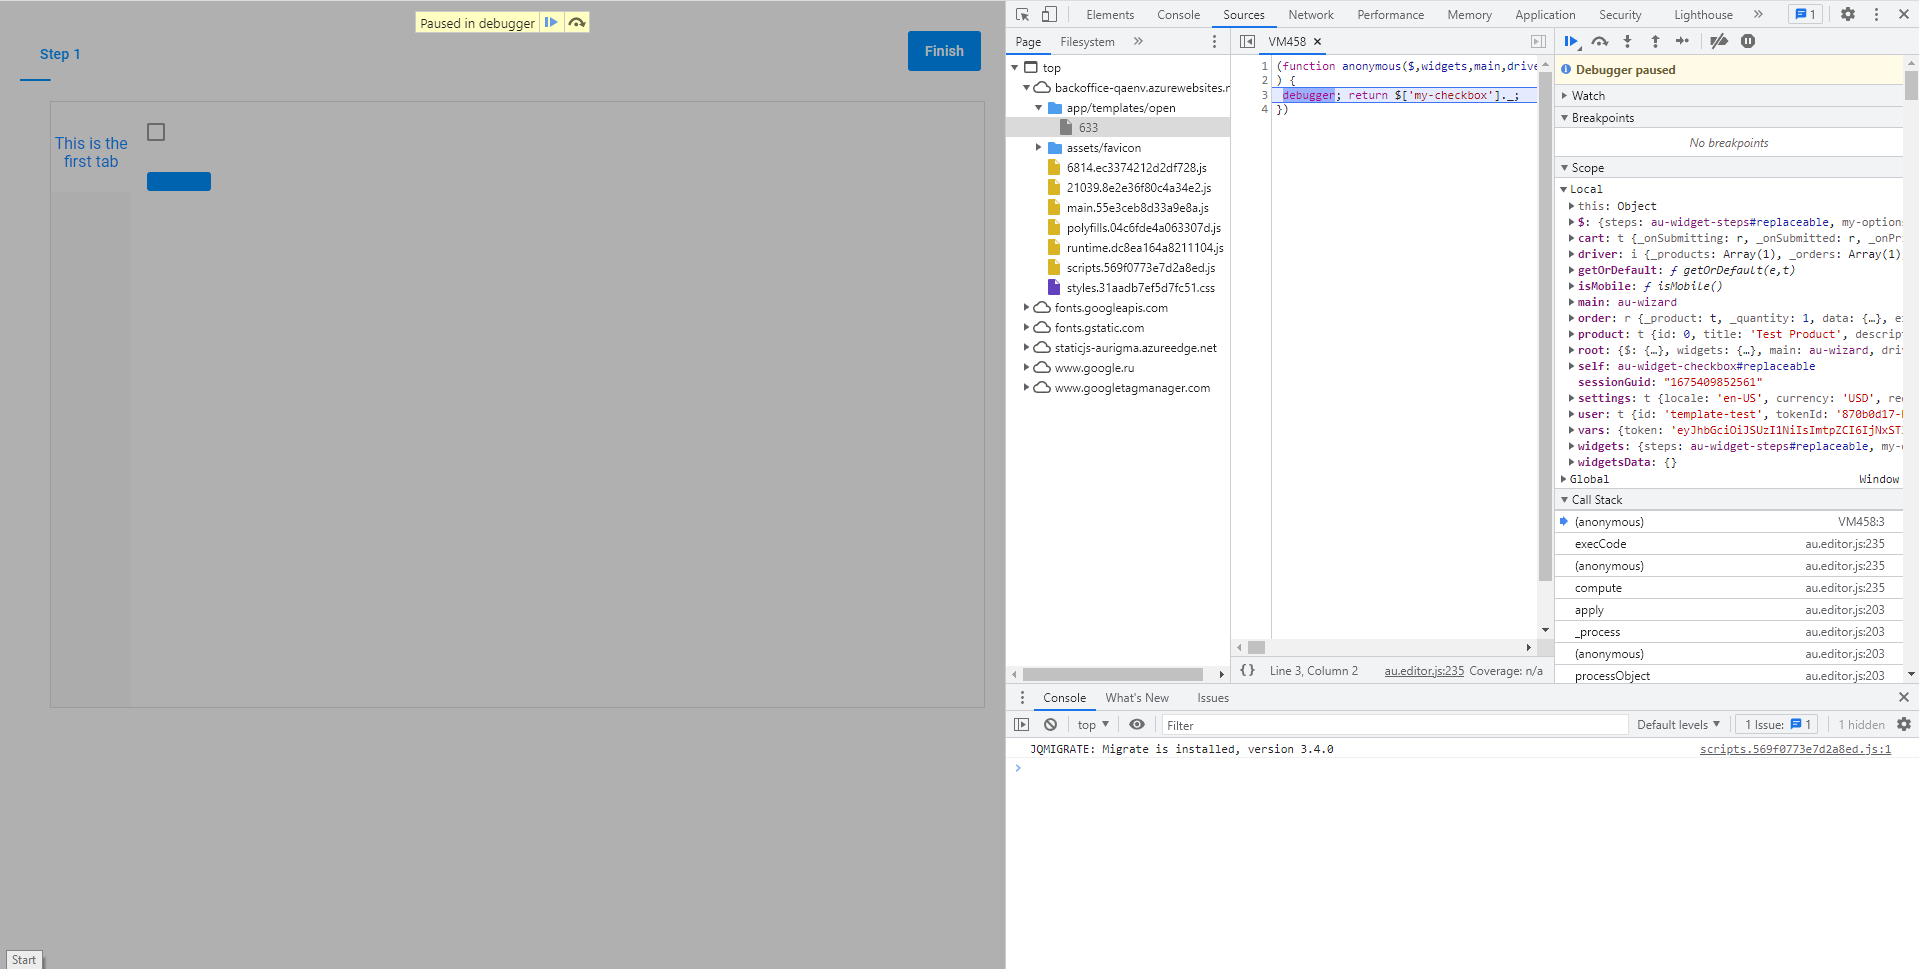
The @debug keyword works like a breakpoint for a dynamic expression. You can add it to the beginning of a dynamic expression. Every time the system implements a dynamic expression, a browser will stop at this Java Script code. You can debug the code in the debugger window.

{
    "name": "my-checkbox",
    "type": "checkbox",
    "params": {
        "prompt": "This is my checkbox.",
        "value": false
    }
},
{
    "name": "my-button",
    "type": "button",
    "params": {
        "text": "Click me",
        "enabled": "{{ @debug $['my-checkbox']._}}"
    }
}
Now you can learn how to use dynamic expressions in widgets. To do so, read the Widgets articles.