Concepts
- Last updated on December 29, 2023
- •
- 2 minutes to read
The PIM workflow may consist of three personalization steps: Variant selector, Editor, and Preview.
For each step, the PIM module supports one of the following mockup types:
- The
Thumbnailmockup for the Variant selector step. - The
Editormockup for the Editor step. - The
Previewmockup for the Preview step.
You can read more about personalization steps in the PIM Module section.
Let's consider these mockup types.
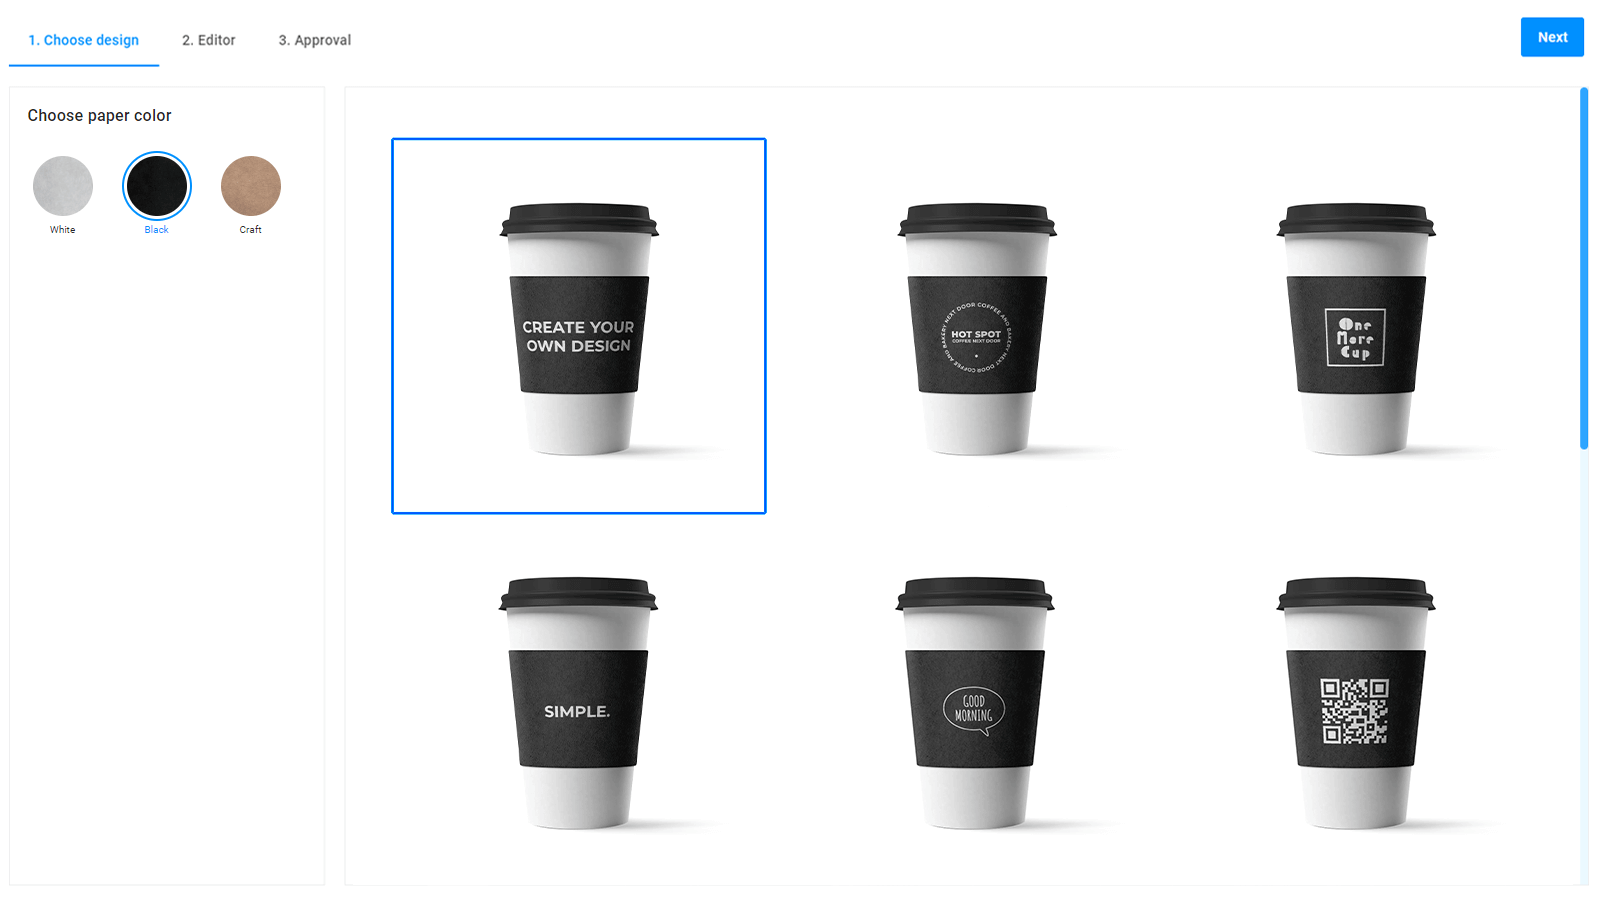
Thumbnail mockup
The thumbnail mockup is a miniature image of a product and used in the Variant Selector step. It introduces a customer to products and gives a basic idea of them.
These mockups may show designs frontally, which is suitable for such print products as brochures, business cards, and so on.
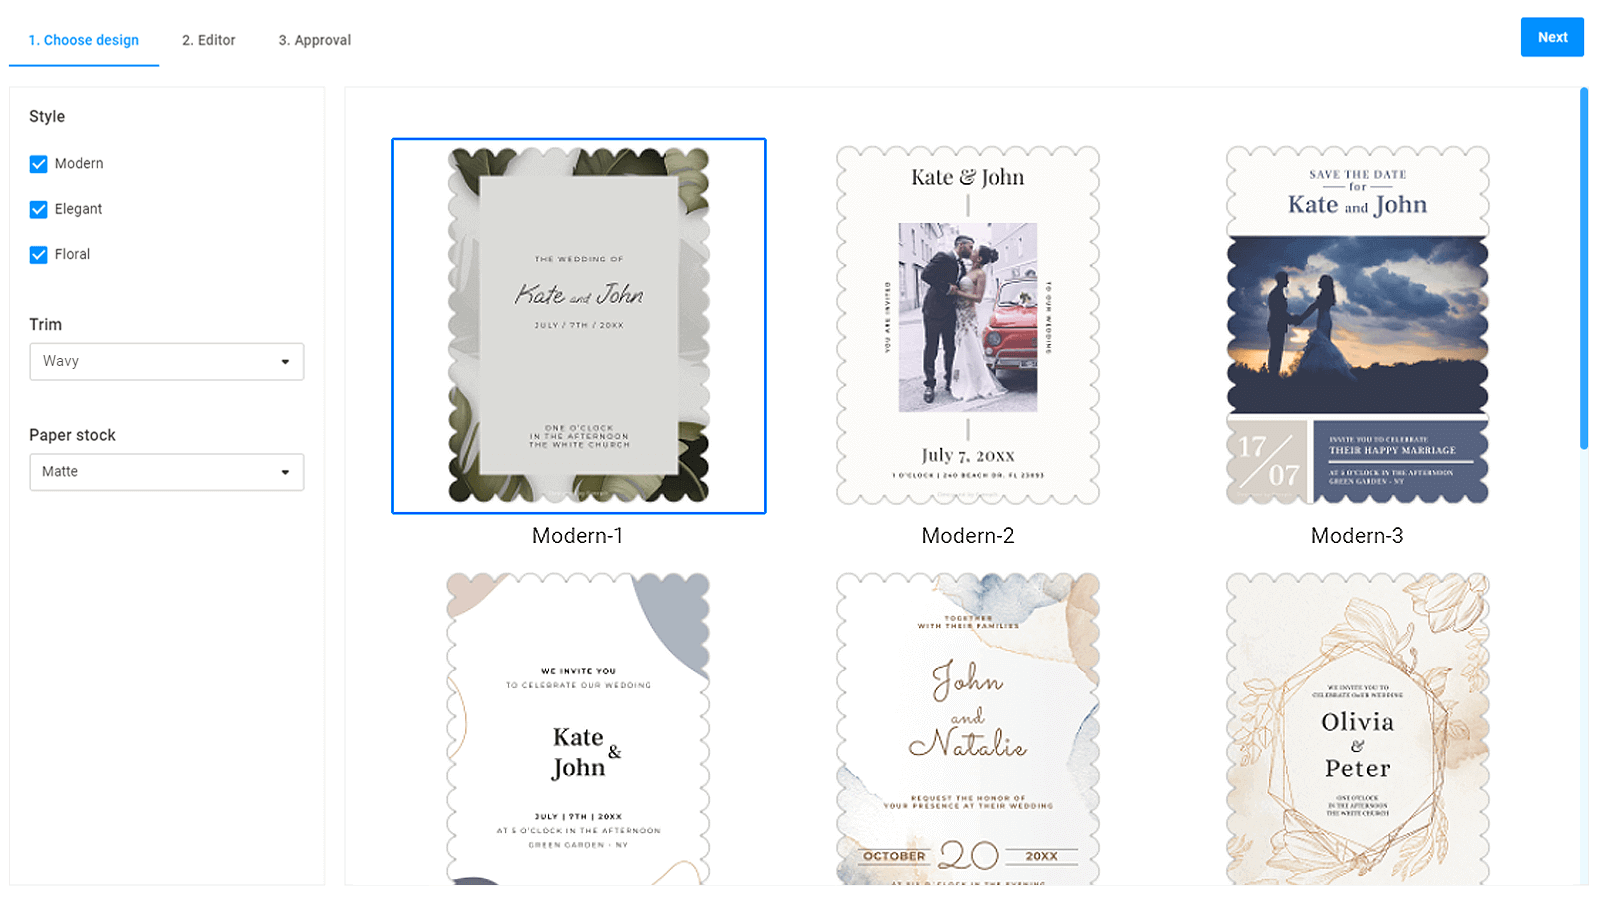
You can also use preview mockups with warp and distort transformations in the role of thumbnail mockups. This may be useful to see how a design looks on some real items.
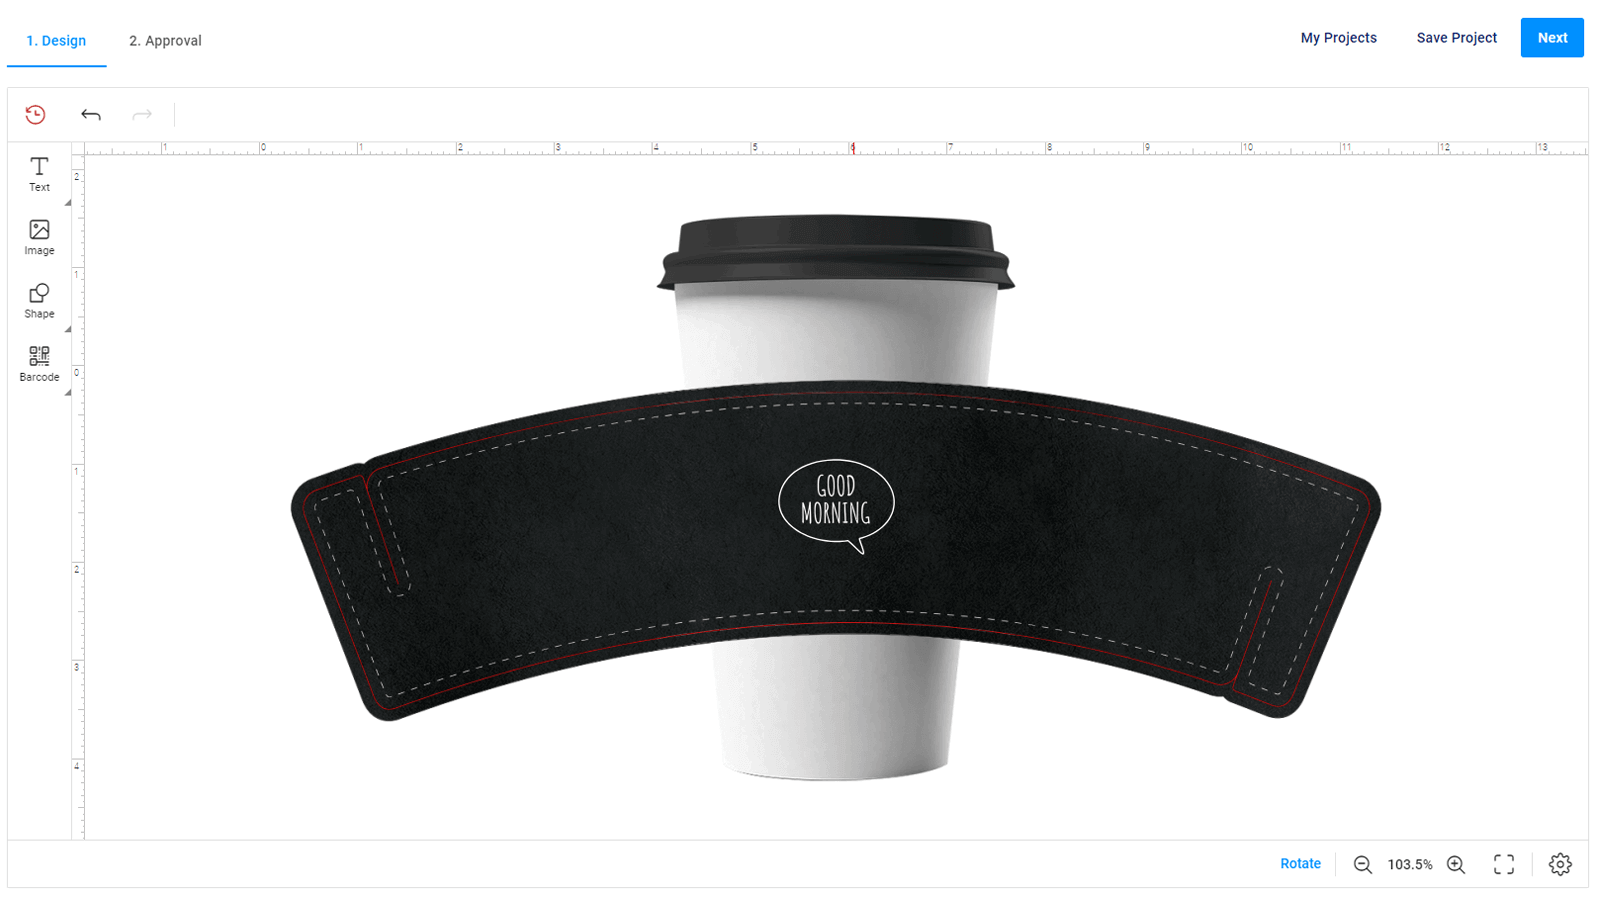
Editor mockup
The editor mockup visualizes a product while personalizing the design in the Editor step. This mockup can also help to display different trim styles, decorative frames, bleed area, and so on.
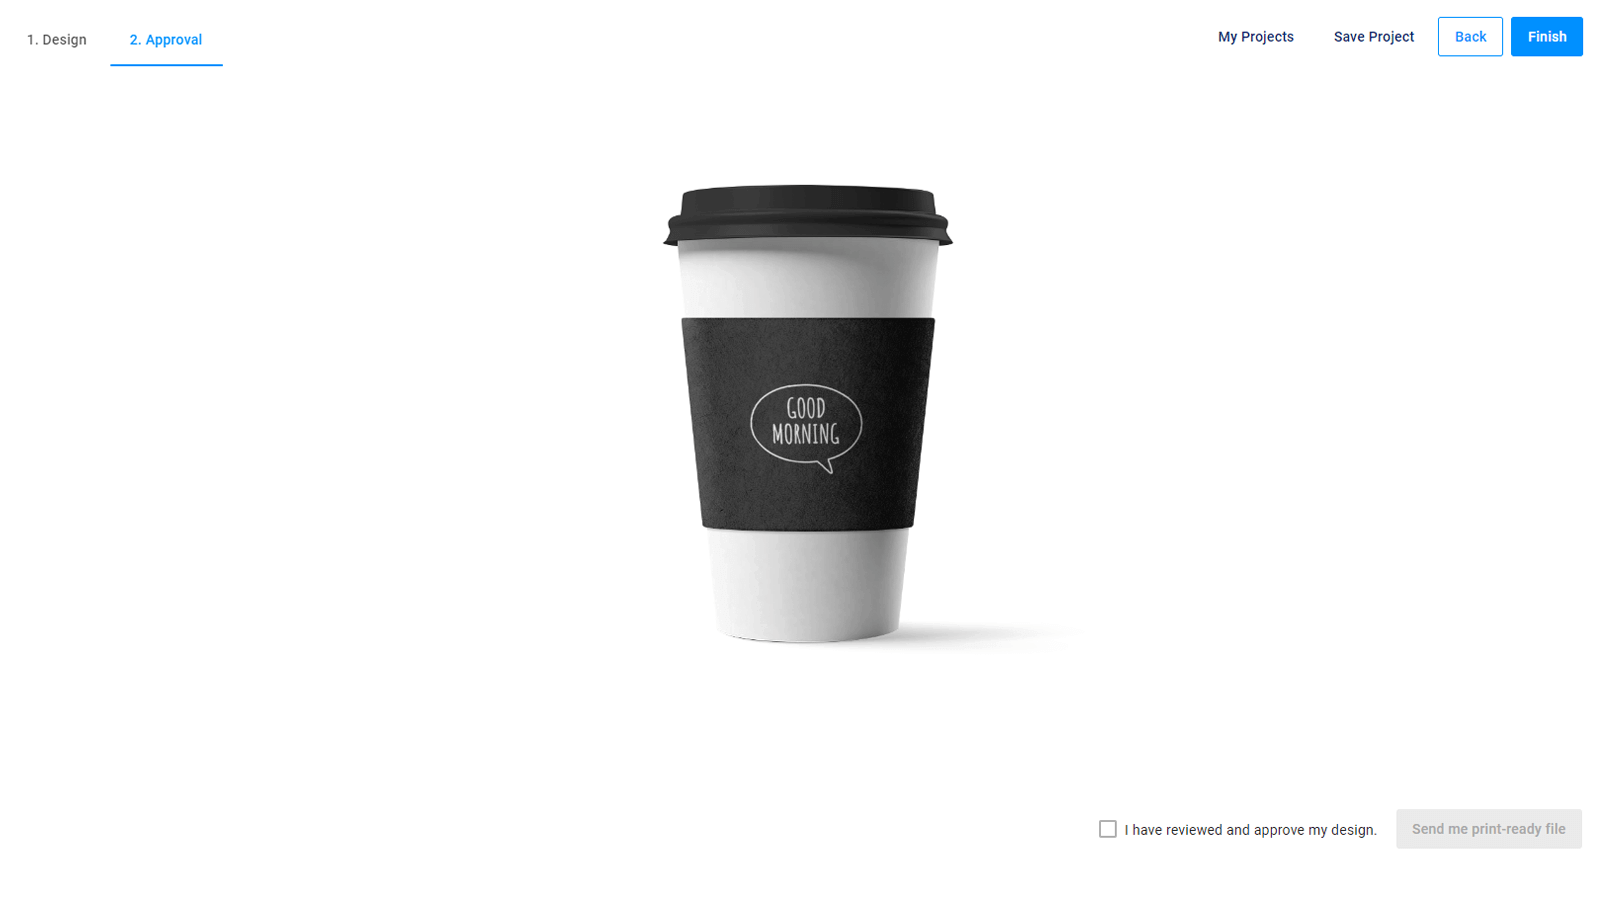
Preview mockup
The preview mockup demonstrates the personalization results at the Approval step. To create a realistic looking mockup, use complicated transformations in Photoshop, such as warp, distort, perspective, and so on. Blending modes are also supported.
Let's consider the anatomy of these mockup types.
Mockup anatomy
In the PIM module, all types of mockups are supported only in the PSD format. You can consider mockups as regular PSD files created in Adobe Photoshop. They consist of the following layers:
| Name | Description |
|---|---|
overlay or up-mockup |
Optional. These layers are over a smart object. |
| smart object | Mandatory. This is the layer where a design will be embedded. |
substrate or down-mockup |
Optional. These layers are under a smart object. |
In the previous example, there is the following substrate part of the mockup.
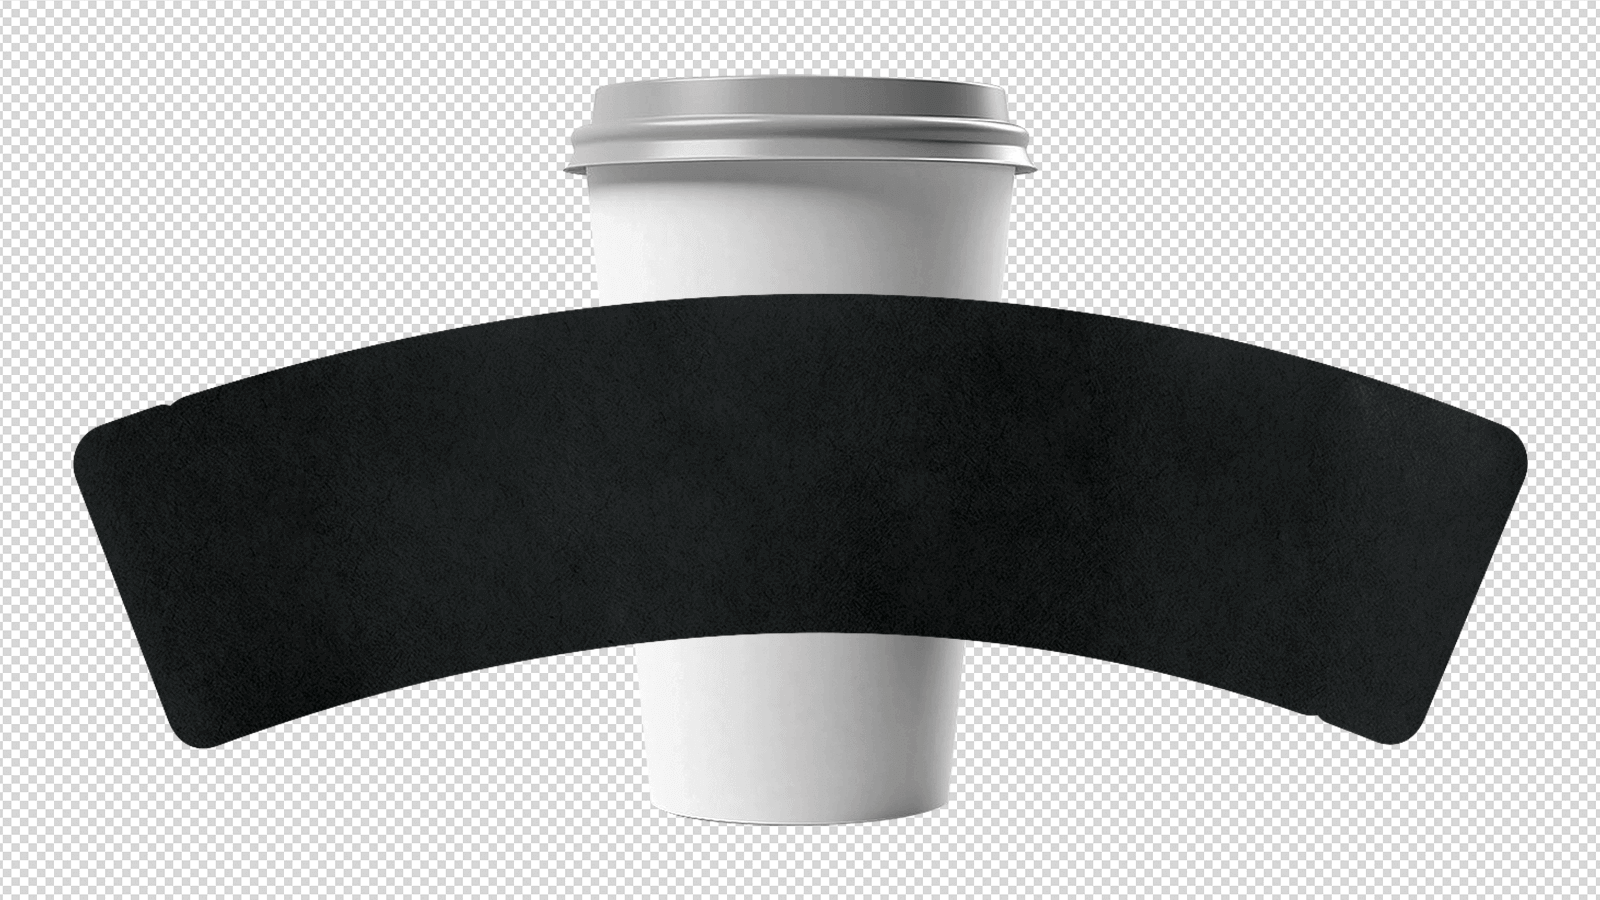
This is the overlay part of the mockup.
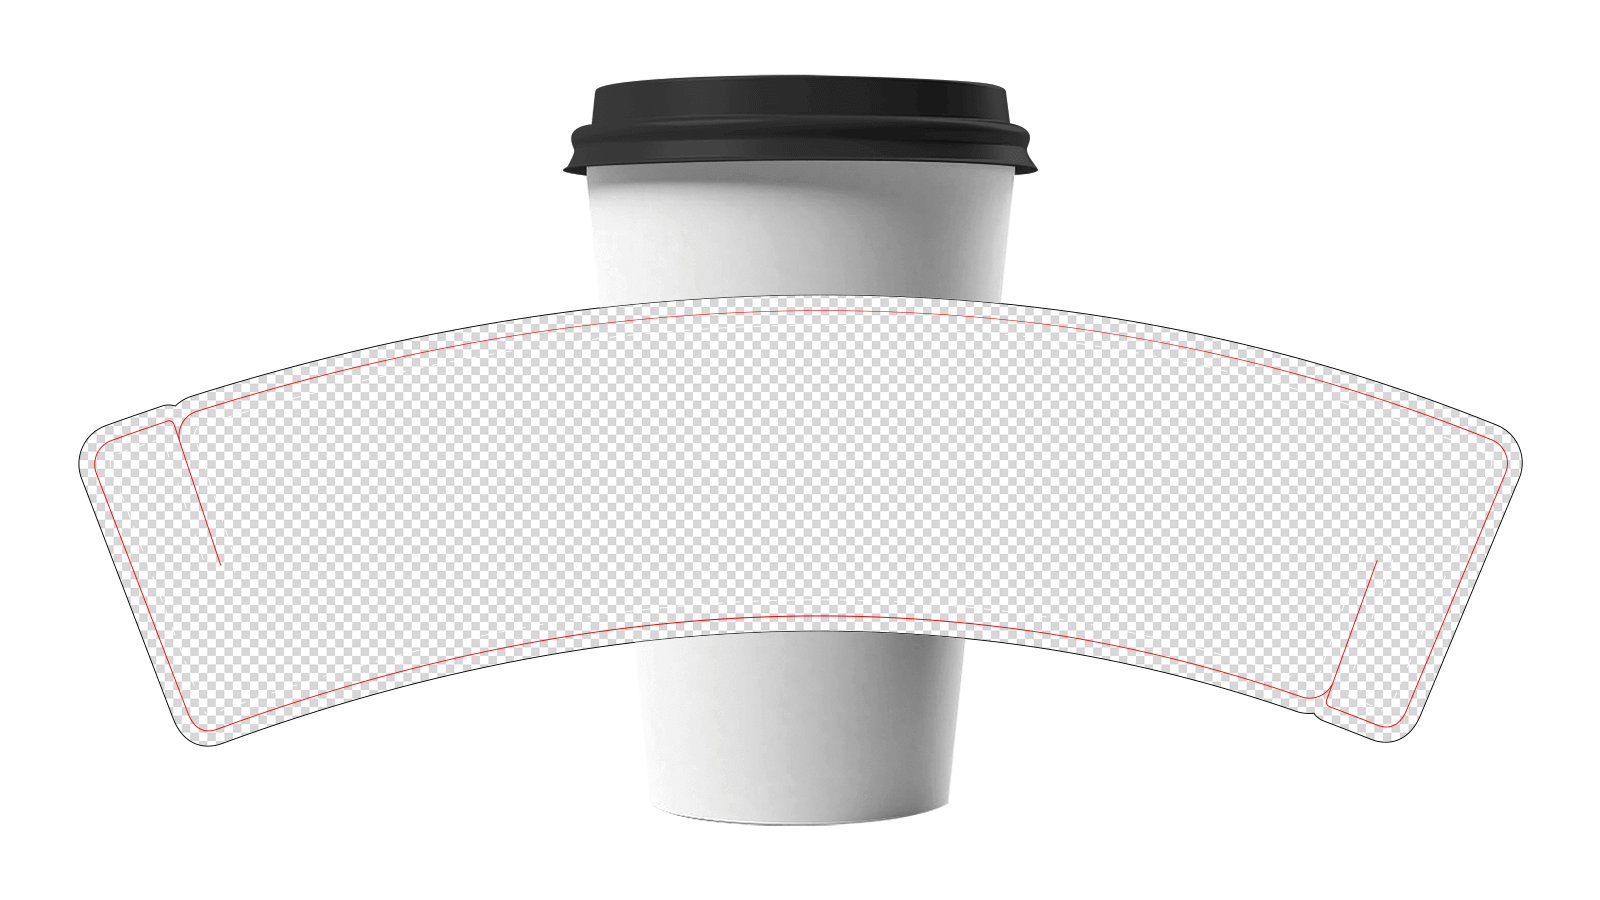
Unlike mockups for product specifications, the PIM module allows you to create one mockup file containing all three layers: substrate, overlay, and smart object.

However, there are some specific features for each mockup type. Let's consider them.
| Properties | Editor | Thumbnail | Preview |
|---|---|---|---|
Dimensions |
Depends on the physical product size in inches, cm, or mm |
The recommended size is from `500px * 500px` to `600pх * 600px` |
The recommended size is `1000px *1000px` to `1200px *1200px` |
Transformations |
— |
Smart object implements warp, distort, perspective, and so on |
Blending modes |
— |
To learn more about available blending modes, read the Blending options article | |