Garment editor mockup
- Last updated on December 29, 2023
- •
- 4 minutes to read
In this tutorial, you will learn how to create 1500x1500 mockup images for a T-shirt that will be displayed in the Design Editor. We are going to get everything we need to configure an editor with a mockup:
- Down mockup JPEG image visualizing a T-shirt.
- Up mockup PNG image used to clip elements that go outside of the design area.
- Design location coordinates.
Prerequisites
This tutorial assumes that you have Adobe Photoshop.
Although not required, you may want to read the How to create editor mockups article for a better understanding of the process.
Step 1. Prepare a product image file
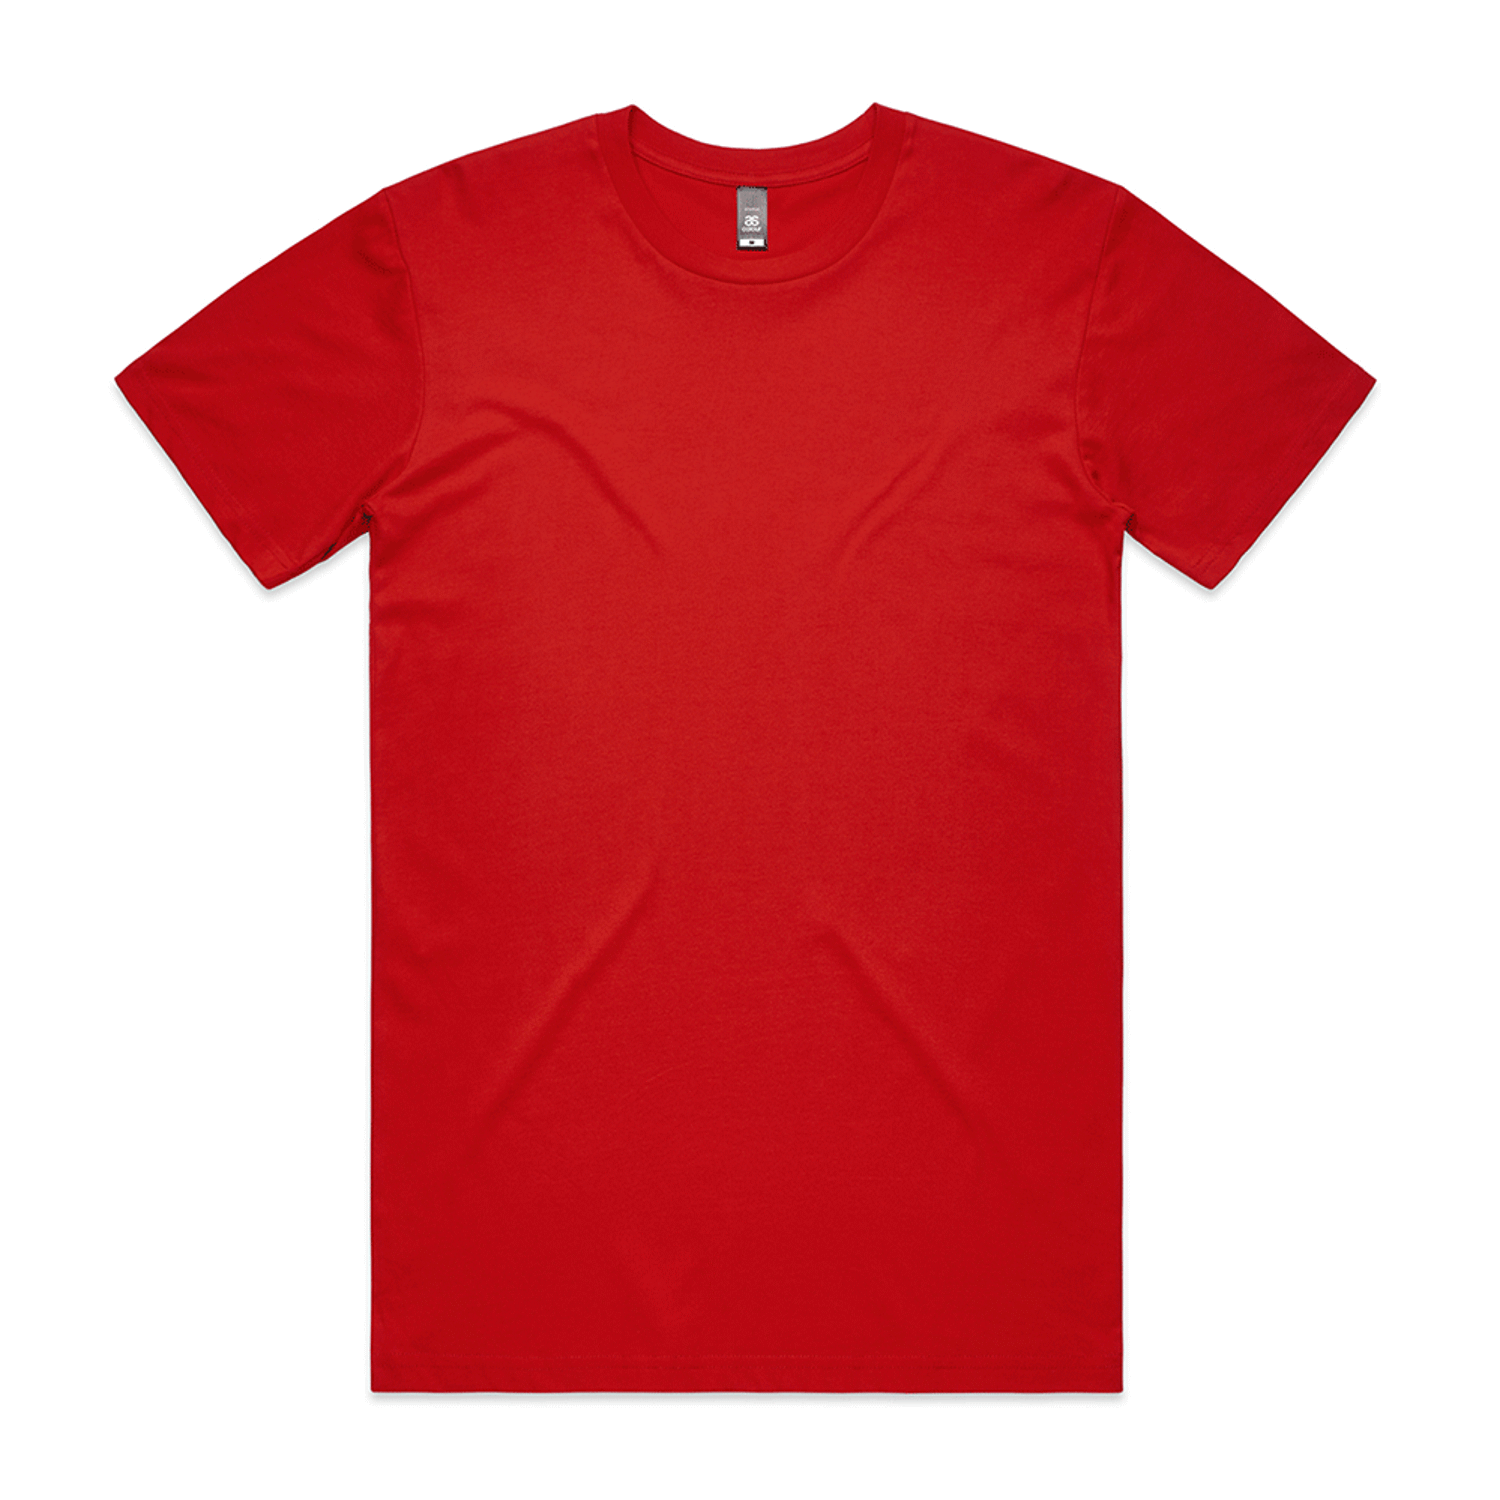
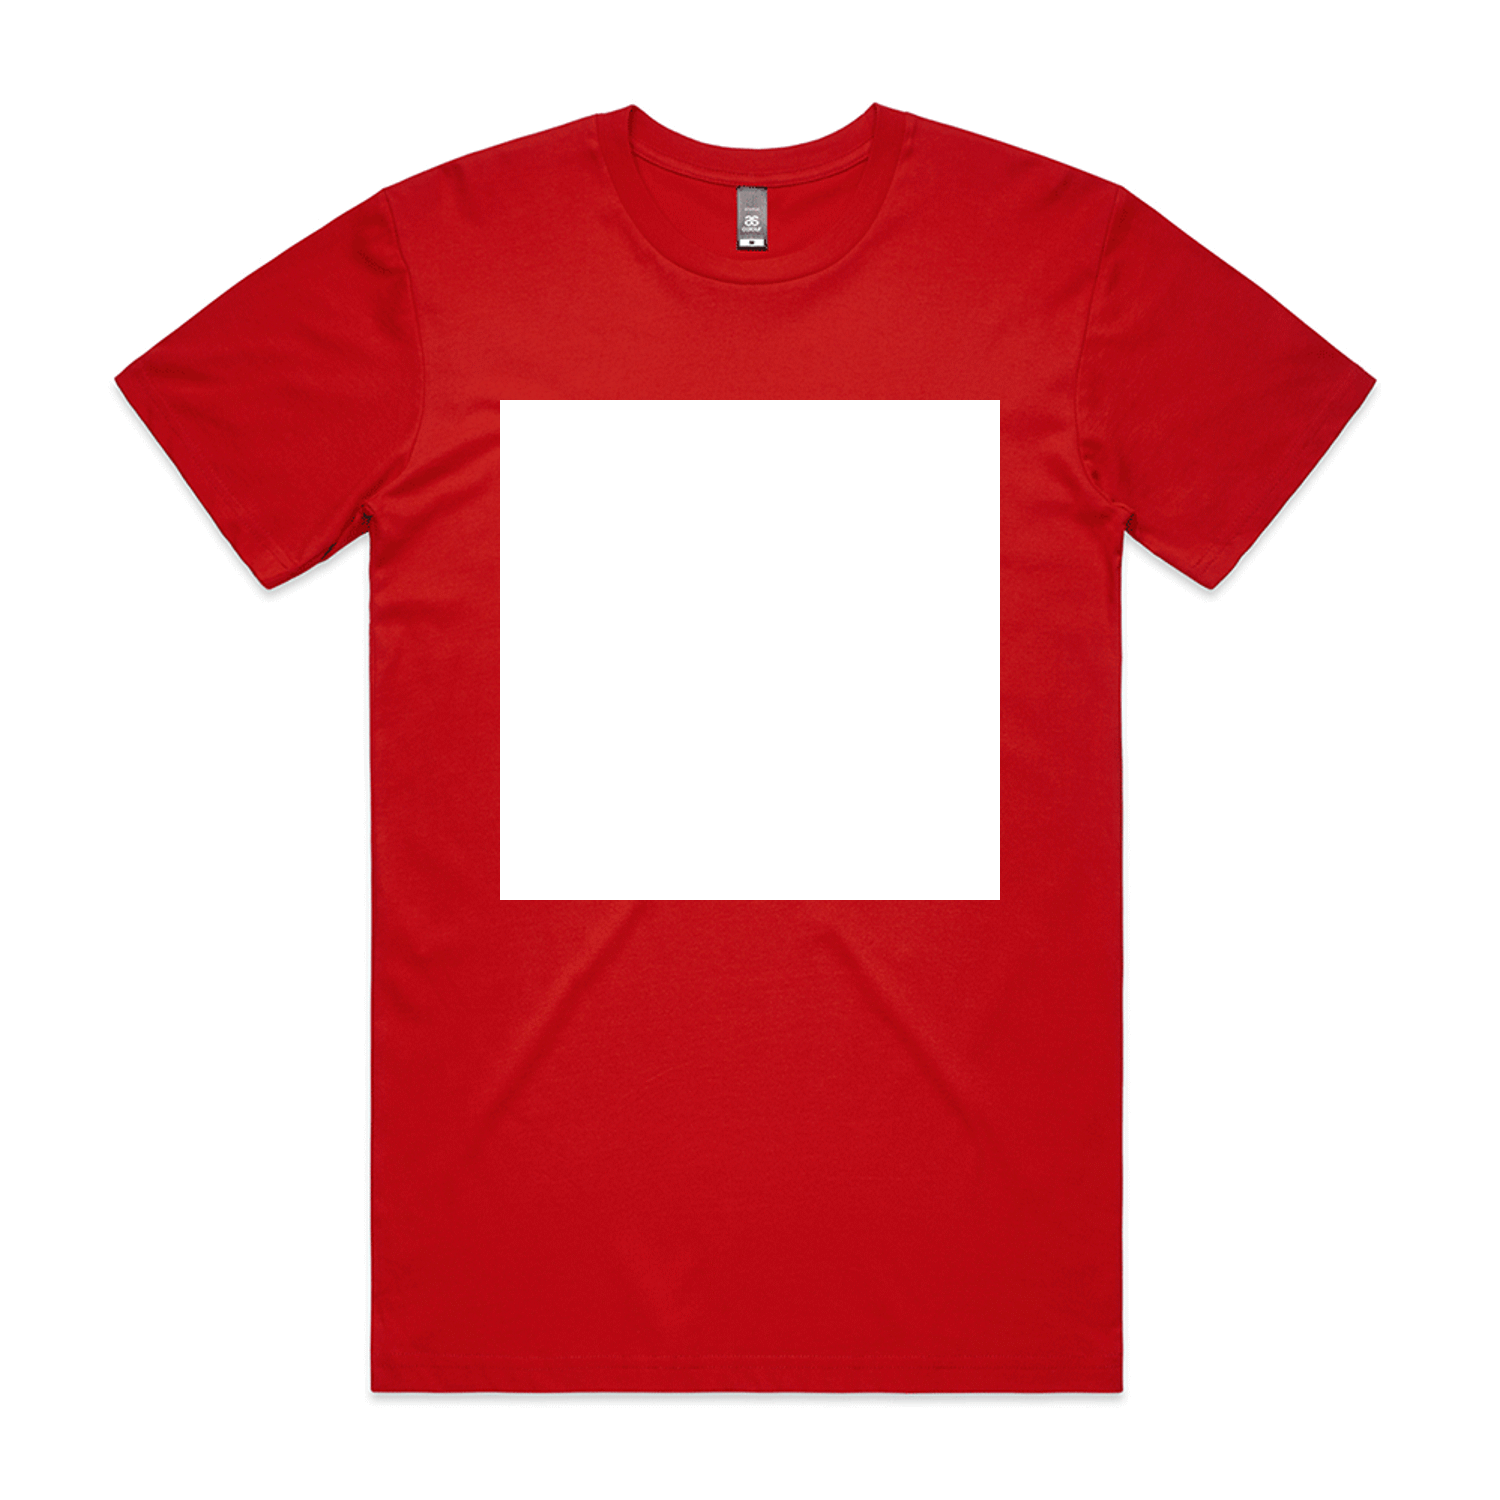
The first thing we need to do is prepare a good product image. The design area should be flat and occupy a decent space to make it look good in the editor. We will go with the following image.

Click to download a full-size image
Create a new file in Photoshop. Our target pixel size is 1500x1500, so use the following parameters:
- Width to
1500pixels - Height to
1500pixels - Color mode to
RGB color - Background contents to
Transparent
Don't change the resolution at this point; we will adjust it later.
Once you set these parameters, just drag an image from the file explorer to the new file, adjust the size, and then press Enter.
Step 2. Calculate the physical size
To continue, you need to know the exact specifications of the print area and have an idea of how the artwork is located on the product. If you don't know exactly, consult your printing provider. For example, let's assume that your artwork will be 11x11 inches.
We need to draw a rectangle of the same aspect ratio on the mockup. In our case, it will be a square. Put it exactly where you think the artwork is located and resize it accordingly.
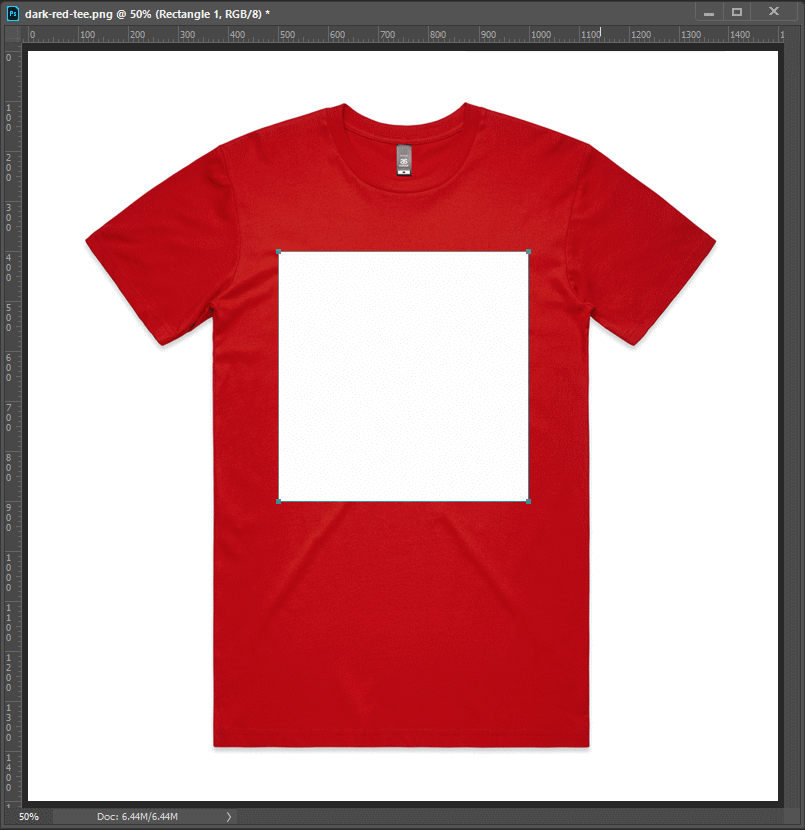
Now you need to measure the length of the design area and find its proportion to the full mockup. In our case, the design area width is 500px, which means that the full mockup is three times larger than the print area. It means that the full mockup's physical size should be 11*3 inch = 33 inches. The resolution of the mockup file should be 1500 / 33 = 45.454545 DPI.
Let's set this physical size.
- Open Image > Image Size... menu or press
Ctrl+Alt+I. - Clear the Resample checkbox.
- Make sure that the necessary units are selected near the Width and Height boxes, in our case, Inches.
- Enter 33 in Width.
The Height and Resolution will be automatically recalculated. The Resolution will equal the 45.454545 figure we have calculated above.
Step 3. Remember the design location
The design location is just the top-left corner of a design area. Customer's Canvas expects this value in points. Here are the instuctions on how you can determine them:
- Select a rectangle depicting the design area.
- Click Edit > Free Transform or press
Ctrl+Tto enter the transform mode. - On the toolbar, right-click X box and choose Points. Write down the value.
- Do the same for Y.
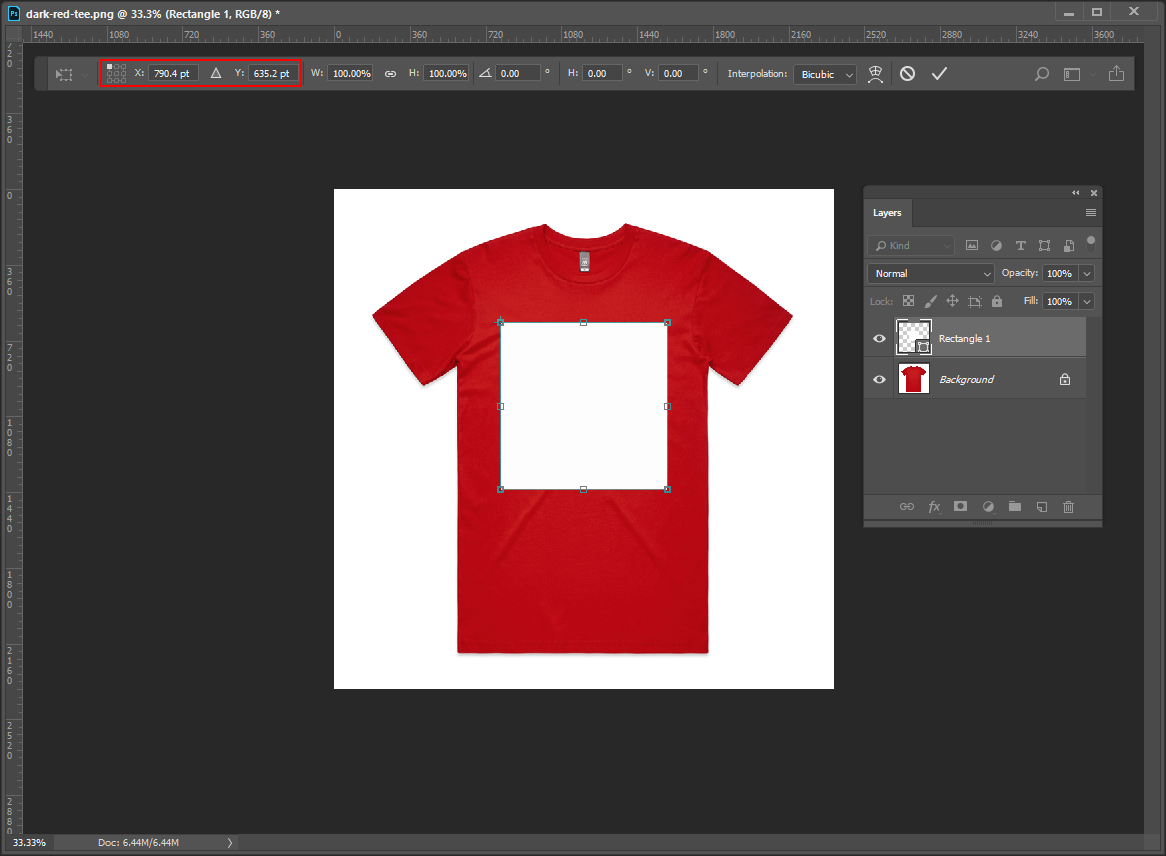
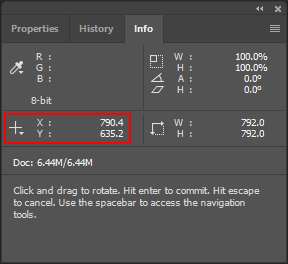
Alternatively, you can open the Info window (Window > Info or press F8), hover over the top-left corner of the design area, and write down X and Y. If the current units are not points, click Edit > Preferences > Units & Rulers > Type and ensure that the Rulers dropdown is Points.
Important
Make these calculations after you have specified a final image size (see Step 2).
Step 4. Save the down mockup
Hide the rectangle representing the design area. To do this, choose this layer and click the eye icon in the Layers list or use the Ctrl+, hotkey.
Click File > Save As or Ctrl+Shift+S and select JPEG as the file type. Choose a file location and configure the JPEG properties as you like. The recommended JPEG quality is 8.
Your down mockup file is ready.
Step 5. Save the up mockup
Our goal is to make the portion of an image that corresponds to the design area transparent. Here is the quickest way to do it:
- Hold the
Ctrlkey and click the design area rectangle in the Layers panel. It will create a selection of the same size as this layer. Note, there is no need to make the layer visible for this step. - Select the mockup image layer. Make sure that the selection is still there.
- Press
Del.
It will delete the selected part of the design and make it transparent.
Now let's save our up mockup as a PNG file. It is important to use PNG to keep transparency.
Click File > Save As or Ctrl+Shift+S and select PNG as the file type. Choose a file location and configure the PNG properties as you like.
Your up mockup file is ready.
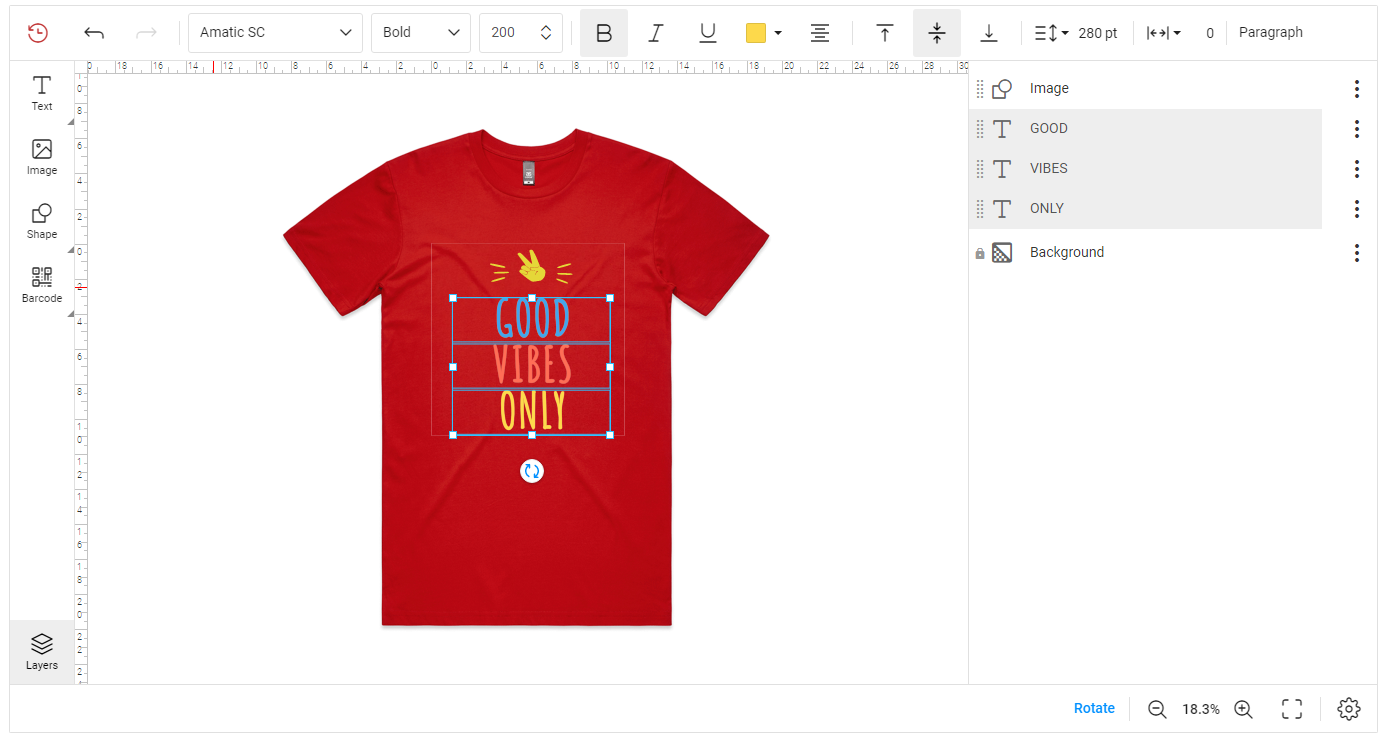
Result
After you configure the mockups in Customer's Canvas, the editor will look like this:
Note
The editor configuration depends on how you use Customer's Canvas and is the subject of separate articles.
The process described above works for most product types, however, some certain products have their nuances. Let's see how to prepare mockups for cards with different trim styles.