Pages
- Last updated on August 1, 2024
- •
- 5-6 minutes to read
As you can learn from the Design File Anatomy article, design files may be composed of several pages or, speaking more generally, surfaces. For example, a design may have a front side or a back side, or an outside front, inside front, inside back, and outside back. Perhaps it is a multi-page brochure. For simplicity, let's use the term page and surface interchangeably, even if we are talking about sides.
When you start creating a new design, the Template Editor opens with one or more empty pages. Let's learn how you can work with them.
Managing pages
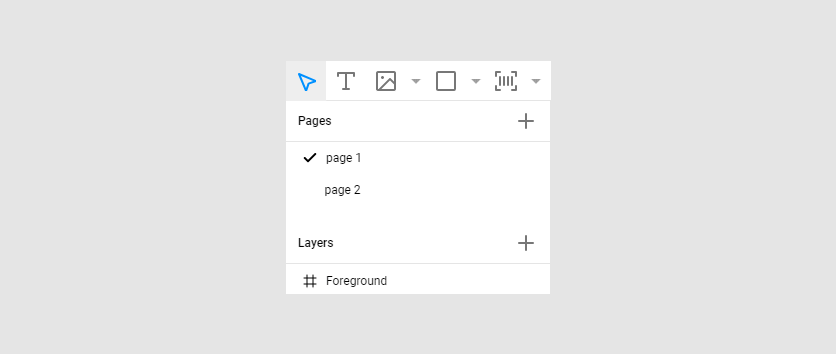
A list of pages is displayed in the Pages panel between the toolbox and layers.
Renaming pages
To change a name, either double-click it in the tree or click the Rename command in the context menu. As an alternative, you can edit the Name field on the Page options tab.

It is a good idea to give meaningful names to pages. With some configuration of the end-user's editor, the end-users may see these names in the interface. Even if they don't see them, meaningful page names will help you work more efficiently with the Template Editor.
Adding pages
The Template Editor allows you to add new pages to a design in two ways: insert a new empty page or duplicate an existing page with all its content.
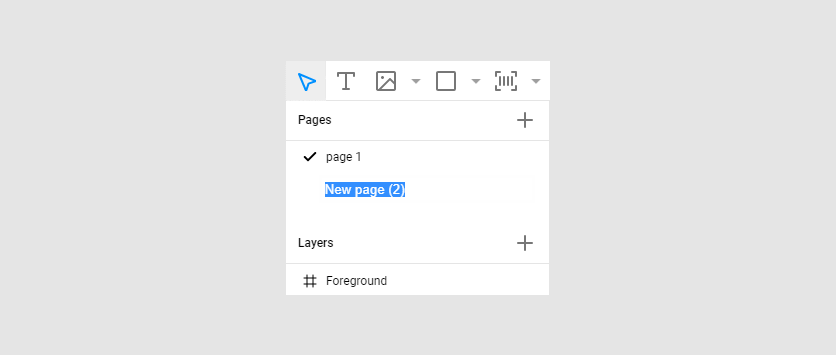
To add a blank page, do the following. In the Pages tree, right-click a page and then click New page or just click the plus (+) icon. Then, change the default page name.
Note
The page size will be the same as the last page of a design.
To duplicate an existing page, right-click the required page and then click Duplicate.
Removing pages
You can delete unnecessary pages by right-clicking them using the Delete command in the context menu. You can also select a page in a list and press the Del key on a keyboard.
Note
If a design consists only of a single page, you cannot delete it.
Changing page options
To display the Page options tab, you can click either a page in the Pages tree or an area on the canvas free of design elements.

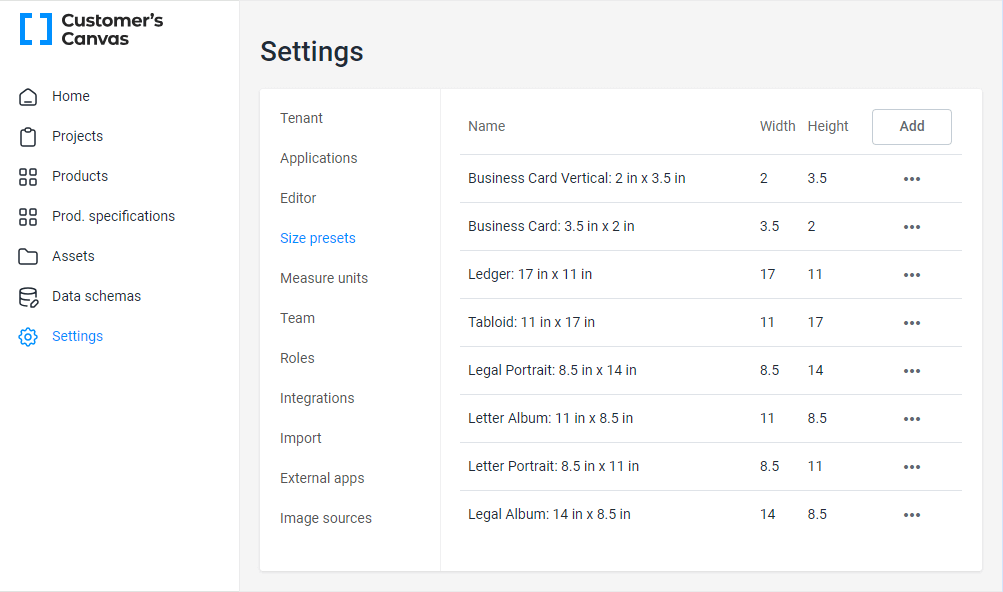
To change the page size, you can select one of the predefined sizes in BackOffice settings. You can change this preset on the Size presets tab.
In the options, you can also define a custom page size in the Width and Height fields. To maintain the design aspect ratio, click the lock icon. You can quickly change the orientation (swap the Width and Height) by clicking the appropriate icons to the right of the dimension input boxes.
After you have defined options for a page, you can apply them to all design pages: click the ellipses next to the title Page options and then click Apply to all pages.

Bleed and Slug
The Template Editor allows you to create Bleed and Slug zones in your design.
These zones are nested within each other:
Product
The innermost zone is the product itself. Its size is defined by the page width and height. Its boundaries form a trim line.
For example, a business card is 3.5x2 inches after being trimmed. You are setting the page size equal to 3.5x2 inches. It will be the size of the trim box in an output PDF file when it is rendered.
Bleed zone
A bleed zone is added to the outside area of a product. You are supposed to fill the bleed zone with the element adjacent to the edge of a product (such as a background or similar elements). It helps to avoid white stripes when a print production team trims a product due to a subtle inaccuracy. The outer boundary of a bleed zone forms a bleed line.
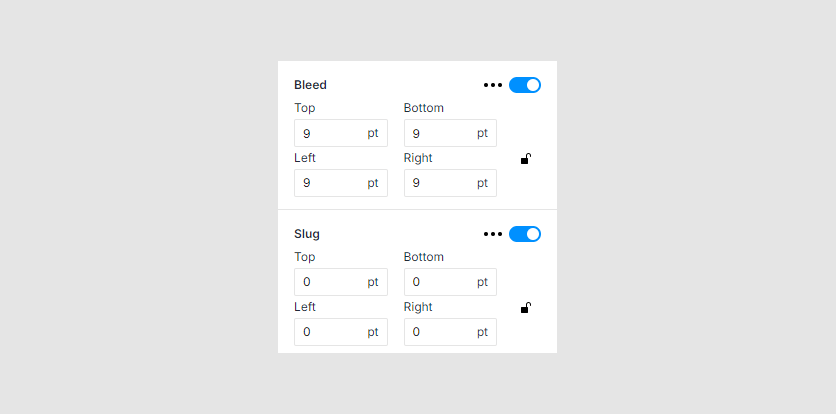
A typical bleed zone size for commercial printing products is 1/8 inch (9 points). In the case of the aforementioned business card, the size of a bleed box in the output PDF will be 3.75x2.25 inches.
Slug zone
A slug zone is added outside of a bleed zone. It is typically used for such technical marks as the order information, etc. Unlike a bleed zone, it has different values for different edges, for example, it can only be added to the bottom of a design.
There is no standard slug zone size - just ensure that it is large enough to put all necessary data into it. For example, let's assume that you add 1/2 inch to the bottom and 1/8 inch to the left and right. In this case, when we render a PDF for our 3.5x2 inch business card with a 1/8 inch bleed, the media box in this PDF will be 4x2.75 inches.
The image below illustrates different zones.

Areas
You can also enable additional markup to the product to designate some special areas. They can be used for different purposes - for margins, "safety zone", etc. It is possible to add several such areas. For example, for a t-shirt, you may add an area for the left and right chest.
Those areas don't have any effect on an output print file. They are used solely for the editor. They help users add the elements they create to the correct positions. A user can still add elements outside of these areas, but they can also use Design Editor tools to quickly place items inside the appropriate areas and snap lines will work with the edges of these areas.

To create an area, you need to do the following:
- In Areas, click the plus (+) icon.
- Specify margins relative to the edges of the product.
- If you like, configure the color and line style.

Note, if you would like to enable snap lines not only in the end-user's editor but also in the Template Editor, you may need to enable it in the settings:
- Click the gear icon to open the settings.
- Click Snap lines.
- Click Enable snap to page.
- Click Apply.

Background
In the page options, you can set the background of the page: define a fill color or set a background image.

You can also use the toggle button to turn the background off. If you then turn it on again, the previously defined background will return. When resizing a page, the background is automatically scaled.
To apply a plain color to the background, click the Color button and then click the color box. When the Color Picker opens, select a color.

To use an image as the background, click the Image button, click the upload icon, and select an image.

Note that the bleed area is filled with background, but the slug area remains empty.
Now, let's go further and learn how to work with layers in the pages.