Connecting an editor with Preflight to a Shopify product
- Last updated on May 27, 2022
- •
- 4-5 minutes to read
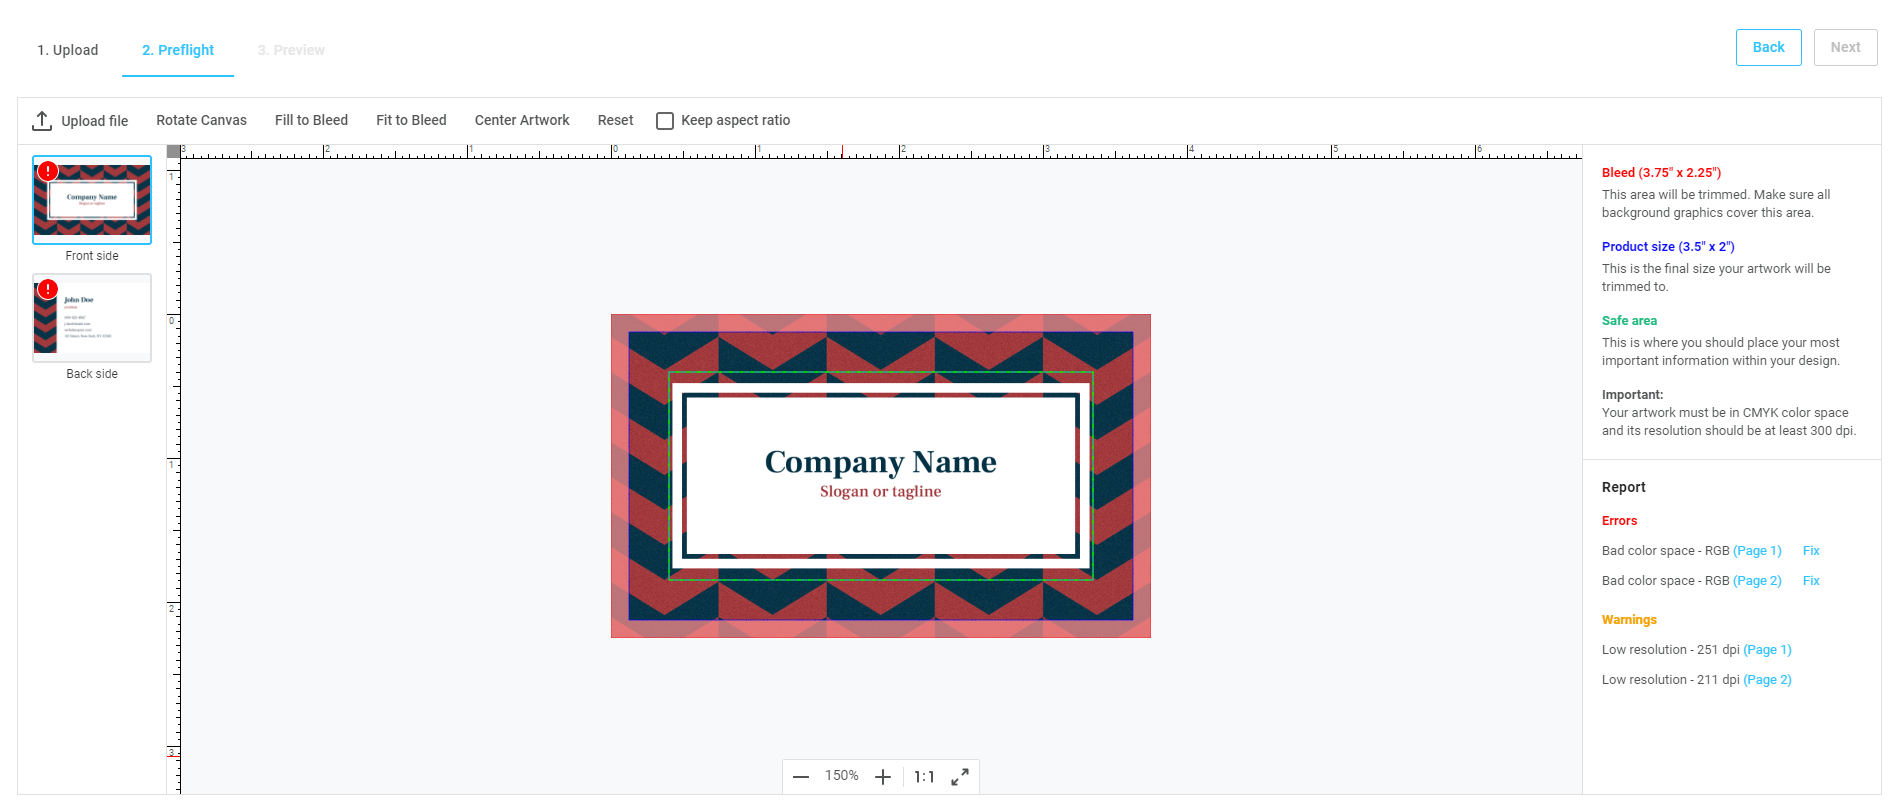
When you receive predesigned files for printing, it's possible to preflight a design online and fix some problems immediately. The Preflight tool allows you to set up the ordering process when customers don't edit their design files, but rather send the design template to print after the check. During the preflight step, your customers can see if their design uses the correct color space, fits the product surface, and that all design elements are within the trim lines.
Users might be able to fix any positioning and orientation issues with the design in the editor on your website. This online tool also allows you to auto-fix users' designs instead of editing them manually and resolves many common issues by changing the color space from RGB to CMYK, turning text into curves, and keeping the design within the bleed area.
In this tutorial, we'll learn how to connect an editor with preflight capabilities to a business card, configure product specifications, and set up rules that can warn or restrict end-users during the preflight step.

Prerequisites
You must have an account with Customer's Canvas linked to your online store. The preflight configuration should also be enabled for your online store. If you are missing any tools for this tutorial, please contact our support team.
Adding a product to your store
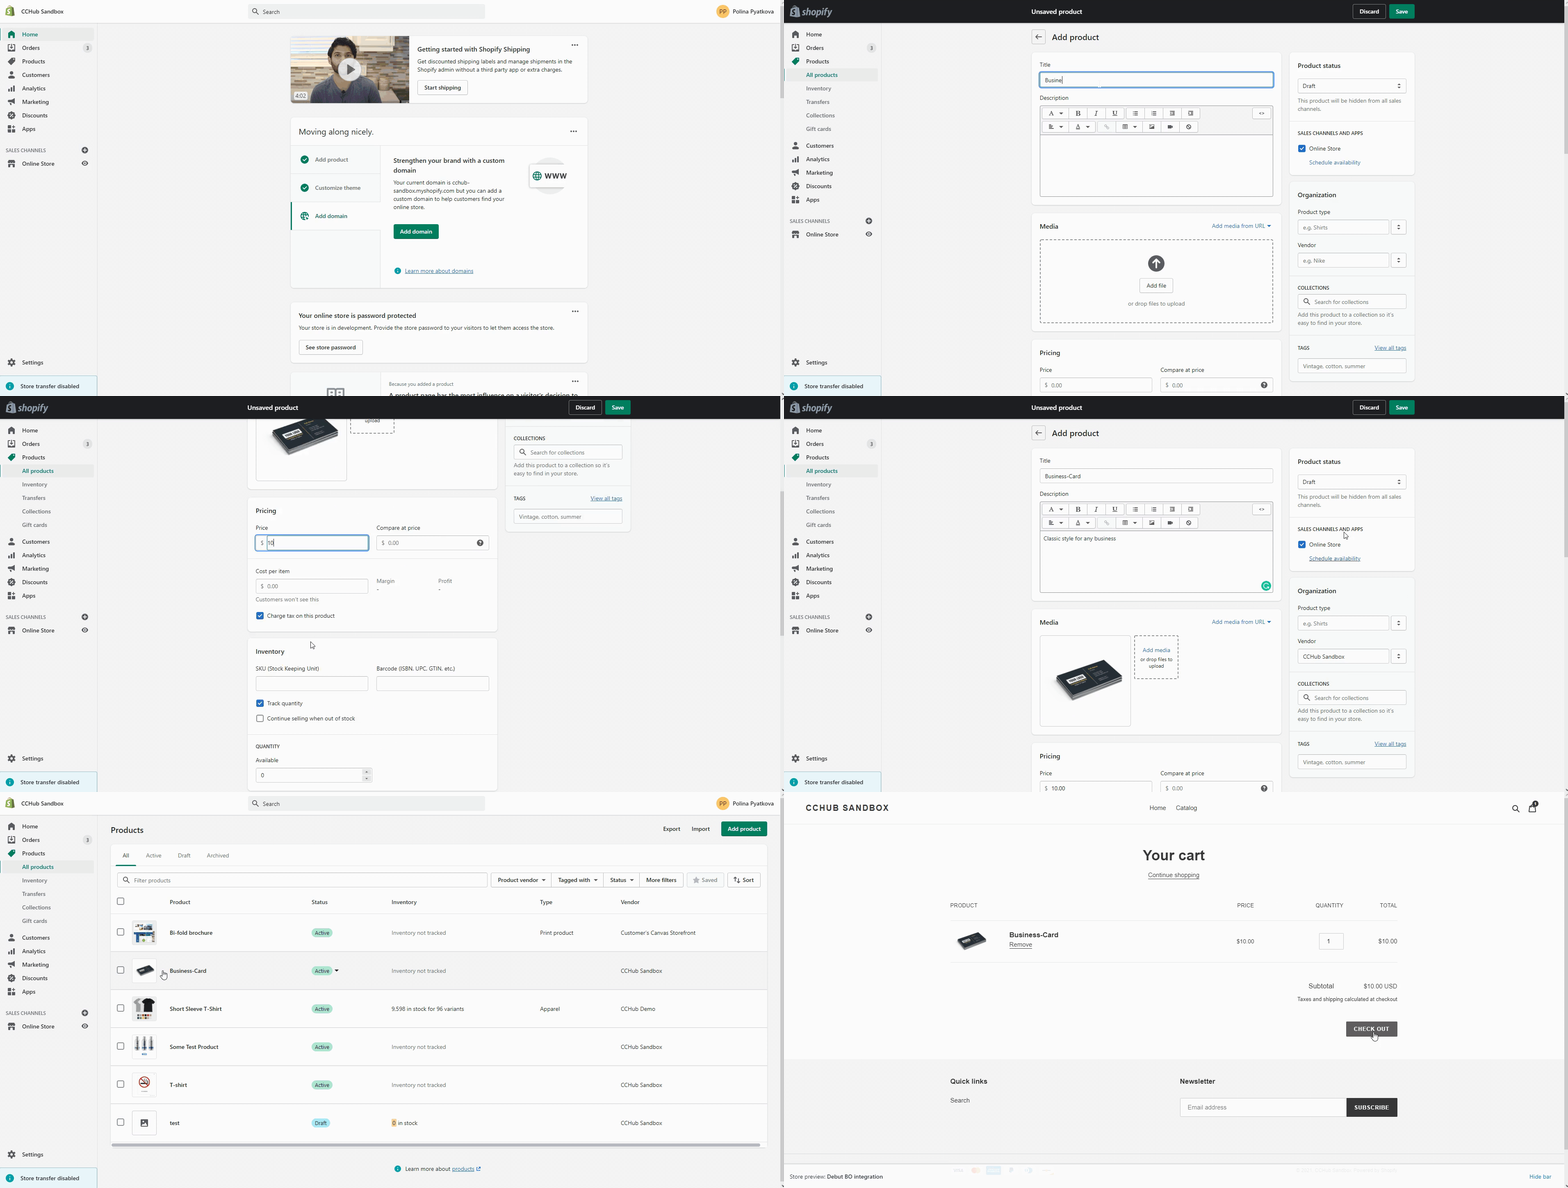
You must first add the product to your Shopify store account. You can find the fewest possible steps necessary for the Customer's Canvas integration below. To explore the full list of product creation options, please refer to the Shopify documentation.
Open your Shopify account. Click Products in the left menu bar. Select Add product > type in a Title (Business-Card) > add Price, fill in other fields as you like (description, product image, variants). To create a product, you may need a product image depicting a specific business card design.
Disable Track quantity.
In the right menu bar, add a Vendor (your store).
Toggle on the Active product status to publish the business card. Click Save.
Check the published business card by opening it in your store. Click on the eye icon (Preview on Online Store).

Configuring the editor with preflight capabilities
Step 1. Create a product specification.
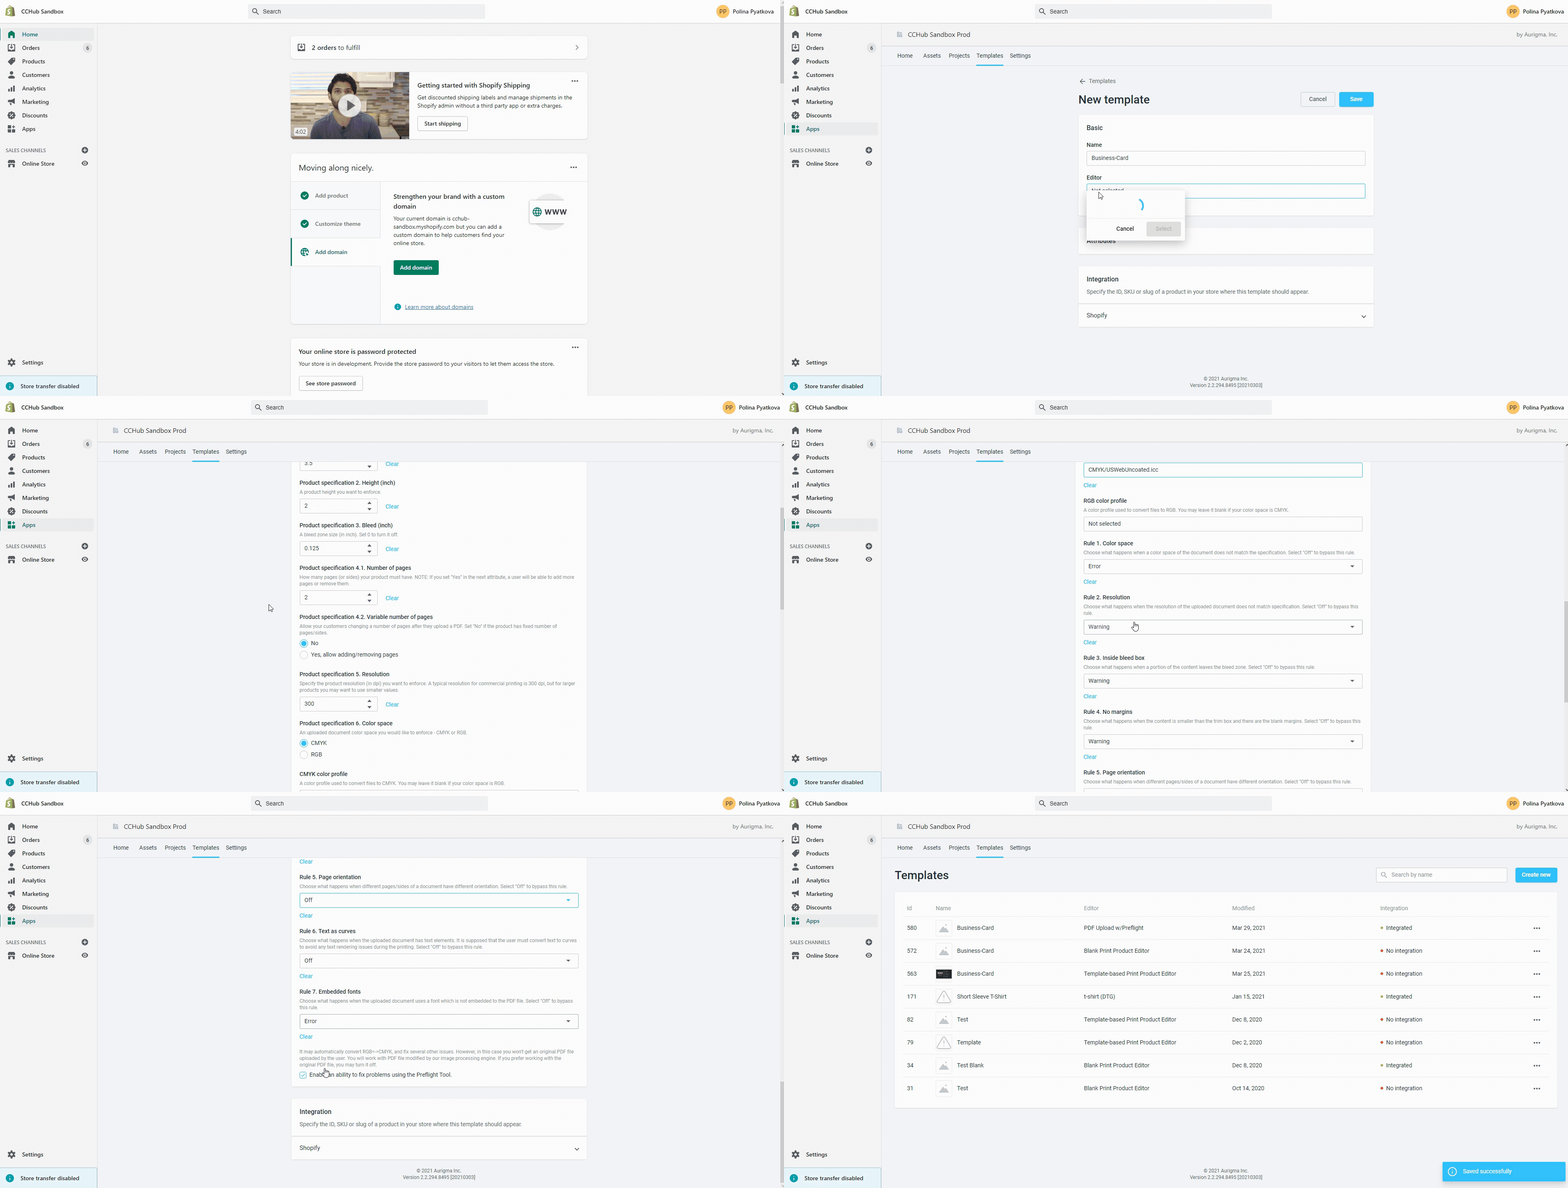
Click Apps in the left menu bar > open Customer's Canvas. Select Product specification > Create new. Give a relevant Name to the specification.
Note
We recommend naming specifications in the same way as products are named in the real store. In our case, it is the business card.
Step 2. Fill in the attributes.
The distinguishing feature of the preflight setup is that in addition to the product specifications, you must configure rules that can warn or restrict end-users during the preflight step. Let's start by looking at the business card specifications and the color profile.
- Set up Width and Height according to standard dimensions. For example, the standard business card size is 3.5 x 2 inches.
- Set up the Bleed zone. The recommended bleed for a business card is .125".
- Set up the Number of pages to 2.
- Set No to a Variable number of pages if you want to prevent end-users from changing a number of pages after they upload a PDF.
- Leave the Resolution on 300 dpi.
- Set up CMYK as a color space, and then select the required CMYK color profile from the list of suggested ones.
- Leave the RGB color profile unselected.
Now, we come to set up the rules.
Rule 1. Set Error for the color space if the document doesn't match the CMYK color.
Rule 2. Set Warning for files with a resolution less than 300 dpi.
Rule 3. Set Error for a file when a portion of the content leaves the bleed zone.
Rule 4. Set Error for a file when the content is smaller than the trim box and there are blank margins.
Rule 5. Toggle off the rule for page orientation.
Rule 6. Toggle off the rule for text as curves.
Rule 7. Set Error for fonts that are not embedded into the PDF file.
Enable the ability to auto-fix problems using the Preflight tool.
Step 3. Connect the product specification.
In the Integration field, you need to Connect the specification to the product from the previous section.
- Select Shopify > in the left drop-down list, find a product you want to connect to the editor. You can type part of the product name to filter the list.
- Click Connect > Save.
Next, watch this video to see the whole process of creating a specification for adding preflight capabilities to your product:

Tip
You may find more details about the Product specifications in the Admin Guide section of Help Center.
Testing the editor integration
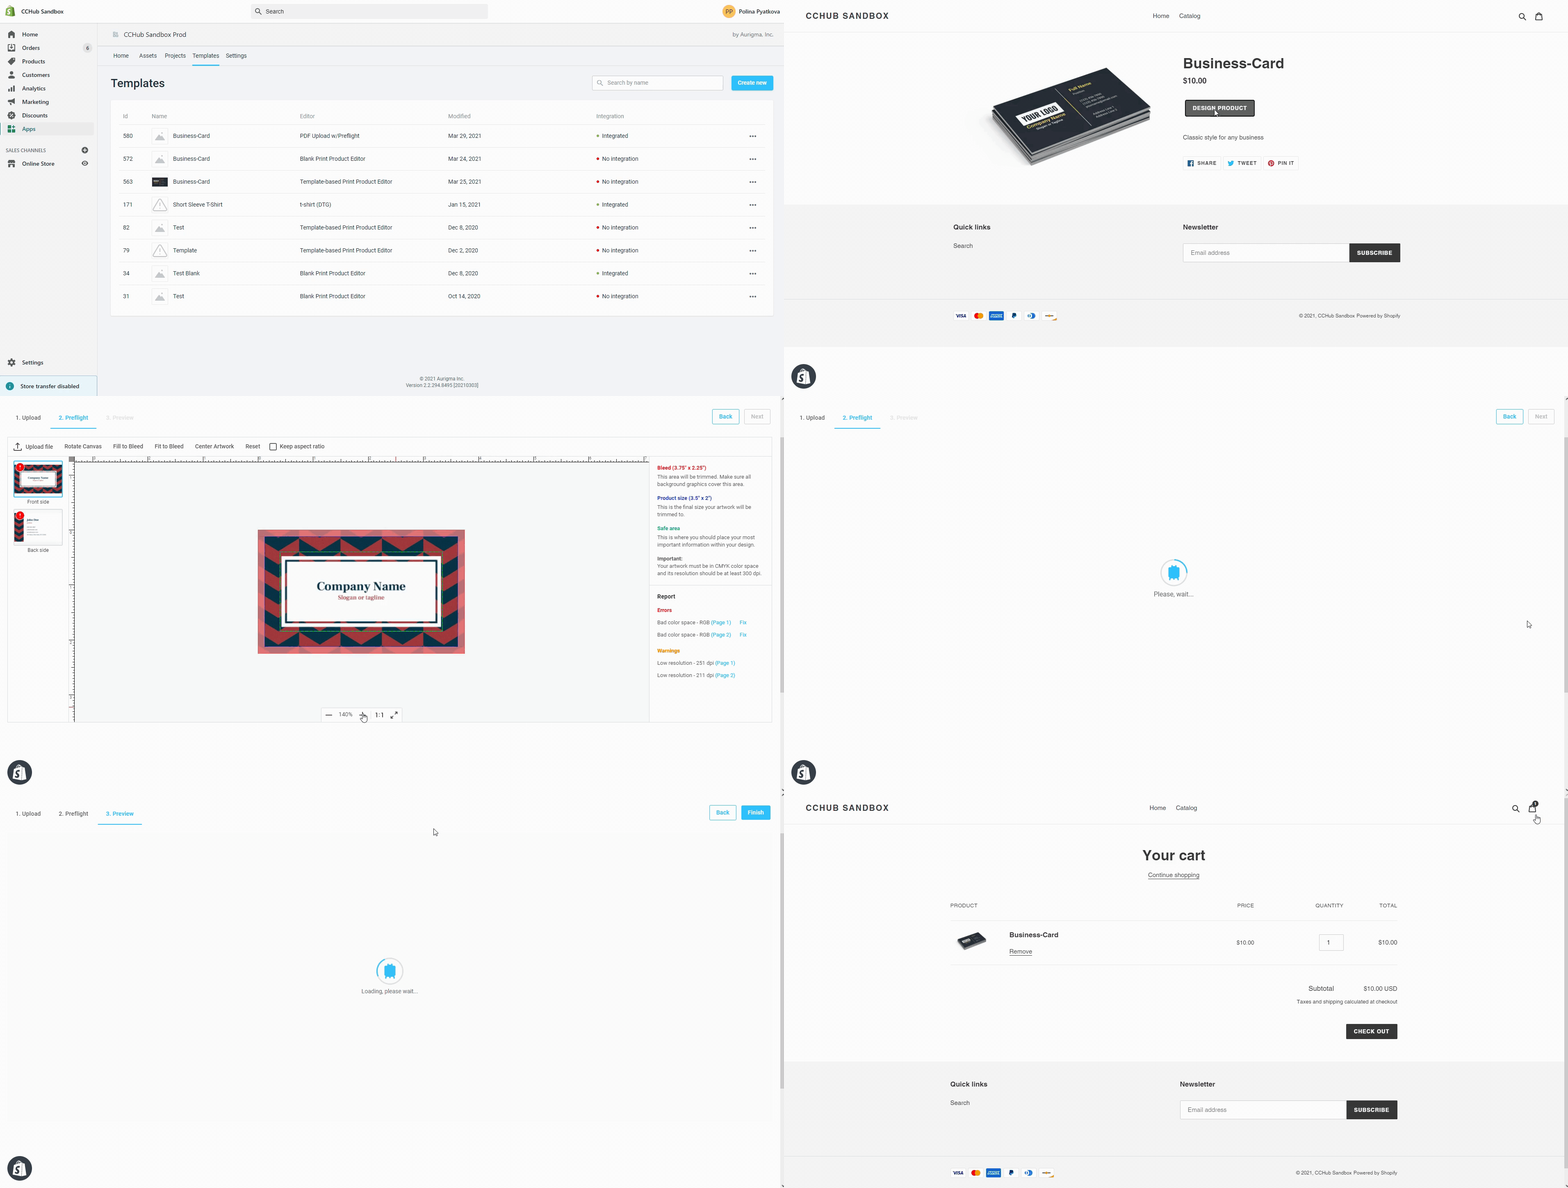
Congratulations! You've just taken a big step to improve your store with web-to-print capabilities. Now, we recommend that you make sure everything is in working order. We suggest that you upload these PDF files with the wrong color space and low resolution to the editor and test that the preflight tool is working properly.
Important
Your customers can upload files in PDF, JPEG, JPG, GIF, TIF, PNG, PSD, and AI formats. If end-users upload a design in PSD format, the fonts used in this file must be pre-installed on the system in the Assets section.

This is just one of the approaches to test the editor integration. If you want to check the work in other ways, for example, by testing the entire ordering process, look at the following tutorial.