Testing an editor integration
- Last updated on May 27, 2022
- •
- 5 minutes to read
To ensure that the web-to-print integration was successful, it's important to test all the settings. There are three main approaches to doing this:
- Check the integration in the test window mode.
- Test settings in the online store.
- Test the entire ordering process.
Here, we'll test the connection of the template-based editor to the business card product. You can check that other editors are working in the same way.
Prerequisites
You must have an account with Customer's Canvas to complete this task, and the account must be linked to your online store. If you don't have an account yet, please contact our support team.
For this tutorial, we will assume that you have already connected the template-based editor or another editor to the Shopify product.
Checking the connection of the editor to the product
Step 1. Check the integration in the test window mode.
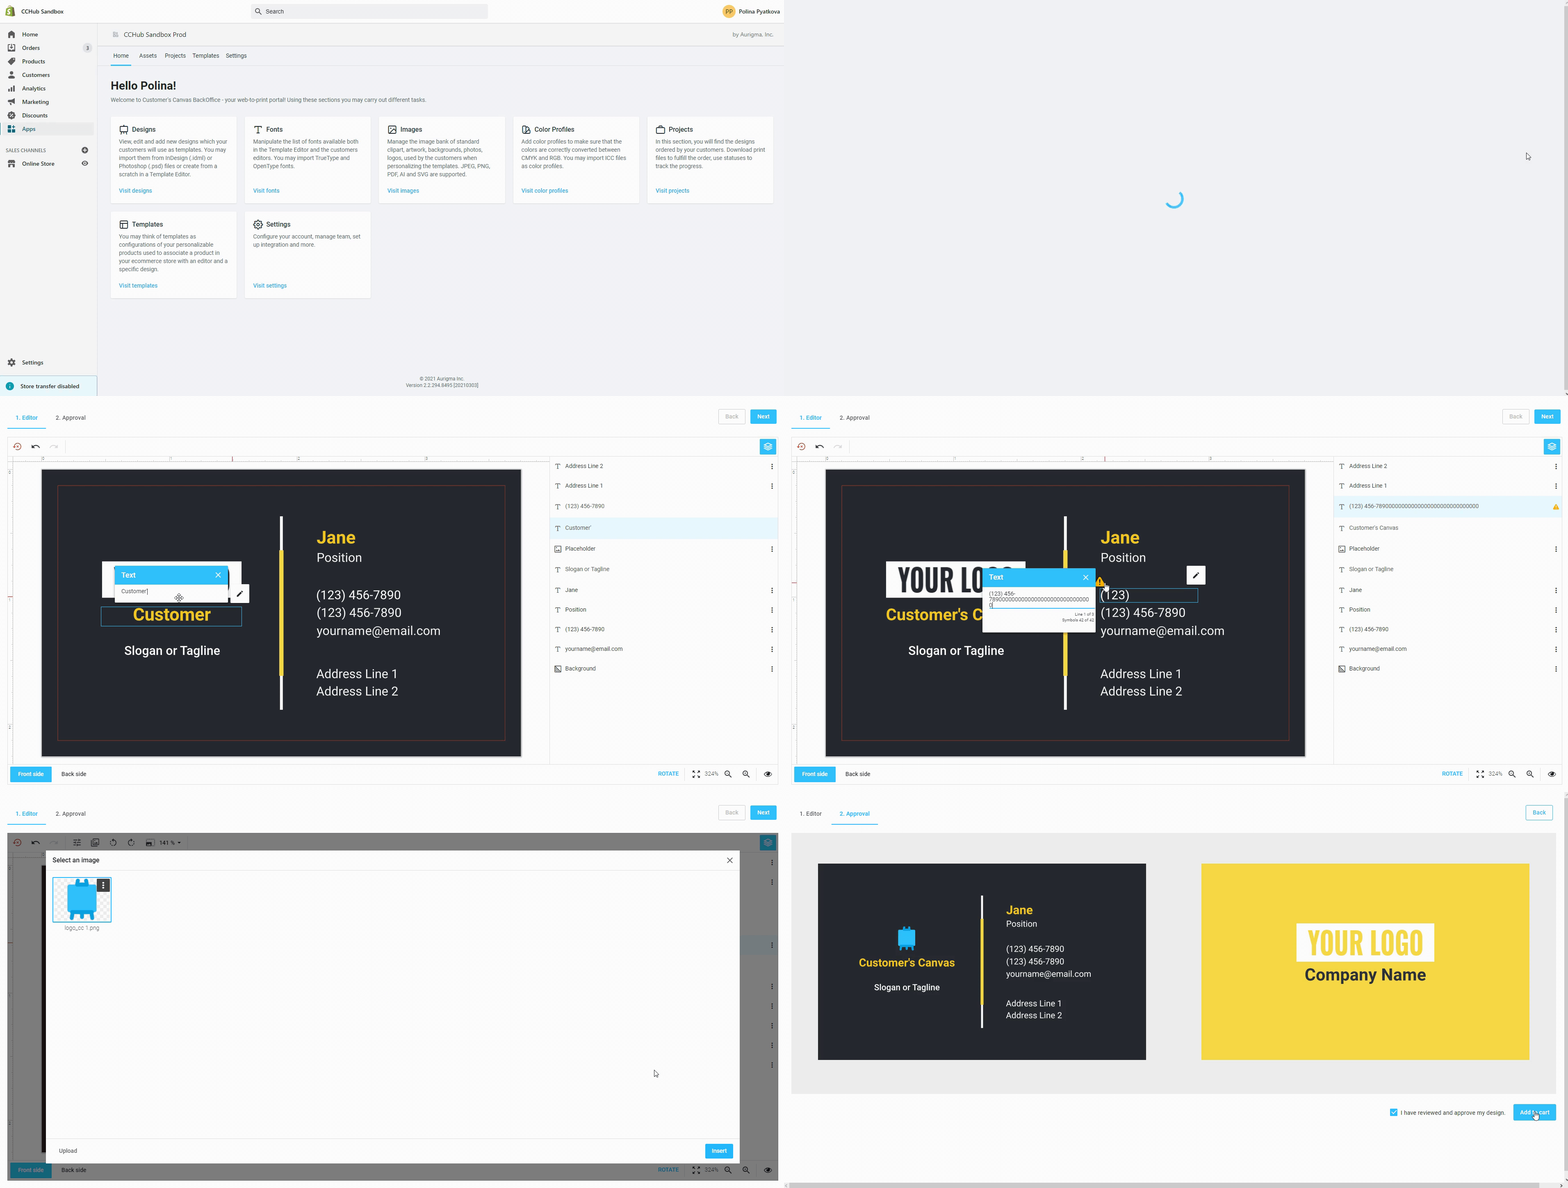
The first approach allows you to make sure that the editor settings are correct directly within the Customer's Canvas admin panel and without opening the online store.
- Open Product specification and find the necessary specification.
- On the right side of the screen, open the drop-down list by clicking on the ellipsis icon > select Test.
- In the window that opens, edit the front and back sides of the business card to test all the settings. Try to change the name, image, and other fields.
- Check the behavior settings of the design elements.
- After editing the design, you can move to the Approval step to see how your future product will appear.
Note
The Add to cart button doesn't work in test mode.

Step 2. Test the editor integration in the online store.
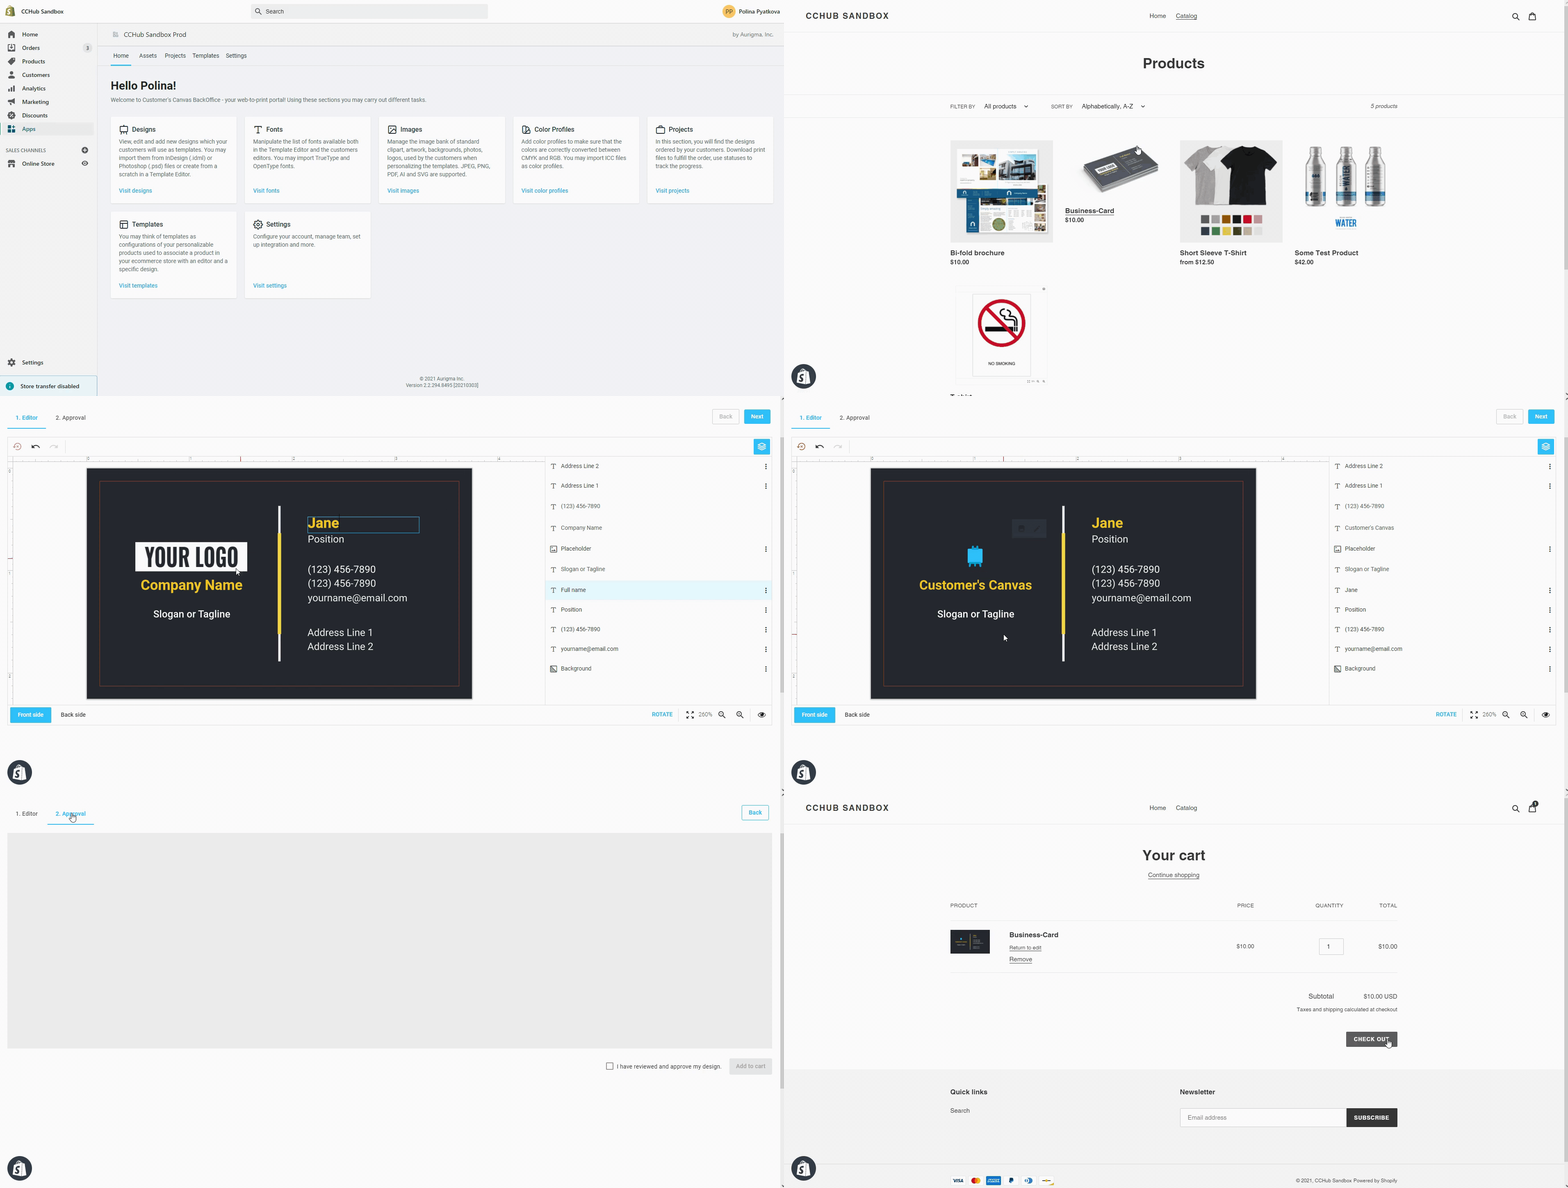
The second approach is to go to the online store, open the product page where you have connected Customer's Canvas, and follow the same journey as an end-user.
- Click on the eye icon (Preview on Online Store) in the Shopify panel left menu bar.
- Find the product in the store's catalog. Instead of the Add to Cart button, you will now see a Design Product button.
- Click Design Product. You will be redirected to the product editor. Here, you can edit the front and back sides of the business card to test all the settings. Try to change the name, image, and other fields.
- Check the behavior settings of the design elements.
- After editing the design, you can move to the Approval step to see how your future product will appear.
- Click on I have reviewed and approved my design > Add to Cart.
- You'll be taken to the Your cart page > check the product and click on Check out.

Step 3. Test the entire ordering process.
We tested the editor integration in the previous step, but if you want to go further and check the entire ordering process, including payment and project creation, Shopify allows you to do this in three ways:
- Connect a special Bogus Gateway to your store.
- Conduct real transactions with refunds.
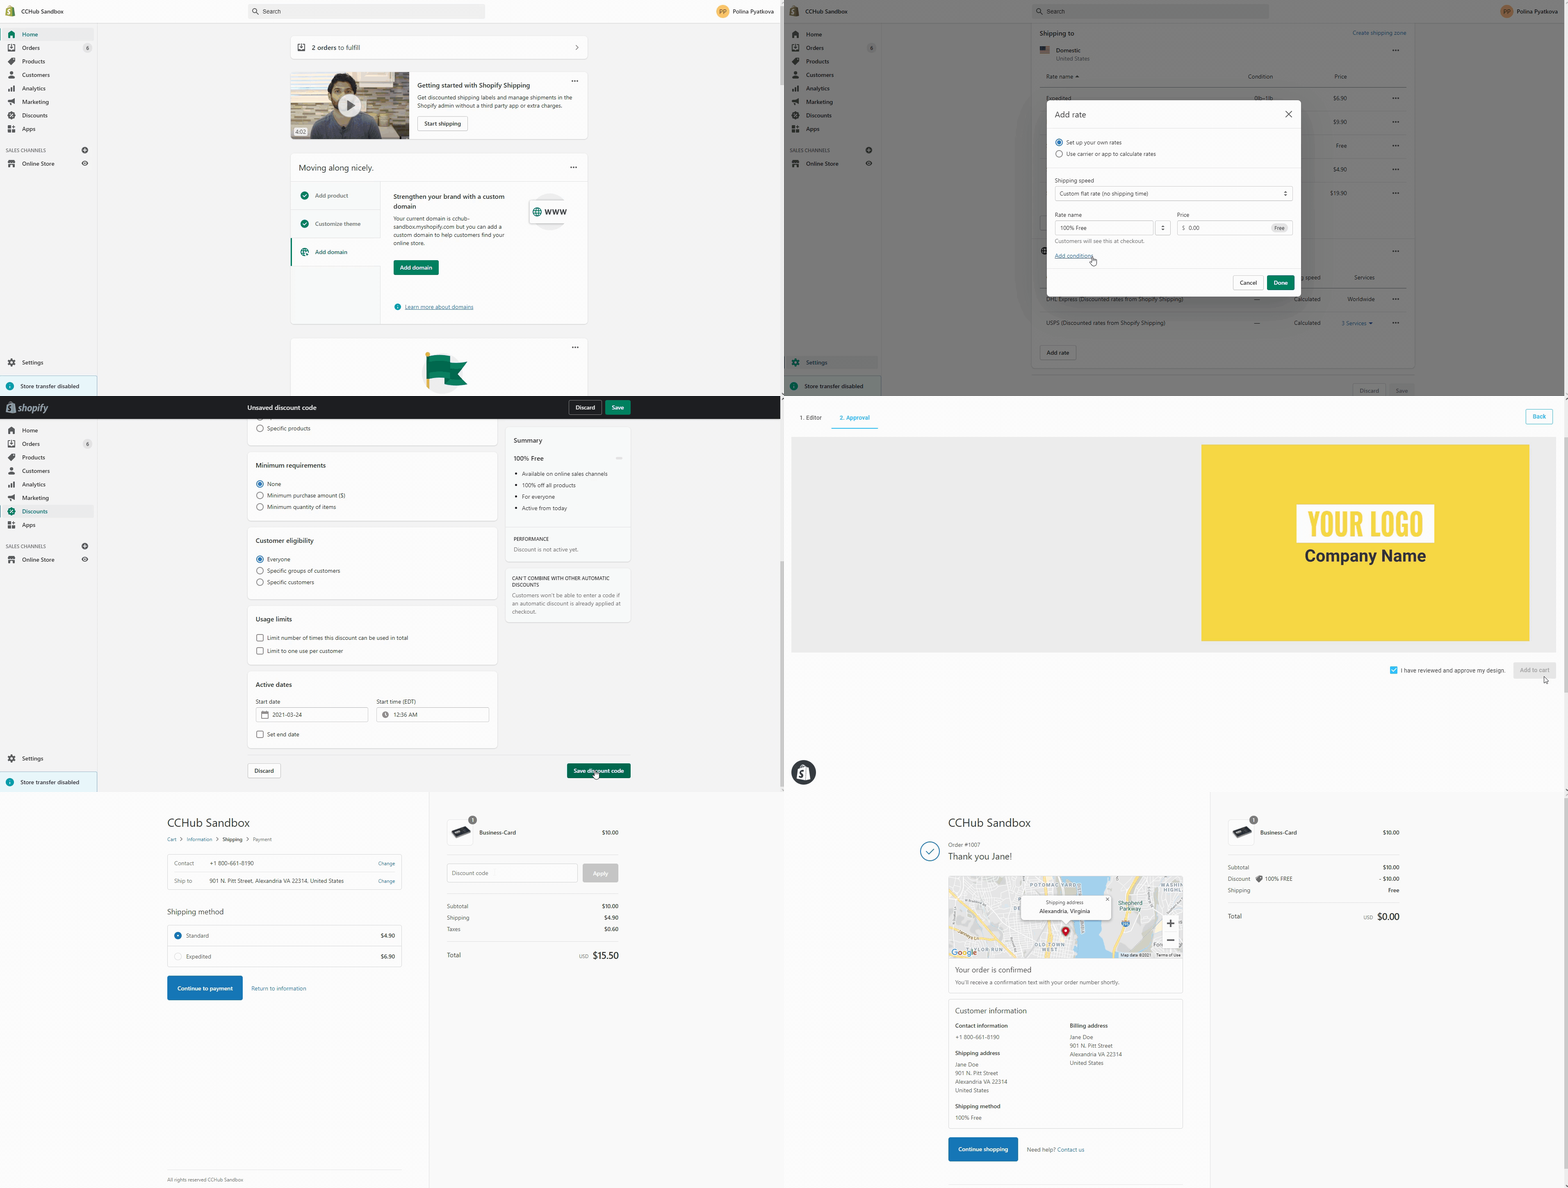
- Create a 100% discount and free shipping.
Connect a Bogus Gateway.
You can set up a special Bogus Gateway to your store for making test purchases. How to connect and use the Bogus Gateway is described in the Shopify documentation in the Placing a test order article. After connecting this gateway, you can make payments with a pseudo-card and without spending real money.
The Bogus Gateway is a convenient way to test the integration during the development stage when there are no visitors to your store. If you are working on an existing store where people are already placing orders, however, this approach will not work because these customers can also make purchases through the Bogus Gateway. In this case, we recommend conducting real transactions with refunds to test the process.
Conduct real transactions with refunds.
Of course, you don't really want your card to be charged for a test transaction. The obvious solution is to perform the refund immediately after such a transaction, as described in the section about real transactions when placing a test order.
Create a 100% discount and free shipping.
Placing orders with a refund also has some limitations. This is quite often not a free operation and this method can be inconvenient if the QA engineers or other employees are doing the testing instead of the store owner. In these cases, we recommend creating a special coupon for a 100% discount and free shipping.
Do the following steps to complete the task:
- Go to your Settings > select Shipping and delivery.
- Next to the shipping profile that you want to add a shipping rate to, click Manage rates.
- Next to the zone that you want to add a rate to, click Add rate. Enter the name and amount for the rate.
- Select Add conditions > toggle on Based on order price.
- Set $0 for the Maximum price > click on Done.
- Save all settings.
For your order to be entirely free you need to create a discount code.
- From your Shopify admin, go to Discounts.
- Click Create discount code > enter the name of the discount.
- Set up the Discount value to 100% > click on Save.
Next, make a test purchase as described in Step 2 and fill in your contact information. At the Shipping stage, enter the discount code 100% free and select 100% free for the shipping method.
You can take a look at this video to see the full process of creating a discount and free shipping:

In the following tutorial, you'll learn how to manage your orders in the Projects section of Customer's Canvas.