Connecting a template-based editor to a Shopify product
- Last updated on May 27, 2022
- •
- 4 minutes to read
In this tutorial, you'll learn how to empower your customers with web-to-print by connecting the template-based editor to a business card product in a Shopify store. You should utilize the template-based editor if you want end-users to edit products based on your design rather than from scratch. As a result, your customers can order the product in your store and customize a previously prepared design.
You can input your settings in the Customer's Canvas admin panel, where even non-technical staff can set up product configurations. You can use this panel to store and manage your design assets like design files, fonts, colors, and images.
Prerequisites
There are a few things you will need before proceeding with a Customer's Canvas integration:
You must have an account with Customer's Canvas to complete this task, and the account must be linked to your online store. If you don't have an account, please contact our support team.
We'll connect an editor that is based on a pre-made business card design, so you will need to create the design and upload it to Customer's Canvas. There are three ways to do this:
You can make it in Adobe InDesign or Photoshop and upload it to Customer's Canvas.
You can also create a design in the Customer's Canvas Template Editor.
You can download and use our ready-made design.
Adding a product to your store
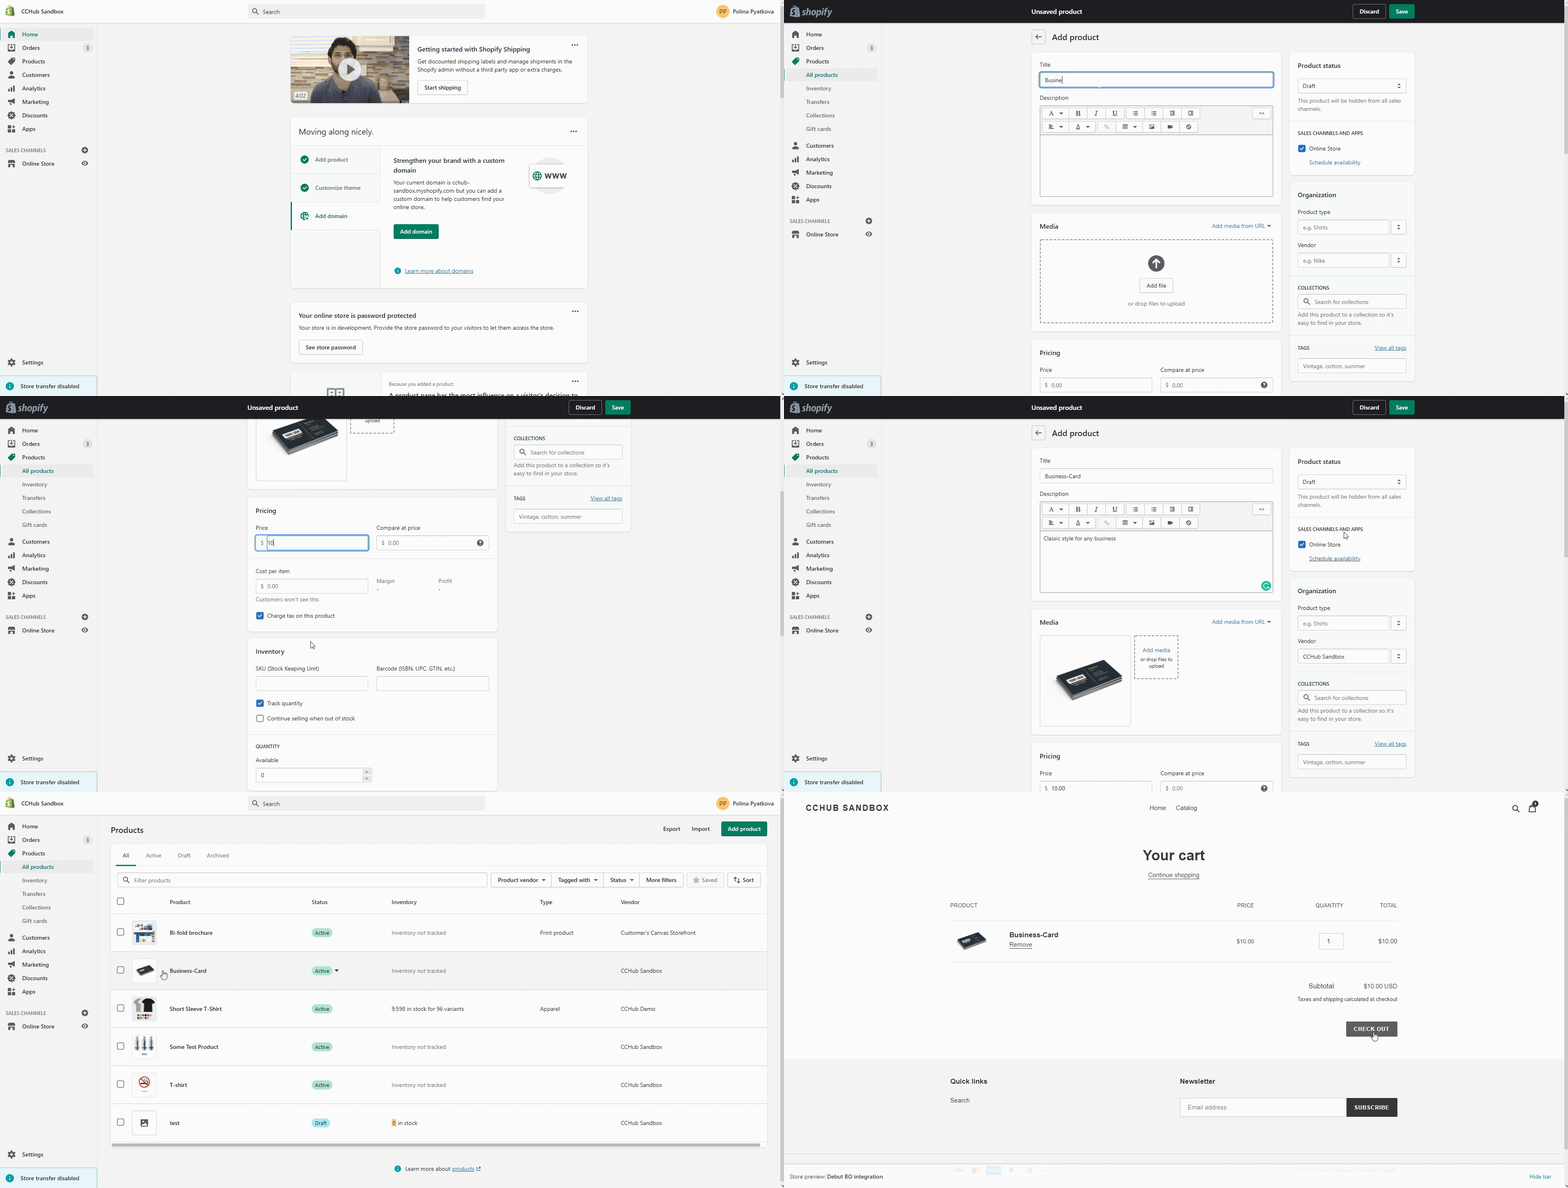
You first must add the product to your Shopify store account. Below, you can find minimal possible steps needed for the Customer's Canvas integration. You can explore the full list of product creation options in the Shopify documentation.
Open your Shopify account. Click Products in the left menu bar. Select Add product, type in a Title (Business-Card), add Price, and fill in other fields as you like (description, product image, variants). To create a product, you may need a product image depicting a specific business card design.
Disable Track quantity.
In the right menu bar, add a Vendor (your store).
Toggle on the Active product status to publish the business card. Click Save.
Check the published business card by opening it in your store. Click on the eye icon (Preview on Online Store).

Connecting an editor to the product
You have published the business card and your store is ready to be integrated with Customer's Canvas. In this section, you'll create a Product specification to connect the editor to the business card and configure the necessary attributes.
Step 1. Create a product specification.
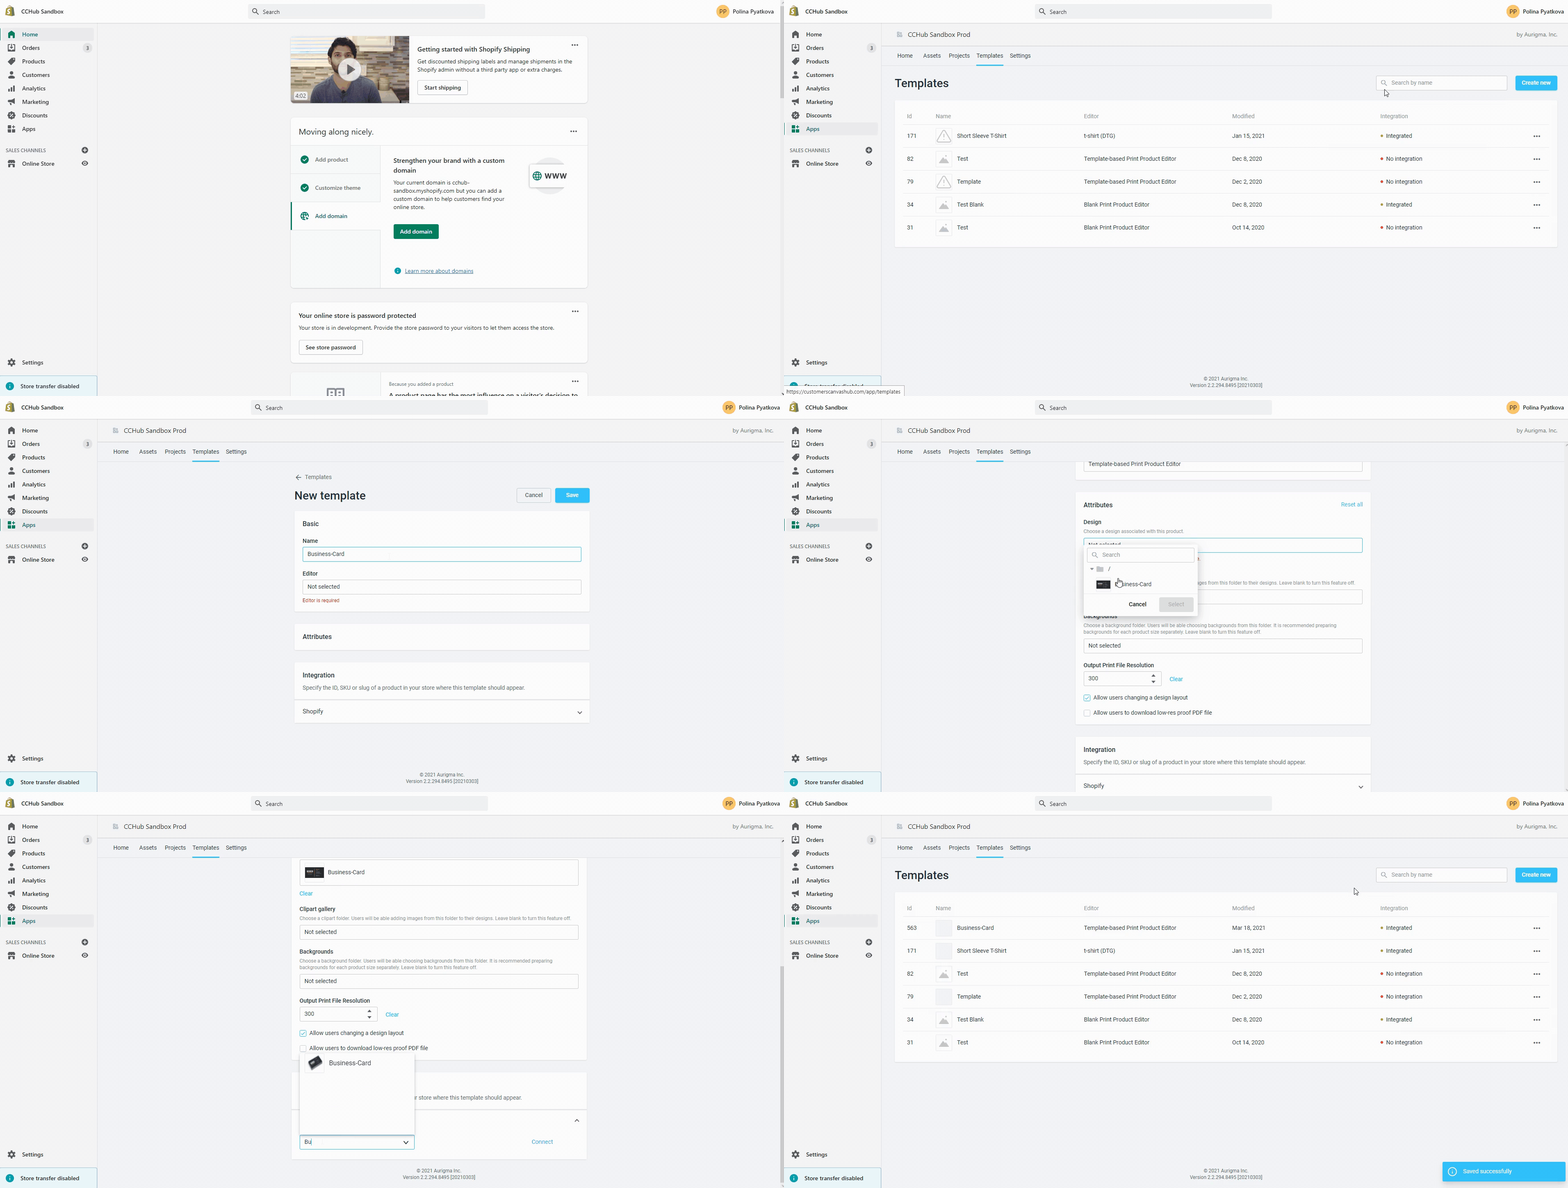
Click Apps in the left menu bar and open Customer's Canvas. Select Product specification > Create new. Give a relevant Name to the specification.
Note
We recommend naming specifications in the same way as product are named in the real store. In our case, it is the business card.
Step 2. Select an editor.
Select an Editor. In this field, you need to select a config file with the editor settings for your product. Choose Template-based Print Product Editor > choose Select.
Note
The config file is located in the admin panel of the tenants of the Customer's Canvas application owner (Aurigma Inc.) You can't edit it. According to the selected config file, you have access to fill in the editor attributes.
Step 3. Fill in the attributes.
Each editor has a set of required Attributes. Let's fill in the attributes necessary for the template-based editor to work properly.
- Select the Design that you want to use as a template in our editor.
- Don't select clipart or background images.
Tip
If you want to provide end-users with a standard set of images, upload them in advance to the Images section, divide them into folders, and specify the appropriate subfolder in these attributes.
This setting is described in more detail in the tutorial for connecting the blank print product editor (available soon).
Leave the Output Print File Resolution on 300 dpi.
Leave the check mark enabled on Allow users changing a design layout if you want to allow end-users to move design elements. You can restrict customers by setting the behavior of design elements.
Leave the check mark disabled on Allow users to download low-res proof PDF file if you want to prevent end-users from downloading preview files. These PDF files are rasterized at low resolution.
Step 4. Connect the product specification.
In the Integration field, you need to Connect the specification to the product from the previous section.
- Select Shopify > in the left drop-down list, find a product you want to connect to the editor. You can type part of the product name to filter the list.
- Click Connect > Save.
Next, you can watch the whole process of connecting an editor to the business card:

Tip
You may find more details about the Product specifications in Admin Guide section of Help Center.
Testing the editor integration
Congratulations! You've just taken a big step to improve your store with web-to-print capabilities. Now, we recommend that you make sure everything is in working order. We have prepared a separate tutorial for testing the editor integration.
If you need to give end-users the total freedom to personalize the product, refer to our tutorial about blank editor integration.