Connecting a blank editor to a Shopify product
- Last updated on May 20, 2022
- •
- 5 minutes to read
In certain situations, you might prefer to give end-users total freedom to personalize all the design elements of a product. We suggest integrating a blank editor with a Shopify product for this task. This is simply a blank canvas where users can add text elements, images, backgrounds, and artwork. This approach works well for gifts and promotional products but can also be set up for other printed products with simple designs that don't require the help of a professional designer.
Working with this type of editor, you can set up the product size, bleed zones, and upload a set of images. We'll return to our business card example in this tutorial and learn how to set up editor attributes for this type of product.
Prerequisites
You must have an account with Customer's Canvas to complete this task, and the account must be linked to your online store. If you don't have it yet, please contact our support team.
Adding a product to your store
You must first add the product to your Shopify store account. You can find the fewest possible steps necessary for the Customer's Canvas integration below. To explore the full list of product creation options, please refer to the Shopify documentation.
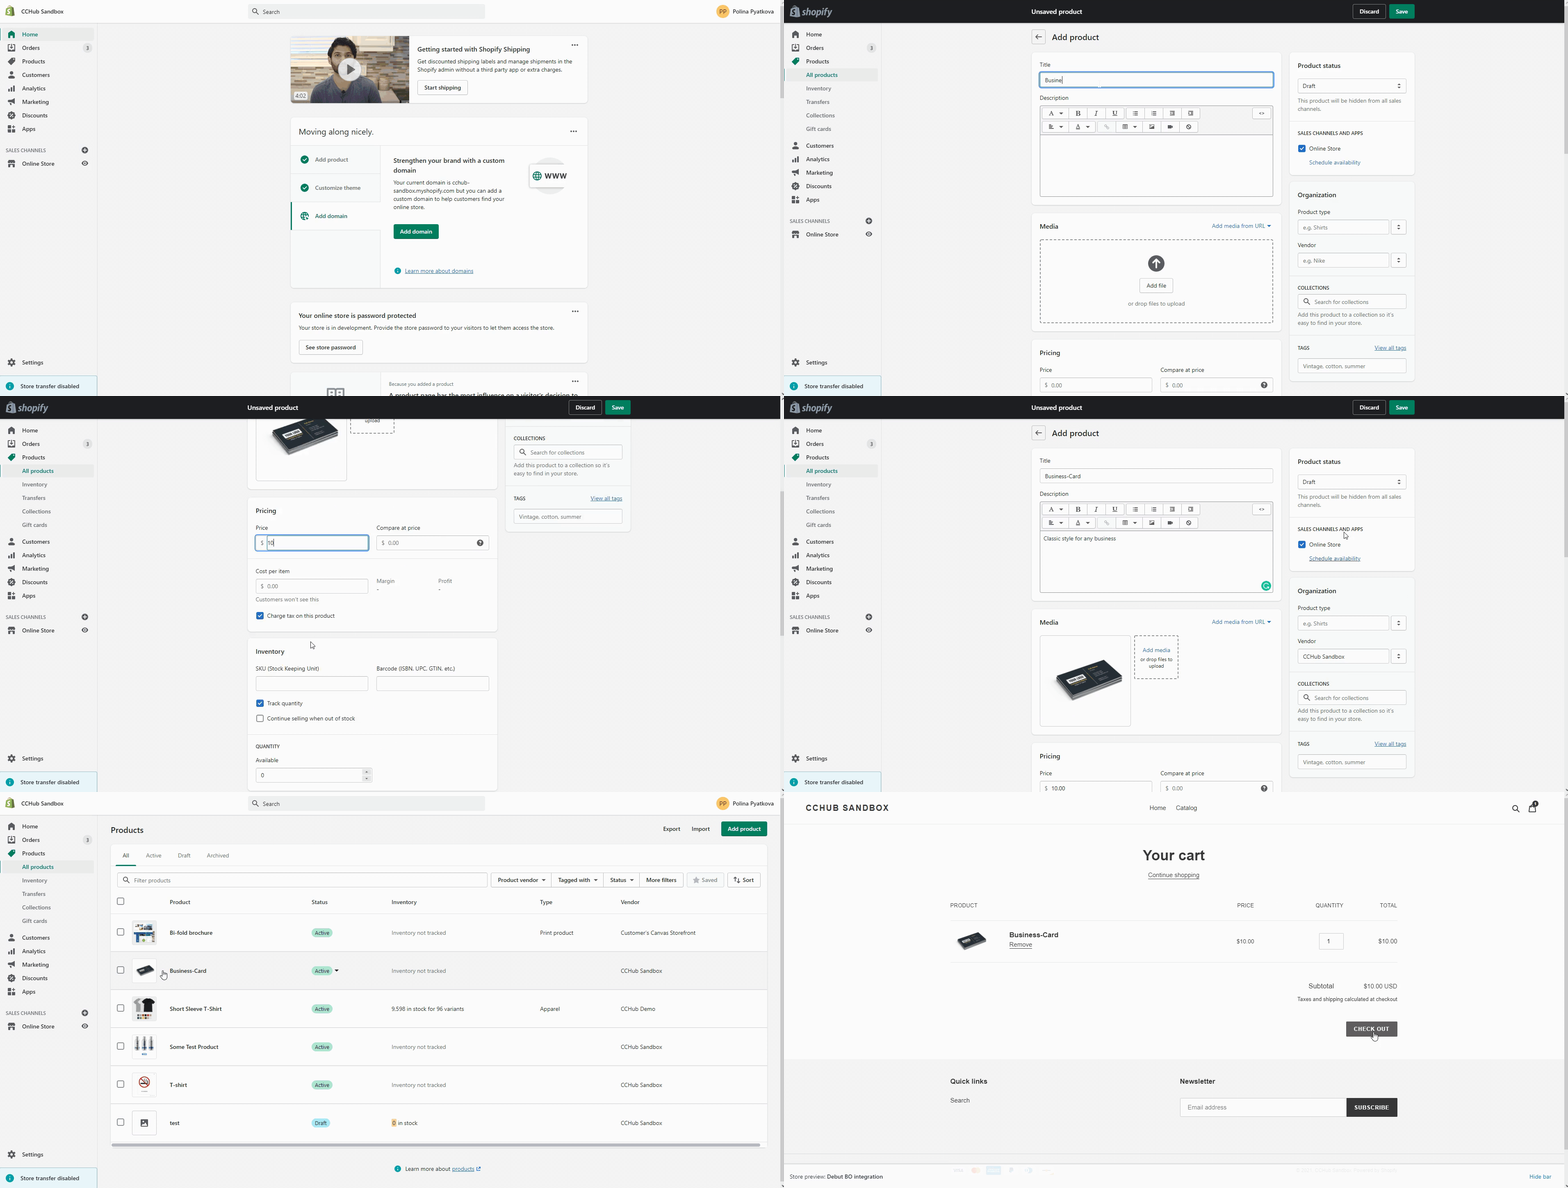
- Open your Shopify account. Click Products in the left menu bar. Select Add product > type in a Title (Business-Card) > add Price, fill in other fields as you like (description, product image, variants). To create a product, you may need a product image depicting a specific business card design.
- Disable Track quantity.
- In the right menu bar, add a Vendor (your store).
- Toggle on the Active product status to publish the business card. Click Save.
- Check the published business card by opening it in your store. Click on the eye icon (Preview on Online Store).

Creating a product specification for connecting a blank editor
When you have published the business card, you can proceed further and connect the editor. In this section, you'll create a Product specification to connect the editor to the business card and configure the necessary attributes.
Step 1. Upload the necessary images.
To customize the product design, your customers may need images like backgrounds, icons, or clipart. Although they can upload their own files, it's not likely that your users have a vast library of high-quality professional images. It's a good idea to provide them with a preloaded set of images in Assets (click here to download the files).
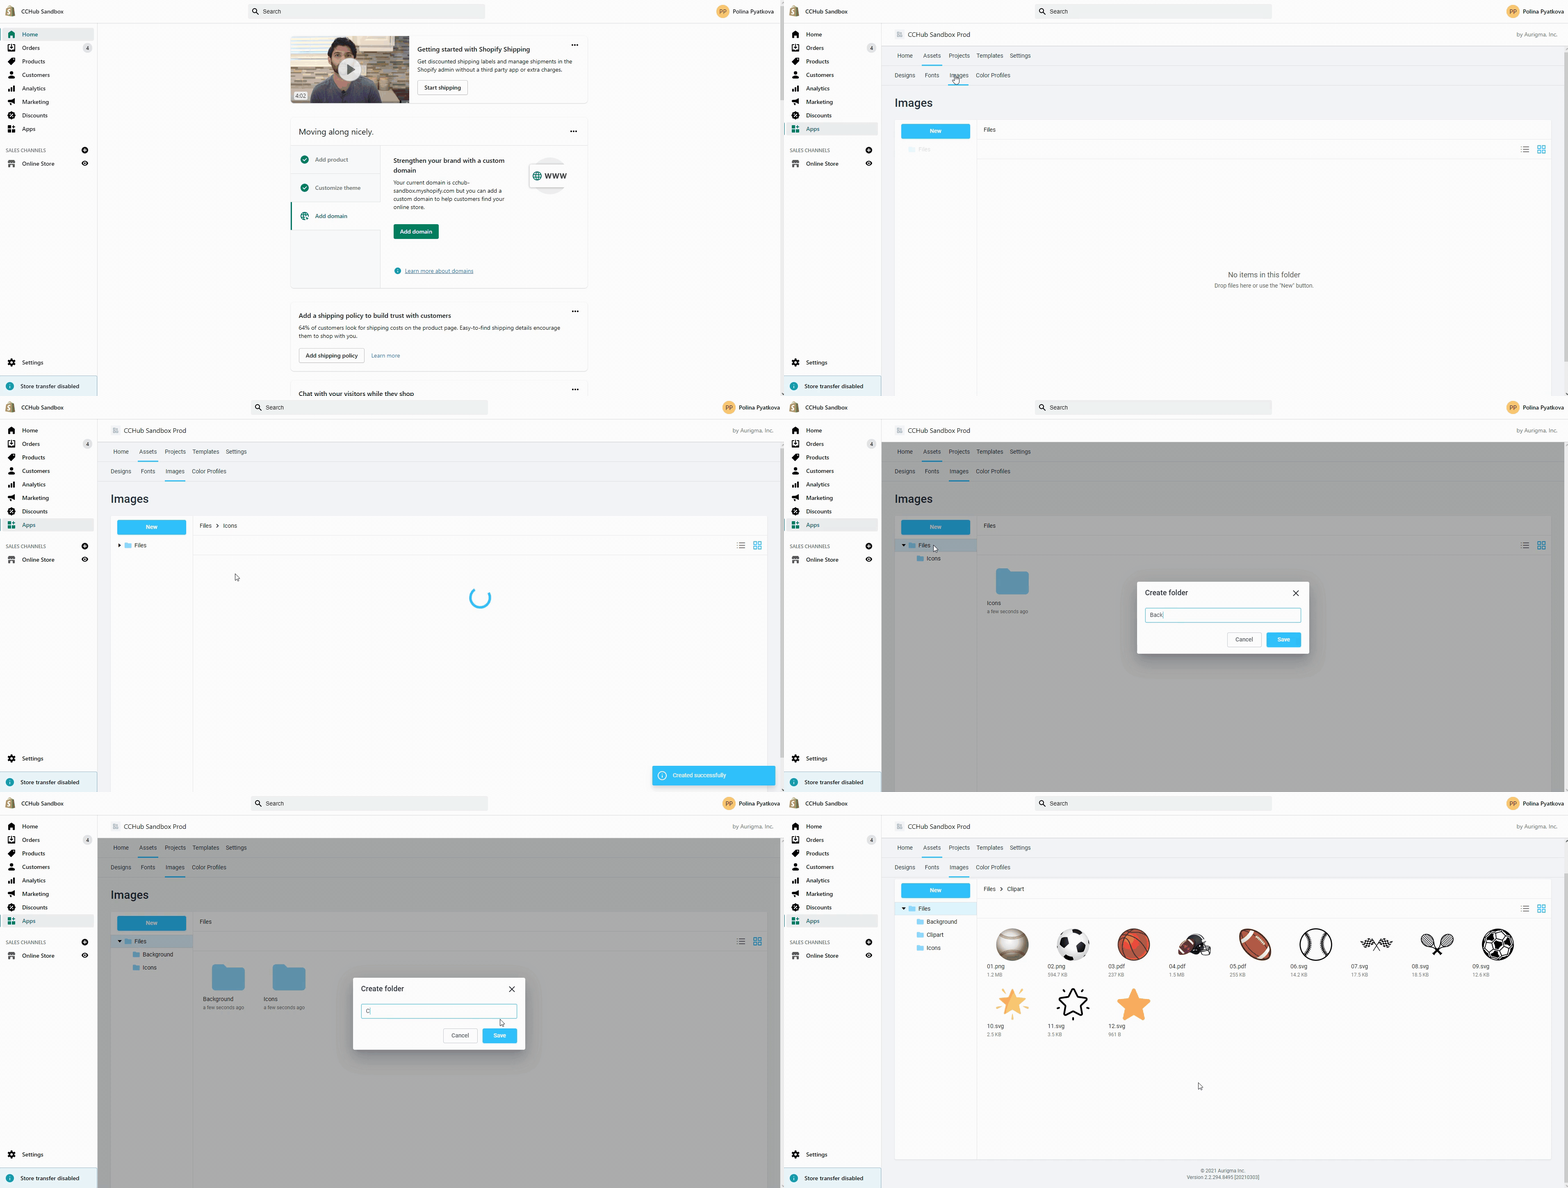
- Click Apps in the left menu bar > open Customer's Canvas.
- Go to Assets > Images. Create a new folder: click New > add the name Icons. Then drag and drop images or click Import.
- Do the same for Backgrounds and Cliparts.
Tip
If you have a large number of images, then you should consider organizing them into subfolders, for example, by categories.
You can upload images in vector or raster formats, such as PNG, JPG, PDF, SVG, and others. The behavior of the images you insert may vary depending on the file format.
For example, SVG files can be recolored by the end-user, so they should be used for icons or simple clipart.
Vector PDF files are great for backgrounds because they can be easily resized without losing quality. You can reuse the same backgrounds with different product sizes and not worry about pixilation.
You can use JPEG, PNG, and other raster image formats as well, but you need to be mindful of the size. If the user resizes it or inserts it as a background for a large product, then the resolution may be too low for high-quality printing.

Step 2. Create a product specification.
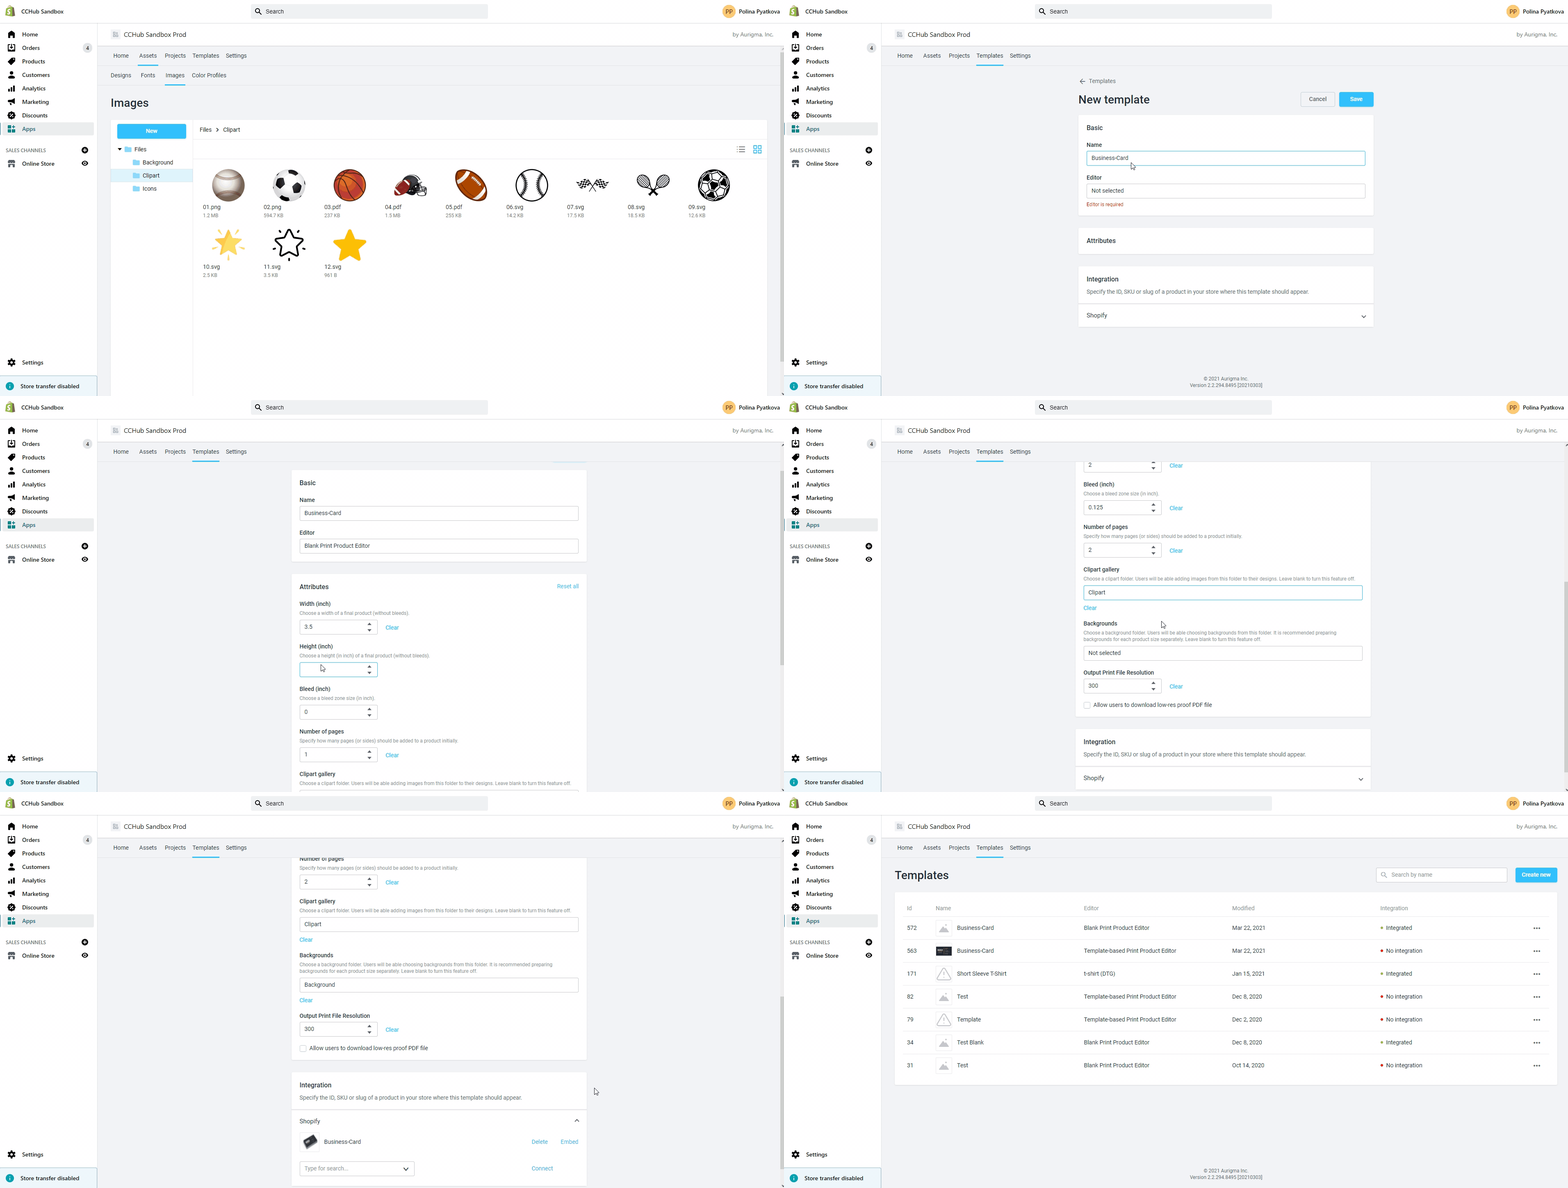
In Customer's Canvas, select Product specification > Create new. Give a relevant Name to the specification.
Tip
We recommend naming specifications in the same way as products are named in the real store. In our case, it is the business card.
Step 3. Select an editor.
Select an Editor. In this field, you must select a config file with the editor settings for your product. Choose Blank Print Product Editor > click on Select.
Note
The config file is located in the admin panel of the tenants of the Customer's Canvas application owner (Aurigma Inc.) You can't edit it. According to the selected config file, you have access to fill in the editor attributes.
Step 4. Set up the editor attributes.
Each editor has a set of required Attributes. Let's fill in the attributes necessary for the blank editor to work properly.
- Set up Width and Height according to standard dimensions. For example, the standard business card size is 3.5 x 2 inches.
- Set up the Bleed zone. The recommended bleed for a business card is .125".
- Set up the Number of pages to 2.
- Select the Clipart folder that you created earlier as the Clipart gallery.
- Select the Backgrounds folder that you created earlier as the Backgrounds.
- Leave the Output Print File Resolution on 300 dpi.
- Leave the check mark disabled on Allow users to download low-res proof PDF file if you want to prevent end-users from downloading preview files. These PDF files are rasterized at low resolution.
Step 5. Connect the business card to the editor.
In the Integration field, you need to Connect the product specification to the product from the previous section.
- Select Shopify > in the left drop-down list, find a product you want to connect to the editor. You can type part of the product name to filter the list.
- Click Connect > Save.
Check out the video below to watch the whole process of creating a product specification to connect to the blank editor.

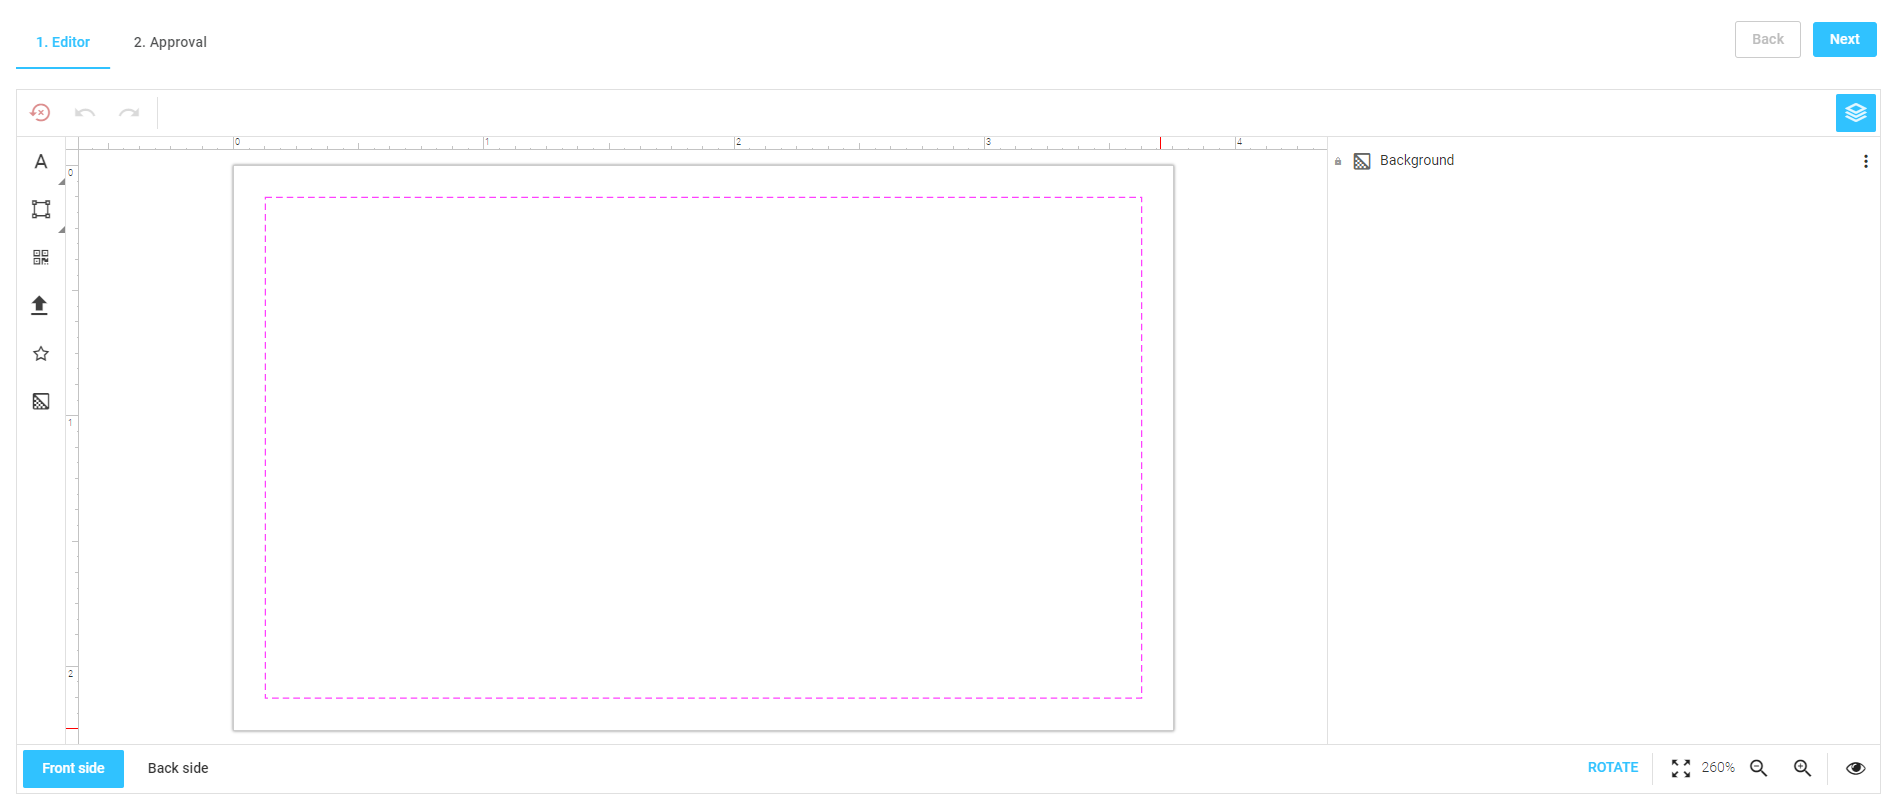
As you can see in the image below, end-users will have a blank canvas to personalize the business card design. The blank area is based on the previous configurations. The uploaded backgrounds and clipart will be available in the left menu bar.

Tip
You may find more details about the Product specifications in the Admin Guide section of Help Center.
Testing the editor integration
Congratulations! You've just taken a big step to improve your store with web-to-print capabilities. Now, we recommend that you make sure everything is in working order. We have prepared a separate tutorial for testing the editor integration.
You may want to improve your integration by adding a preflight check. In this case, check out our tutorial on connecting the Preflight Tool.