Working with projects
- Last updated on March 4, 2022
- •
- 3 minutes to read
When your customers make a purchase in your online store, the order information is automatically stored in your e-commerce platform in the Orders section. It contains the billing information, shipping address, and other details. However, you may wonder where do we store the product personalization data, such as a design modified by a user and a PDF print file.
To represent this information, Customer's Canvas has a special section called Projects. When an order is submitted, Customer's Canvas creates a project for each shopping cart line item which is a product associated with some of the editors. A project stores the information about the order as well as the design personalized by a customer. In other words, it contains everything you need to fulfill the customer's order.

In this tutorial, we'll learn how to manage such projects in Customer's Canvas, work with its statuses, download PDF files, and even modify users' designs if a mistake is detected. As usual, our example will be a business card product.
Prerequisites
There are a few things you will need before proceeding with working with projects:
- You must have an account with Customer's Canvas to complete this task. If you don't have it yet, please contact our support team.
- You need to add a product to your Shopify store and connect it to a template-based print product editor.
- You have to make a test order, because the project information appears after the transaction. Shopify allows making test purchases in various ways, which are described in detail in Step 3 in the tutorial about testing the editor integration.
Creating a project
Step 1. Find the project corresponding to the order number.
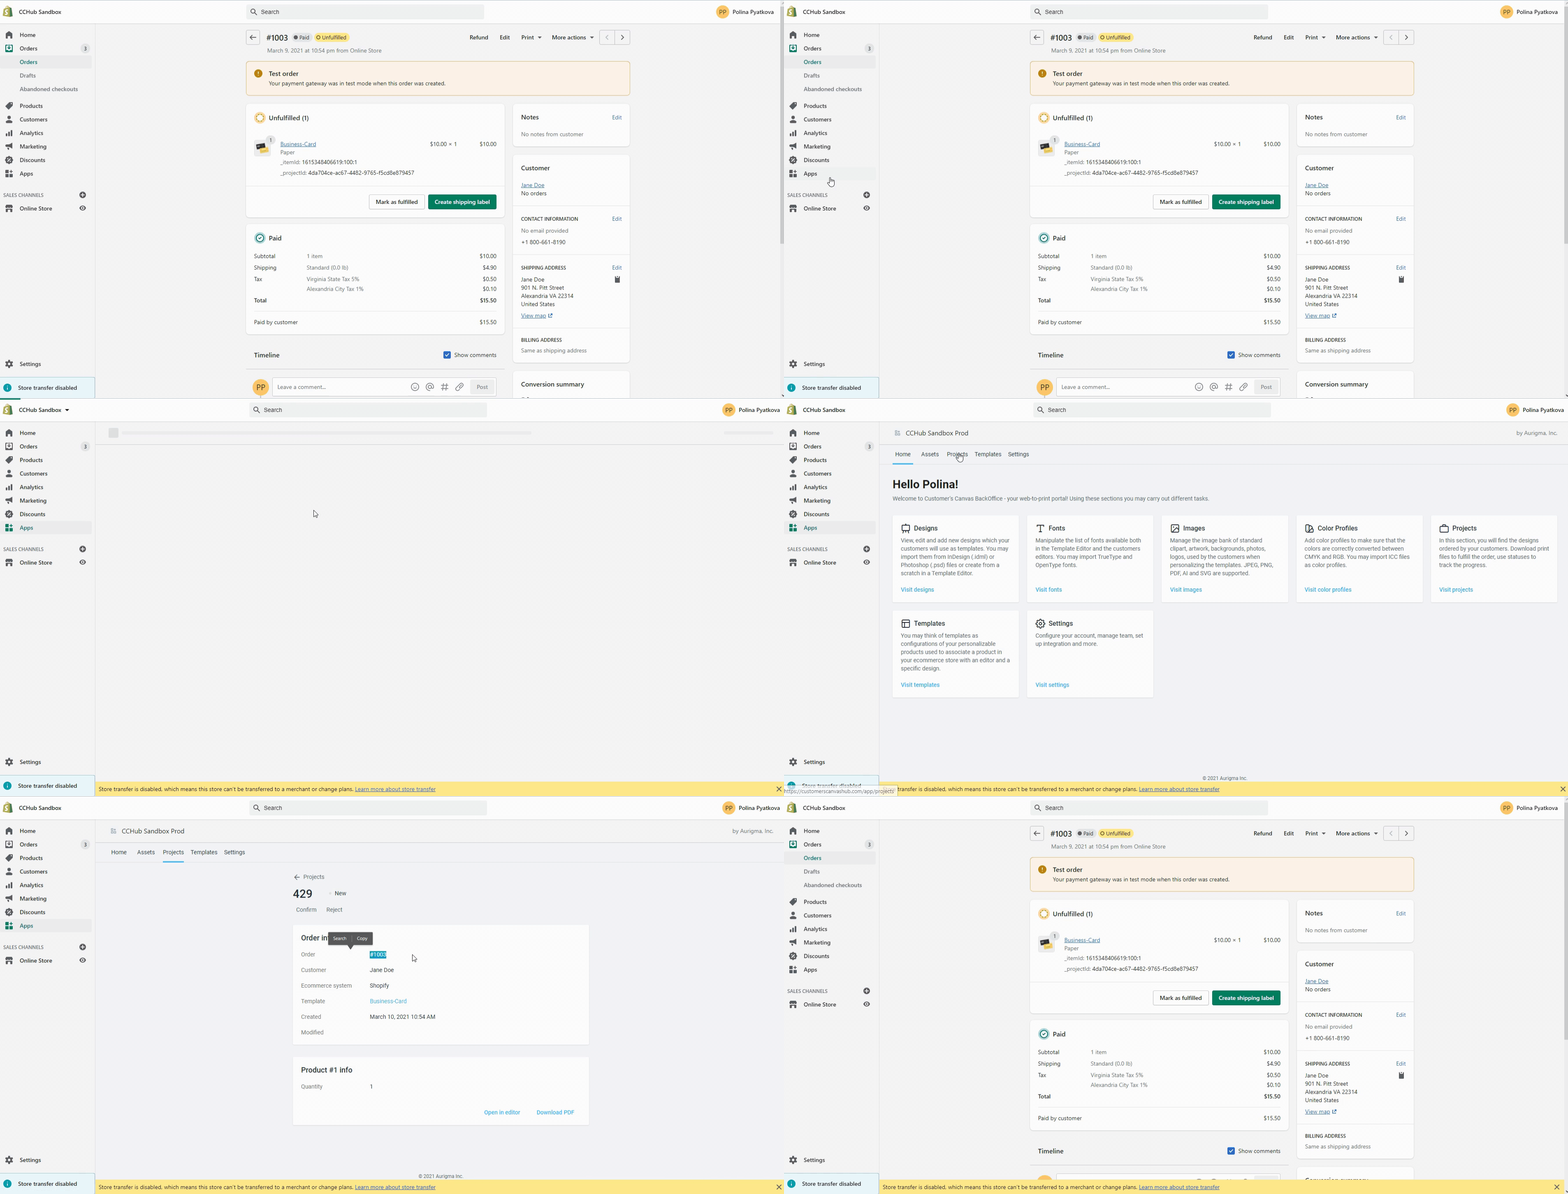
After the purchase has been made, the order information will appear in Shopify in the Orders section, then you can start working with the projects. Remember the order number, for example, in our case, it is #1003.
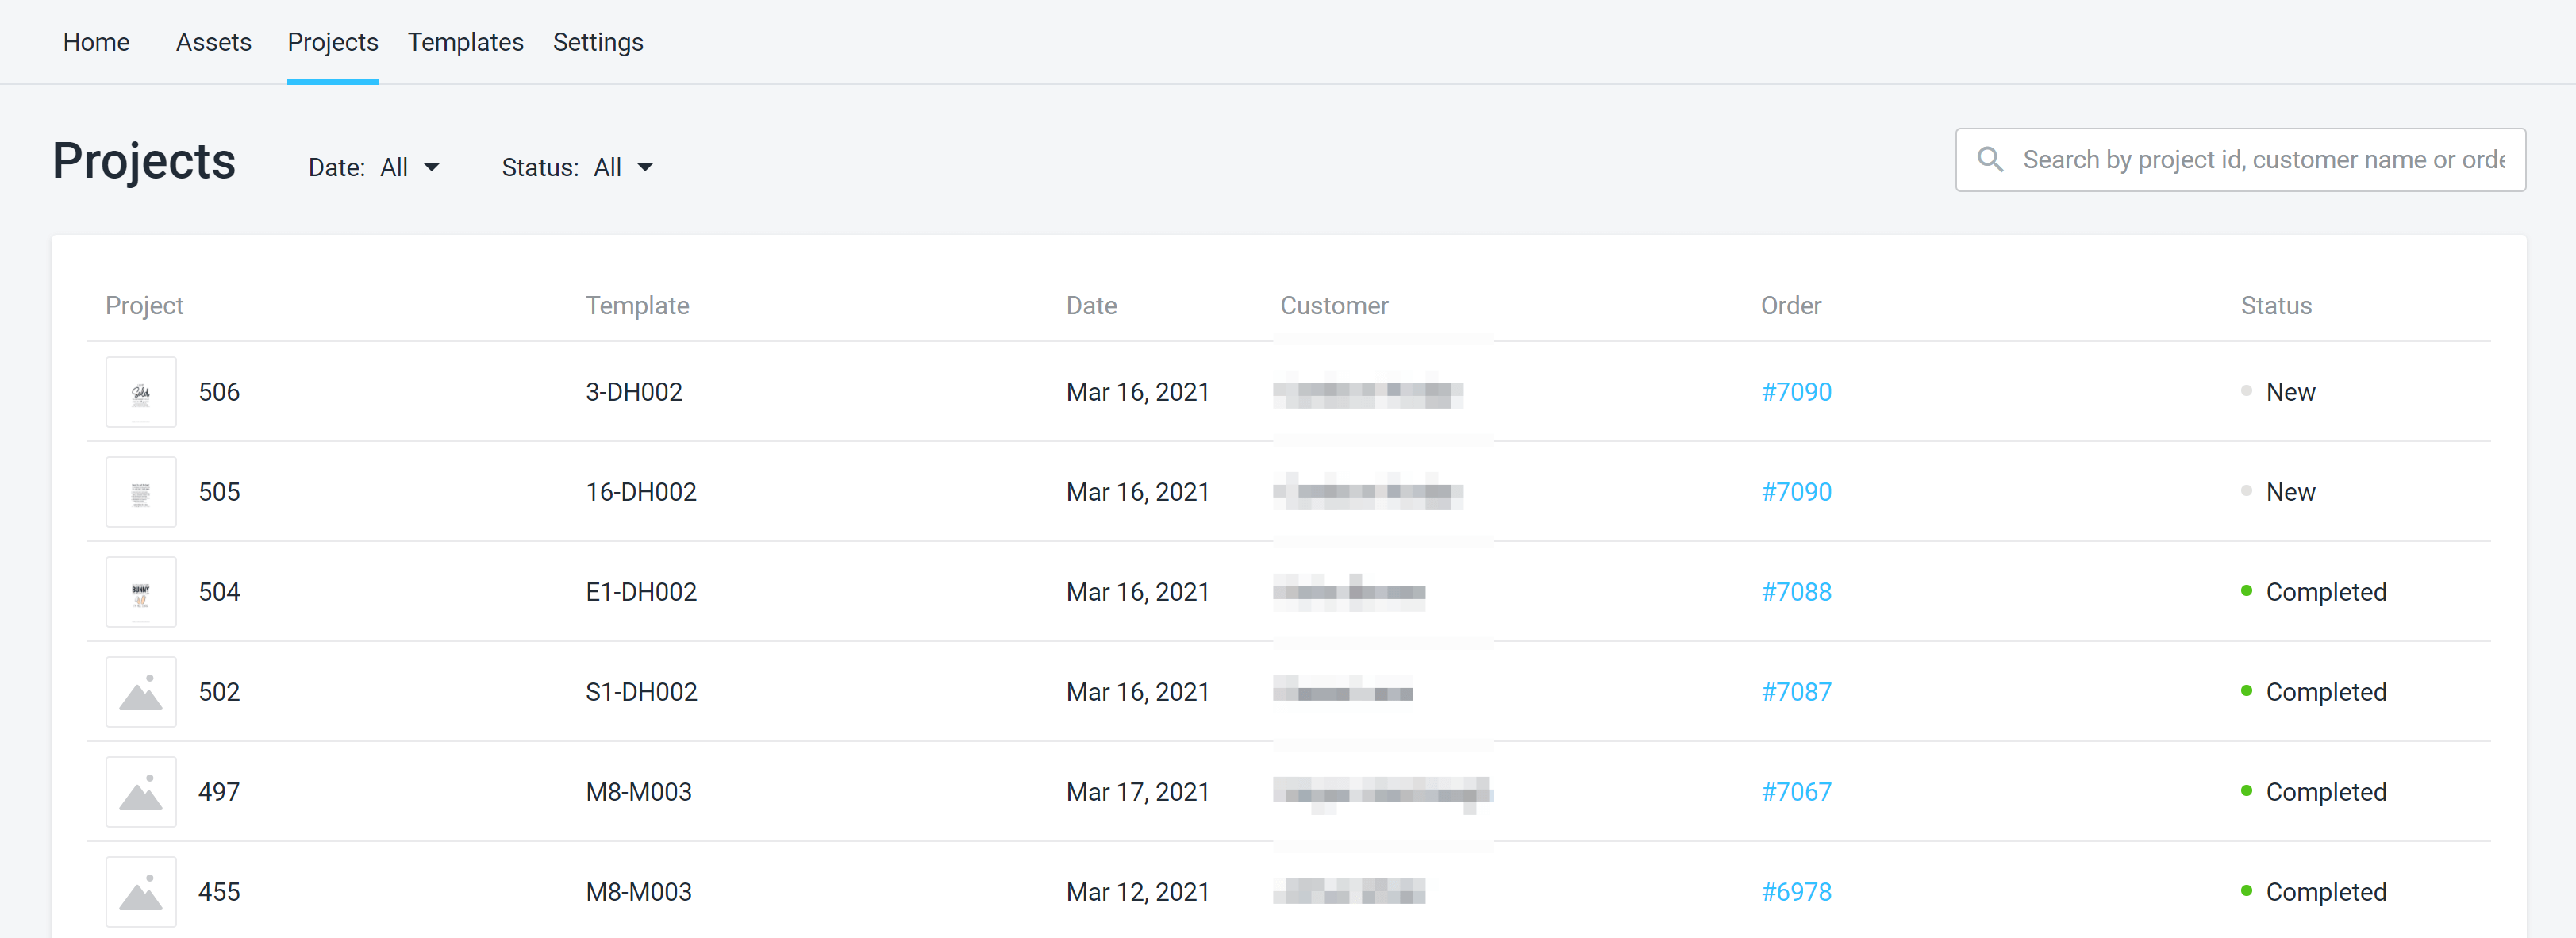
Go to the Customer's Canvas application > find and select Projects in the menu bar. You can find the necessary project corresponding to the order number in the list of projects.
Note
For convenience, we recommend using the search by project ID or customer name.
Next, we recommend that you open the desired project and make sure that it matches the order. Click on the Order number. You will be redirected to the Orders section in Shopify.
On the project page in the Order info section, you can find information about the customer, the creation date, and the Template that was created to connect the editor to the product.

Step 2. Download a PDF file to test it.
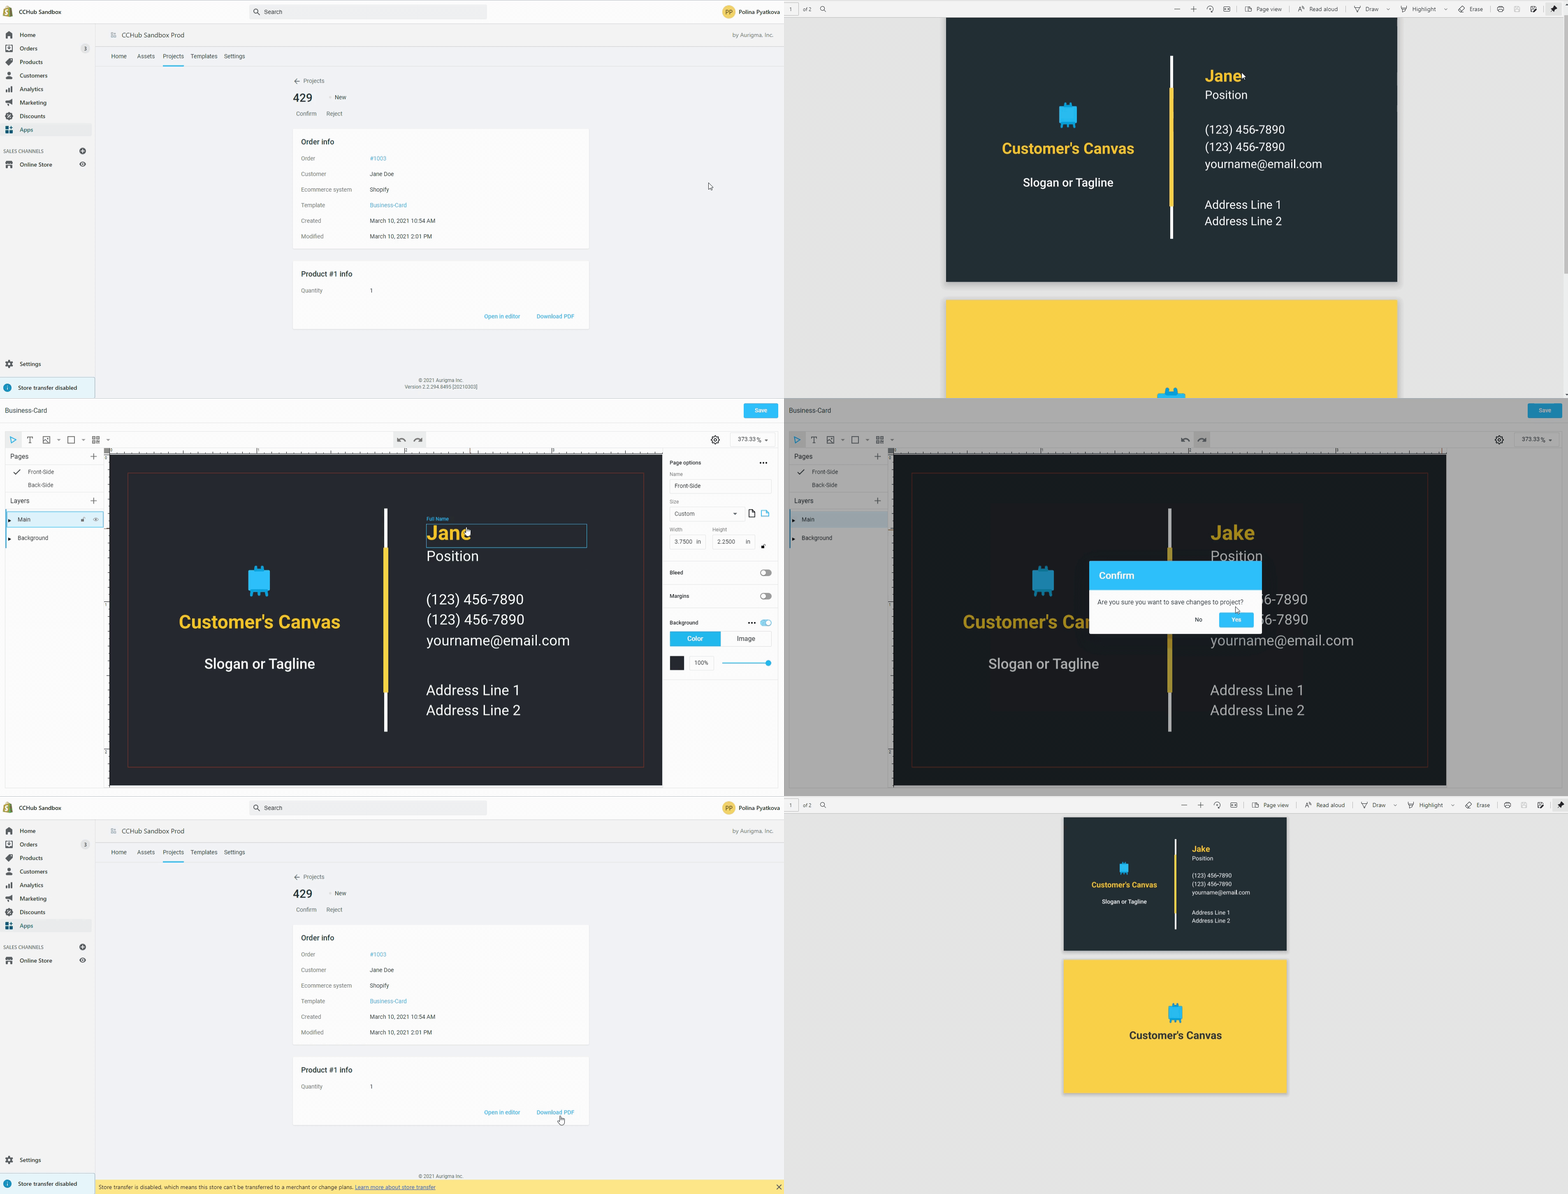
Before you start performing the order, download the PDF file and ensure that the data is correct.
- Click on Download PDF > open the file using Adobe Acrobat or other software.
- Let's say you have found a mistake, for example, a misprint. You can click on Open in editor > fix the mistake > save, and > download it again.

Step 3. Change the project status.
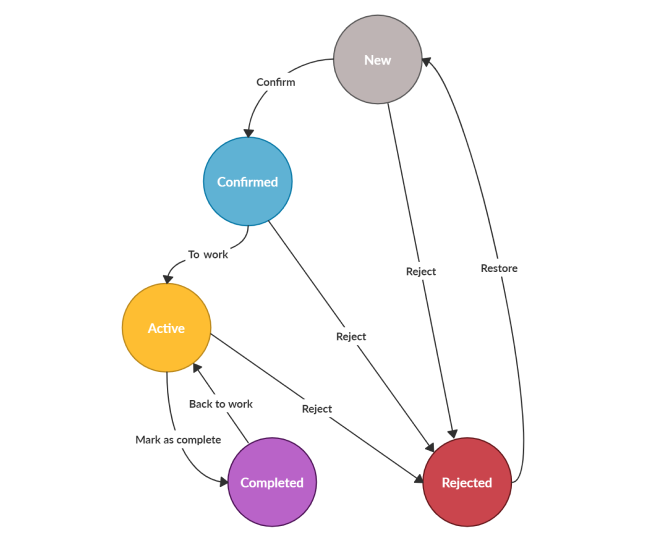
At each stage, the project has its status, it allows to distinguish between orders that have already been processed and those that are still in progress. Each status represents the state of a project as it moves through its lifecycle. When the order status is updated in Shopify, some project statuses may switch automatically.
- New — this status will be assigned automatically after making the order.
- Confirmed — this status will be assigned automatically when the transaction was completed.
- Active — you need to change the status to this one when you send the product to print. To do so, click To work.
- Completed — you need to change the status to this one at the end of the work.
Note
If the order becomes Fulfilled in your Shopify account, the project is automatically converted to Completed.
- Rejected — you need to change the status to this one if you refused to fulfill the order for some reason.
You can take a look at this image that illustrates the process of changing statuses:
