Mockup-based product images
- Last updated on January 22, 2024
- •
- 5-6 minutes to read
One of the use cases where Customer's Canvas may be helpful is creating images based on mockups.
For example, you are building a print-on-demand (POD) system where you have a catalog of some products, let's say, different types of mugs. Your customers sell mugs with their artwork on their websites. You may want to simplify the process of publishing such products by automatically generating a product image, where the mug image stored in your catalog is combined with the artwork the customer uploads.
This article provides an overview of how this scenario can be implemented with Customer's Canvas.
General idea
Let's understand how this task can be implemented in Customer's Canvas.
First, let's organize a product catalog. You should create the following items:
- Products (e.g. mugs, tumblers, etc.)
- Options (e.g. color, material, etc.)
- Variants (combinations of all option values with assigned SKUs)
- Options (e.g. color, material, etc.)
You may connect the preview mockup files created in Adobe Photoshop to each variant. You may have more than one mockup for each combination of options, for example, a product image pictured from different angles.
Your POD system should also have a catalog, which may mirror the structure in Customer's Canvas or be more complex. The key is ensuring you can link variants in Customer's Canvas with yours using SKUs.
Creating a product image is straightforward:
- Identify the product variant in your system.
- Determine its corresponding SKU.
- Use the SKU to find the corresponding product and variant in Customer's Canvas.
- Identify connected mockups for this variant.
- Populate the mockup's smart object with your chosen image — either user-uploaded or stored in Customer's Canvas.
Now, let's explore the implementation of each task in detail.
Configuring data in Customer's Canvas
Organizing a catalog
The first thing you need to do to achieve our goal is organize a catalog of the products.
In Customer's Canvas, you can create the products (e.g., mugs, T-shirts, etc.), add options (e.g., model, color, etc.), configure SKUs for each variant, and associate the mockup images with the necessary options and variants. You can learn how to organize such products in the Admin Guide of Customer's Canvas Help Center.
Creating mockups in Adobe Photoshop
You may wonder how exactly to create the mockup images. Customer's Canvas supports mockups created in Adobe Photoshop, which can be multi-layered. The placeholder for the artwork is designated with a smart object. Learn more about creating mockups in the Designer's Manual of Customer's Canvas Help Center.
Adding mockups to Customer's Canvas
Once you have PSD files for your mockups, you need to upload them to your Customer's Canvas account through the admin panel, as explained in the Admin Guide > Manage Assets > Mockups section of the Help Center.
You can also manage mockups in your tenant using the Mockups APIs.
Optional — adding artwork to Customer's Canvas
Depending on your needs, you can also pre-upload the artwork added to the product images (in case it is not provided by the end user and not updated so often). The process is quite similar to the mockups, but you should use the Images section instead. Also, if you prefer manipulating them through API, use the Images API.
If you prefer using the artwork uploaded by the user, there is no need to upload images to the asset gallery first. This scenario will be considered later.
Putting things together
So, let's see how you can configure a catalog of your product mockups in Customer's Canvas:
- Create a PSD mockup of your product.
- Upload this mockup to the Assets > Mockups section. If needed, organize the folder structure to make it easy to navigate in this section.
- Create a product and its options. Your product model may contain only those options that determine the originality of the mockup. If your product does not have options, then it is enough to create any option with one value.
- Establish Asset Connections for mockups by linking specific mockups to specific option values or their combinations.
- Specify the SKU for each option using the same values as in your system.

Establishing a connection between Customer's Canvas and your system
To easily find the necessary mockups, you need to do something like publish our products in your system. Let's look at how you can implement this.
First, create an integration describing your application in Customer's Canvas so that we can publish products there:
- Go to Settings > Integration.
- Create an integration of the Custom type.
- Save its name (for example, My POD System) and ID.
For more details, refer to the Registering a storefront topic.
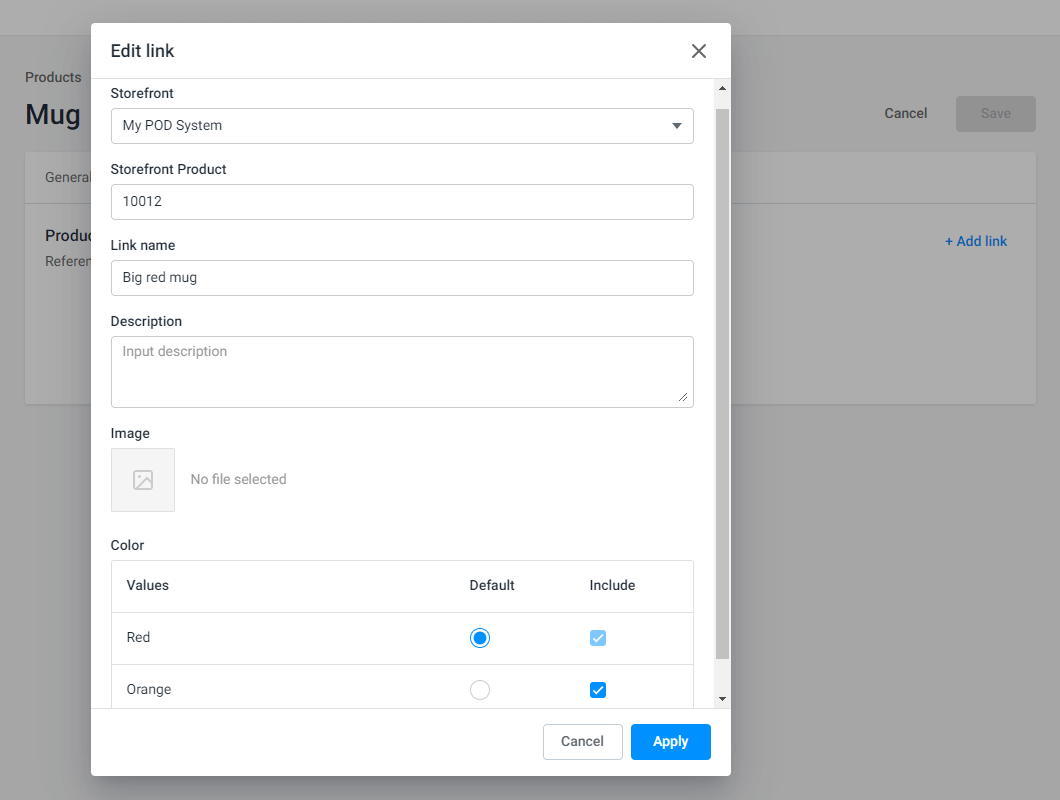
Then, open our product and go to the Links tab. Create a product link on it, specifying My POD System as the created Storefront and the product ID that you use in your system for this product as a Storefront product.

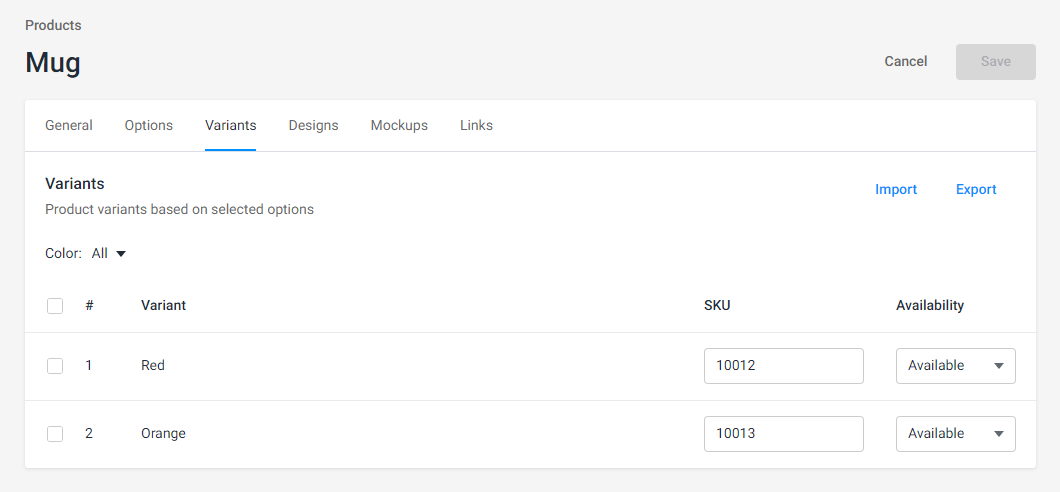
If your product has options, you'll probably want to find mockup variations for different combinations of options. To do this, on the Variants tab, specify the SKU from your system for each variation.
Generating a preview
To begin working with the BackOffice APIs, you need to register your app in your tenant and implement the Client Credentials authentication flow, as explained in the Authentication in Customer's Canvas Hub article.
You can generate a product preview through the following steps:
- Obtain a token to access data storage with designs and mockups, using an External App.
- Find the product linked to our mockups by passing its reference ID to the endpoint
GET /api/storefront/v1/product-referencesof the Storefront API. As an alternative, you can filter products by SKU through the endpointGET /api/storefront/v1/productswith the additional query parametersku. - Get the details about variants and mockups through the endpoint
GET /api/storefront/v1/products/{id}/variant-mockupswith no restrictions on variants. Its response will contain all the variants, and you will be able to implement a search through them and quickly switch between them. - For the obtained mockup set, call the endpoint
POST /api/atoms/v1/images/render-previewto render product previews.
The following sequence diagram illustrates the process.
Artwork sources
You can use artwork from the following sources:
- A gallery of your artwork that you upload to the Assets > Images section.
- User images that they upload to their private storage.
- Prints in an external system that can be accessed through their URLs.
To learn how these use cases can be implemented, refer to the Rendering preview mockups topic.