Simple mockup
- Last updated on December 29, 2023
- •
- 3 minutes to read
In this article, you will learn how to create a mockup without distortions. You may need such a mockup for a product with a flat surface.
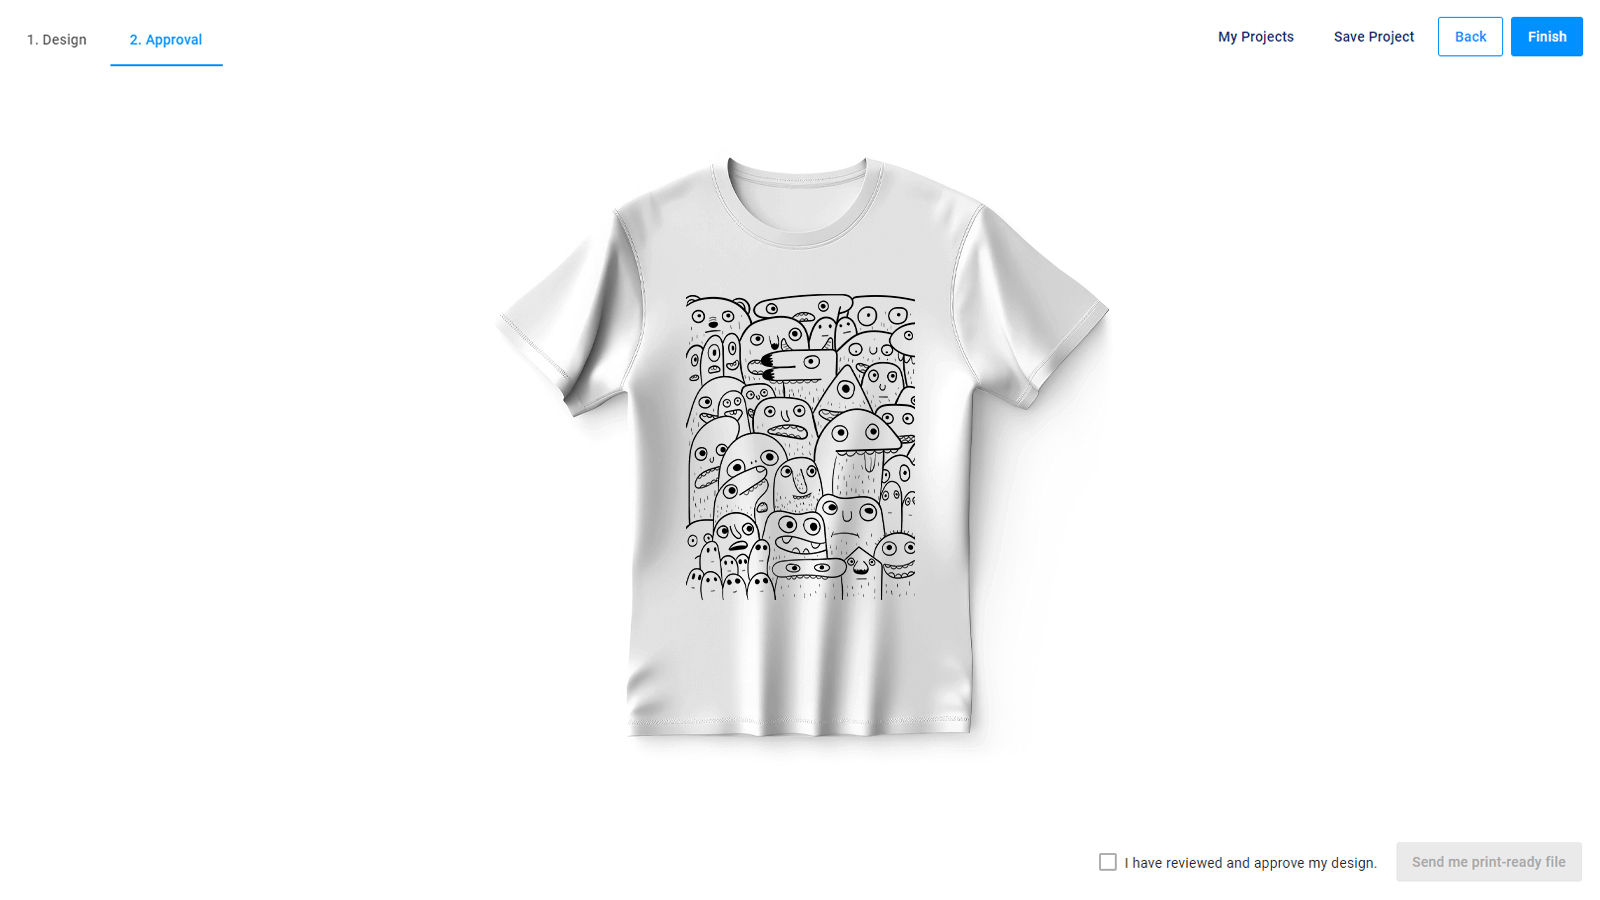
Let's see an example with a T-shirt.
At the Variant Selector step, this mockup is in the role of a thumbnail mockup. At the Preview step, this mockup is a preview mockup.
This is how this mockup looks as a preview mockup.
Let's consider how to create such mockups.
Creating a file
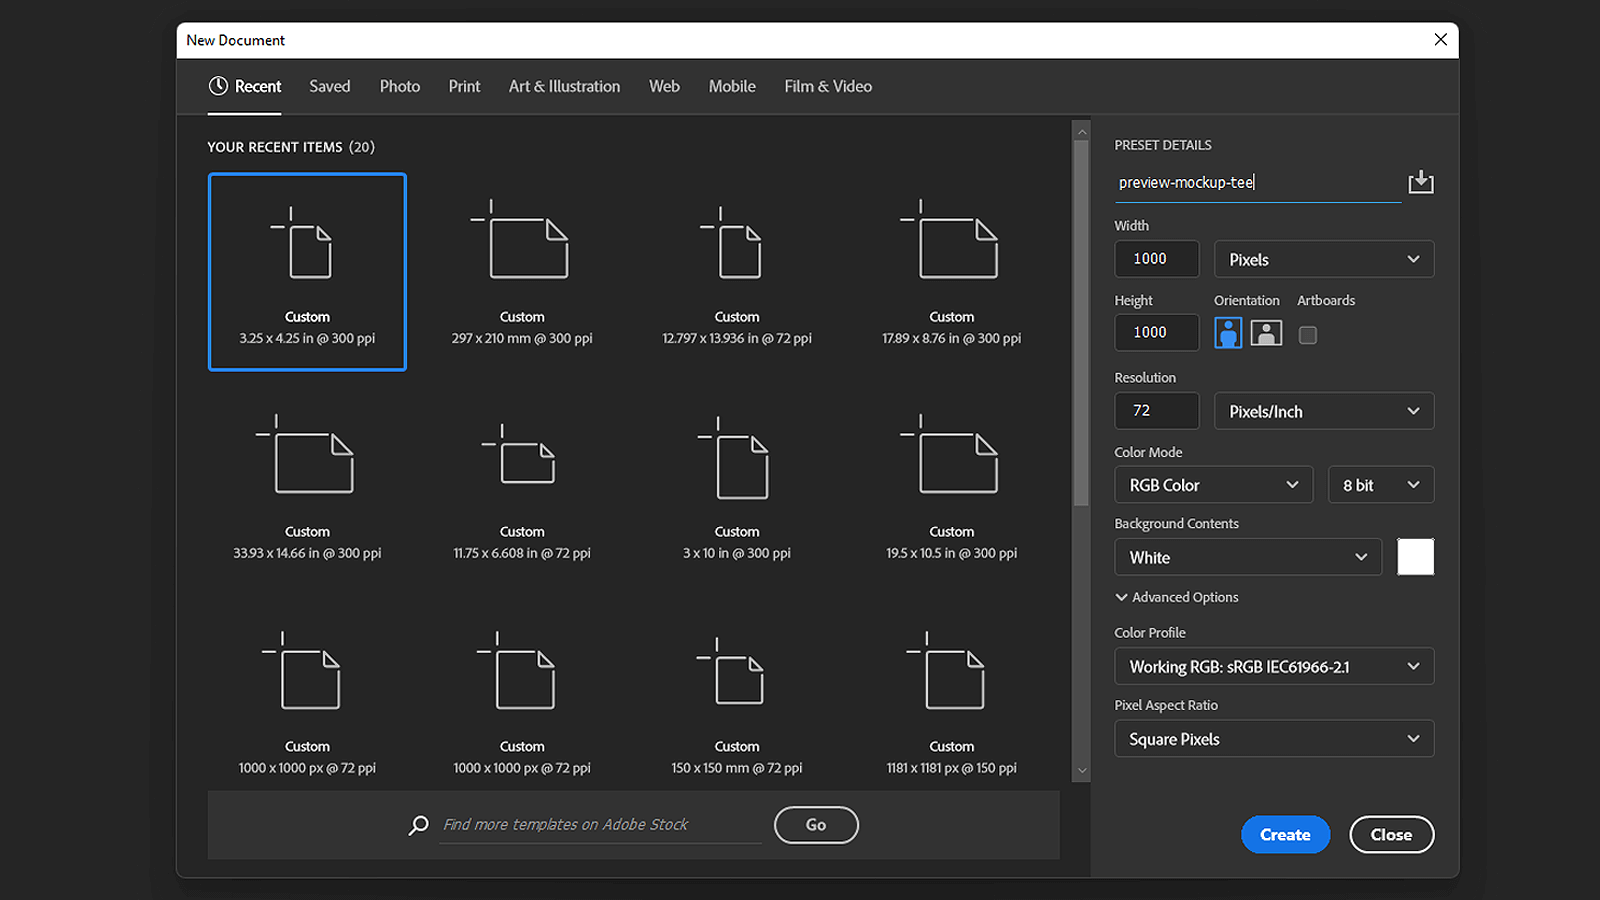
To create a mockup in Photoshop, select File > New. When a new dialog box opens, fill in the following fields:
- Width and Height. The recommended size for a thumbnail is about
600px x 600px, and for a preview is1000px x 1000px. The measurement units are pixels. - Resolution. Set to
72DPI. - Color mode. Select
RGB Color. - In the Background Contents drop-down box, select White.
In this example, you create a preview mockups for a T-shirt of 1000px * 1000px.
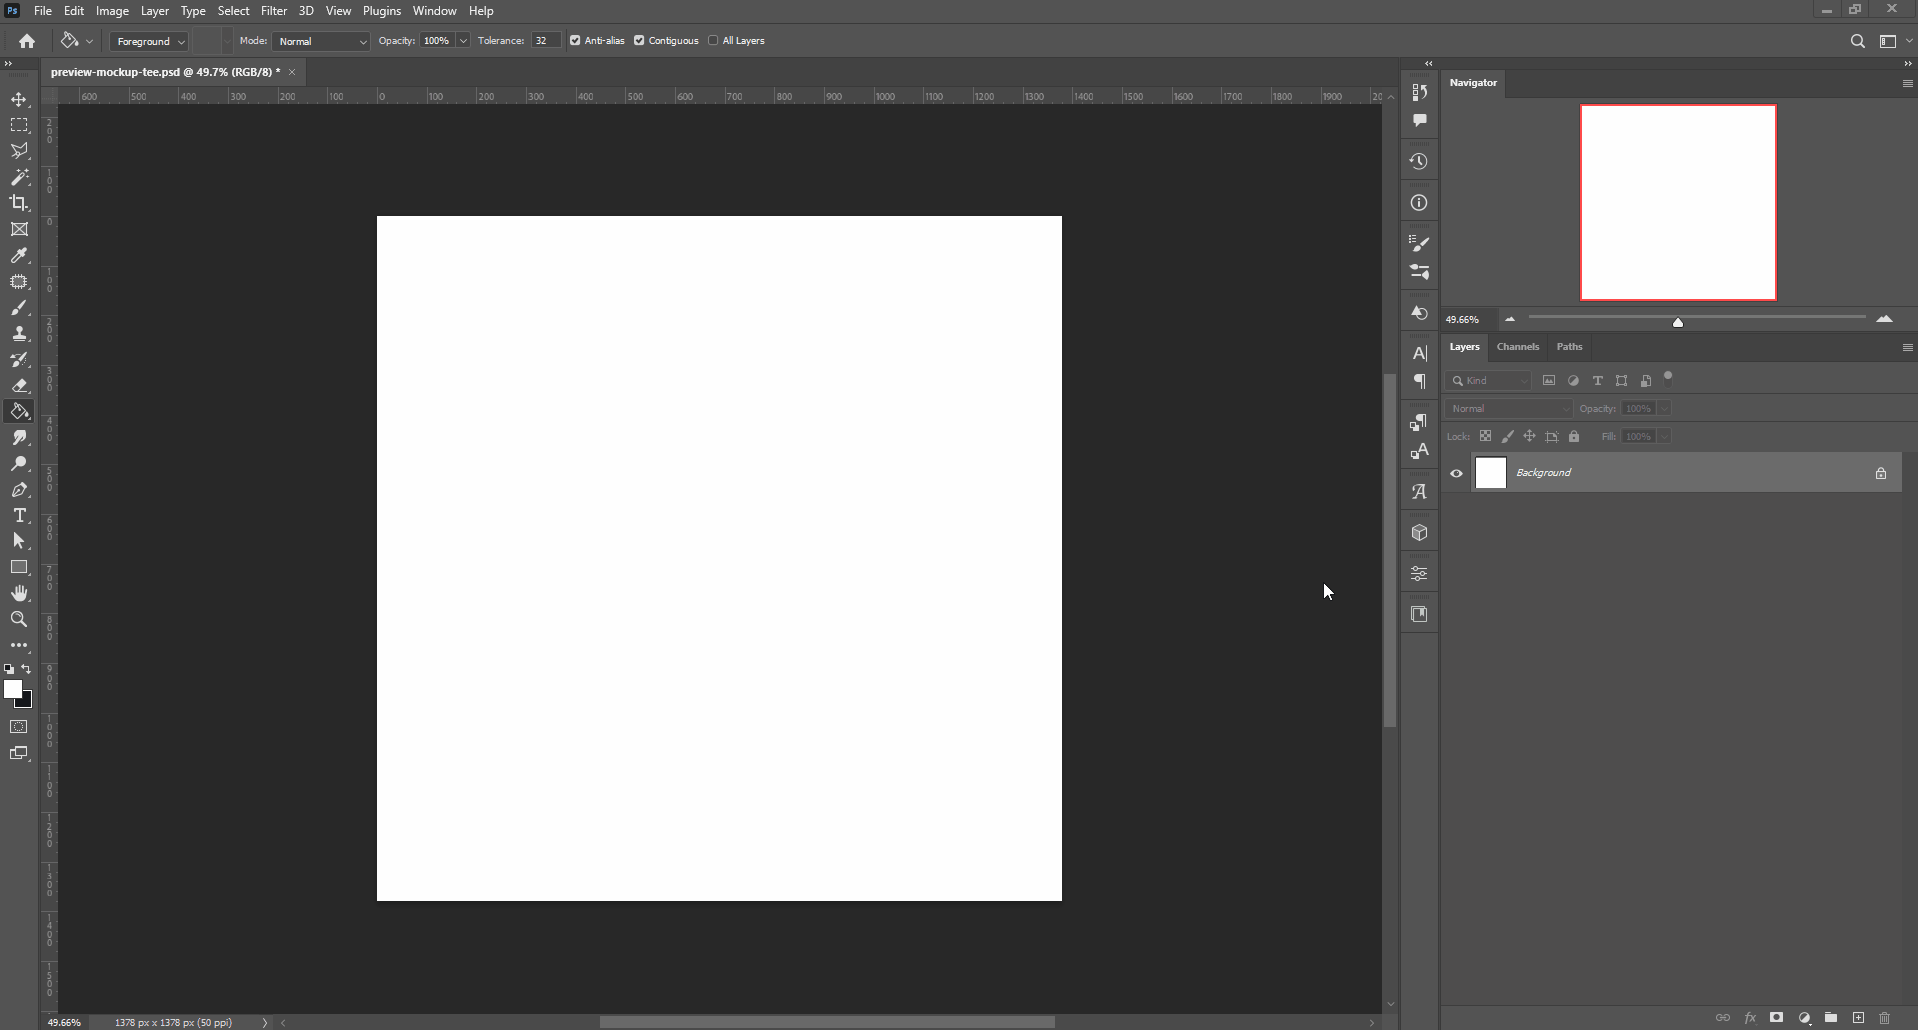
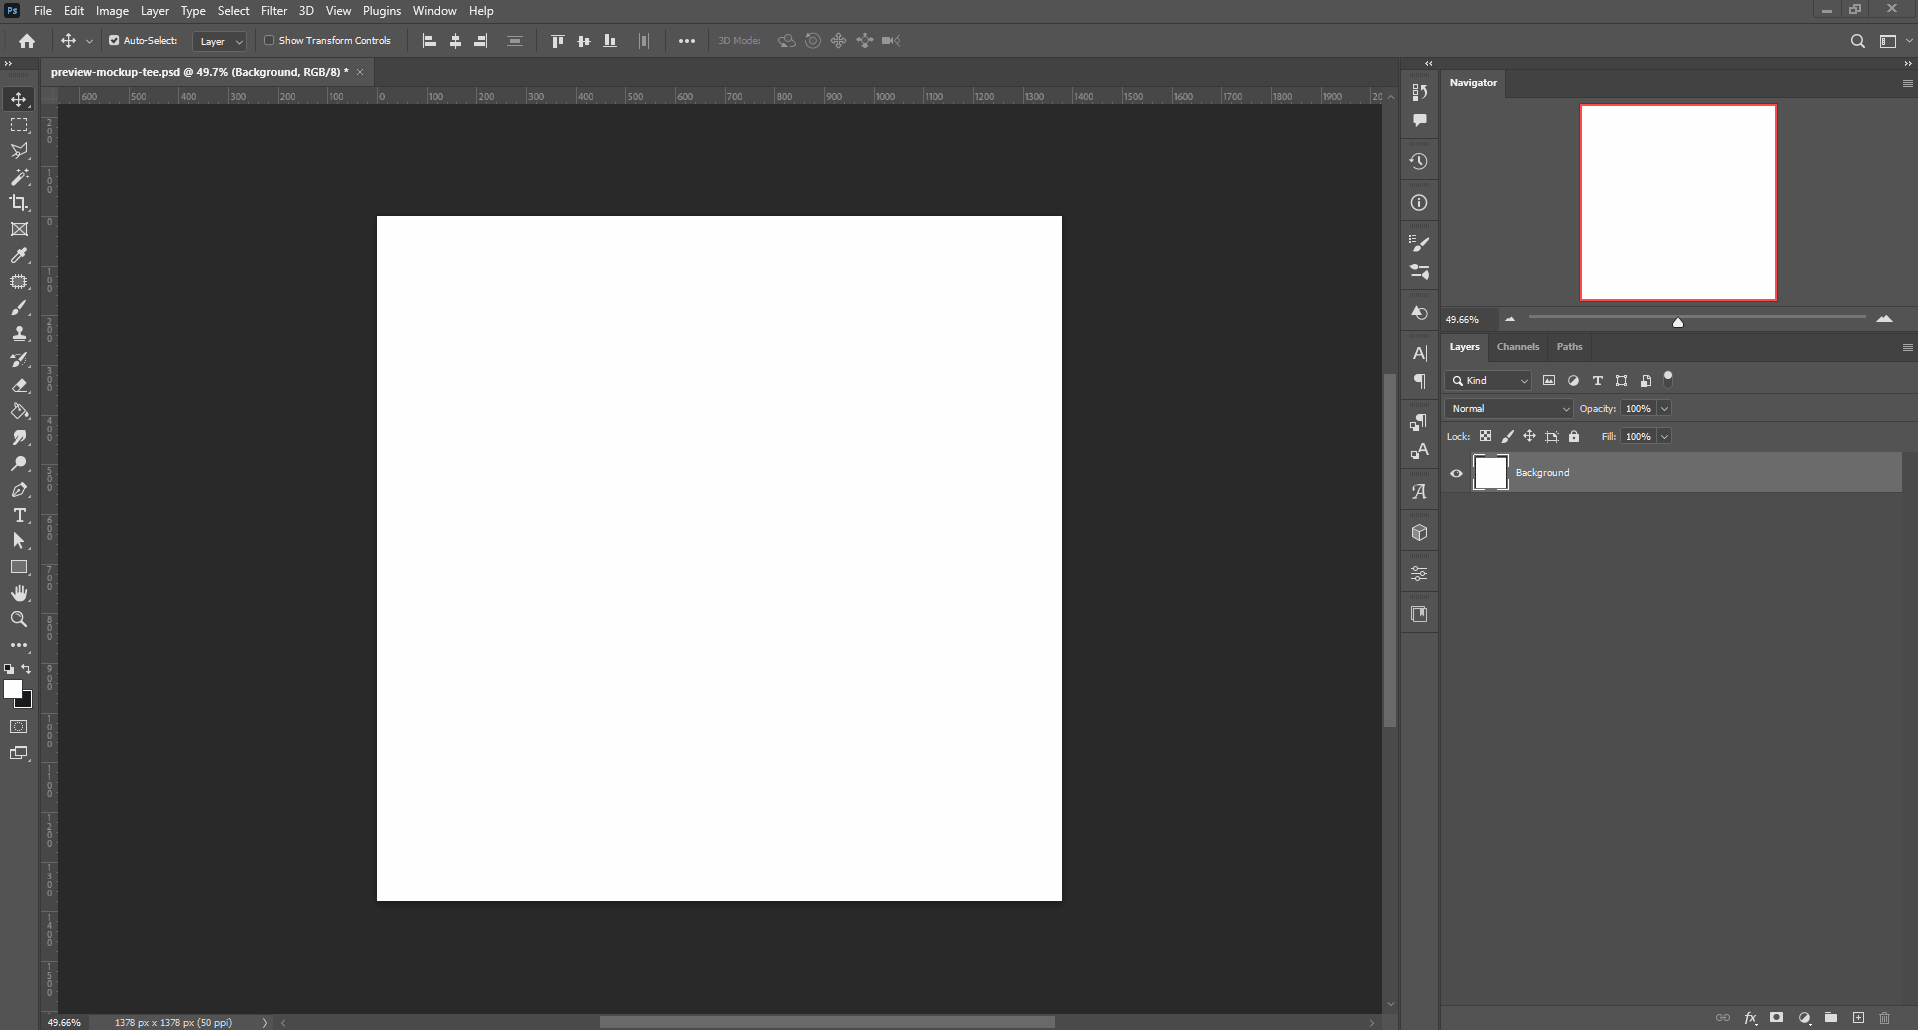
Rasterizing the layer
Photoshop creates a file with only a background layer. To create a regular layer, double-click the layer and select Layer from Background. In a new dialog box, insert a new name, for example, Background.
Now the layer is rasterized, and you can add new layers and place some artwork.
Adding a substrate and overlay layers
In this paragraph, you will learn how to add the overlays and the substrates layers. Read the Concepts paragraph to learn the mockup anatomy. Now, let's add the overlay and the substrate layers to your mockup.
Overlay
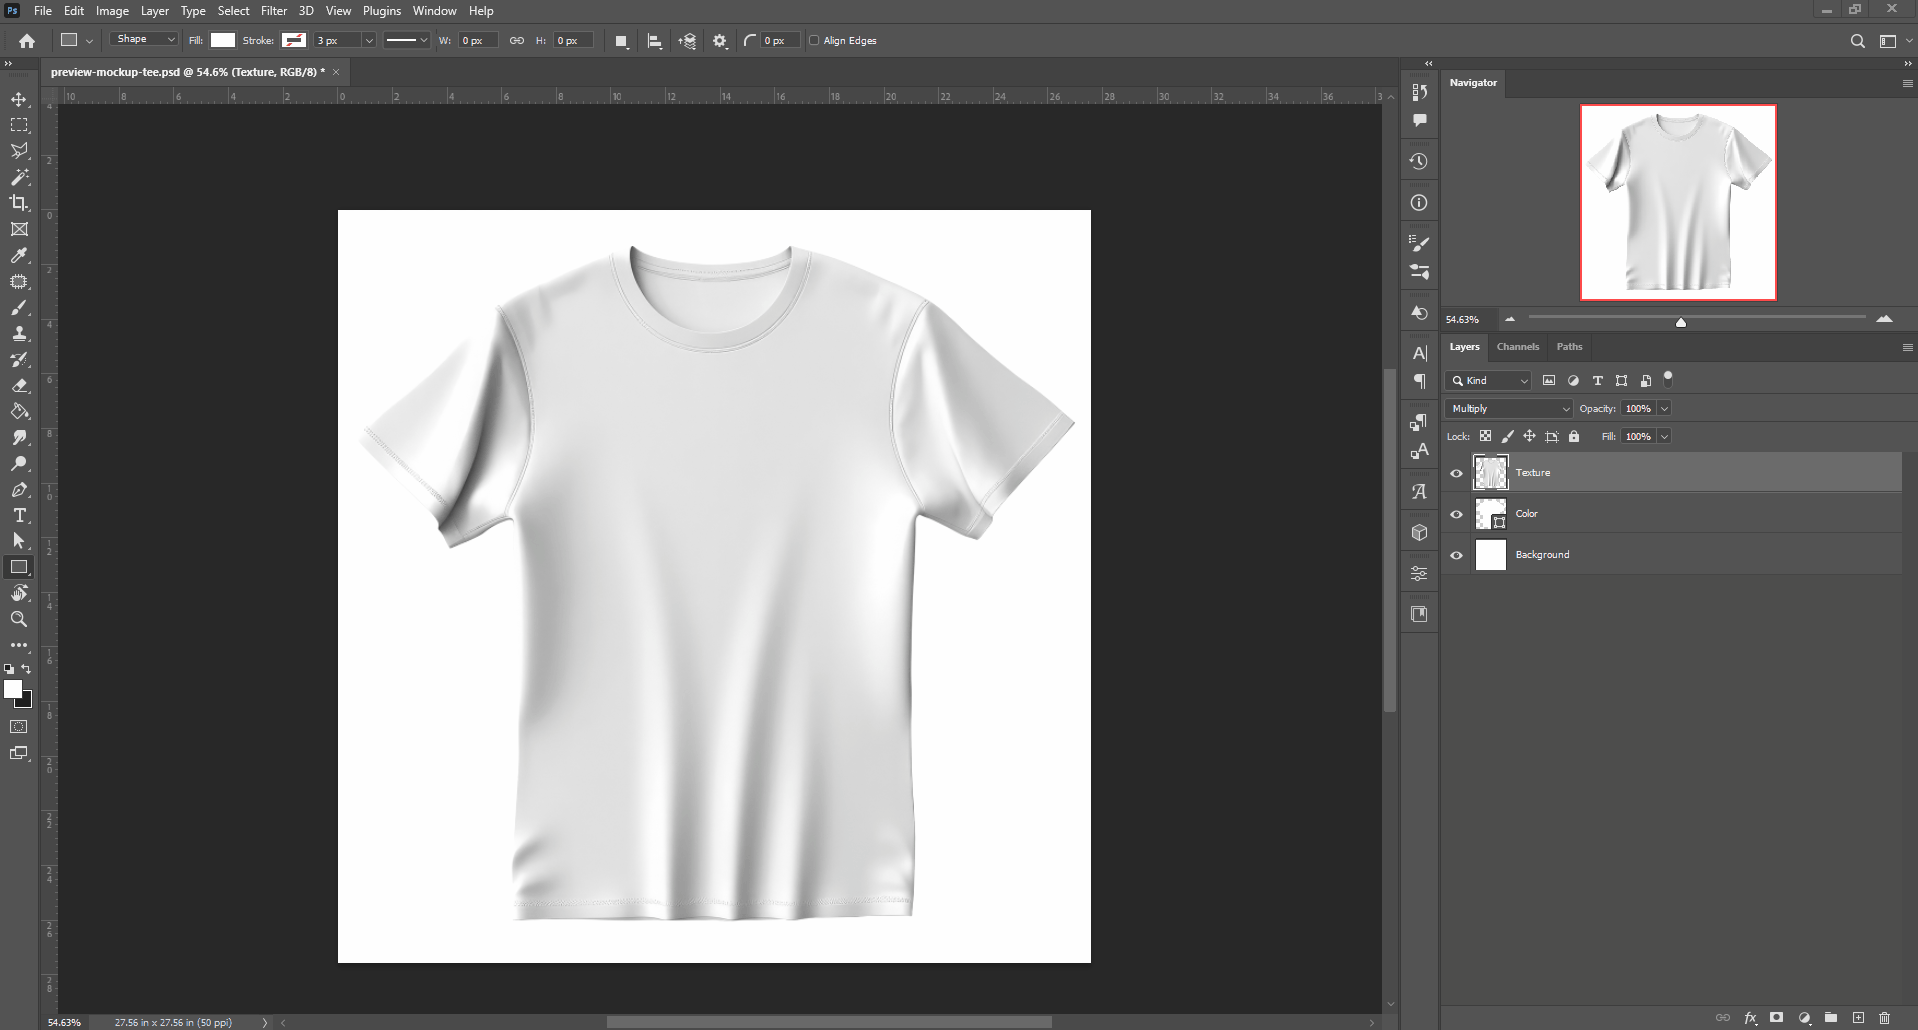
To add the overlay layer to a file, click File > Place Embedded or drag-and-drop an image. Then, rasterize it. For this, right-click the layer and select Rasterize layer. Next, change the blending mode. To do so, select this layer and select the Multiply mode in the drop-down list above.
Here, the overlay layer is named Texture.
Substrate
Let's add the substrate layer to the mockup based on the overlay layer.
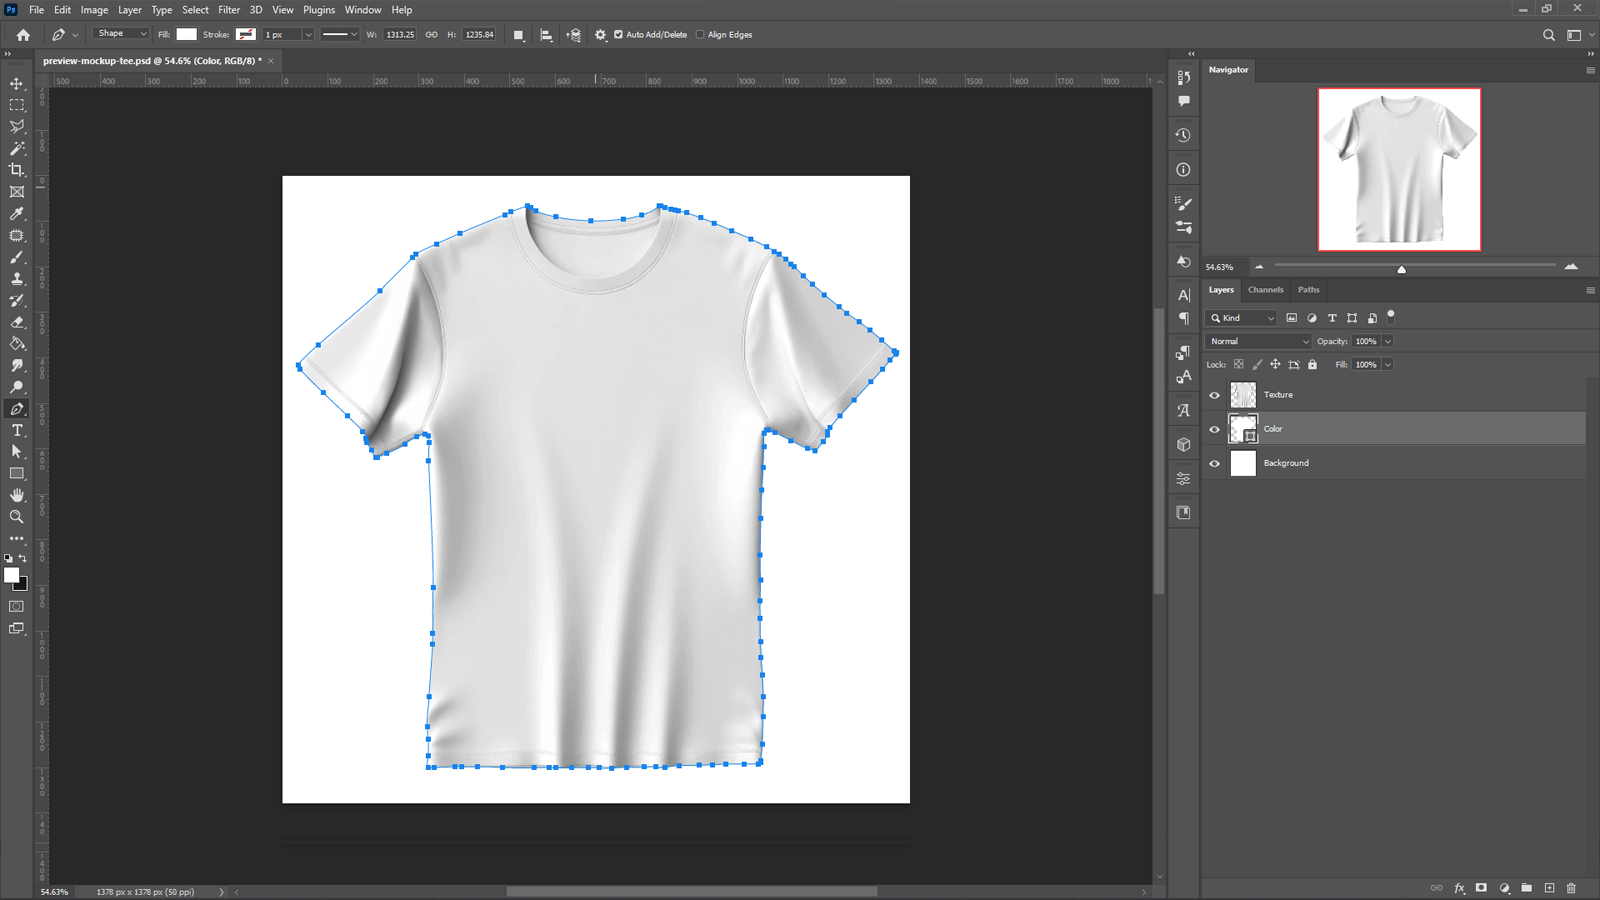
To create the substrate layer, use the Pen tool. Make sure that you pick Shape in the Tool mode. Draw a shape exactly along the T-shirt outline. Once you start drawing, a new layer will appear.
Then, rename this layer to Color. Finally, drag this layer below the overlay in the layer list.
Visual effects
You can add some extra effects to your design to make the image more realistic. For this, use shadows, highlights, reflection effects, etc. Before saving your file, make sure that these effects are rasterized.
Creating a smart object
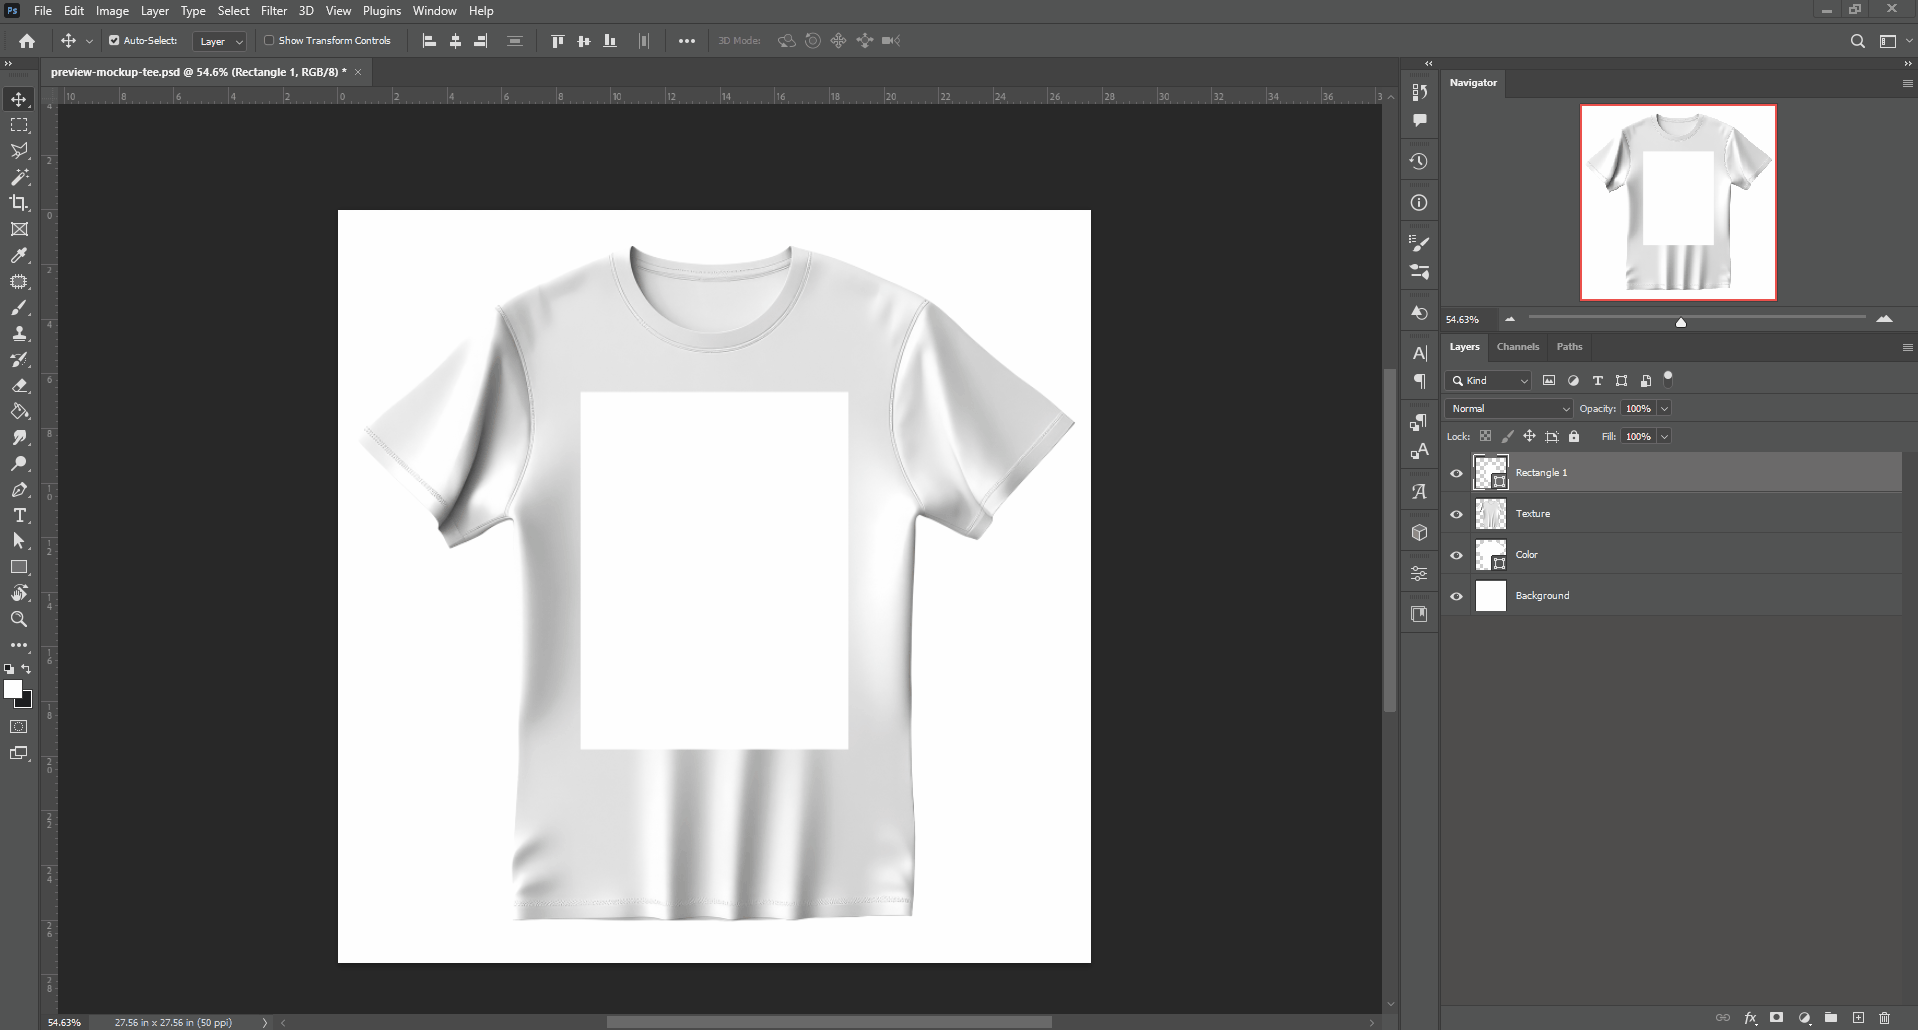
To create a smart object, add a new rectangle with the Rectangle tool. Its exact size doesn't matter, but the aspect ratio needs to match the aspect ratio of your design.
Next, resize the rectangle proportionally and place it in the necessary area of the T-shirt design.
Afterward, rename this layer with the rectangle. For this, double-click the layer and input Image. Then, right-click this layer and select Convert to Smart Object. Finally, rename this layer Design. Then, place the layer between your overlay and substrate layers. In this example, it is between the Texture layers and the Color layers.
Important
The smart object must have the name Design and contain an Image layer. These names allow Customer's Canvas to recognize your mockup.
Saving the mockup
To save the product, click Ctrl + S or click File > Save and select the PSD format.
Uploading a mockup
To upload a mockup to the Customer's Canvas cloud, read the File manager article.
Connecting a mockup to a product
To read how to connect this mockup to a product, read the Connecting assets to products article.