File manager
- Last updated on March 20, 2025
- •
- 7-8 minutes to read
Customer's Canvas assets are managed in BackOffice through a file manager in a uniform way. Whether you are working with designs, fonts, or any other asset type, the user interface will look like this.
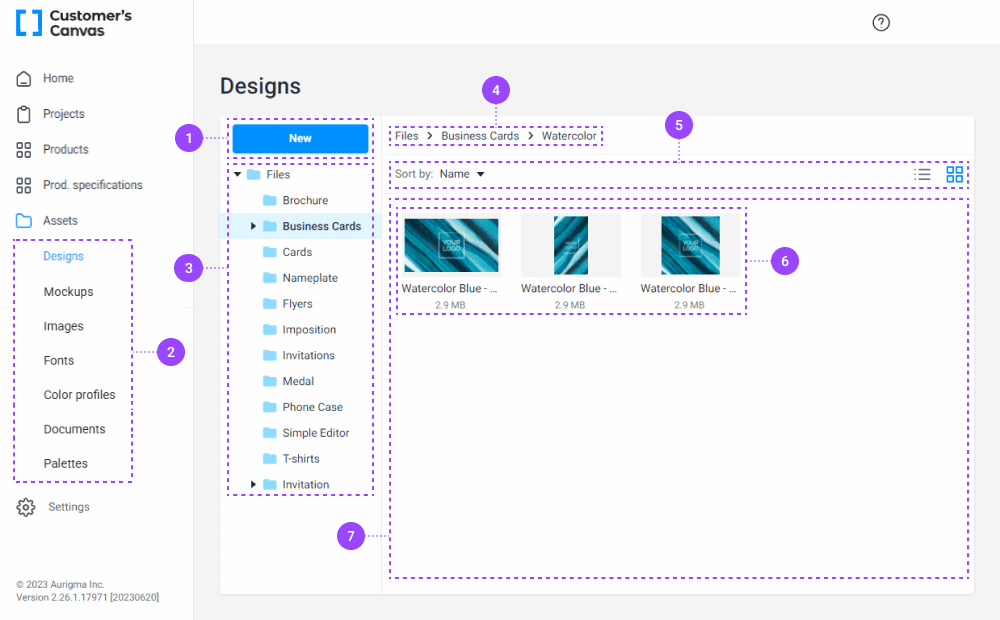
- New button allows you to create a new folder or upload an asset.
- Assets tabs contain the corresponding types of assets.
- Folder tree displays folders of the current asset tab.
- Navigation bar displays breadcrumbs.
- Toolbar allows you to change the appearance of the assets: sort them by
Name,Data Modified, orSizeand switch between thetable viewandgrid view. - Assets of the current folder.
- Gallery of assets provides the same actions as the New button by right-clicking the field.
Although there are some specific nuances for some specific asset types, we will focus on the most common scenarios in this article.
Switching between asset types
Each asset type has its own storage of folders and files. You cannot mix assets of different types in one section.
To switch between asset types, use the tabs in the left sidebar.

A quick overview of asset types:
- Designs are used by your customers as templates for personalized products. You may create them from scratch or import them from InDesign (.idml) or Photoshop (.psd) files. It is also possible to download and upload them to exchange them between different accounts.
- Fonts are used in designs to display text with the correct typeface. You may import TrueType and OpenType fonts.
- Images can be used in an image bank of standard clipart, artwork, backgrounds, photos, and logos. Customers use these images when personalizing the templates. JPEG, PNG, PDF, AI, and SVG are supported.
- Color Profiles are used in the Customer's Canvas configuration to make sure that colors are correctly converted between CMYK and RGB. You may import ICC files as color profiles.
- Mockups are used in the PIM module to display a product view when selecting a product variant, editing the design, and preview the results. These mockups can be created in Adobe Photoshop in the PSD format.
- Documents are used to store die-line models for packaging in PDF and toggle sets in JSON.
- Palettes are used to store color schemes for themes, swatches, or design colors.
Folders
You can organize assets into folders, similarly to how you would in a file system of your local PC/Mac. Like in File Explorer on Windows or Finder on Mac, the left panel contains a list of folders and the right panel displays assets in the current folder.

- Breadcrumbs
- Assets in the current folder
- Folder tree
Navigate through folders
To choose a folder, you can use the tree view on the left. Select folders by clicking their names. If a folder is nested in another folder, you can expand it in the tree.

If a current folder contains subfolders, they appear in a list of items. You can double-click them to navigate them.
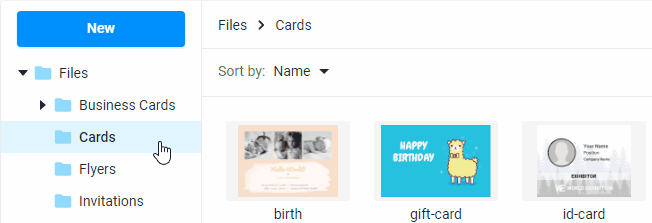
Above the item list, you can also find breadcrumbs. They allow you to easily go to the upper levels in the folder hierarchy.
Create a new folder
You can create new folders using the New button. When you click it, a dropdown menu appears. Choose Folder to create a new folder.

It will open a dialog where you need to provide a new folder name. Once you click OK, the folder is created. It will be nested in the current folder.
Note
Like in a file system, you cannot have two folders with the same name in one folder.
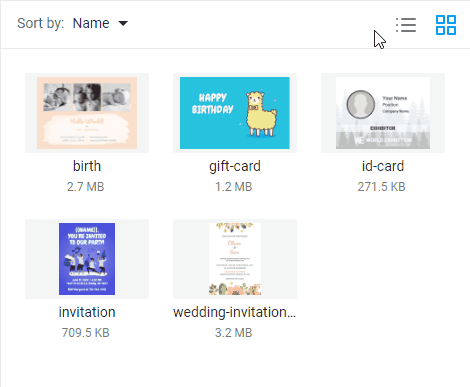
View folder content
In the right panel, you can see all files located in a selected folder. In the toolbar, you can change the sort order and switch between the grid and table view in the gallery.
If you select a file, you will see a toolbar with actions. The list of actions may vary depending on the asset type, but such actions as Download and Delete are available for all elements.

Add new assets
You can add new assets in several ways:
You can use the same New button as for a new folder. Depending on the asset type, it may have an import option, or you can create a new item. For Designs, it looks as follows:
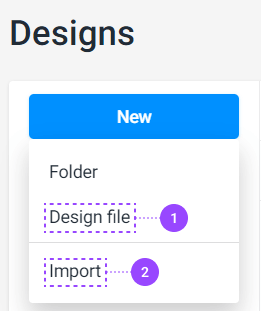
The Design file menu item will create a blank design, and the Import menu will allow you to upload an InDesign or Photoshop file.
You can just drag-and-drop files you want to add to the file manager. Note, the file type should be supported by these asset types.
You can also right-click anywhere on a blank space in the asset list of the current folder and choose Import in the menu.
Important
At the moment, the upload limit for your files is 512MB. If you need to upload larger files, contact our support team.
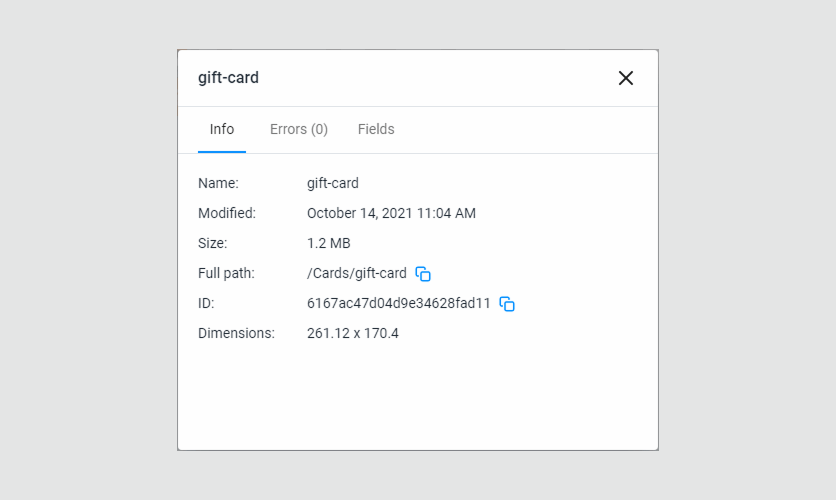
Asset metadata
Information
You can see details for an asset. They include the unique ID, name, full path, size, modified date, and some additional information about specific asset types. For example, fonts have postscript names, images have dimensions, and so on.
To see these details, right-click an item and click Properties.
Custom fields
In addition to the general information, you can also add custom fields to your assets. As usual, you may need to do so when you have some special integration of Customer's Canvas with your system. Also, they can be used for some scenarios within Customer's Canvas, for example, when you are configuring mockups.
To open a list of custom fields, right-click an item, click Properties, then switch to the Fields tab. Here, you can add a new custom field or edit existing ones.
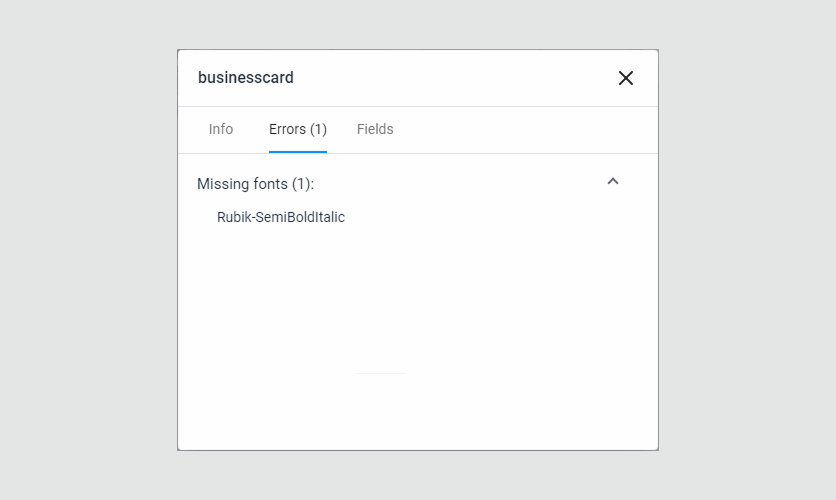
Errors
When a system detects any issues with a specific asset, you can see a warning icon on it. For example, if you create a design and delete some fonts used in this design, it will show you a warning about missing fonts.
![]()
You can see details about such problems on the Errors tab of an info window.
Manipulating assets
To manipulate assets, you can right-click an asset and select commands in the context menu.
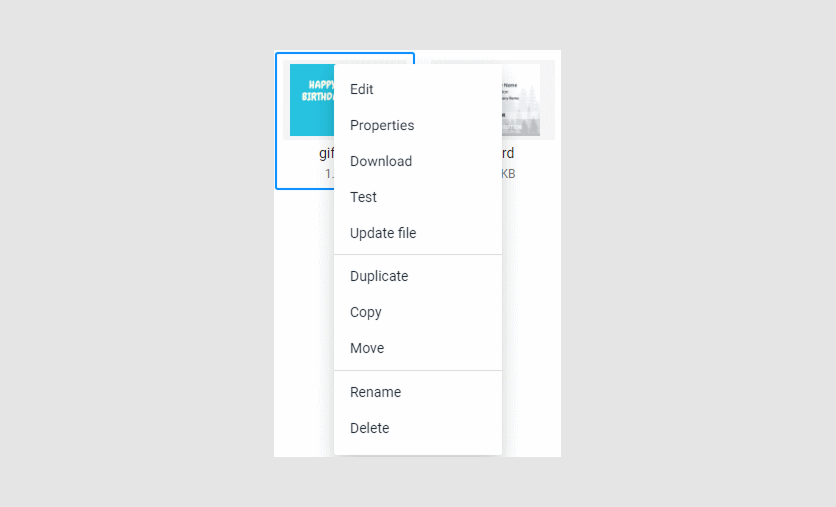
Depending on the asset type and configuration of your account, the list of commands may vary. Let's describe the most common commands below.
Edit
If an asset is editable (e.g. a design), it is opened in an editor. Designs are opened in the Template Editor.
This is a primary action, which means that instead of opening it through a right-click menu, you can just double-click an item in an editor. If the asset type does not support editing, nothing happens.
Properties
This command opens an info window containing asset metadata, as explained above.
Download
This command downloads an asset to your computer. The file type will be the same as it is stored in Customer's Canvas. Instead of a menu item in the right-click menu, you may use the Download action button in the item toolbar.
Note
When you import images or fonts, the original file type is kept. However, if you import a design as PSD or IDML file, it is automatically converted to the Customer's Canvas internal format. When you download such a file, it won't be the original PSD or IDML. It will be downloaded as an .st file, which can be recognized only by Customer's Canvas.
Test
This command is available only for the designs. It opens a design in the end-user's Design Editor in the same way as described in the Testing a design article.
Update file
This command updates a file's content from a file on your computer. It is used when you need to replace a file without losing its metadata and ID. For example, you may want to use this command when you are updating PSD images used as preview mockups.
When you are using this option with a design, you can re-import an IDML or PSD file. It will replace the design, name, and metadata of a file, but the ID will remain. It is convenient when you are updating designs already associated with some products in your online store.
Duplicate
When you click the Duplicate command, an asset copy will appear in the same folder, and a suffix (N) (where N is a number of this copy) will be added to its name.
Copy / Move
These are standard file operations that you can use when you need to copy or move an asset to another folder. When you use these commands, a dialog appears where you choose a destination folder.
The Copy command creates a copy of selected assets in a specified folder. It will keep the name and metadata, however, new elements will get new IDs. Original assets stay intact.
When you use the Move command, assets are removed from the current folder and moved to the destination folder. The IDs of these assets will be kept.
Rename
This command changes the name of an asset. Note, an asset name should be unique within one folder.
Delete
This command deletes an asset. Use it with care; it cannot be undone.
Another way to delete a file is to use the Delete action on the toolbar.
Now, let's learn how you can work with designs.