How to create preview mockups
- Last updated on December 29, 2023
- •
- 7 minutes to read
Unlike the editor mockups, which have limitations since they should be suitable for editing a flat design, preview mockups are supposed to be more photo-realistic. It doesn't matter if a product has a non-flat design or a special material; a preview image should look natural.
To achieve that, you should create a preview mockup as a multi-layered Photoshop file (PSD format). This article gives you guidelines on how to create Photoshop files that work well with Customer's Canvas.
Photoshop file structure
If you open a typical preview mockup, it will look like this.
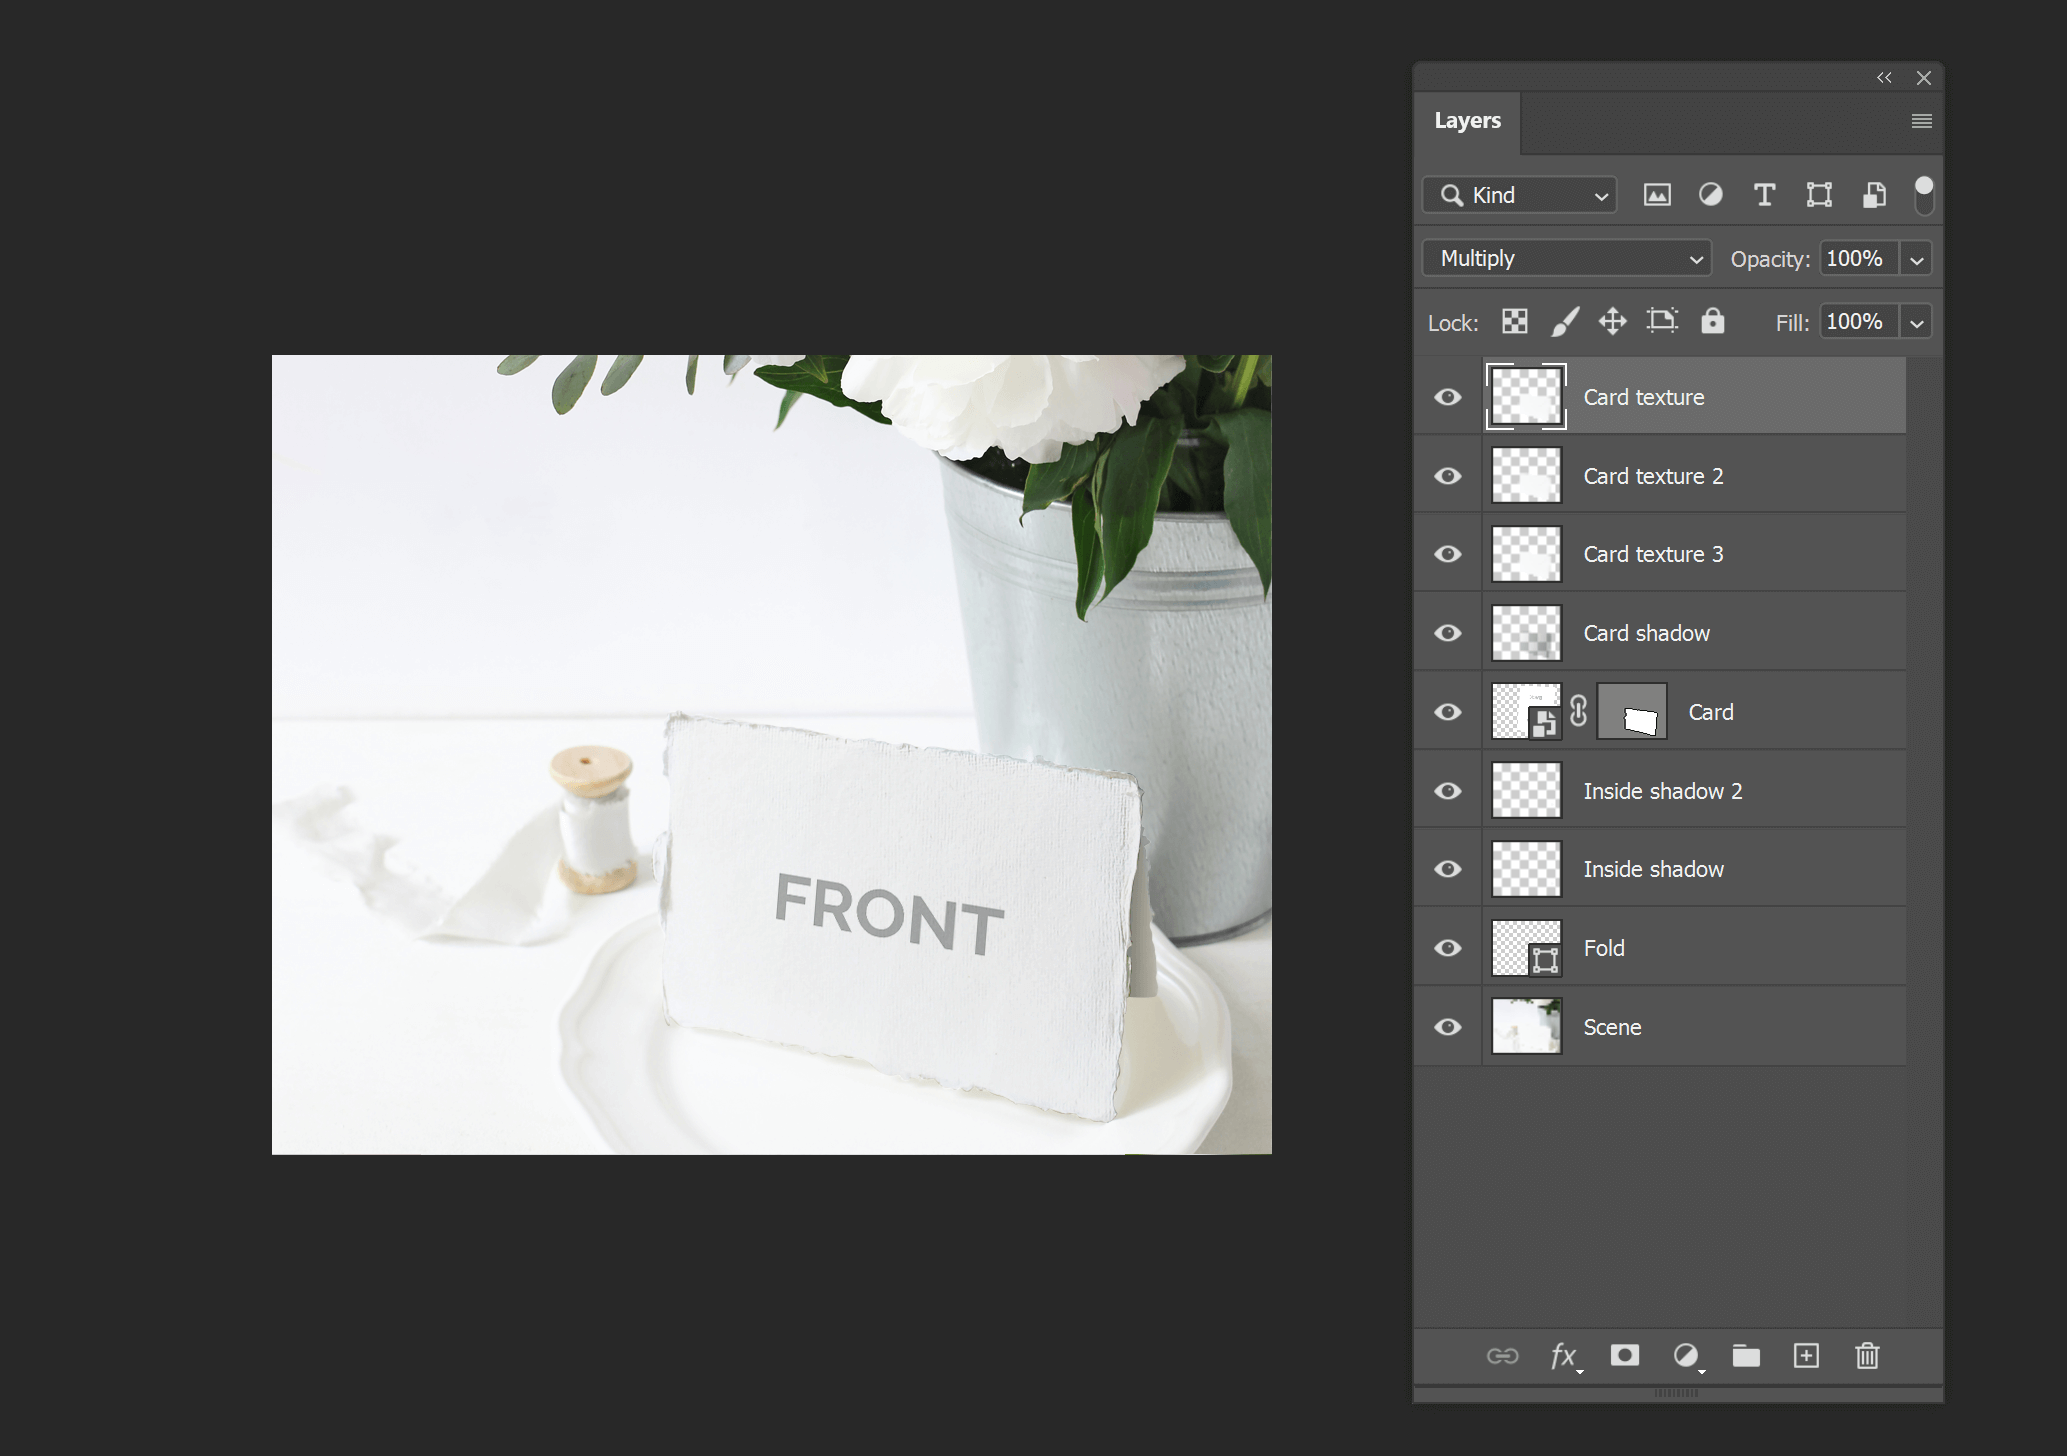
It contains the following layers:
- A scene (or a blank background)
- An image of a product
- Some helper objects - shadows, highlights, texture, etc.
- A smart object where Customer's Canvas will insert a design
If you are already familiar with creating mockups in Photoshop to create product images manually, you will find it quite similar. However, you need to keep in mind that Customer's Canvas does not support 100% of Photoshop's features. Its limitations will be explained further.
Image layers
As you may notice from the screenshot above, you can add as many image layers as you want. You can add the main product image, scene image, shadows, textures, and other elements above or below a design image (a smart object). Although Customer's Canvas does not place any limitations on the number of such layers, it is recommended to use a reasonable number of layers. The fewer layers you use, the faster a preview image is generated.
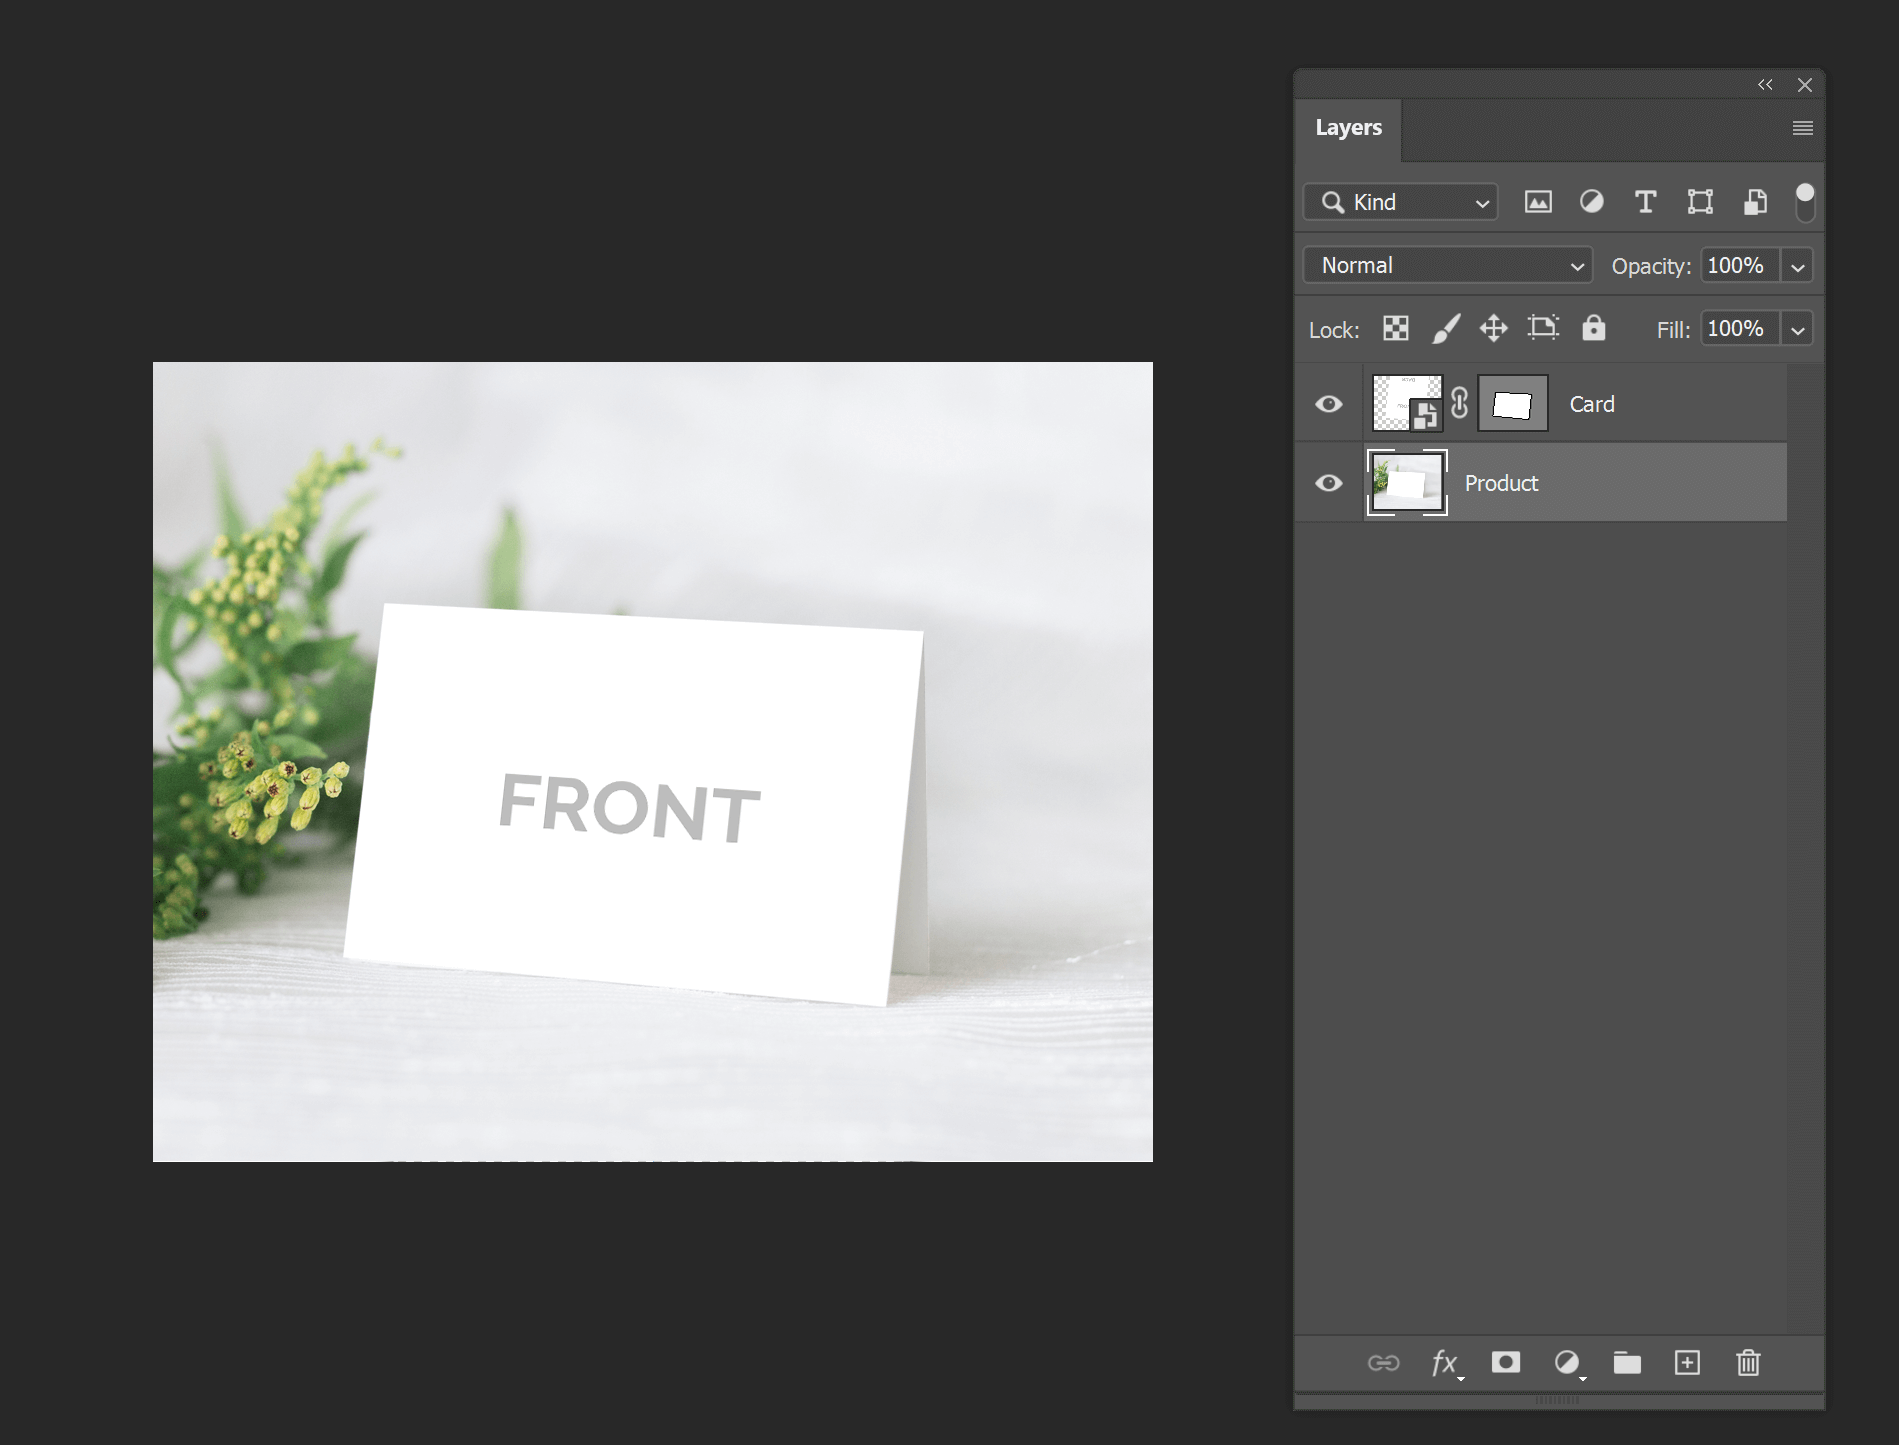
The simplest preview mockup will look like this - a single product image and a smart object placeholder above it.
Blending Options
To make textures, shadows, and other helper elements look more realistic, you may use Blending Options. Not all blending modes are supported at the moment. You can currently use these modes:
- Color Burn
- Color Dodge
- Darken
- Difference
- Exclusion
- Hard Light
- Lighten
- Linear Burn
- Multiply
- Normal
- Overlay
- Screen
- Soft Light
Opacity is supported as well with all these options.
Layer effects
Only Drop Shadow and Color Overlay work for image layers and smart objects originally added to the PSD file. However, these effects will not persist for the dynamically changed content.
It is highly recommended to rasterize all other effects.
What is not supported
In addition to the layer effects and blending modes not listed above, you cannot use adjustment layers and smart filters. Rasterize them as well.
Smart objects
Smart objects are used as placeholders for a design. You may have more than one smart object, for example, when you are displaying both the front and back sides of a card on a single preview.
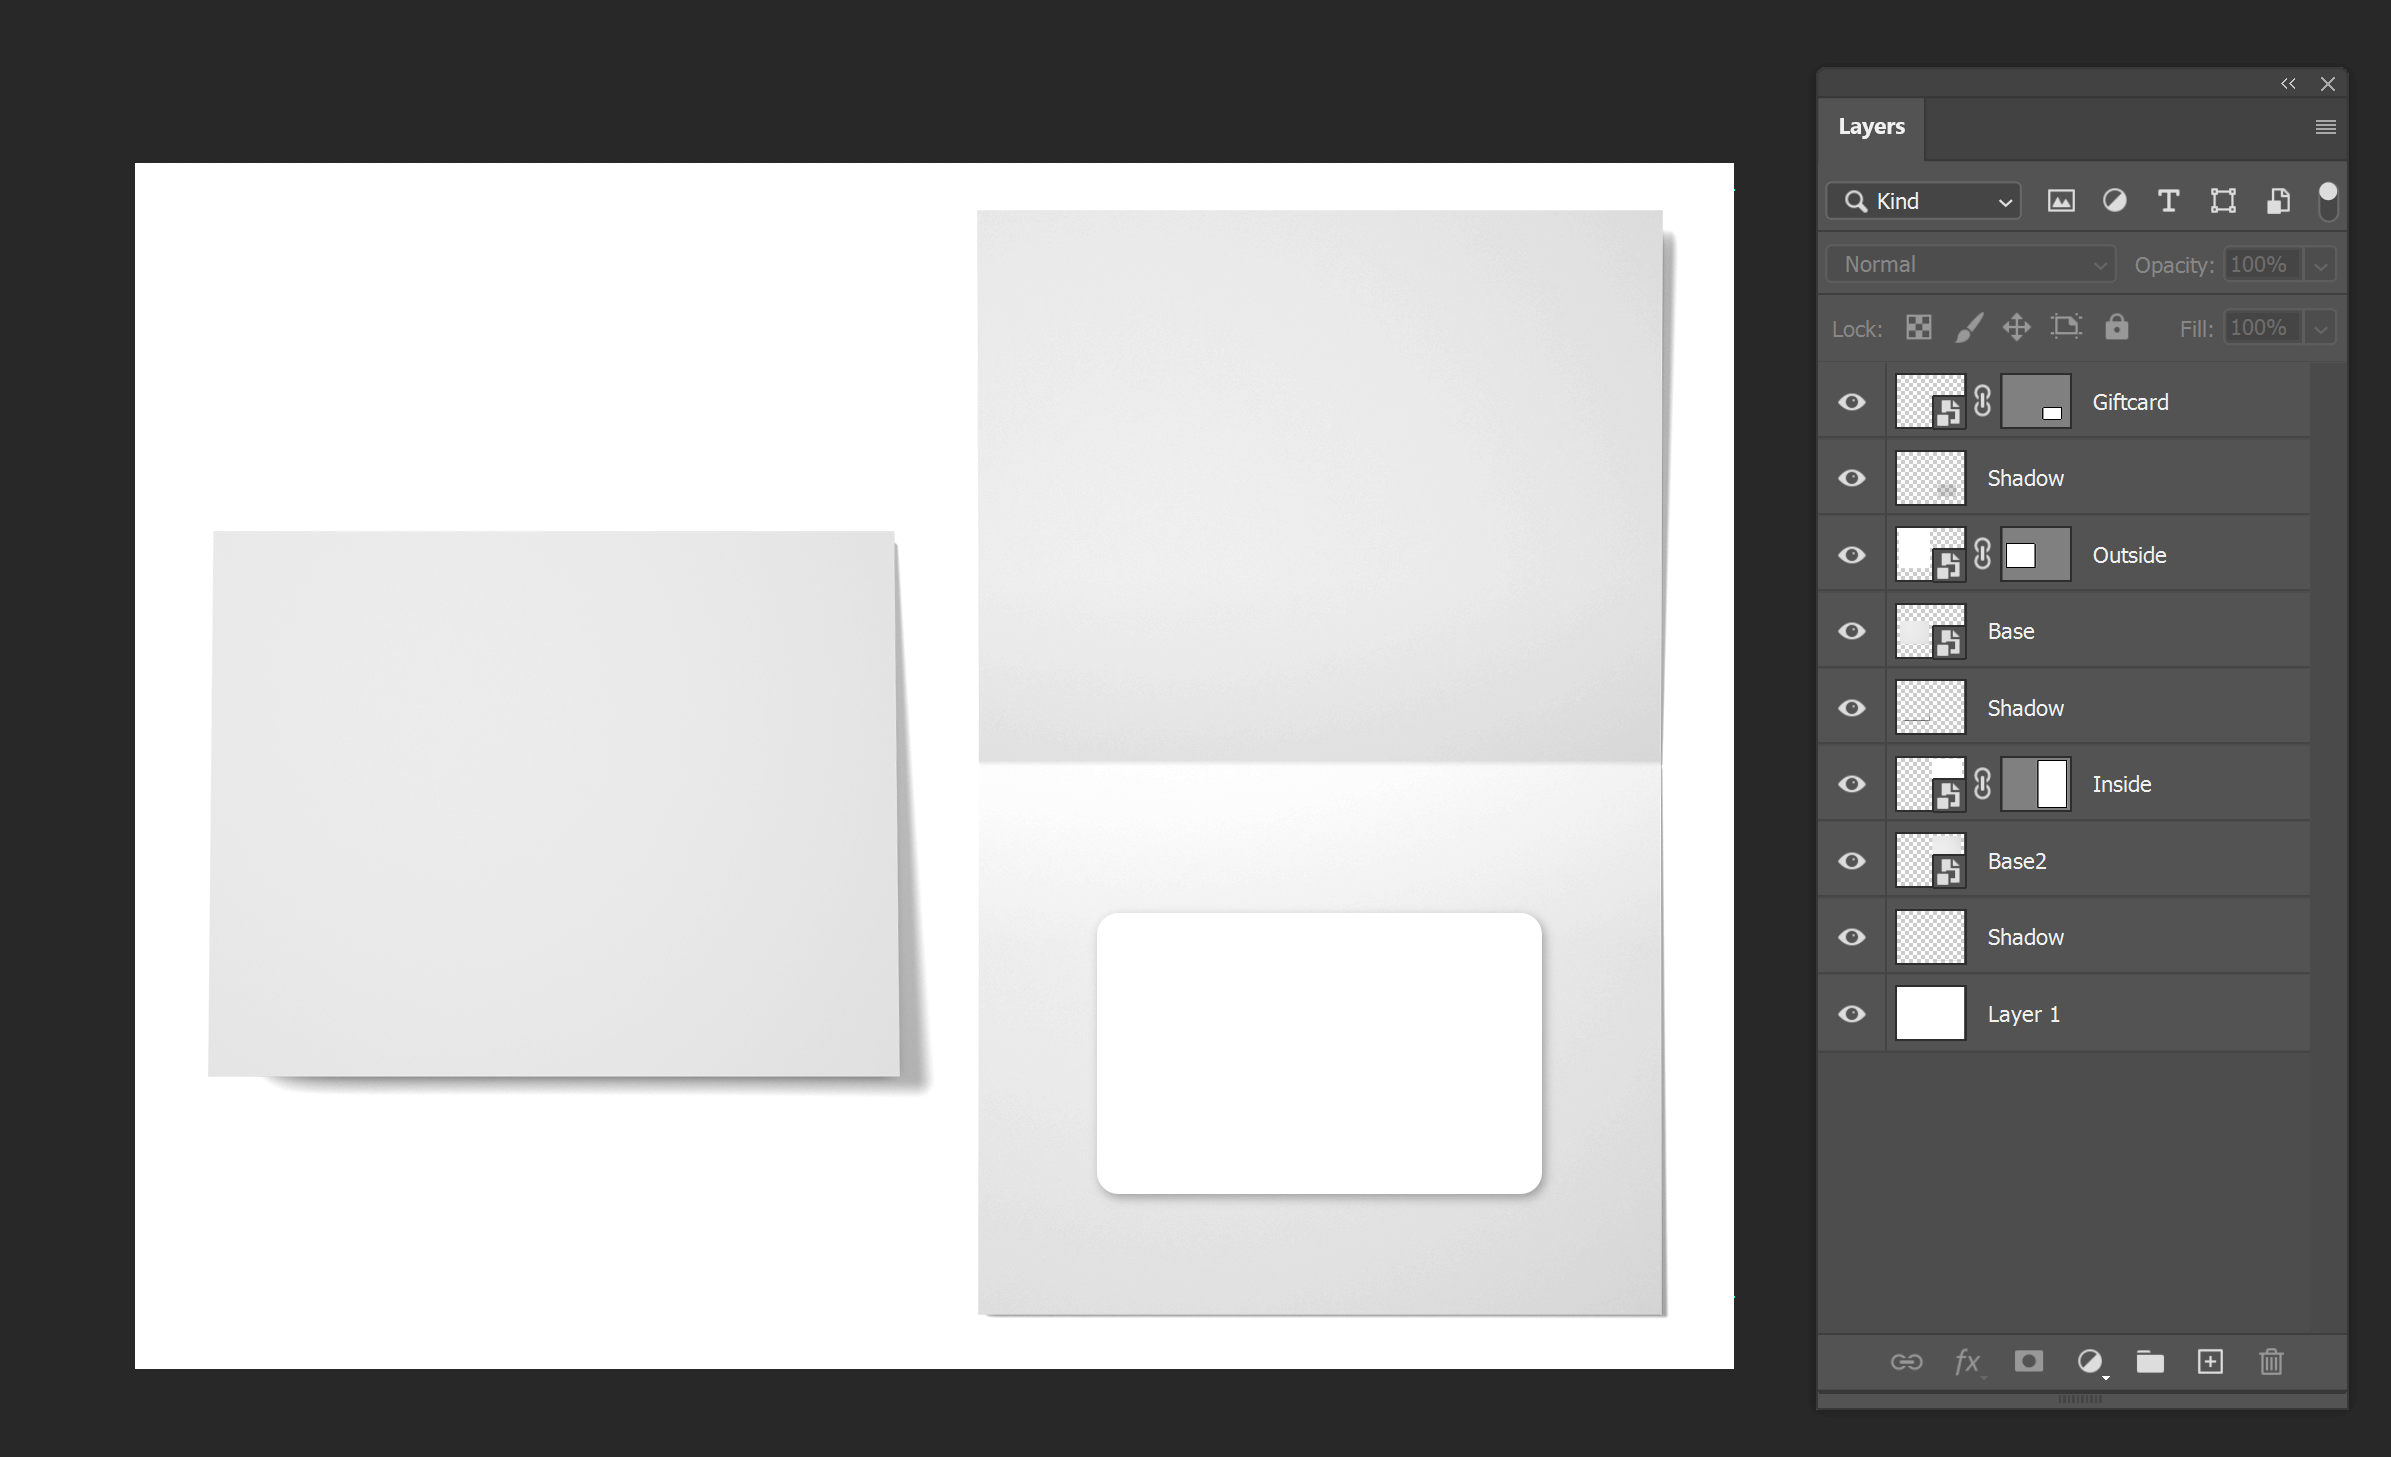
When you add a smart object, you need to give it a meaningful name. You must specify the name when configuring the mockup so that Customer's Canvas can understand where you want to insert a design.
It is also possible to specify several smart objects with the same name. In this case, the same design will be inserted into a mockup several times.
Aspect ratio
Pay attention to the smart object aspect ratio. It should be the same as the proportions of the design file. Otherwise, the design won't fill the entire smart object and the preview image won't look right.
Masks
If a design file is larger than you need (for example, it contains a bleed zone), you may want to add a mask to clip the unnecessary portions of the design. You may use both vector and layer masks to achieve that.
Tip
Masks are supported for smart objects as well as image layers. However, we recommend flattening the masked elements to simple image layers to optimize performance.
Smart object transformations
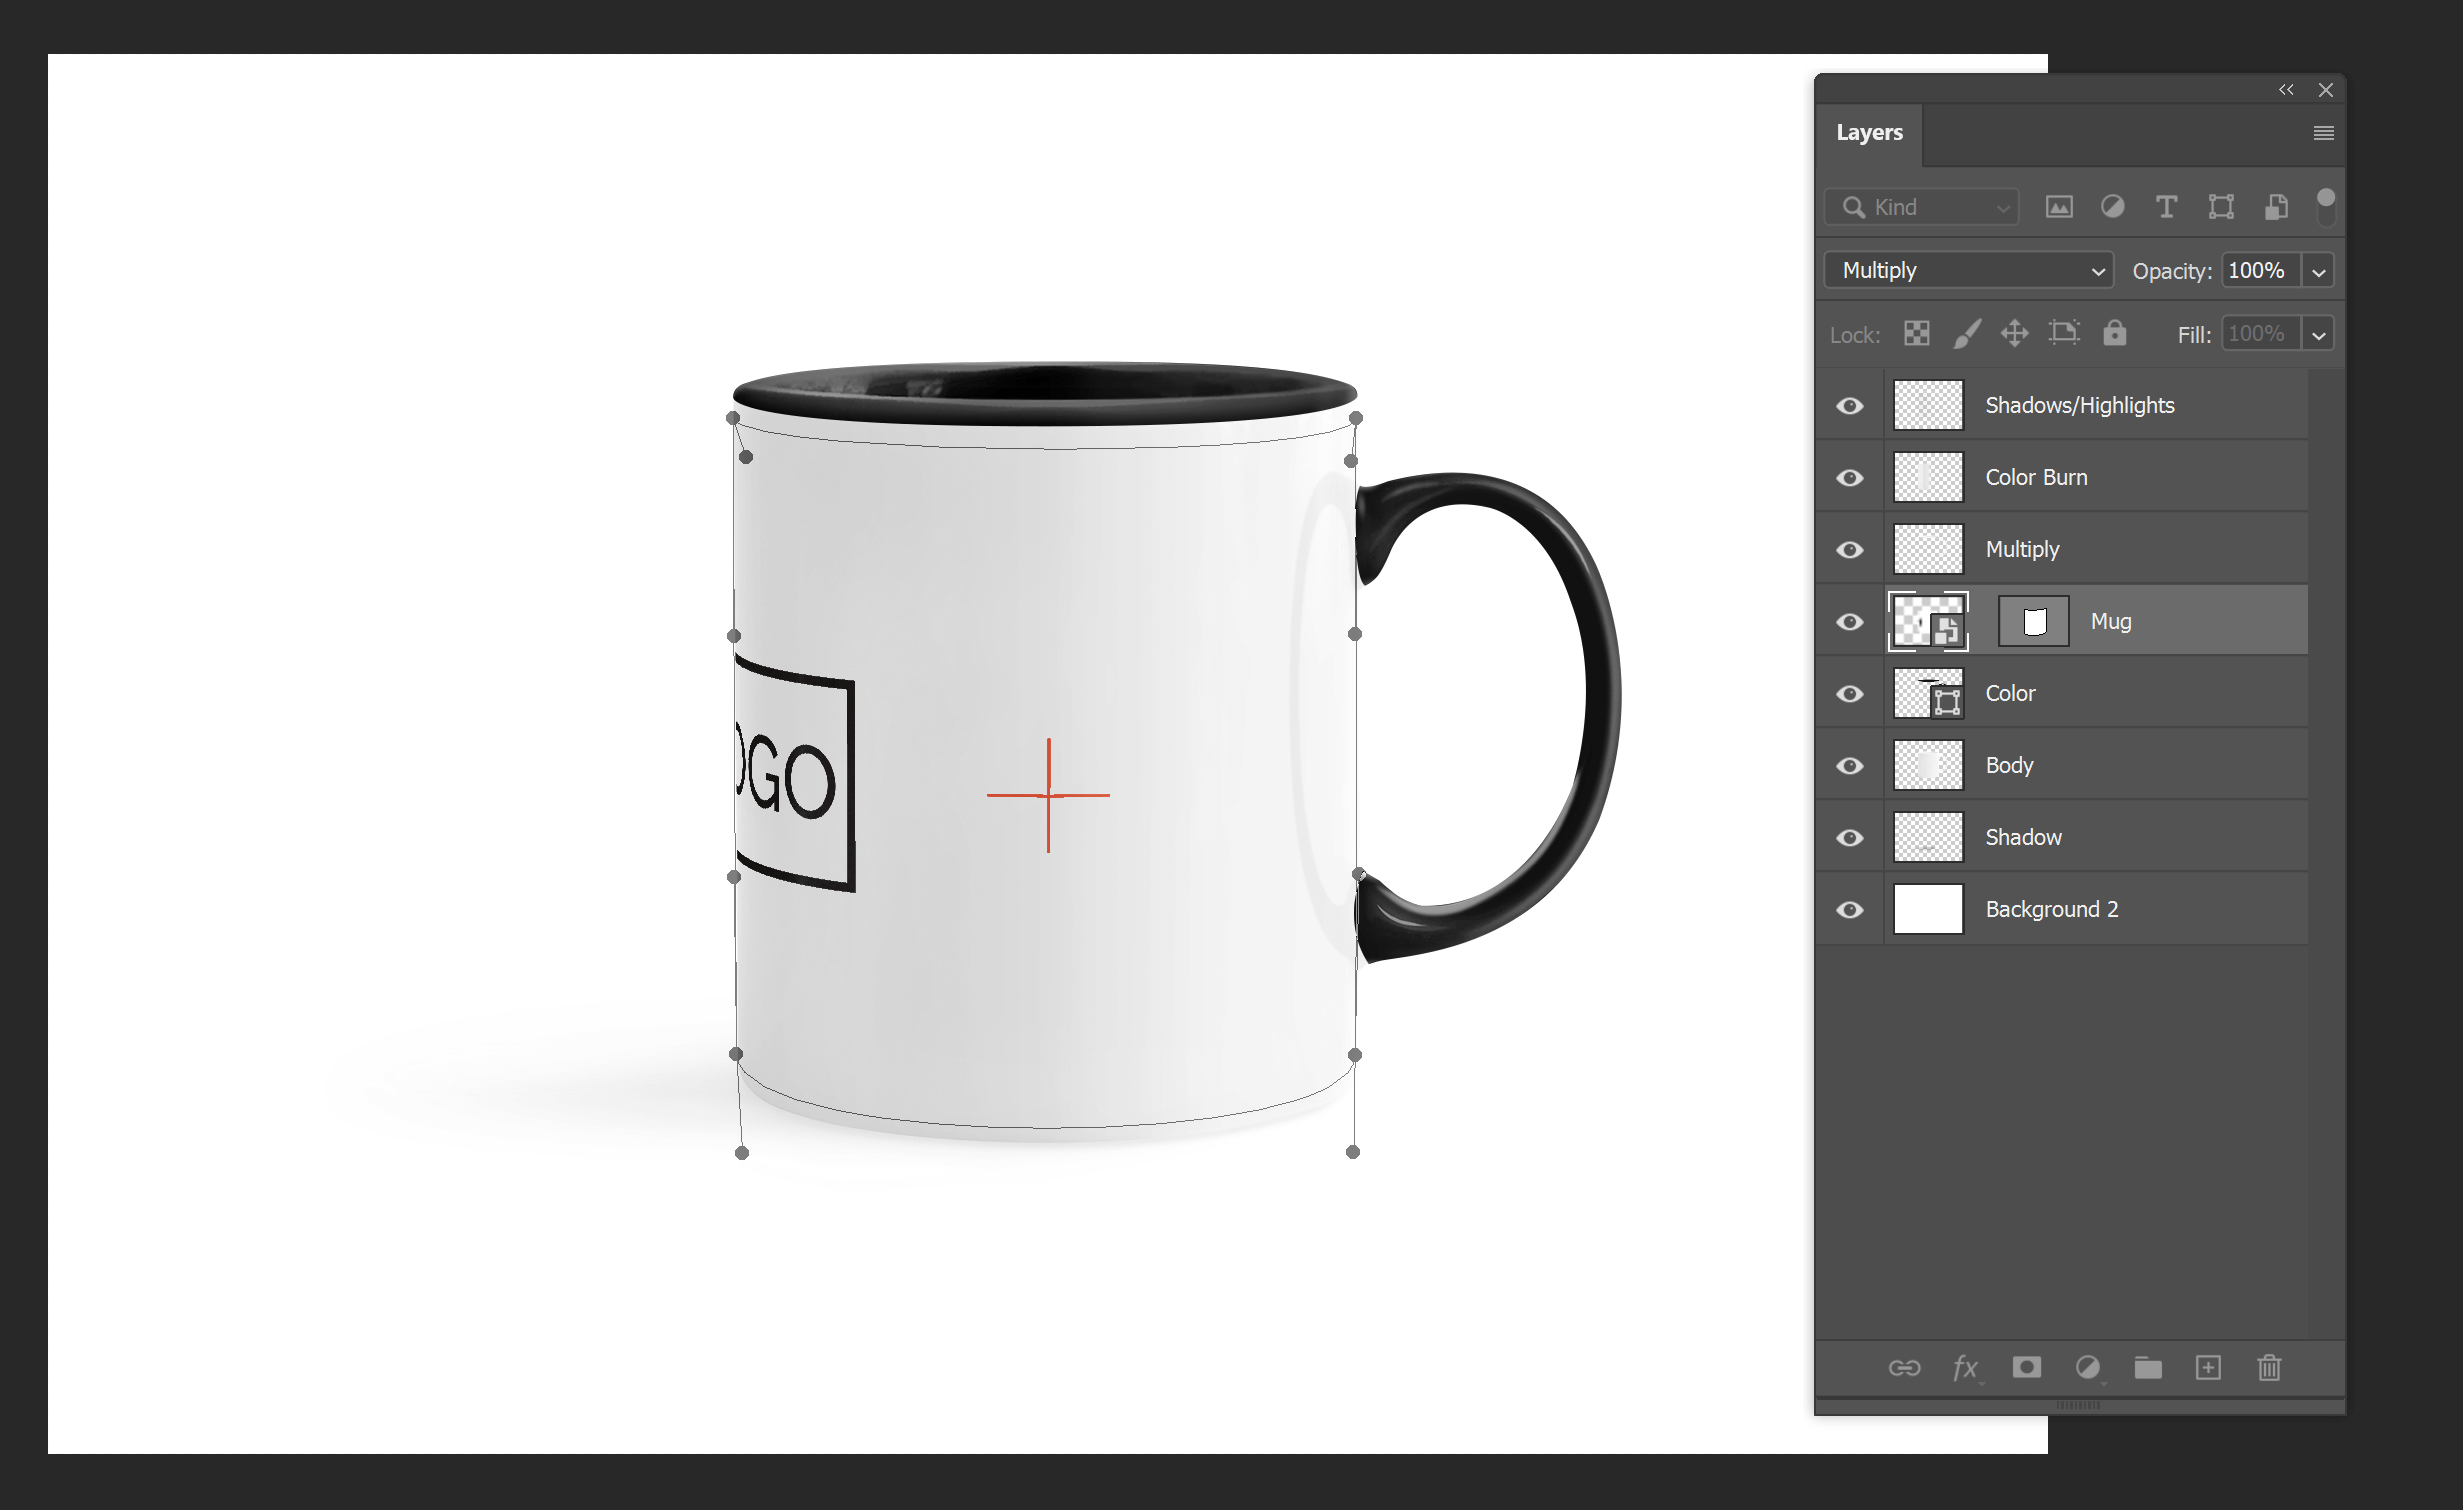
Quite often, a design on a preview will not be flat. A product may be rotated in space, or its surface may be curved. You can apply the following transformations to smart objects:
- Scale
- Rotate
- Skew
- Distort
- Perspective
- Warp
Nested smart objects
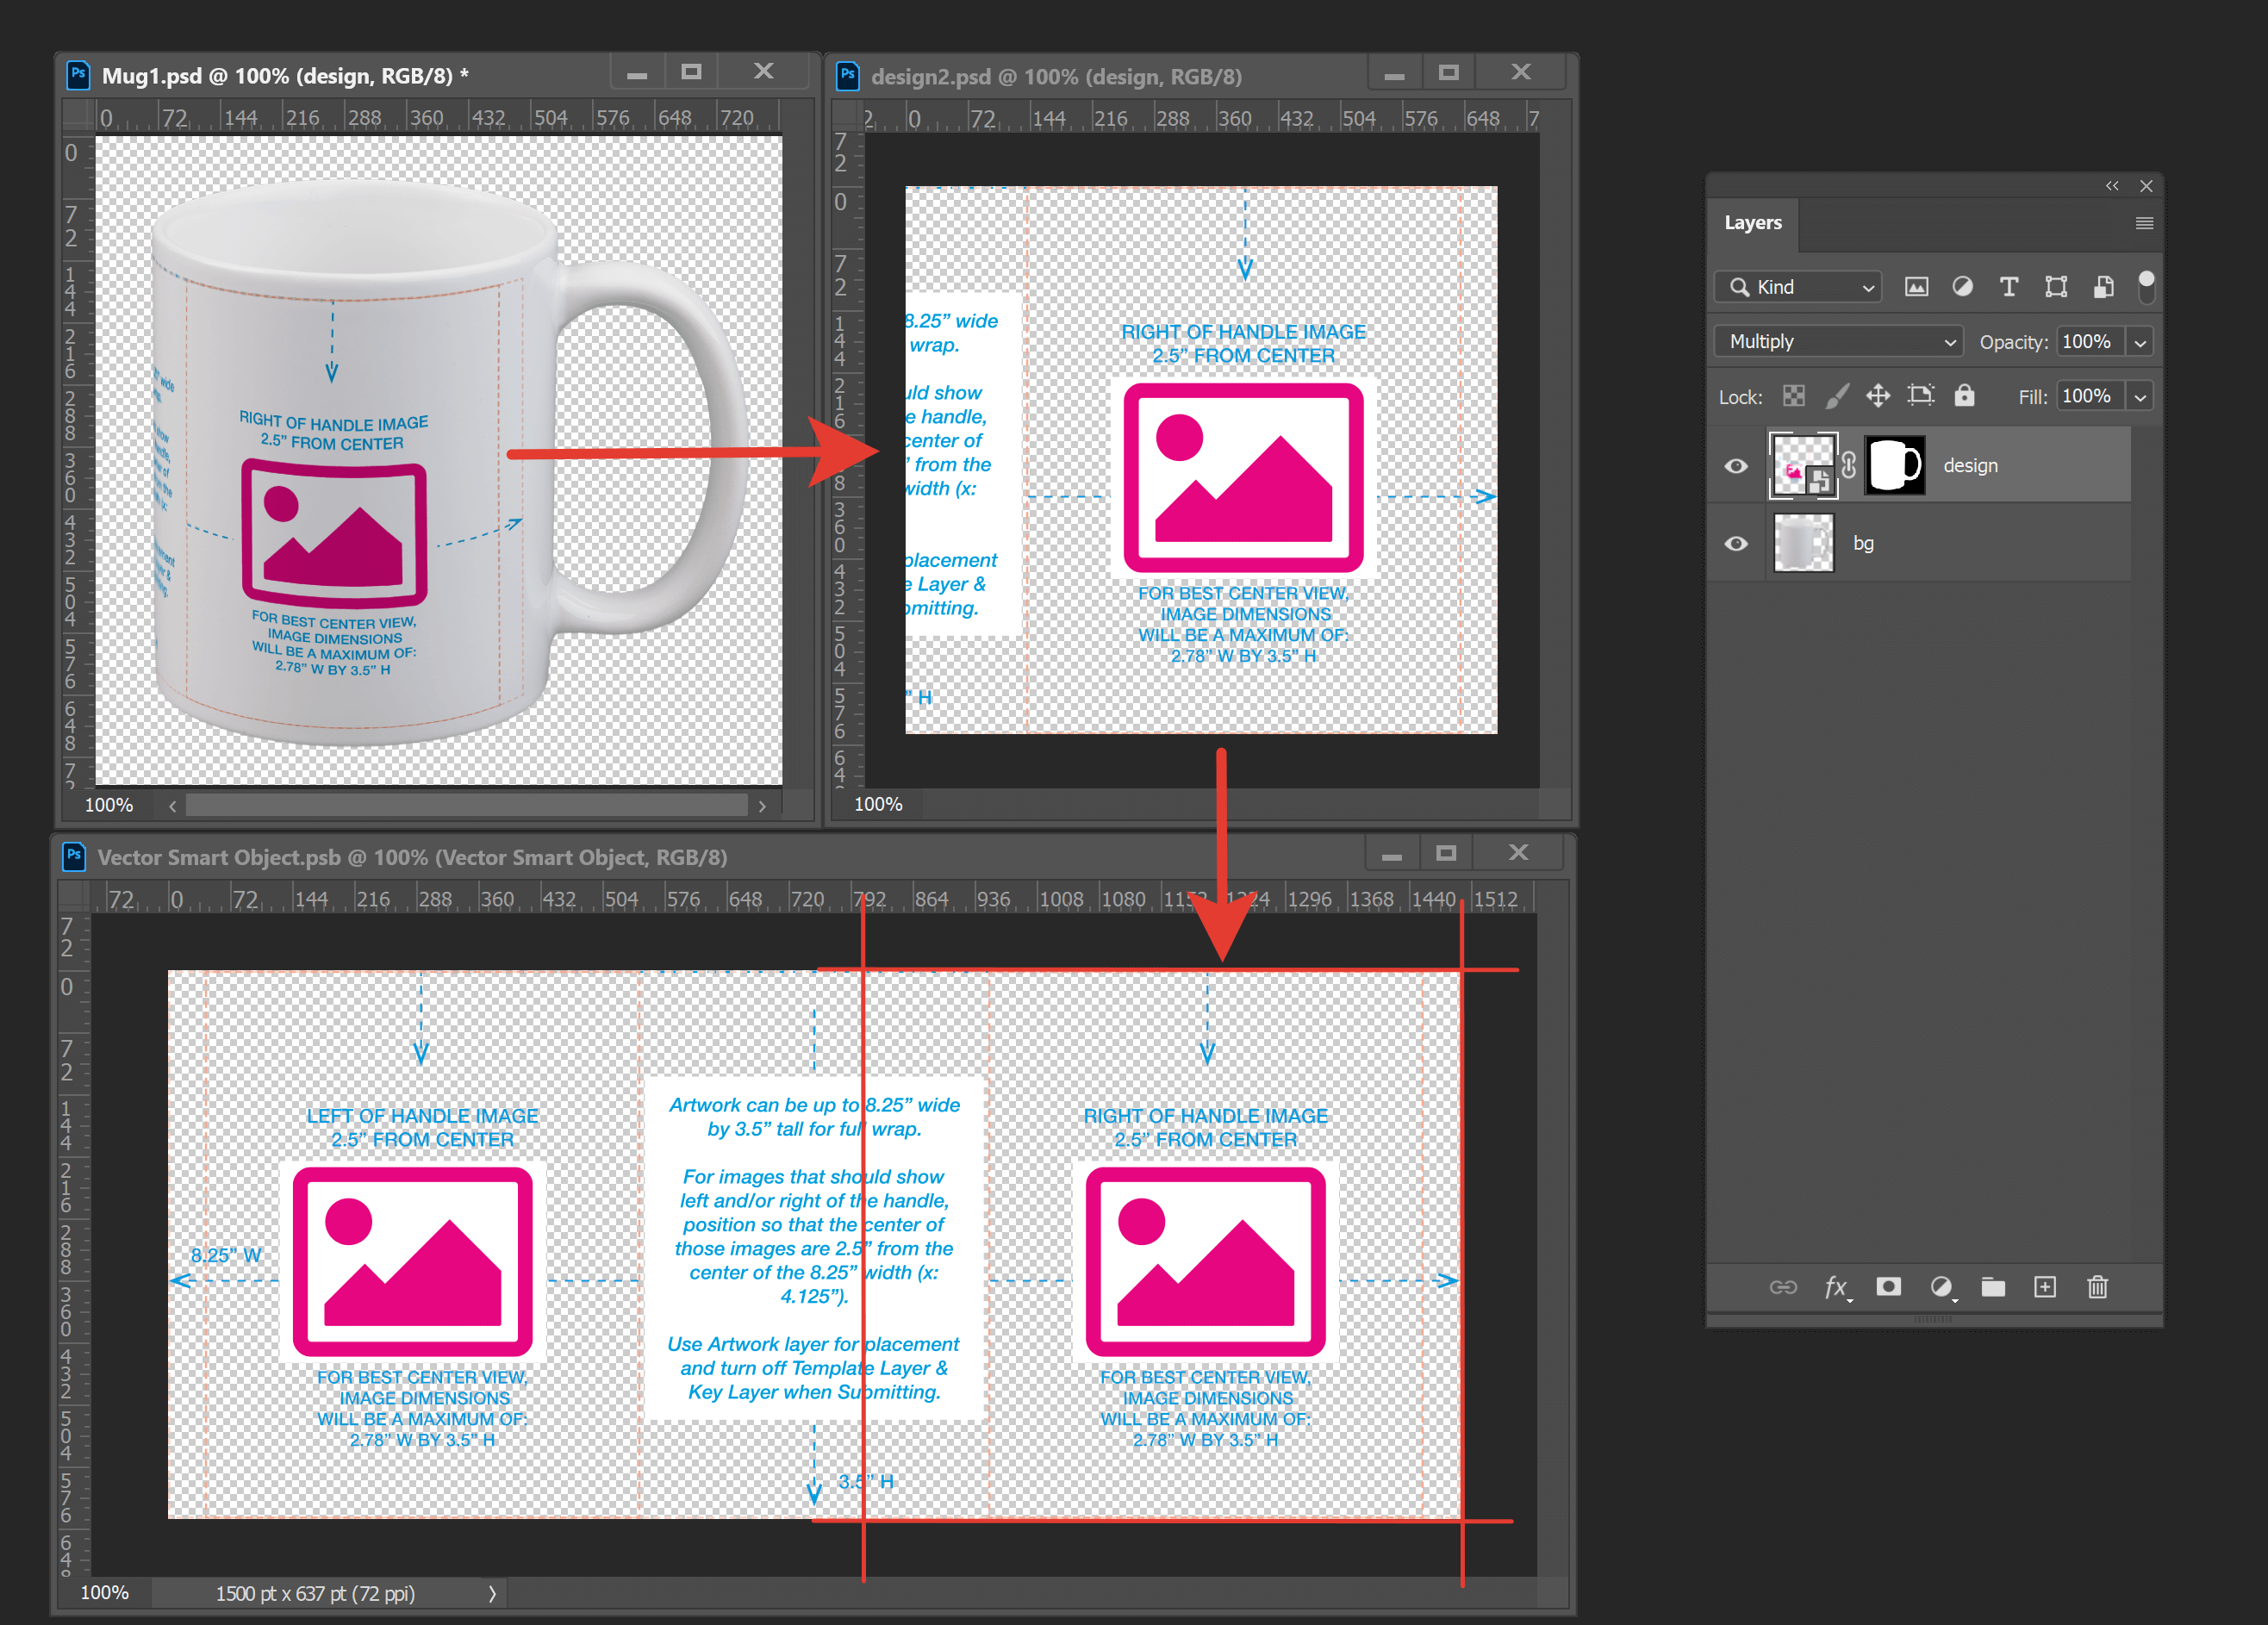
You may want to create a preview image where only a part of a print file is visible. The most frequent scenario when you need it is when you prepare a preview mockup for a cylindrical product with a 360-degree print.
In this case, it is not enough to add a smart object. A smart object on a mockup will be used to visualize the visible part of the design. It can be warped in accordance with the product surface (e.g., cylindrical). Inside this smart object, you need to add another smart object of the same size. Its content will be a full design what is larger than the smart object. You need to adjust the position of the content inside this smart object to make the appropriate portion of the full design visible.
Resolution and mockup dimensions
Unlike editor mockups, when you create preview mockups, the physical size of the product and relative position of the design and mockup are not important. The reason is that the design images will be inserted into smart objects and automatically resized to fit within them. So as long as its proportions are correct and the smart object is correctly placed on the entire image, it will look right.
However, you may want to re-use the same PSD file for both the editor mockup and preview mockup. In this scenario, you still need to make all the calculations as explained in the How to create editor mockups article.
As for the pixel size of a PSD file, use the same width and height as is reasonable for your preview image. As usual, it is around 1000-1500 pixels. The recommended resolution is 72dpi.
Note
If the image quality with these dimensions is low or insufficient, you may increase the image size. However, the larger the size, the longer the image will take to load in the editor.
The parameters of smart objects inside the preview mockups must also use these settings.
Dynamic mockups
In certain personalization workflows, Customer's Canvas allows for sending commands to the preview image generator, which modifies the mockup. Some commands include toggling the visibility of certain elements, selecting a visible item inside a group, or changing the color of a shape layer. This way, the mockup becomes dynamic.
Note
The implementation of the dynamic mockup functionality described above does not happen automatically. The developer or a person who configures the personalization workflow should make certain changes in the code. This article focuses on the operations a graphics designer should do to make it possible.
Toggle layer visibility
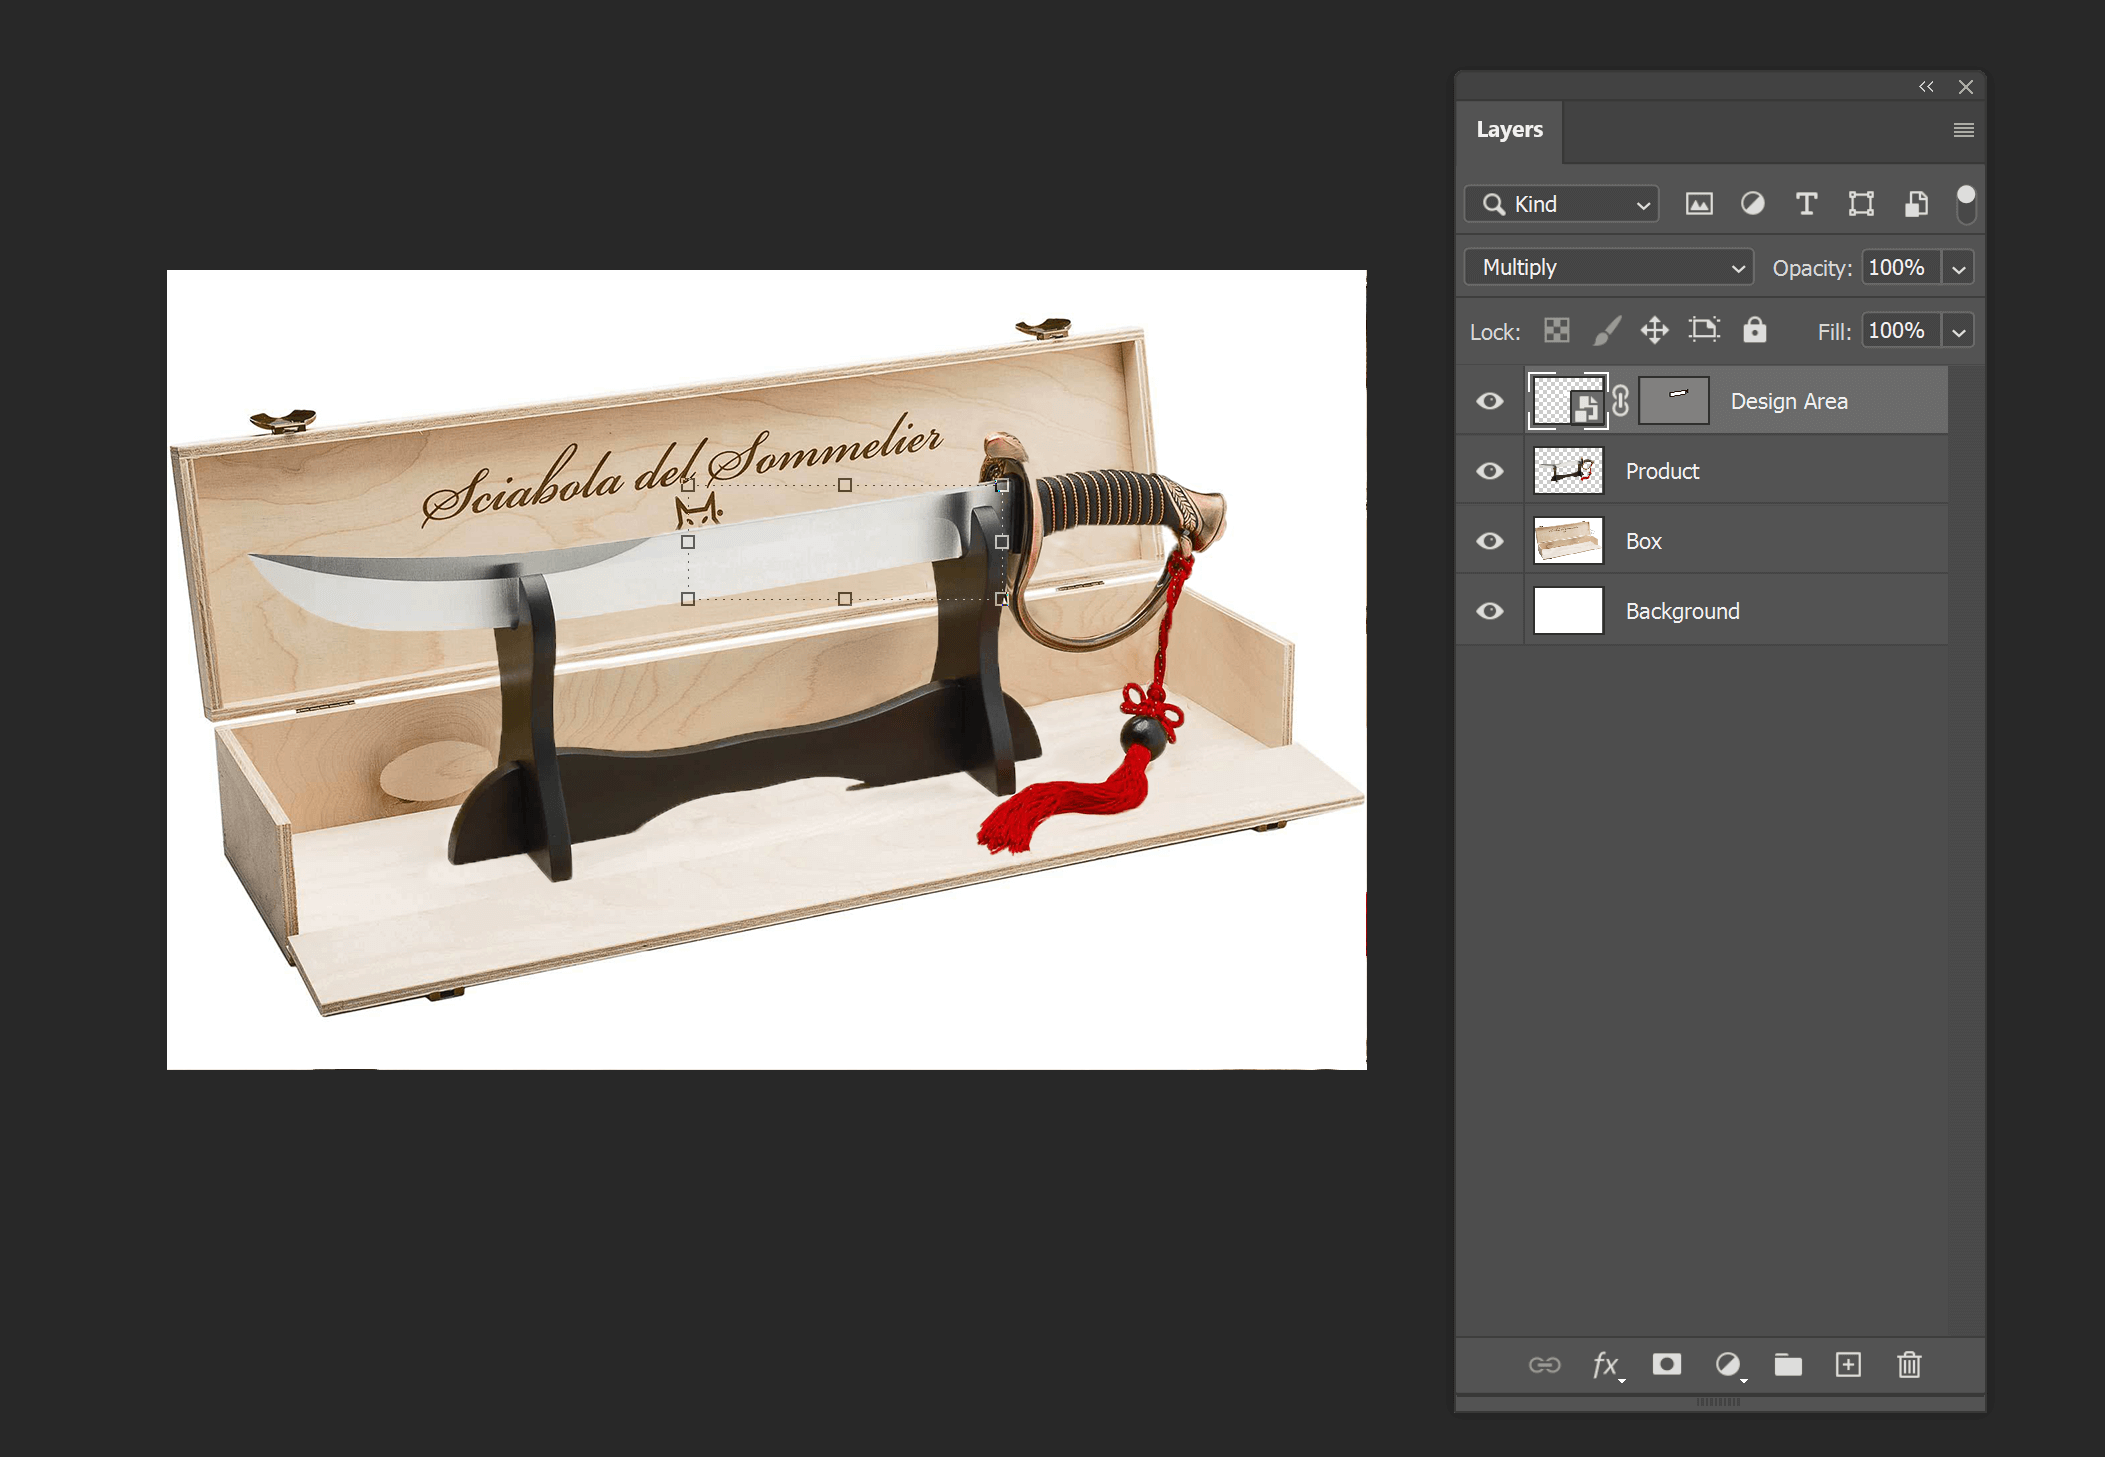
Let's imagine that a product has an option like add a gift box. Depending on the user's choice, you may want to display a product with or without a box.
In this case, you need to add an optional element as a separate layer. This layer name should be meaningful, and it should be associated with an option in your online store that toggles this layer.
Choose a layer in a group
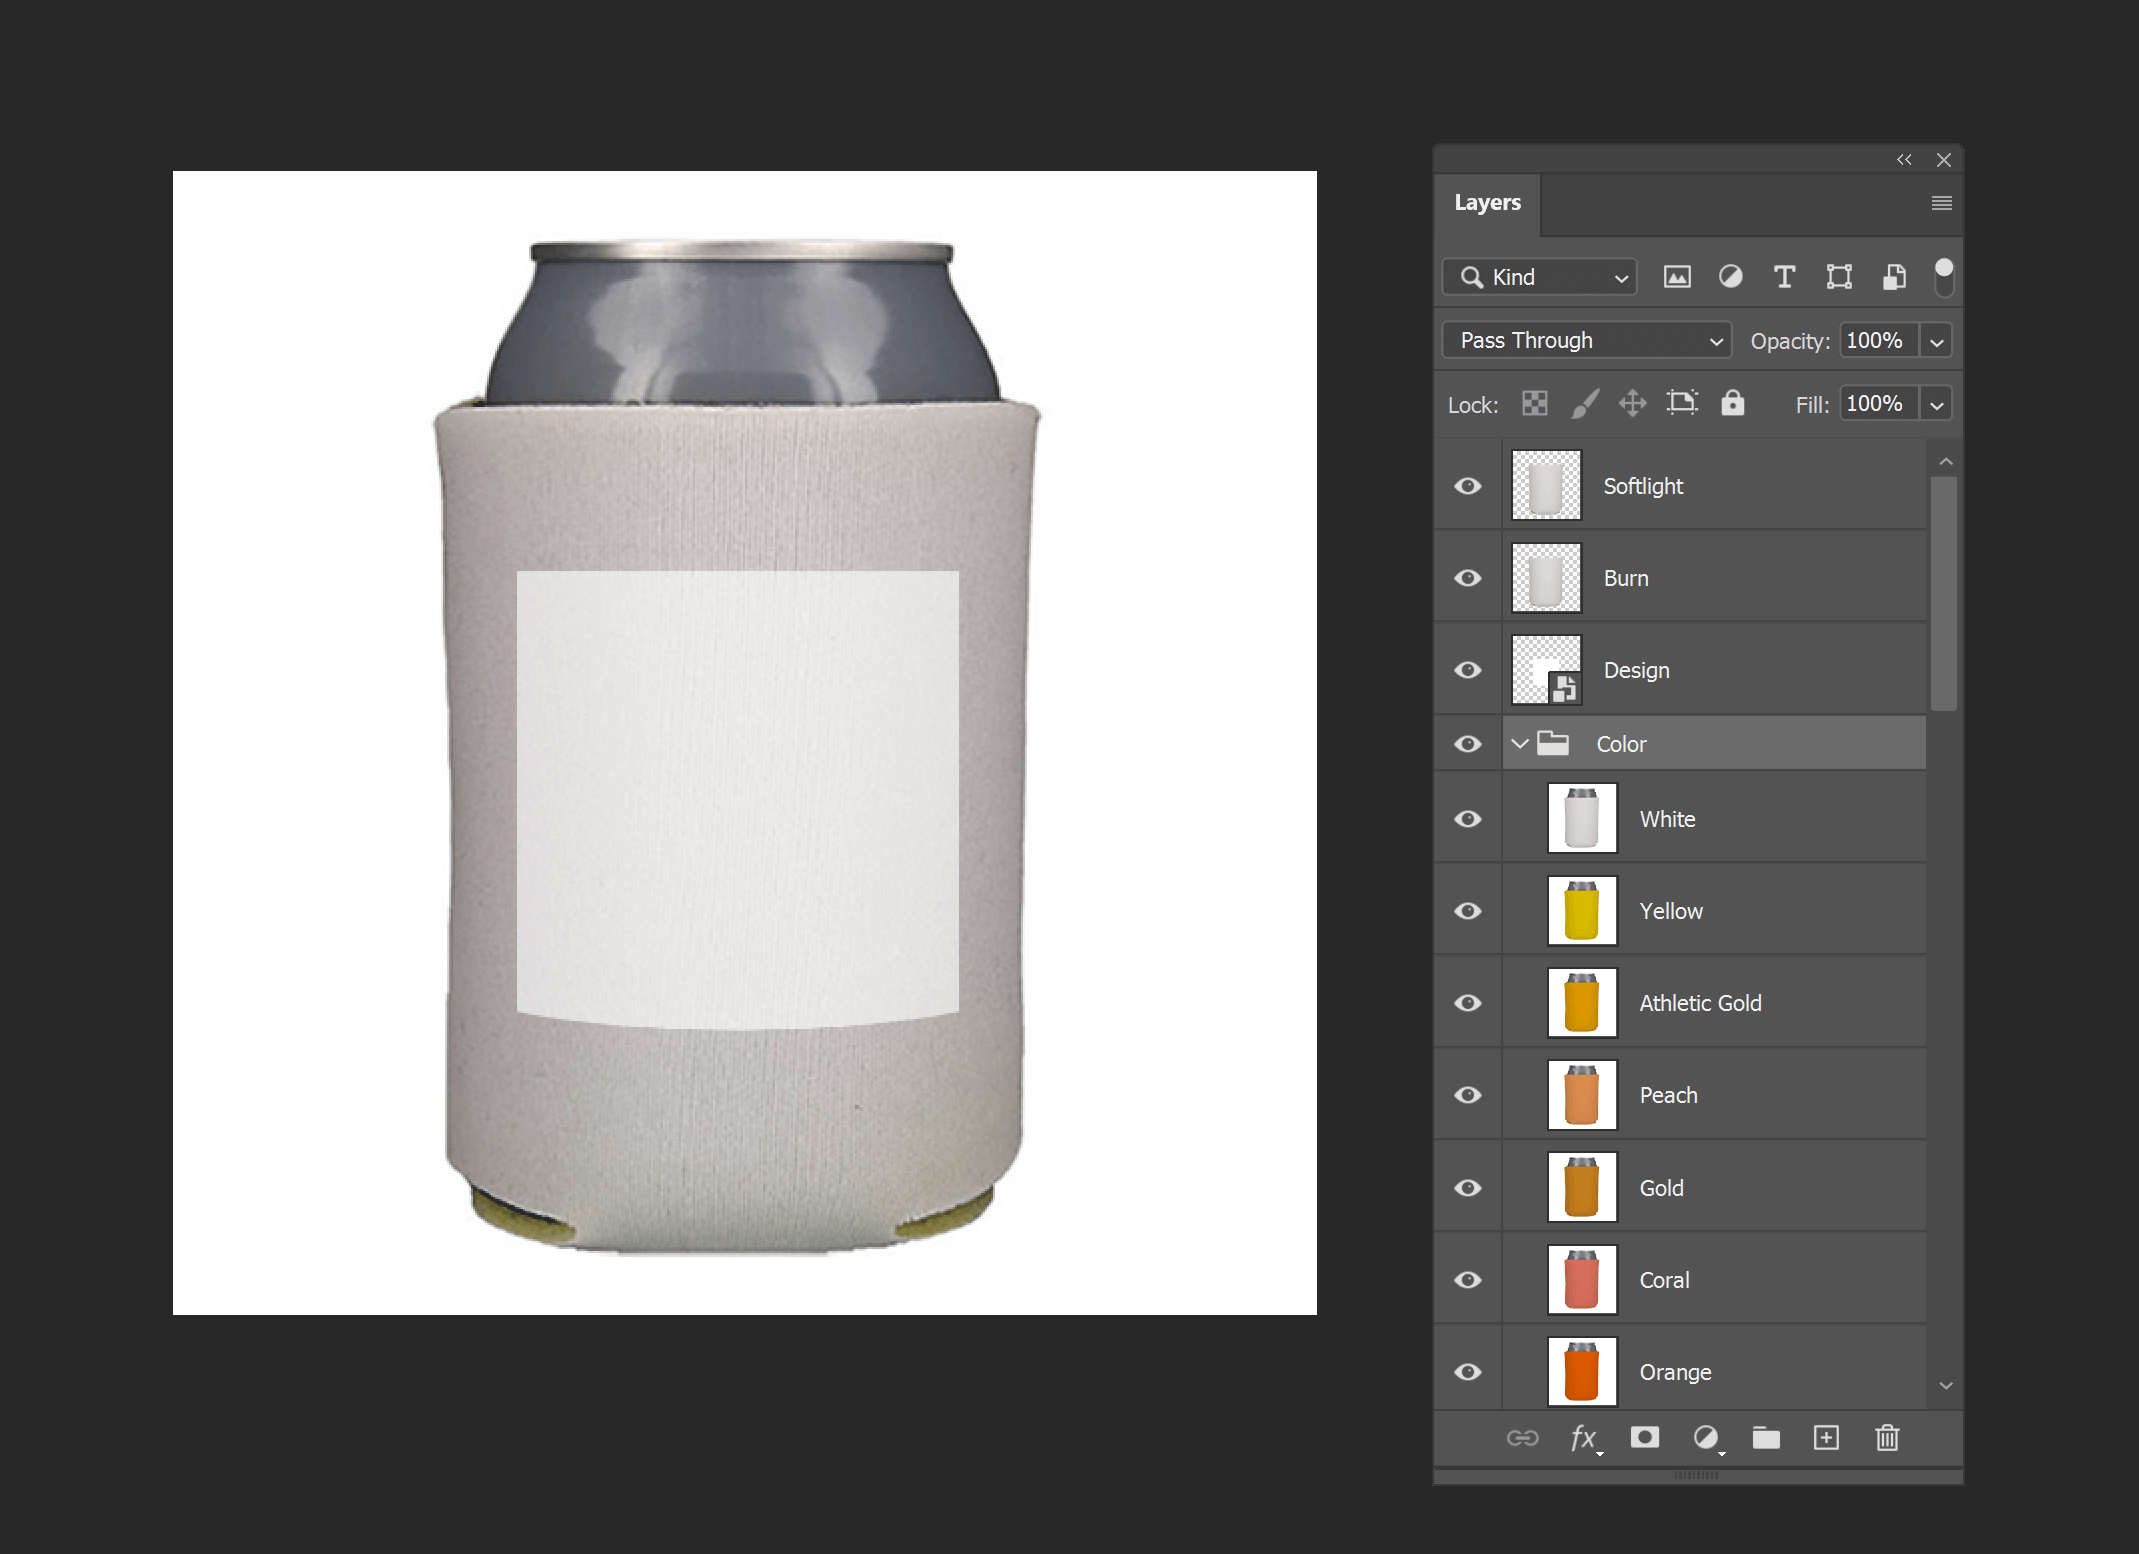
Another popular scenario is when you have several versions of a product, but the print area and helper elements are the same. For example, when your product comes in multiple colors.
The simple way to implement this scenario is to create a group layer, and each of its elements will be a product image of the necessary color. The naming convention is important. As usual, you should give your groups names that match the options in your online store (e.g., Color), and group element names should be the same as the option values (e.g., the color names - White, Yellow, Navy Blue, and so on).
Recolor a shape layer
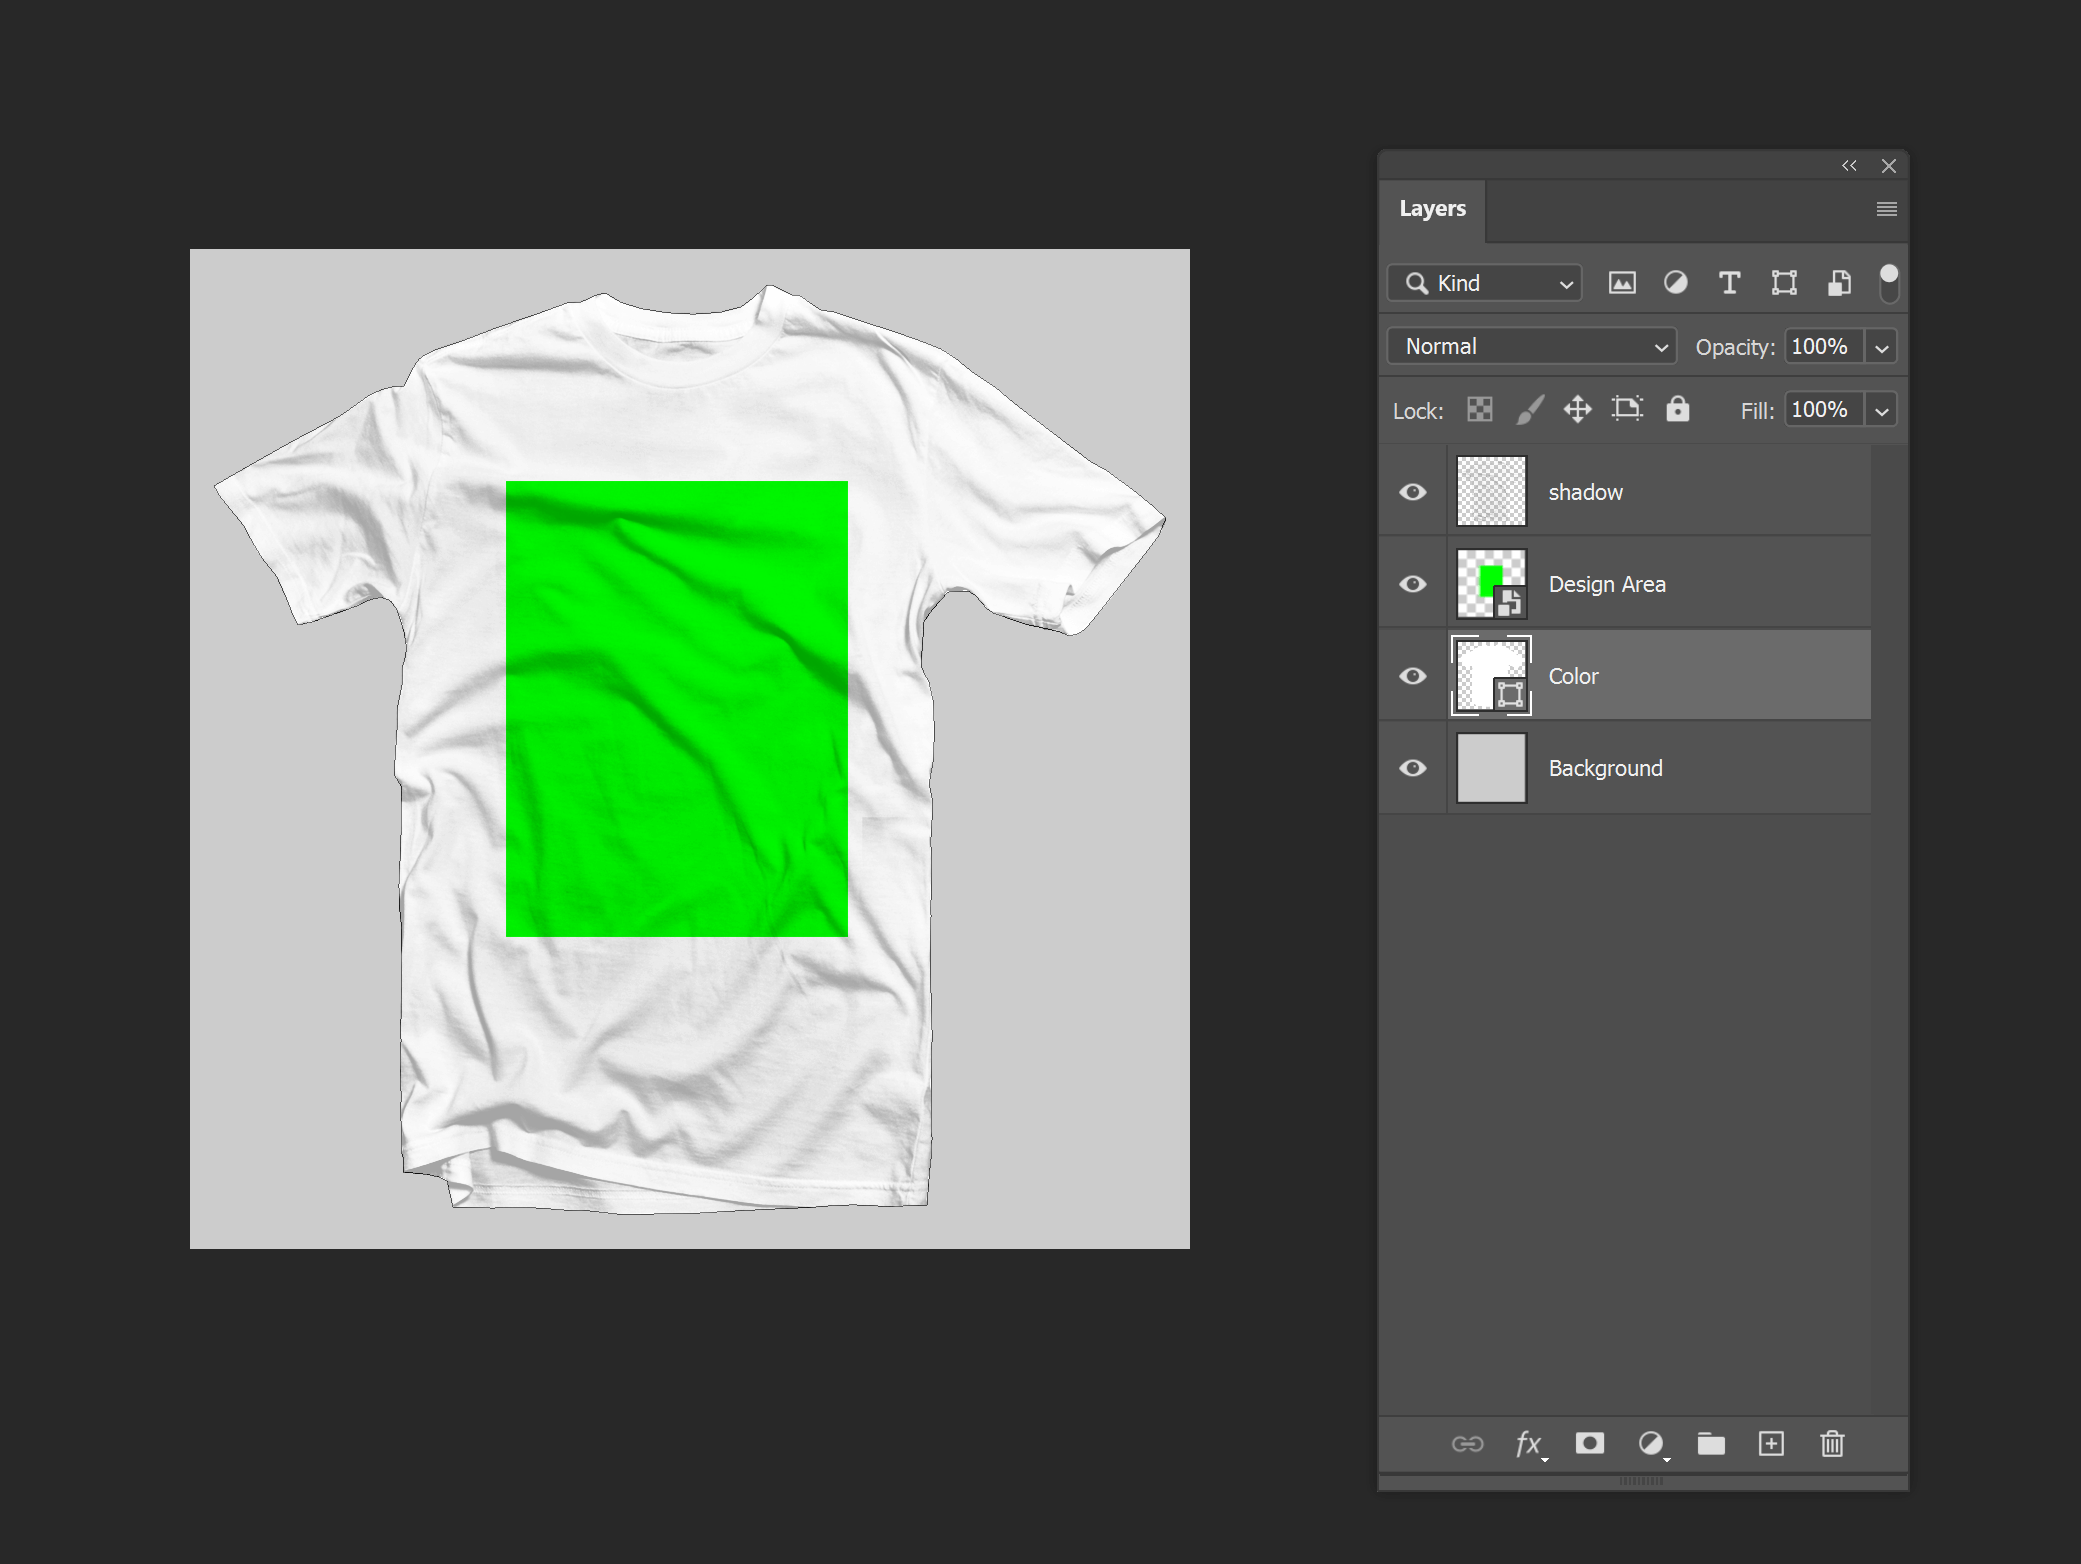
It is not always reasonable to create all possible product colors as a group layer with image variants. It may be preferred if you prepare a single image where you can send an RGB value of a product color.
To achieve this, you need to create a shape layer of the same shape as a product. You can add helper image layers, probably with some blending options to show a texture, shadows, or folds on it. Try to change the shape color to see if the product still looks natural. If so, give the shape layer a meaningful name - a developer who integrates it with a personalization workflow will use it to send a color value from the editor.
Now, let's go further and learn how you can create preview mockups for garments.