Adding personalization to a product
- Last updated on August 8, 2022
- •
- 2-3 minutes to read
In this article, you will learn how to use Customer's Canvas to allow your customers to personalize the products in your Magento storefront. As an example, we will set up a wedding invitation product. Here you need to create a product for each wedding invitation design and connect it to Customer's Canvas. A customer will be able to open this design in the editor and personalize it. After the purchase, you will be able to download a personalized design as a print-ready PDF file.
Let's see how to do this.
Prerequisites
For this tutorial, you need:
- A Magento store with the installed Customer's Canvas extension.
- A Customer's Canvas tenant linked to your online store.
- A design file, you can download and use our ready-made design.
If you have any issues with any of these prerequisites, contact our support team.
1. Creating a Magento product
Let's imagine that we would like to add our product under a category called Wedding Invitations.
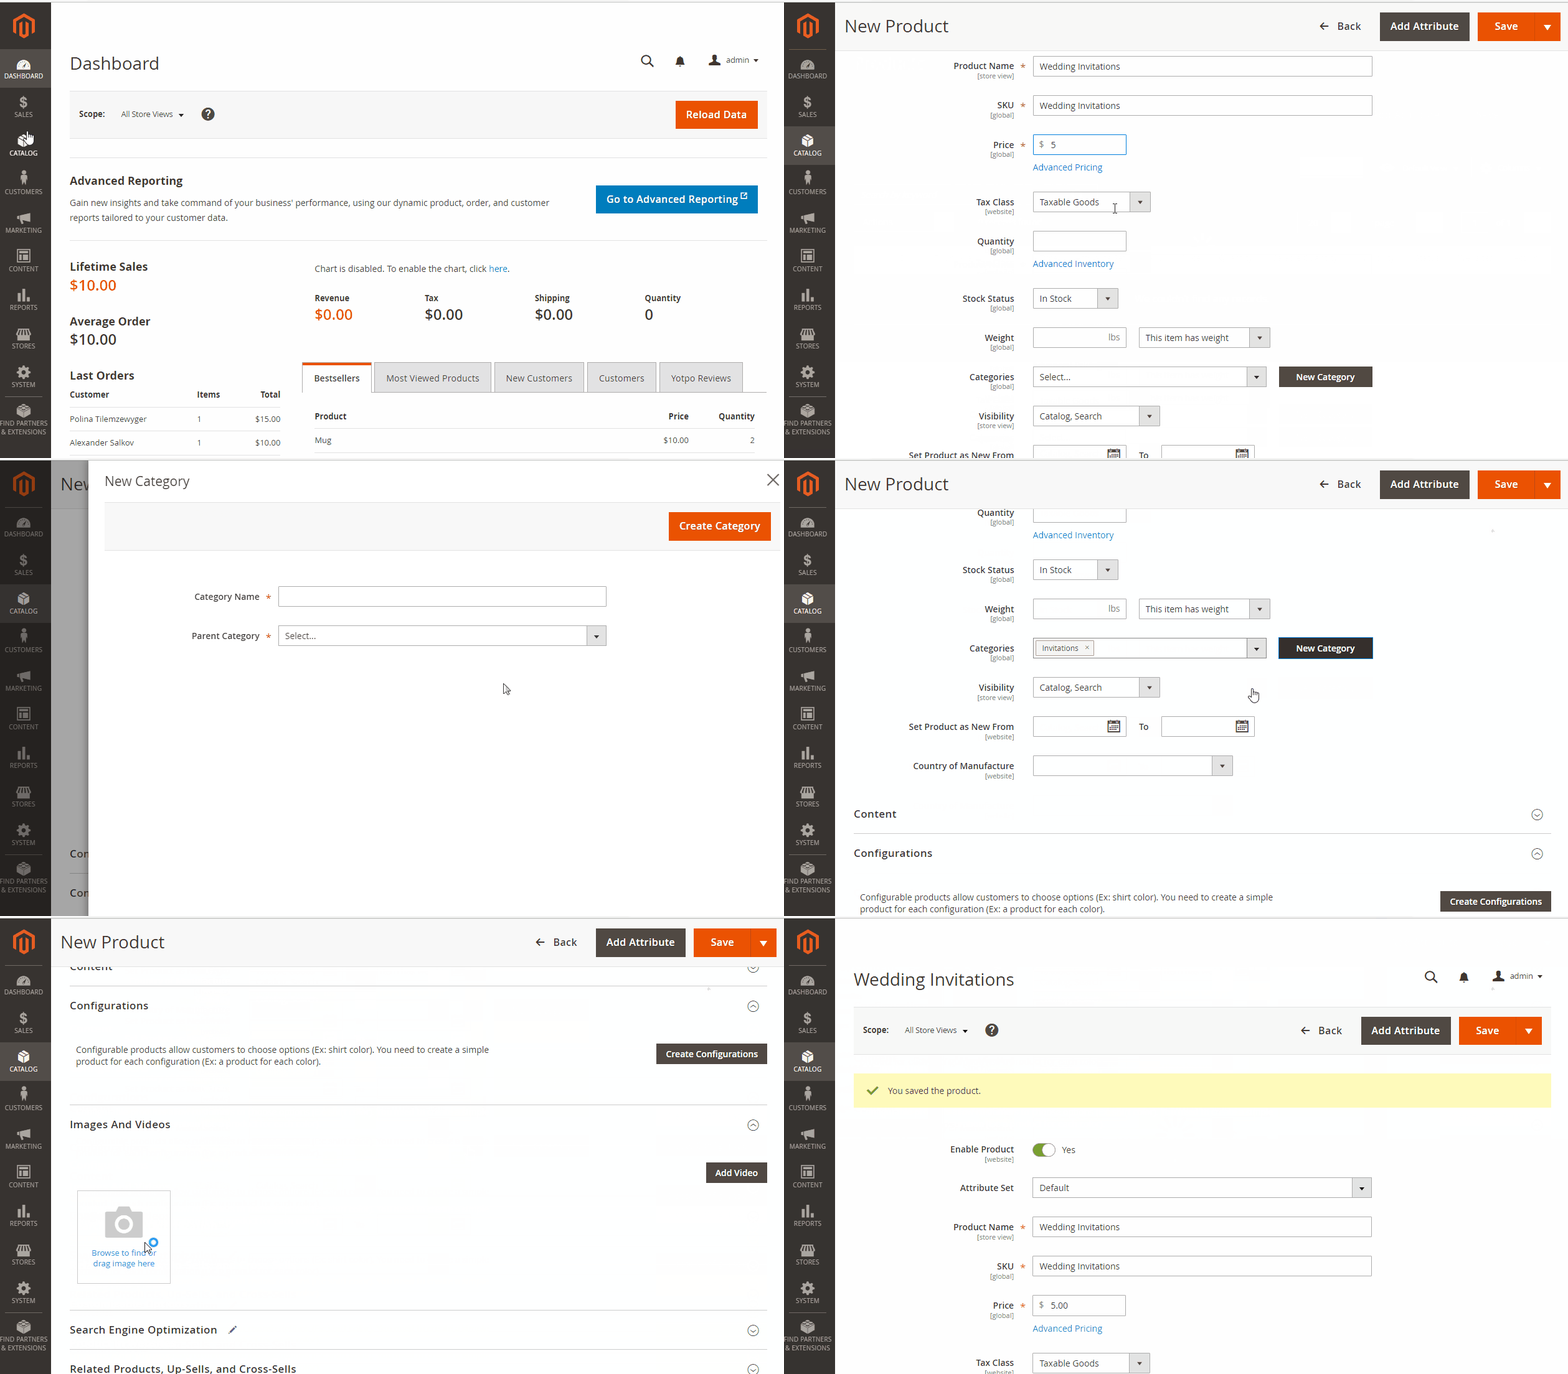
In the Magento admin panel, click Catalog > Products > Add Products.
Fill in at least Product Name, Price, and select Categories. If you don't have a category yet, click New Category and name it Wedding Invitations.
Scroll down the form to Images And Videos, click Browse to find or drag image here, and select the product image from the downloaded archive.
Click Save, if everything is correct.

2. Uploading a design file
Following the next steps, you upload a file in BackOffice.
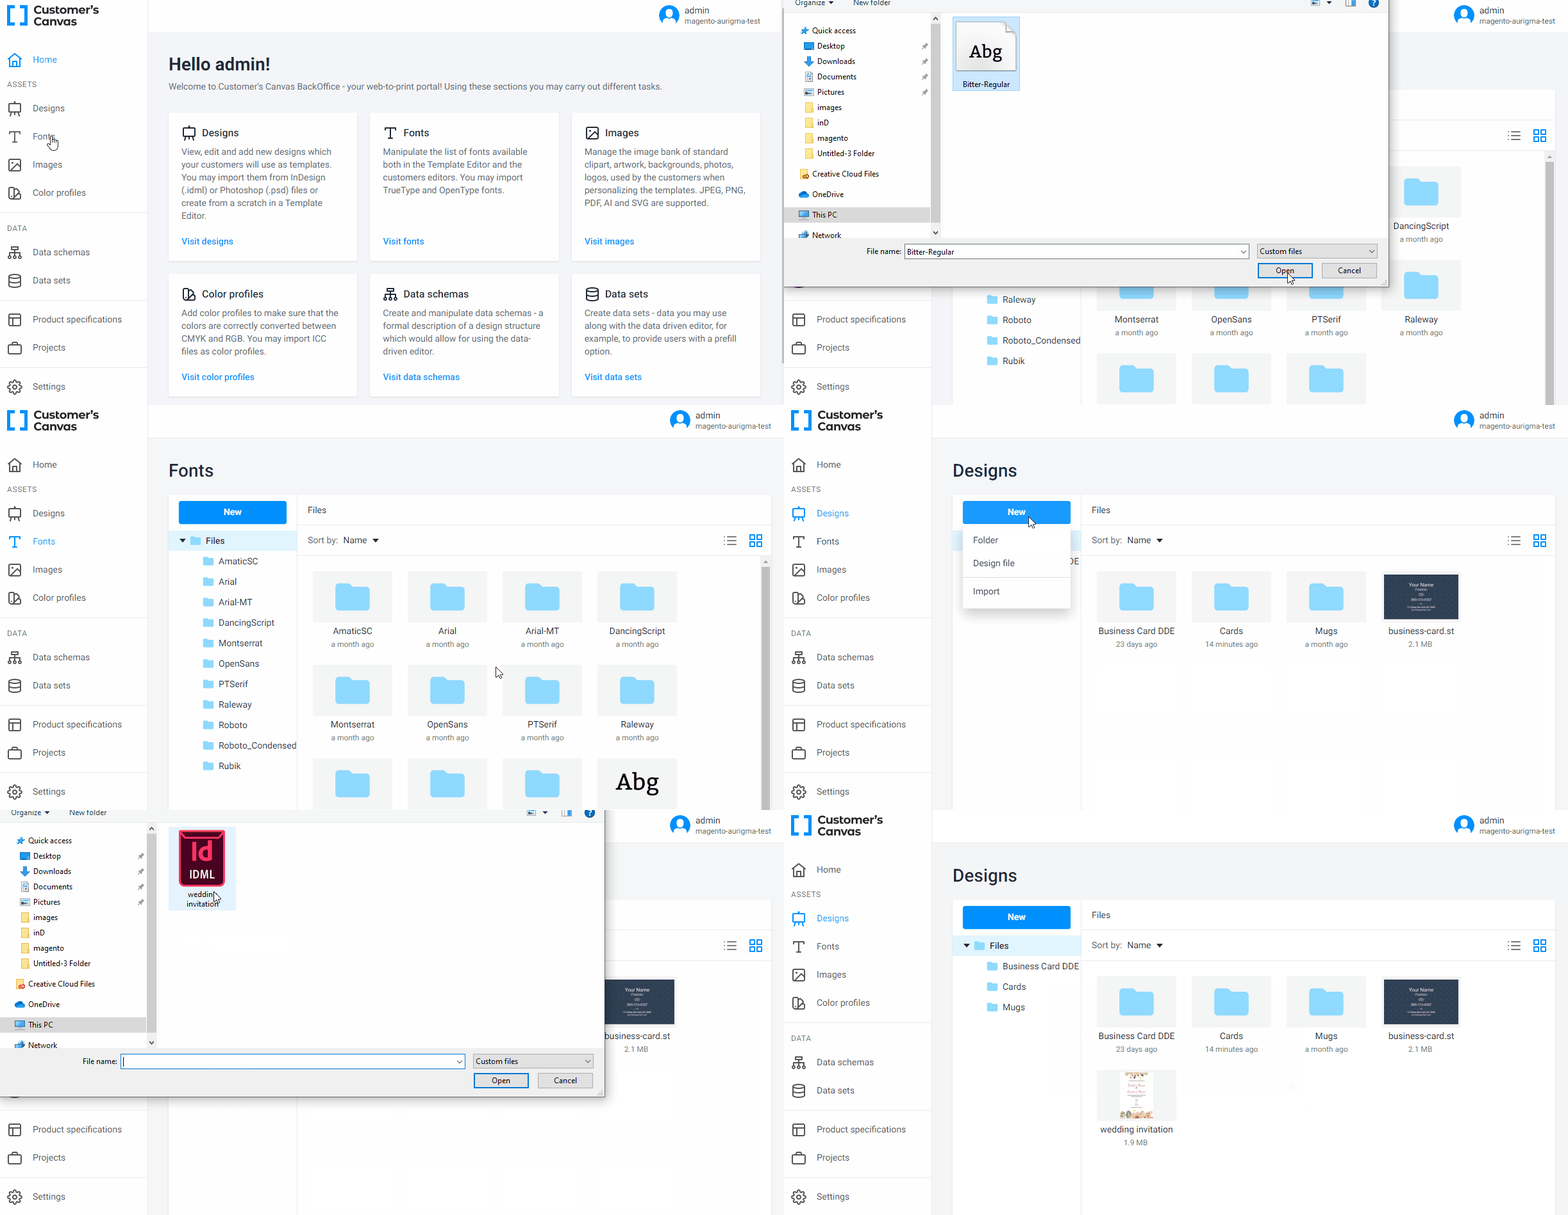
Prepare a product design (PSD or IDML files). See the Assets section to learn more about uploading different file formats.
Log in to your Customer's Canvas account.
Navigate to Assets > Fonts and upload fonts to the Fonts folder either by clicking New > Import or just drag-and-drop them from your computer.
Navigate to Assets > Designs and upload the product design.

3. Associating products with design files
To bind your product in the Magento store to the design file in BackOffice, follow these steps.
Navigate to the Product specification section.
Click Create new.
In the Basic settings, type in a name and select the personalization workflow Template-based Print Product Editor.
In Attributes, click the Design field and select the uploaded design file.
Scroll down the page to the Integration settings and click the name of your store.
In the Select product window, click the product, click Select, and then click Connect.
In the upper-right corner, click Save.

4. Testing the product
Now let's ensure that we have correctly configured the personalization workflow for our product.
Find our product on your Magento storefront when editing the product in the Magento backend.
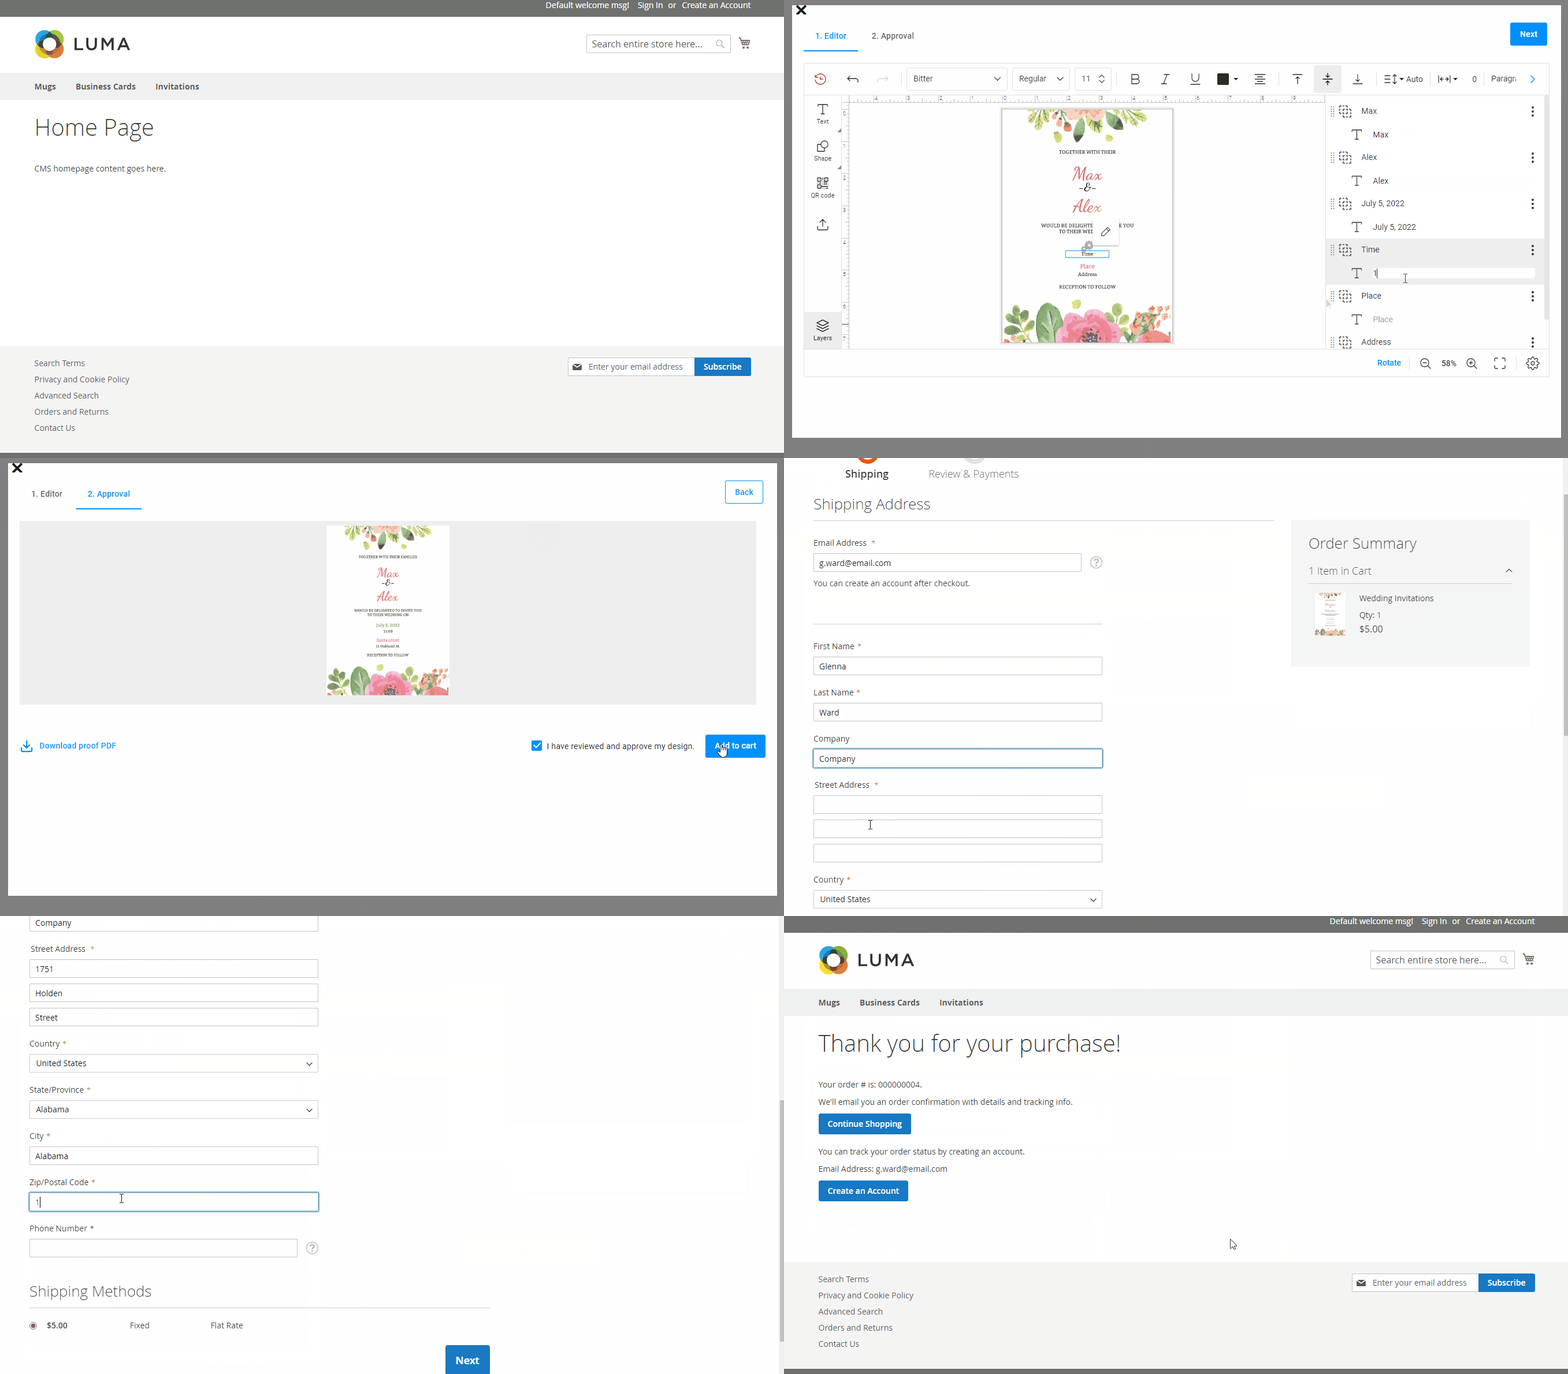
If necessary, adjust the quantity and click Personalize.
On the Editor tab, edit some text information. Your changes will be reflected in the design.
Click the Approval tab and check the result.
If everything is correct, select the Approve my design checkbox and click Add to cart.
Click the cart symbol, and then Proceed to Checkout.
Fill in the necessary fields and click Place Order.

You have successfully created an order for a personalized wedding invitation card. We will discuss how to fulfill such orders in the Working with projects tutorial.