Connecting a template-based editor to a product
- Last updated on May 27, 2022
- •
- 2 minutes to read
In this tutorial, you'll learn how to add personalization to a business card product in a WooCommerce store. Customer's Canvas helps you manage this process by connecting the template-based editor that allows your end-users to edit products based on a design rather than from scratch. As a result, your customers can customize a previously prepared design and order the product in your store.
Prerequisites
To run the personalization, you need:
- A WooCommerce store with the installed Customer's Canvas plugin.
- A BackOffice tenant linked to your online store.
You can contact our support team to implement both these prerequisites.
You can also download and use a demo design file to accomplish the tutorial.
1. Creating a WooCommerce product
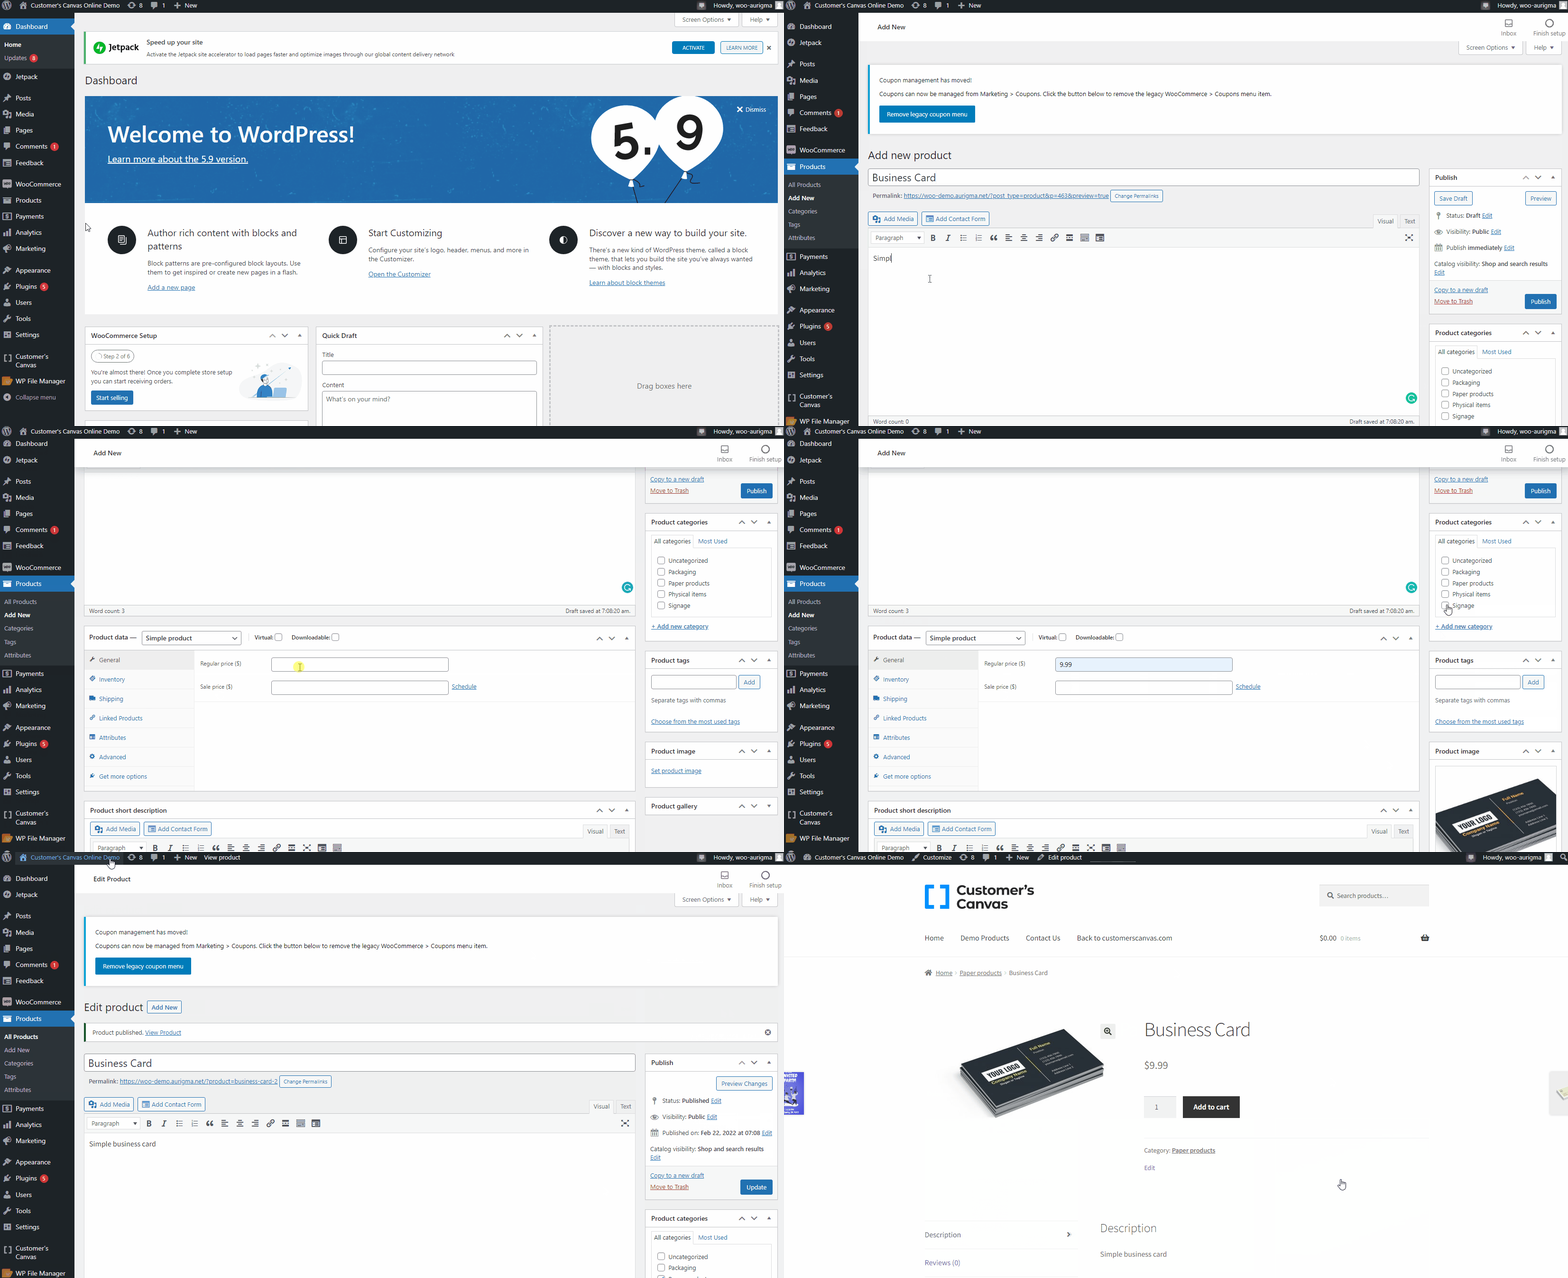
- In the WooCommerce control panel, hover over Products and then click Add New.
- Fill in the Product name, Description, and Regular price fields.
- Click Set product image and select an image in the Media library (if needed, upload a new image first). Then, click the Set product image button.
- Select a Product category.
- Click Publish.
- In the upper-left corner, click Customer's Canvas to preview the result.
- Click the product category you specified in Step 4, and then click your product. Verify the result.

2. Uploading design files
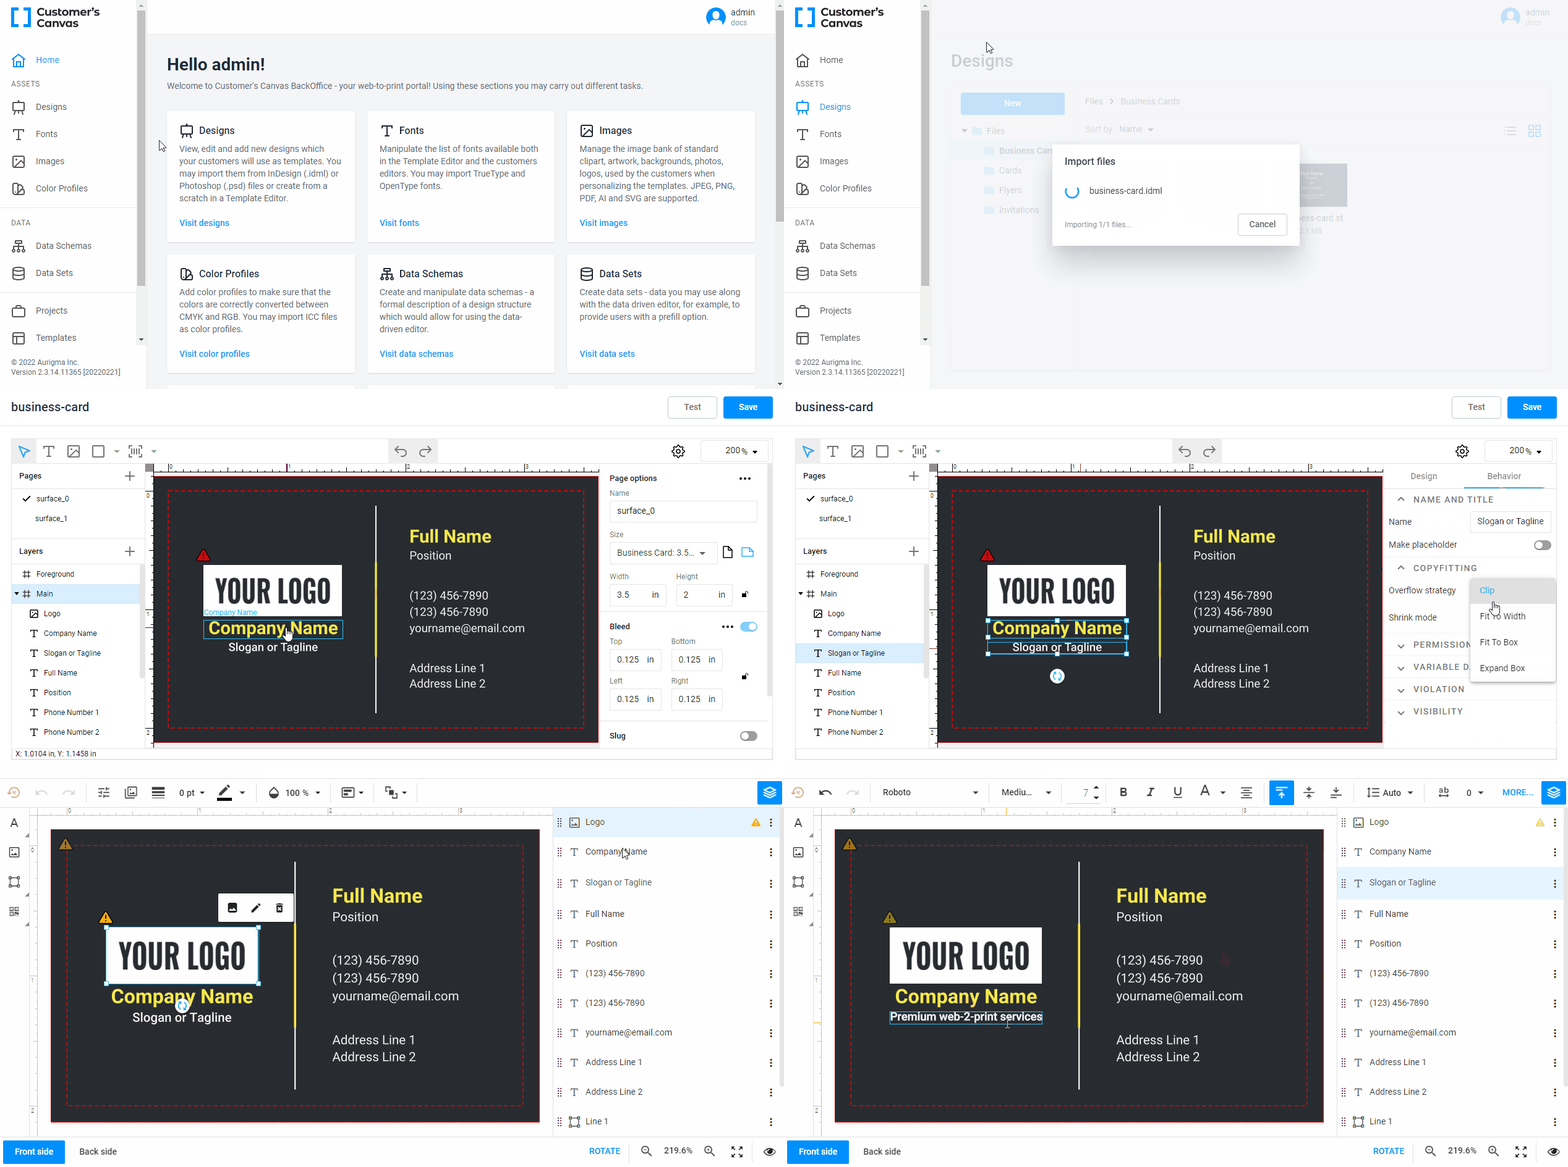
- In the BackOffice control panel, navigate to the Fonts section of Assets.
- Upload fonts used in your design either by clicking New -> Import or just drag-and-drop it from your computer.
- Navigate to the Designs section of Assets.
- Upload the product design either by clicking New -> Import or just drag-and-drop it from your computer.
- Double-click the design and click the Behavior tab to set up the properties of design elements in the editor.
- When you have configured the design, click Save and then click the Test button in the upper-right corner.

3. Associating products with design files
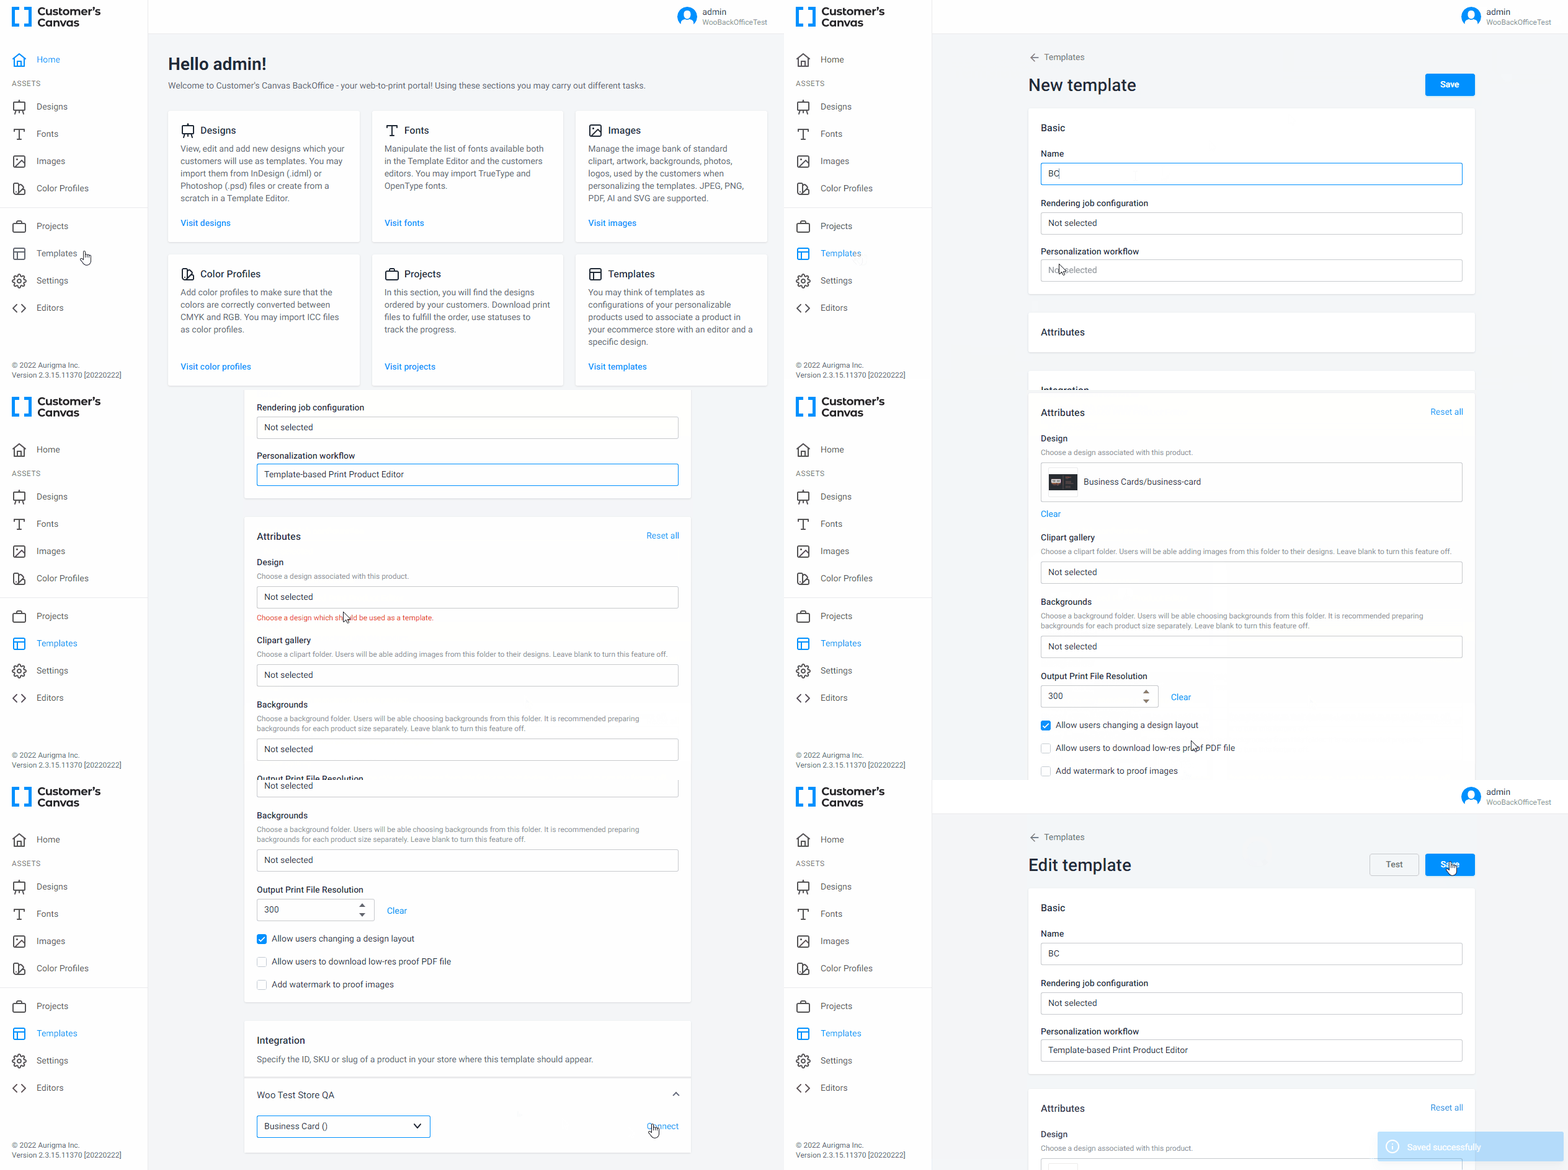
- In the BackOffice control panel, navigate to the Product specification section of Assets.
- Click Create new. In the Basic settings, type in a name and select the personalization workflow Template-based Print Product Editor.
- In Attributes, click the Design field and select the uploaded design file.
- Scroll down the page to the Integration settings and click the name of your store.
- In the Select product window, click the product, click Select, and then click Connect.
- In the upper-right corner, click Save.

Tip
You may find more details about the Product specifications in Admin Guide section of Help Center.
4. Verifying the integration
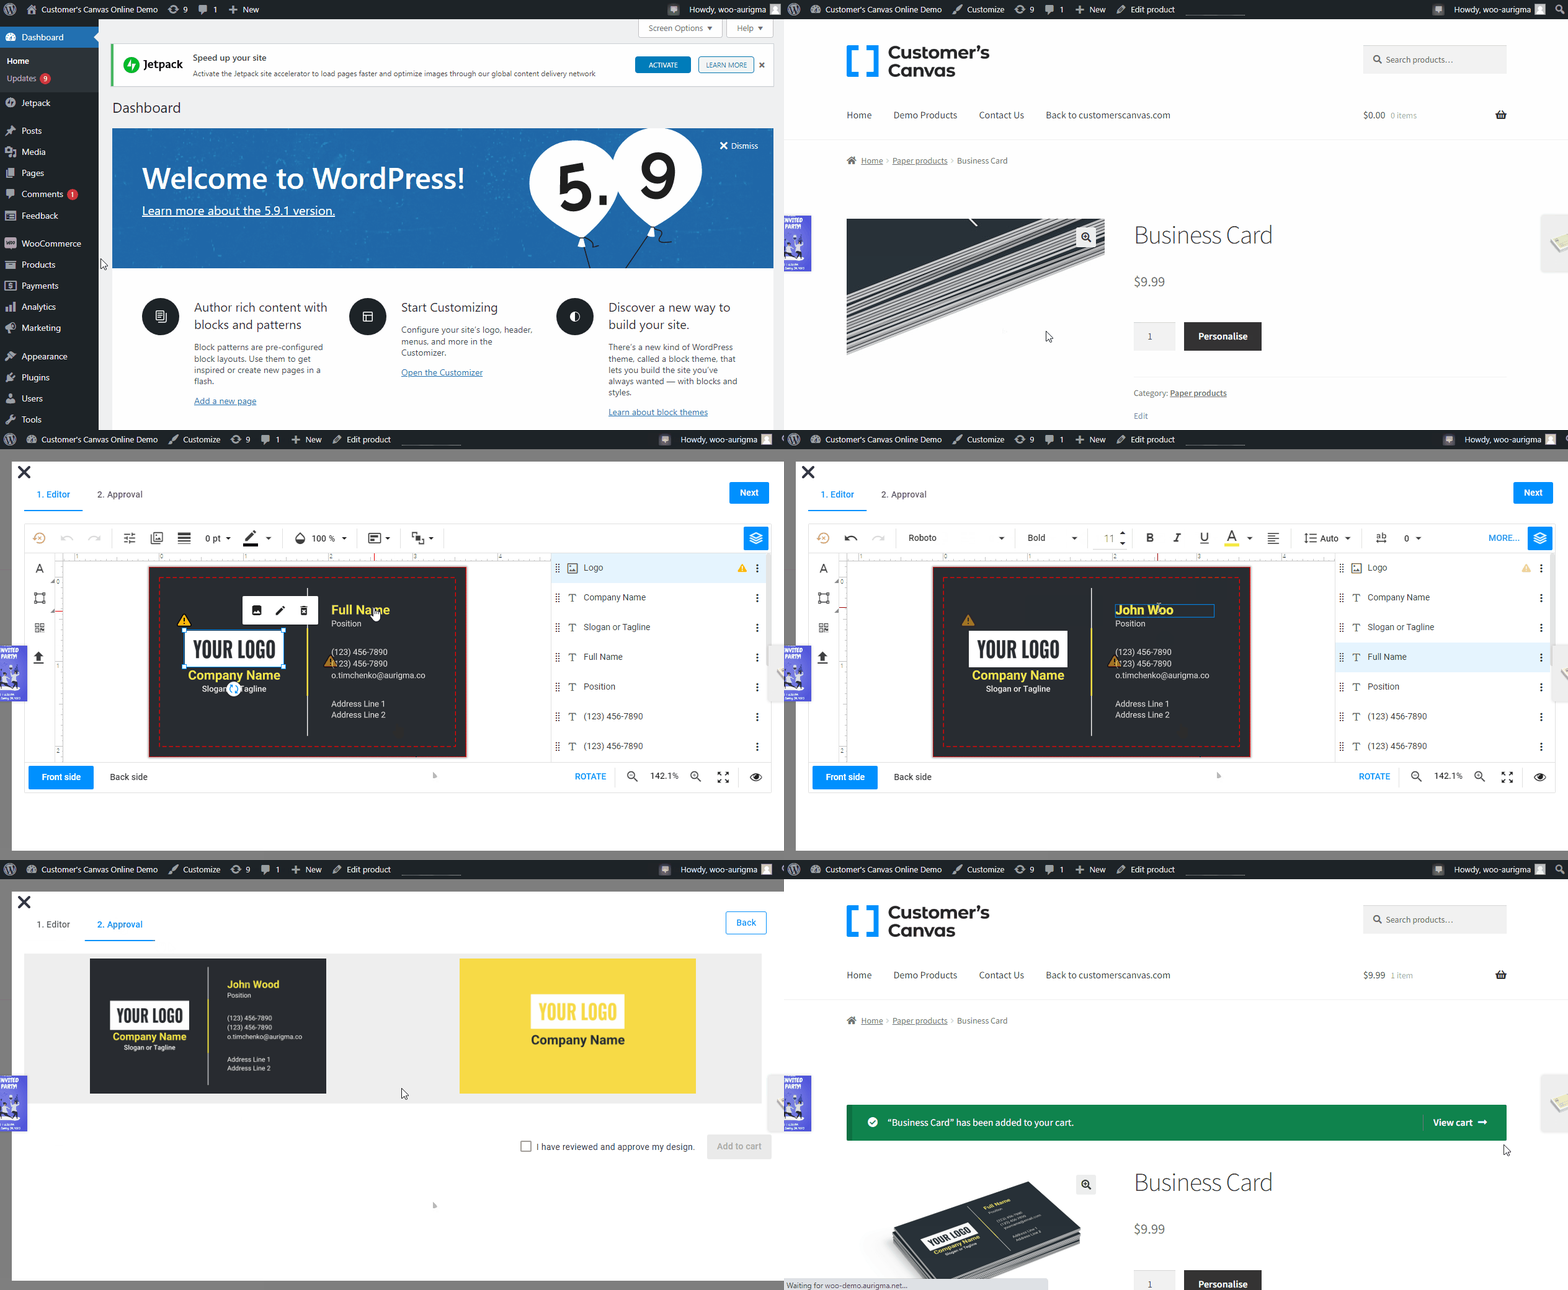
- In your WooCommerce store, hover over Products and click All products.
- In the product list, hover over the product and click View.
- When the product page opens, click Personalize.
- On the Editor tab, change some fields.
- Click the Approval tab, check the result, select the check box, and click Add to cart.

Now your customers will be able to place orders with personalizable products. To learn how to process such orders, see the Working with projects tutorial.