Initialization
- Last updated on September 22, 2024
- •
- 4 minutes to read
In this article, you'll learn how to integrate the Configurator into your storefront and provide the initial data.
| Workflow Element | Tag | Script | Styles |
|---|---|---|---|
| Configurator | <au-configurator> |
web-components/ |
web-components/ |
Prerequisites
- Before embedding the Configurator on a page, create a product in your Customer's Canvas tenant as described in the Creating products topic.
- Create a workflow of the Workflow Elements type as described in the Overview topic.
Adding an editor to a page
There are two methods to integrate an editor:
- Dynamically as described in the integration basics
- Statically as described below
1. Add links to the script and styles
Use the base URL from your tenant settings, the component name, and the script file names. To learn how to add these links dynamically, you can refer to the What are Workflow Elements.
<head>
  <script src="https://staticjs-aurigma.azureedge.net/libs/us/workflow-elements/configurator/index.js"></script>
  <link href="https://staticjs-aurigma.azureedge.net/libs/us/workflow-elements/configurator/styles.css" >
</head>
2. Add a tag to the page
When you know in advance the workflow element tag, you can statically add it as follows:
<body>
    <au-configurator></au-configurator>
</body>
3. Provide configuration parameters
To initialize the Configurator, use the workflowElement.init(config) method, which takes integration settings, product properties, and parameters of the workflow element in the following format:
{
    "configVersion": 2,
    "integration": {
        "tenantId": <yourTenantId>,
        "storefrontId": <yourStorefrontId>,
        "cchubApiGatewayUrl": "<yourCchubApiGatewayUrl>",
        "user": {
            "id": "<userId>",
            "token": "<userToken>"
        }
    },
    "input": {},
    "settings": {}
}
All these objects except integration and input are usually taken from workflow files in your tenant. You can retrieve a workflow file specified for a product by using the endpoint GET /api/storefront/v1/products/{id}/personalization-workflow as described in Opening products for editing. In the settings, you can pass the measure units (one of "in", "mm", "cm", or "pt") and enable the Upload button.
Creating the integration object
The integration object has the following properties:
tenantId: take this from the tenant's settings.storefrontId: register your integration as described in the Integrations topic.cchubApiGatewayUrl: define eitherhttps://api.eu.customerscanvashub.com,https://api.au.customerscanvashub.com, orhttps://api.customerscanvashub.com, depending on where your tenant is hosted — in Europe, Australia, or the USA.user.id: register your users as described in the Registering customers topic.user.token: generate a token as described in the Registering customers topic.
This is how the integration object may look like:
{
    "integration": {
        "tenantId": 12345,
        "storefrontId": 123456,
        "cchubApiGatewayUrl": "https://api.customerscanvashub.com/",
        "user": {
            "id": "john.wood",
            "token": "fcmVhZCIsIlN0b3JlZnJvbnRVc2Vyc19mdWxsIiwiU3R..."
        }
    }
}
Creating the input object
The input contains product properties for the Configurator. These properties allows you to retrieve products defined in Customer's Canvas in two ways. Let's take a look at them.
Product reference
If you integrate Customer's Canvas with a standard e-commerce platform, like Shopify, you can load the editor based on a product ID from that system. In this scenario, Customer's Canvas uses the external product ID to link the product, as described in the Product links article.
To initialize the Configurator, pass the productReferenceId and productId to the input:
productReferenceIdis a product ID in an e-commerce system.productIdis a product ID in Customer's Canvas.
This is how you can define the input object to bind external products from a standard e-commerce system to Customer's Canvas products:
const input = {
    "productReferenceId": "8255218868440", // external product ID
    "productId": 404                       // Customer's Canvas product ID
};
PIM data
Use this approach with custom e-commerce integrations, when an external system knows the product ID from Customer's Canvas PIM module. In this case, you create products in Customer's Canvas and receive a list of products in the admin panel of your store. No product link is required here.
The input object has the following properties:
productIdis a product ID in Customer's Canvas.productVersionIdis a number of the saved product instance.productVariantIdis a product variant ID. If skipped, all the variants will be obtained for managing in your application.productFilterIdis a filter ID to apply to the obtained product variant list.
To initialize the Configurator, pass the productId and productVariantId to the input.
const input = {
      "productId" = 114,
      "productVersionId" = 1011,
      "productVariantId" = 22698
};
4. Set up external styles
To redefine styles of the Configurator, add a <style> element to the page after the styles.css link and change the required CSS variables. The complete list of the supported CSS variables is in the Styling topic.
For example, you may want to open the Configurator in the full screen mode.
<style>
    body { margin: 0; }
</style>
5. Load the Configurator
You can get the component's container through document.getElementsByTagName. Note that you can call the methods of a workflow element only after loading its script.
window.addEventListener("DOMContentLoaded", async () => {

    let configurator = document.getElementsByTagName("au-configurator").item(0);

    configurator.init({
        "configVersion": 2,
        "integration": {
            "tenantId": 12345,
            "storefrontId": 123456,
            "cchubApiGatewayUrl": "https://api.customerscanvashub.com/",
            "user": {
                "id": "john.wood",
                "token": "fcmVhZCIsIlN0b3JlZnJvbnRVc2Vyc19mdWxsIiwiU3R..."
            }
        }
        "input": {
            "productReferenceId": "8255218868440",
            "productId": 404
        },
        "settings": {
            "measureUnit": "mm",
            "showUploadButton": false
        }
    });
});
6. Handle the output
To receive data from the component, subscribe to the submit event.
configurator.addEventListener("submit", event => console.log(event));
To learn more about the result, refer to the Output data topic.
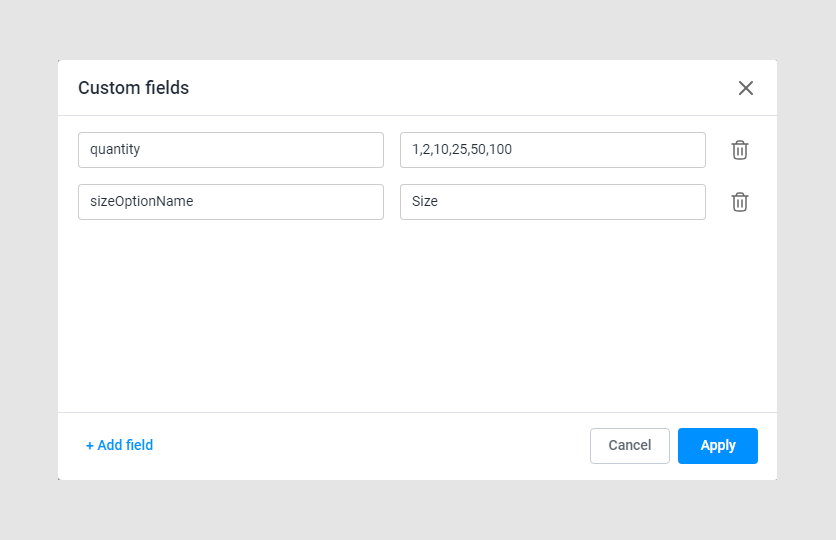
7. Add custom fields
For now, the quantity and sizeOptionName custom fields must be defined for a product to work correctly.
quantityis an array of strings, which is responsible for providing the quantity set to the Configurator. By default, this array is["1", "5", "10", "20"].sizeOptionNameis a string representing the option name responsible for the size. This is some kind of anchor required to determine which option to hide when working withcustomSizes.