What is a workflow?
- Last updated on June 24, 2024
- •
- 4 minutes to read
After customers have selected a product in a storefront, they will personalize it. They add text or images to a product. Finally, they approve the result and download it. In Customer's Canvas, all these processes are called Workflows. Let's see how different workflows looks.
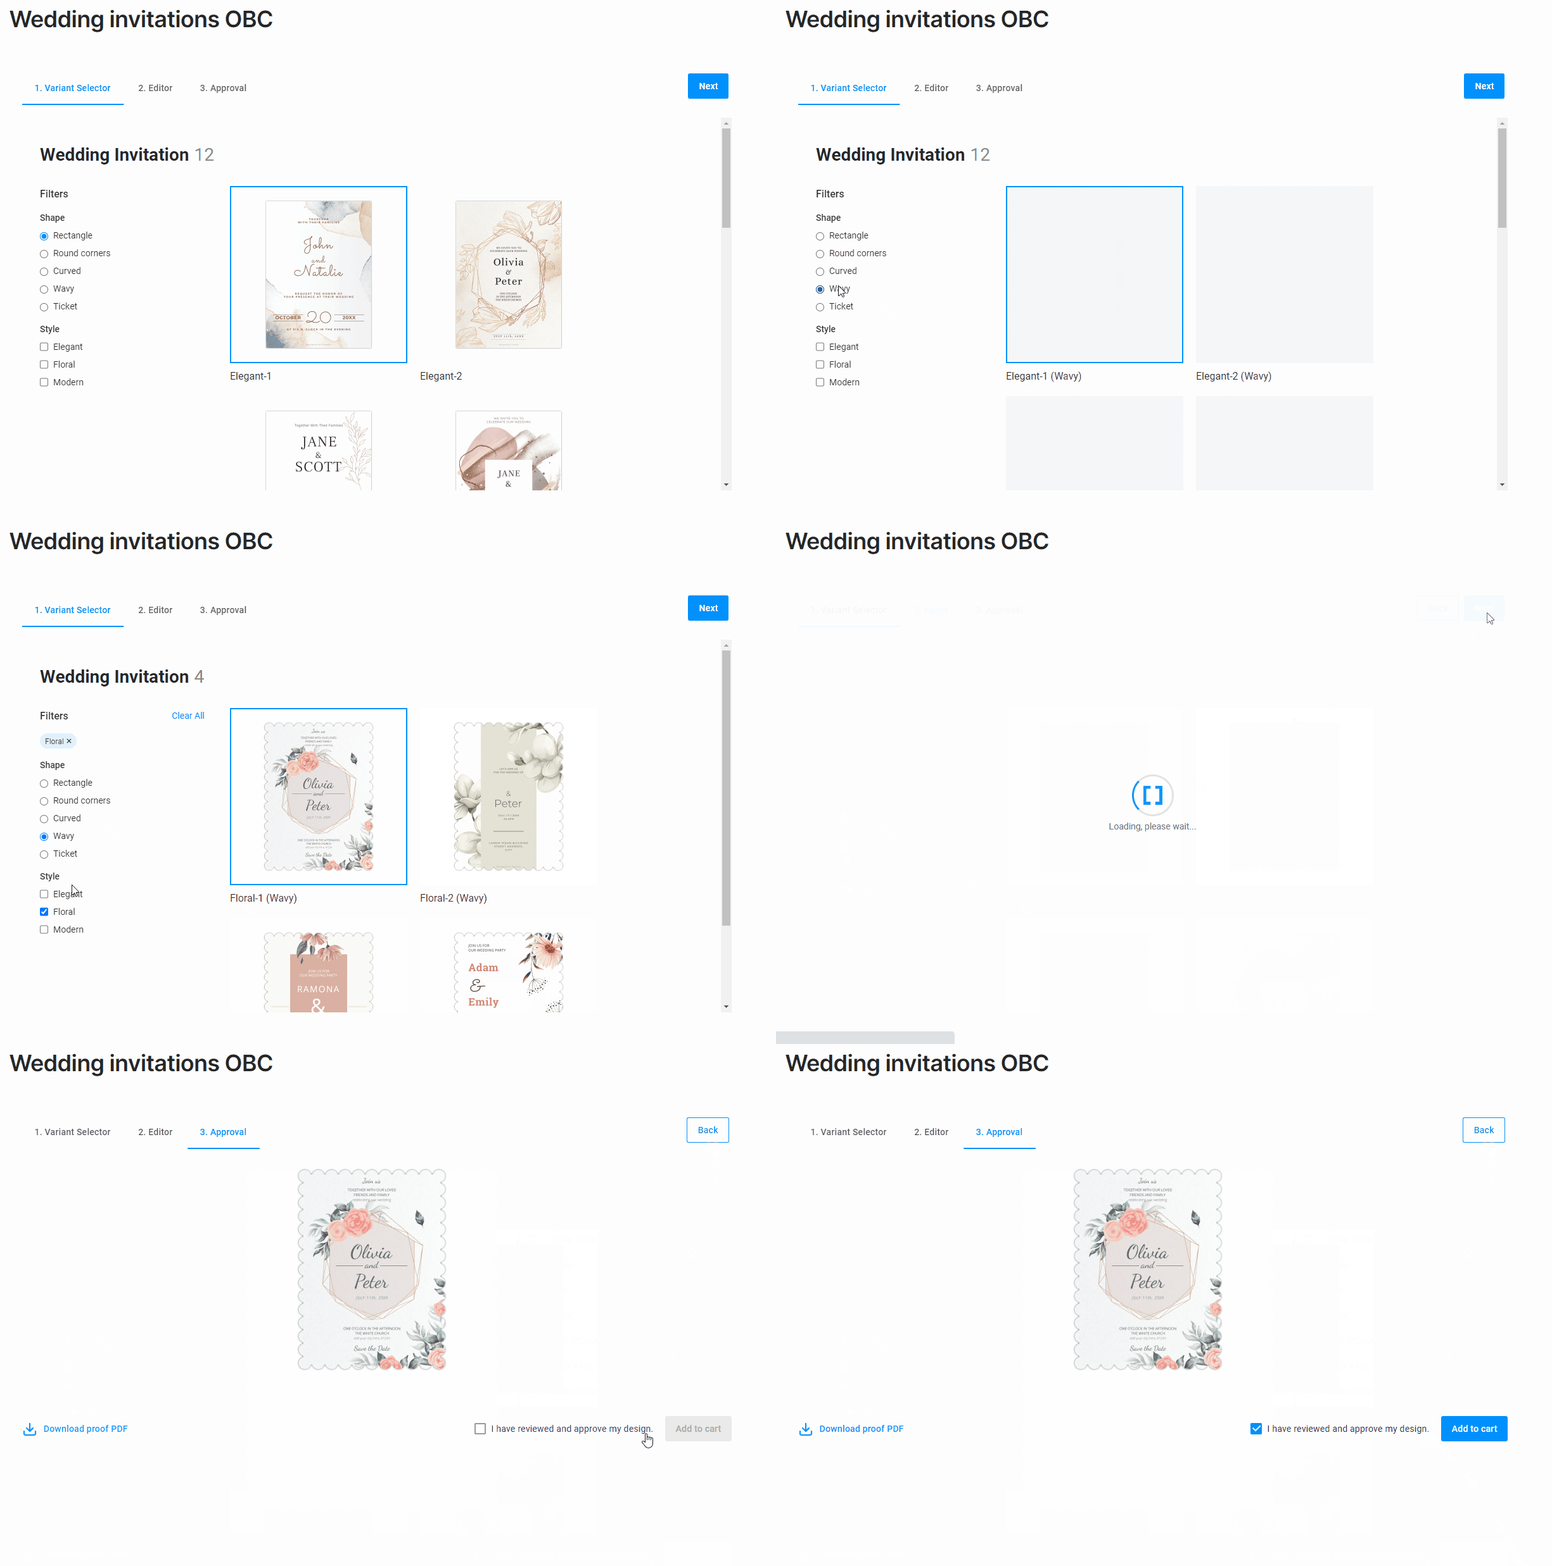
In this example, customers go through three tabs. At the Variant Selector step, they select a design, product shape and style by filters. Then, they personalize the design at the Editor step: changing texts or adding something else. In the end, they see the result at the Approval step.
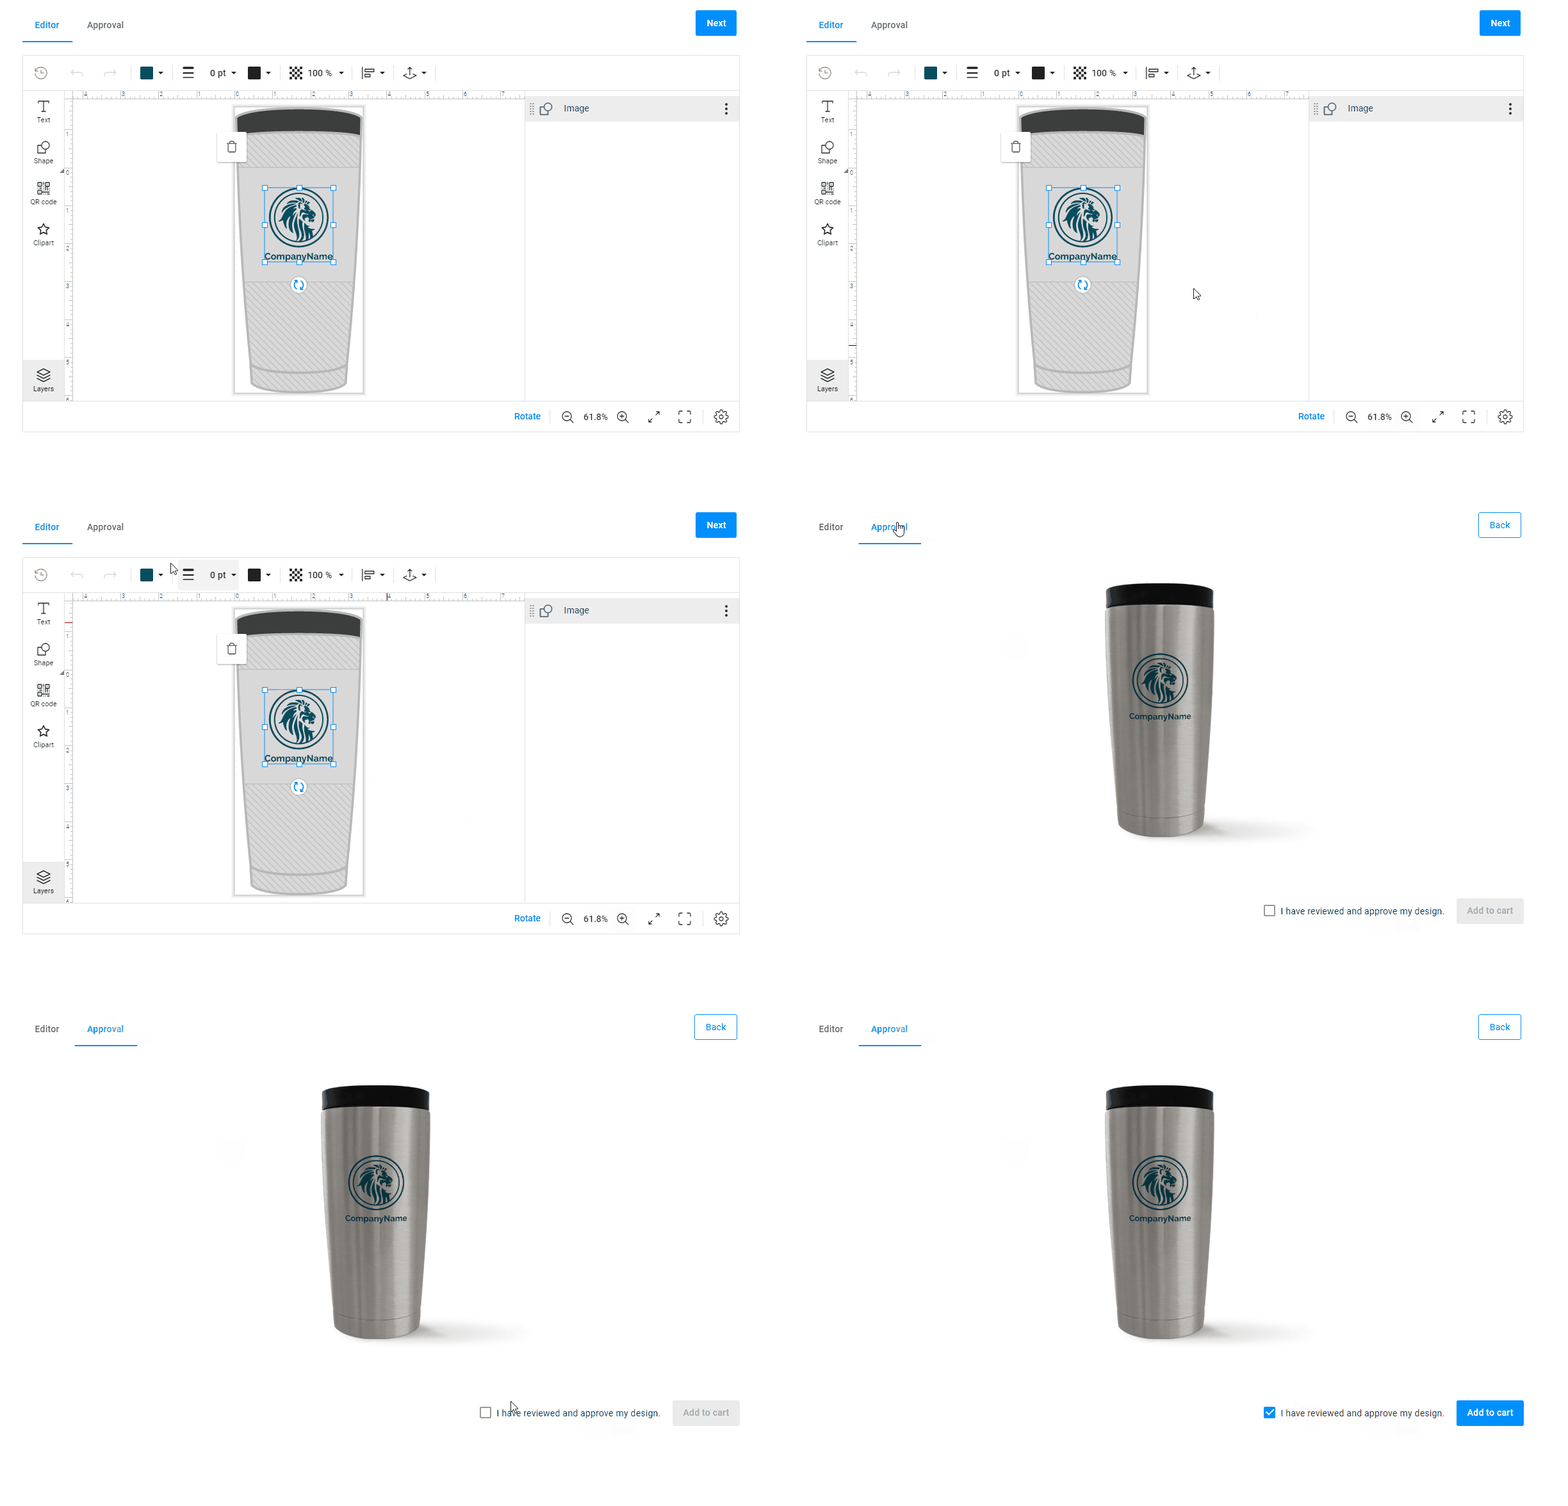
The next example shows how you can implement mockups for displaying the design on complicated forms. In the beginning, customers can add images, shapes, or text, and see it on the flat mockup. At Approval, the result will be displayed as on the real product with corresponding distortions.
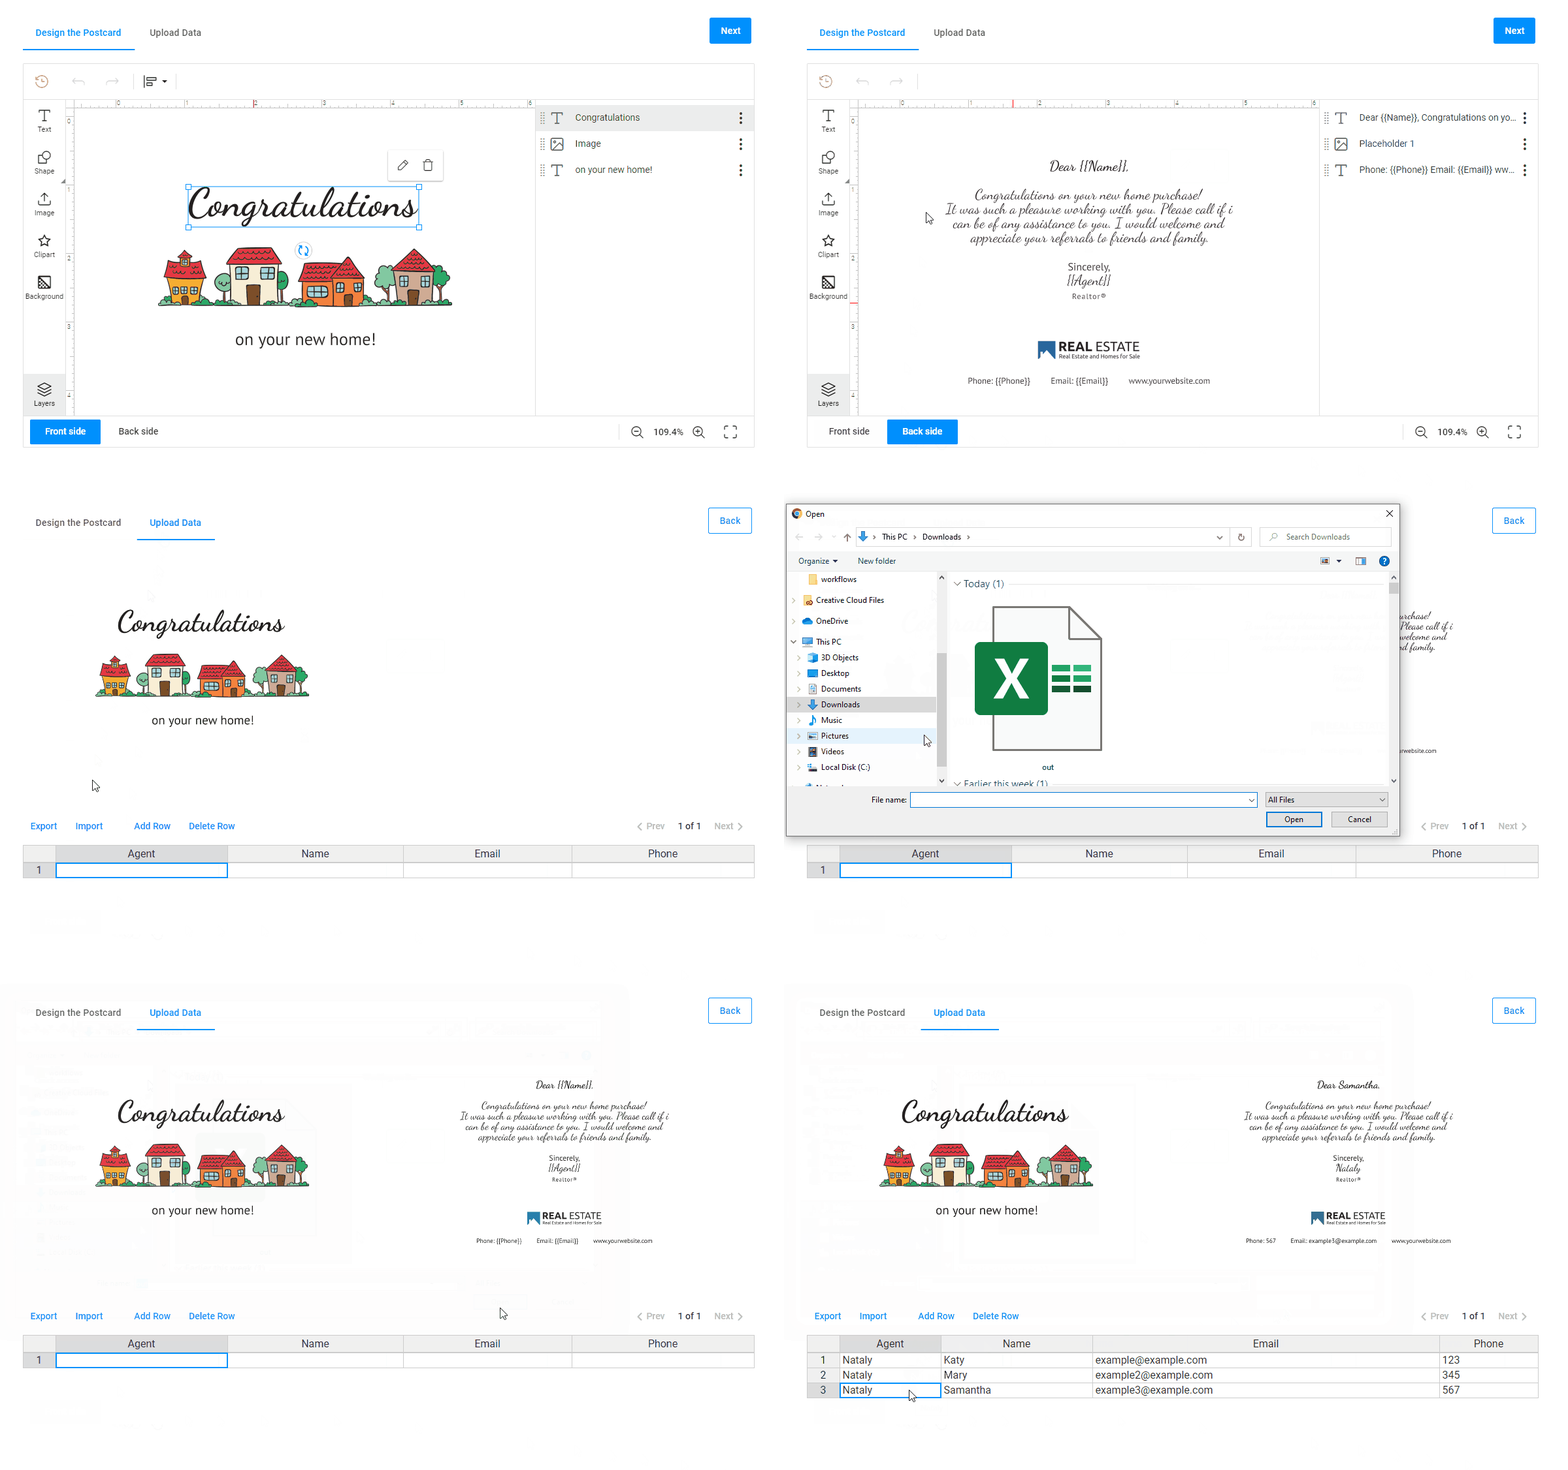
This personalization process allows customers to create postcards with individual data, which is imported from an Excel file.
These examples illustrate that workflows can look different. It archives because workflows are customized. It allows you to create a workflow suitable for the features of your product.
Workflow files
Workflows are defined in workflow files. A workflow file has a special structure that describes the content and behavior of elements in the JSON format. Such a file is divided into the following parts:
- Attributes describing a product.
- Variables adding shortcuts to reduce the code.
- Widgets defining the controls to perform the workflow actions.
- Steps configuring the workflow actions.
- Additional properties.
Although workflows are written in the JSON format, which serves for saving and sending the data, you can expand the functionality and make it dynamic. Using dynamic expressions, you apply basic operators of programming languages, embed a JavaScript function, and request other widgets or assets. Read the Dynamic expressions article to learn more about dynamic expressions.
Learn more details in the Structure article.
Customer's Canvas suggests two approaches of interacting with products: the PIM module and Product Specification. Both these approaches support workflow files of the UI Framework type, and the PIM module also supports the Workflow Elements type.
According to the Product Specification approach, you create a product with one design. You create a new product, input a name, and then change a workflow file. It defines attributes, which you need to add below. To learn about creating a product with Product Specifications in detail, read the Product specifications article.
The PIM module allows you to create one product with product variants. These variants are created by connecting many designs and other options to the product. To learn how to create a product and add the workflow file in the PIM module, read the PIM Module article.
Steps
The personalization process in a workflow is divided into separate sequential smaller processes. For example, choosing a product variant, adding images and texts, approving the result, and so on.
Each process is embedded in a separate step. This is a screen, where you can embed some instruments for a process. You can switch between the steps by the Next or Back buttons.
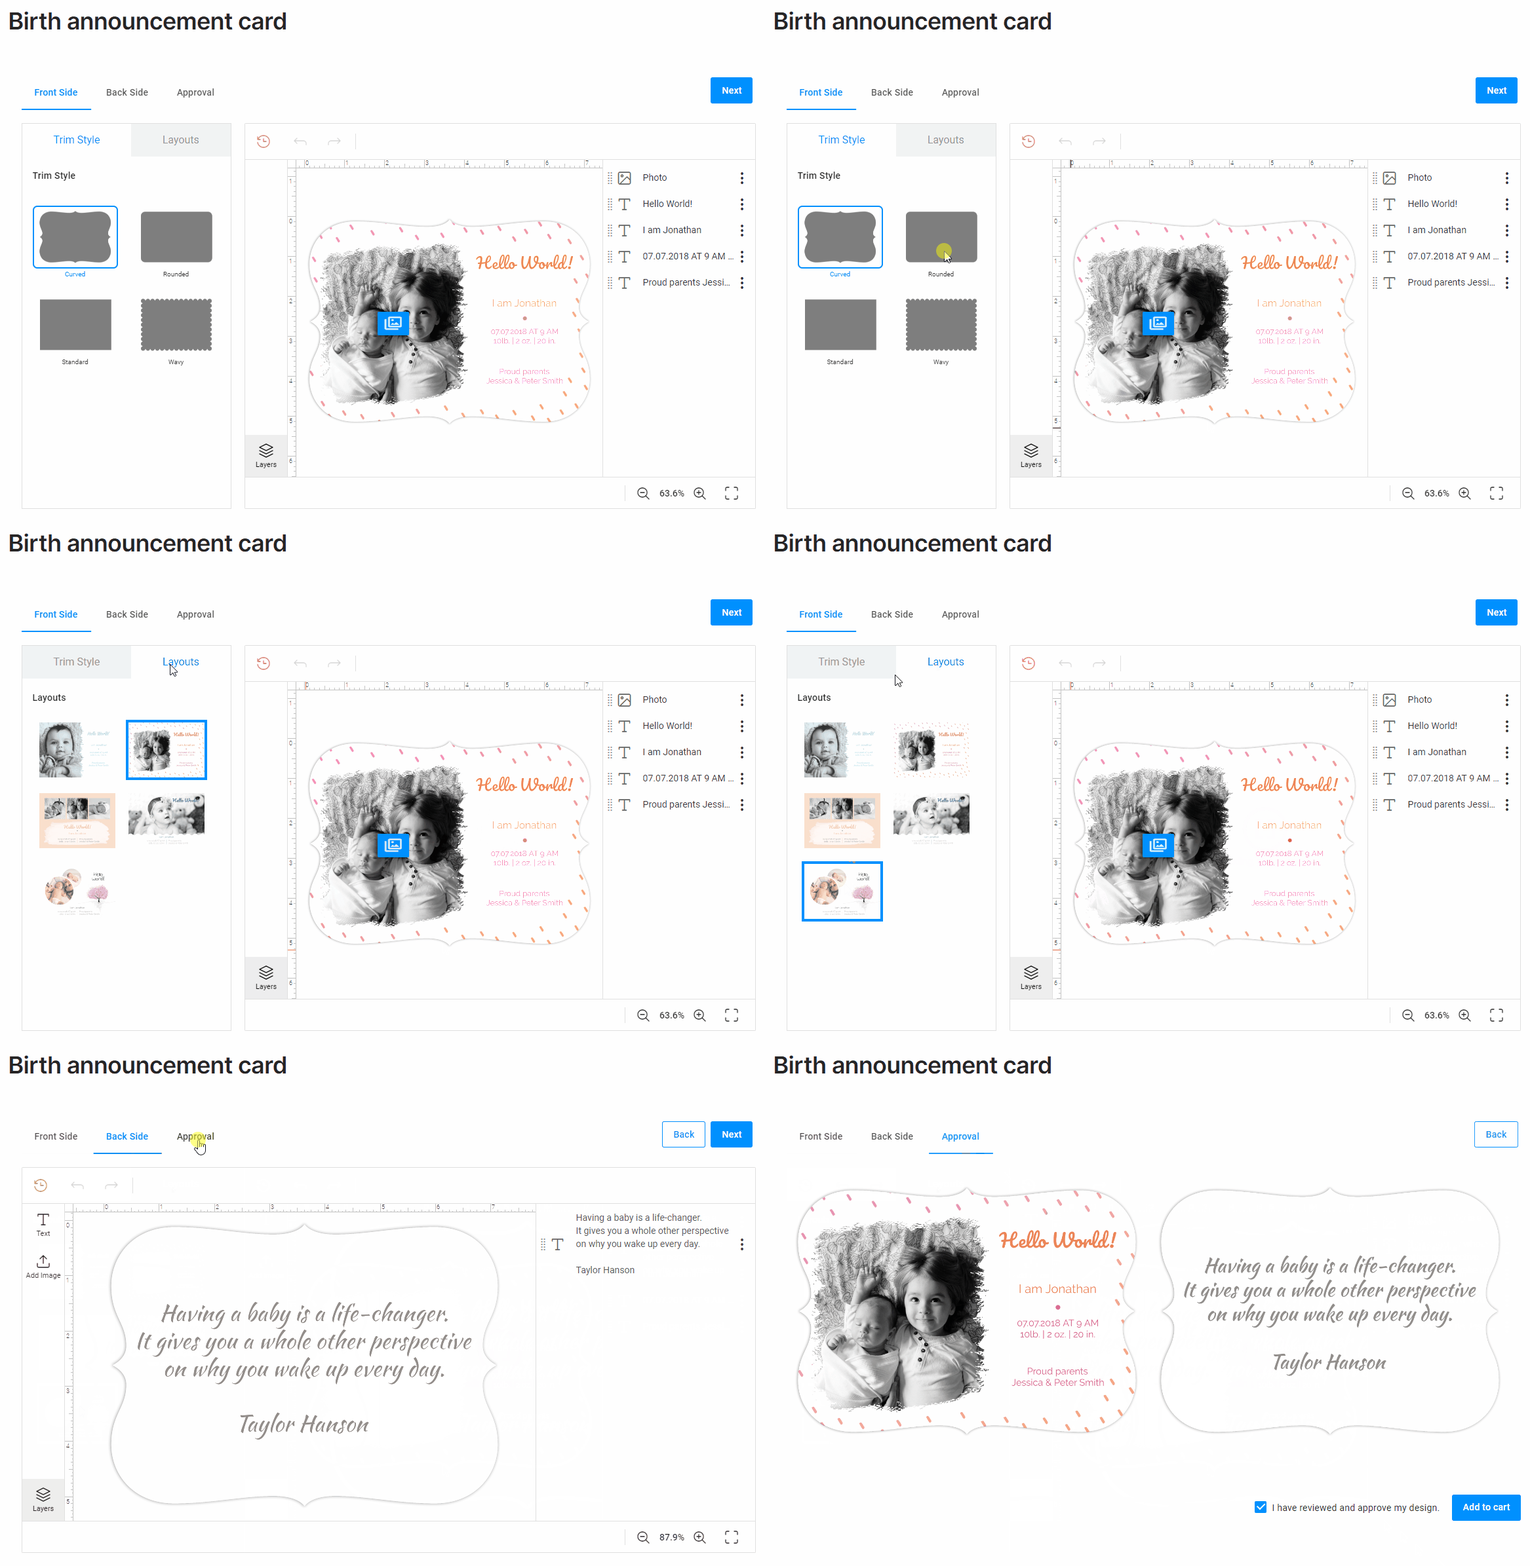
In the following example, the personalization process is divided into three steps. At each step, a customer goes through selecting the front side, selecting the back side, and getting the result.
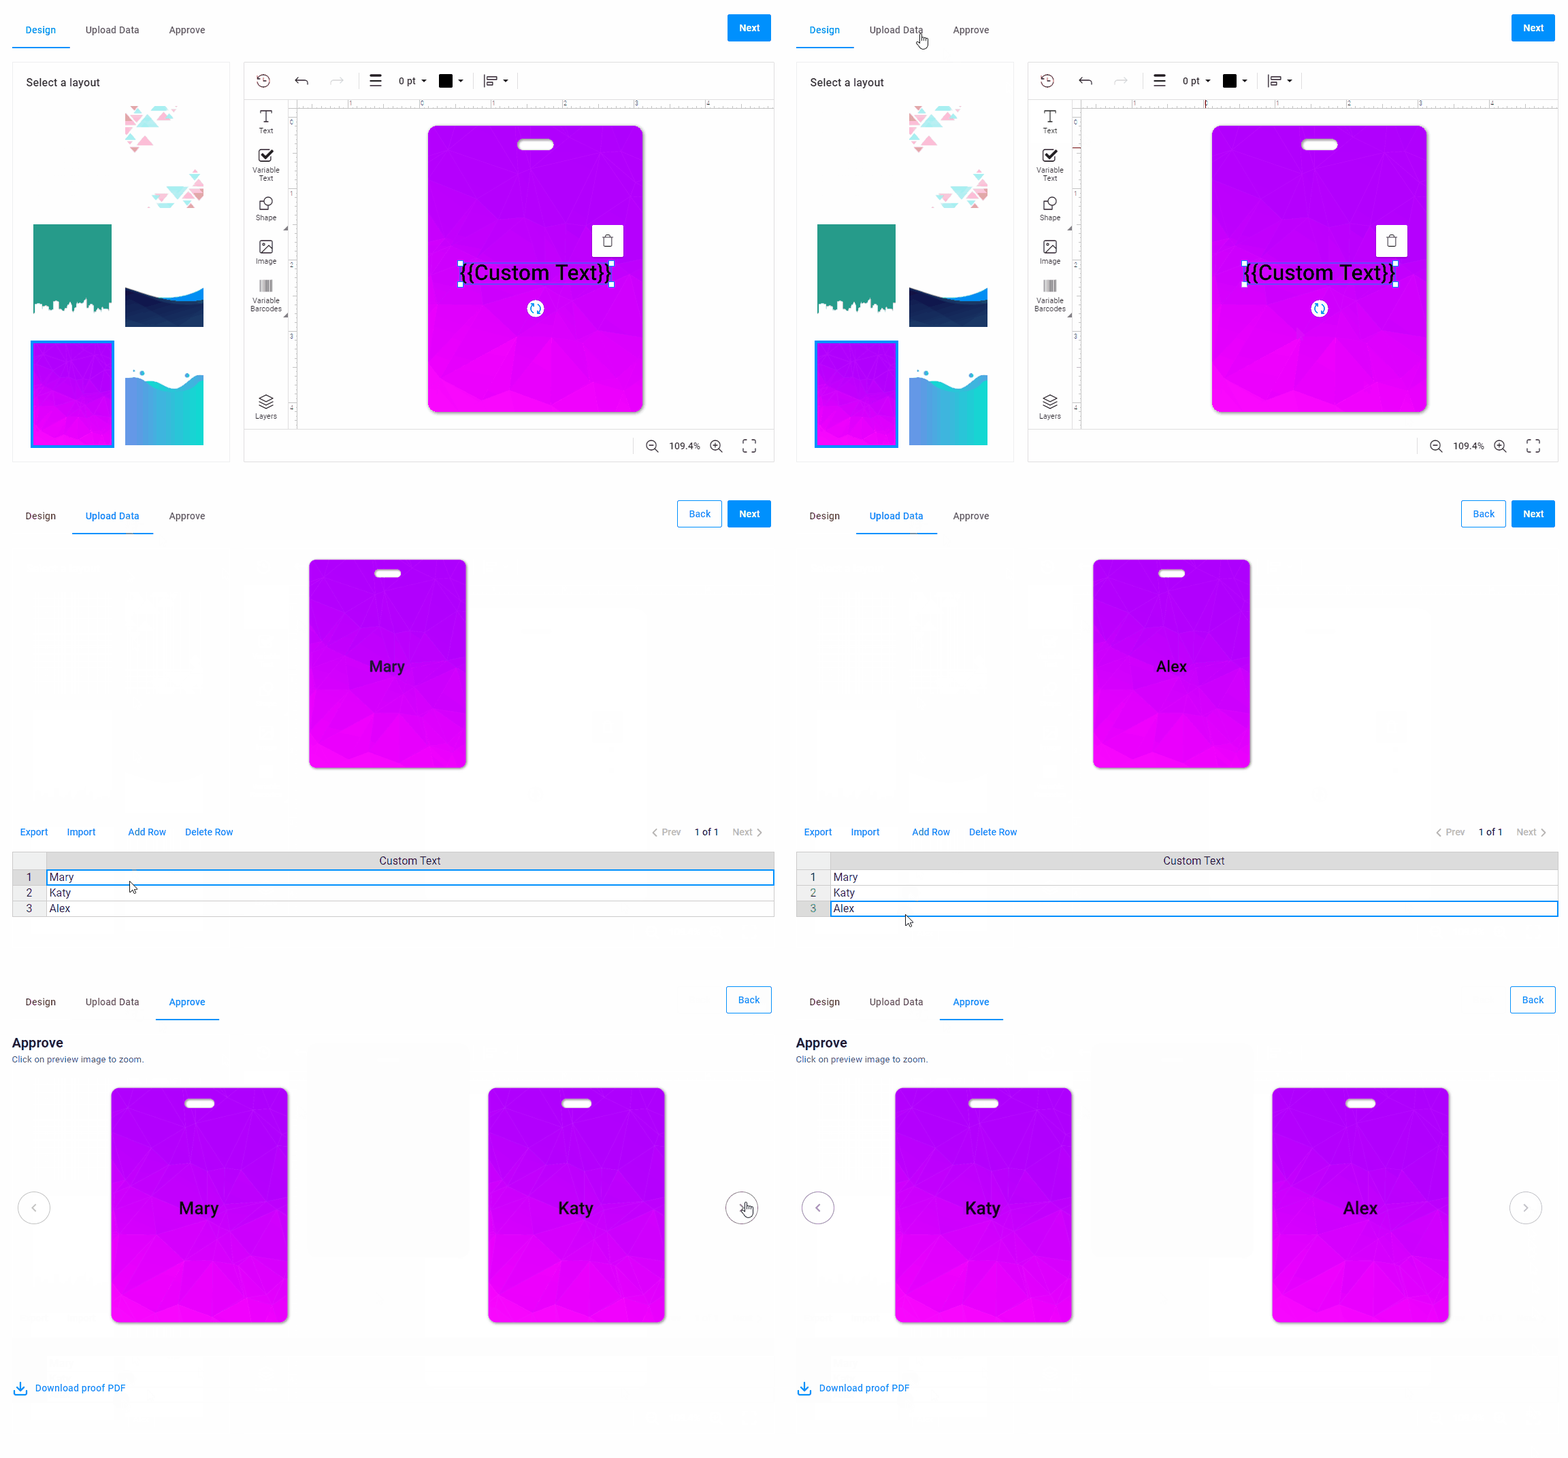
When creating a name card, a customer goes through three steps: selecting a background and adding some text, uploading a name array, and approving the results.
Content of steps
Steps are divided into several screen parts, where you can embed an editor, image gallery, tables, and so on. These parts are called panels. In the following schema, you can see the location of each panel.
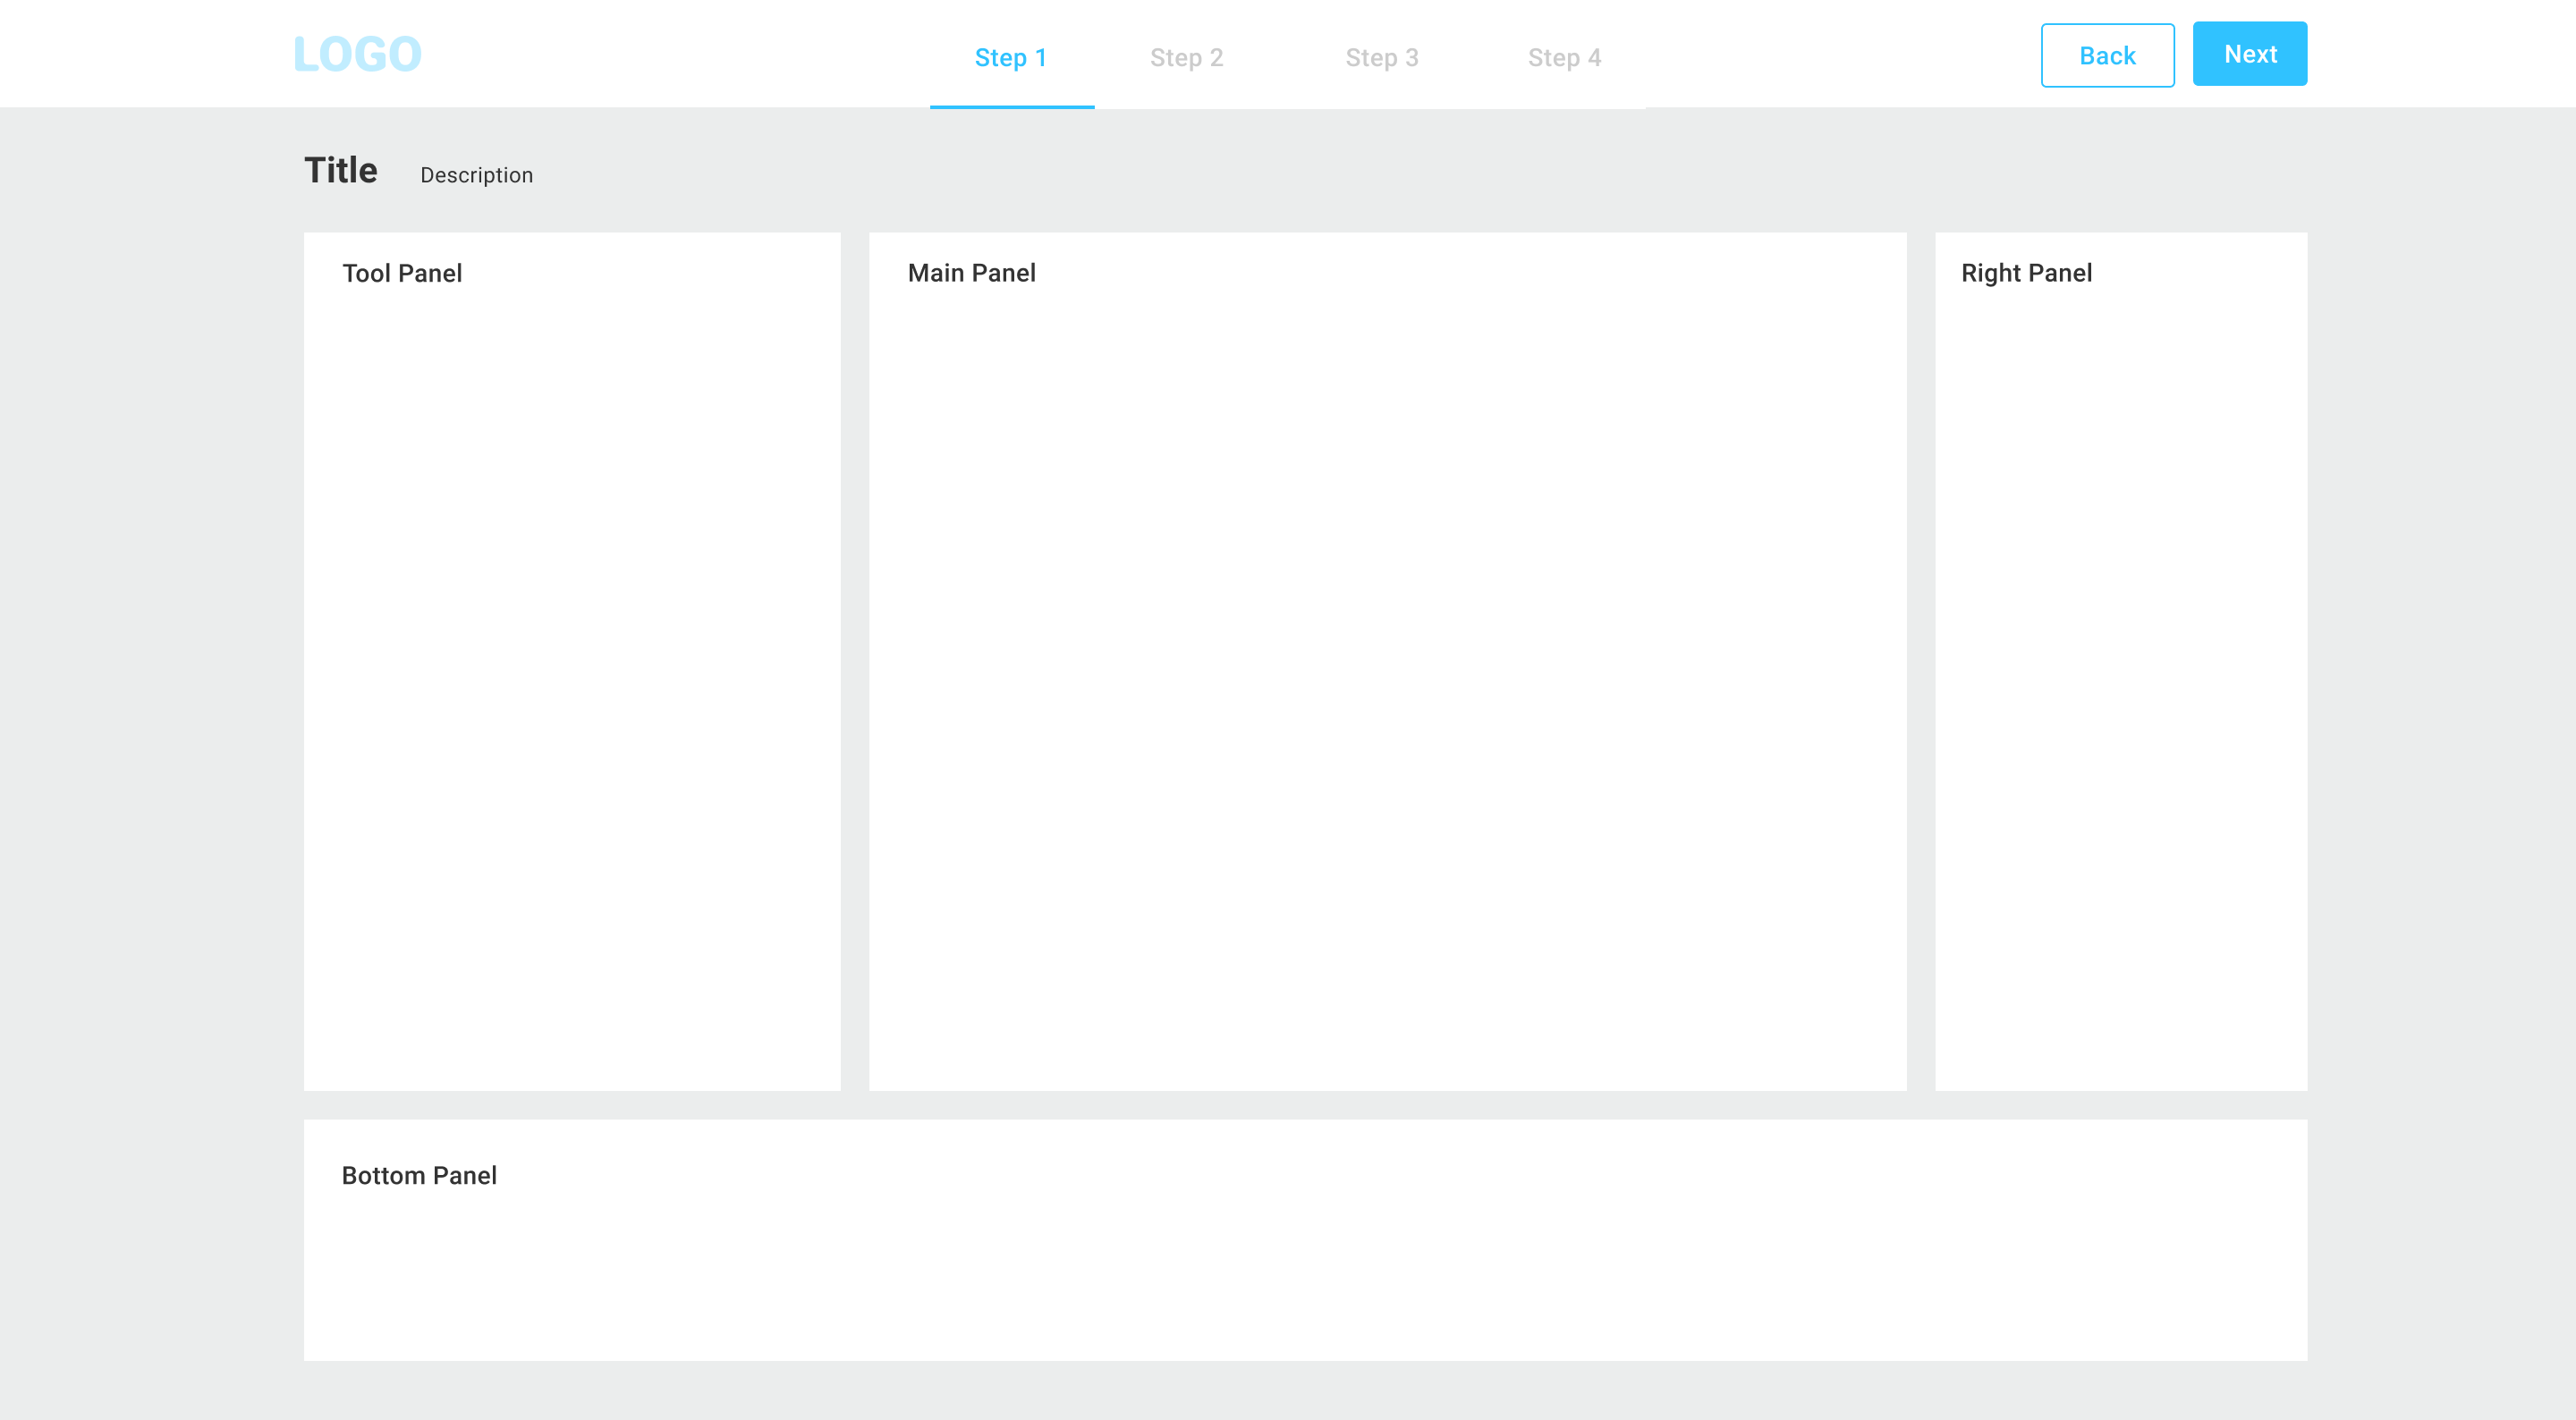
Let's consider details in the table below.
| Panel Name | Content |
|---|---|
| Navigation Panel | It shows buttons to switch between the steps. This panel is added automatically. |
| Main Panel | This is the central panel of a step. It can contain big visual widgets such as the Design Editor, Gallery, Slider, etc. |
| Tool panel and Right panel | They may include options or other tools. |
| Bottom panel | This panel is used for approval checkboxes or adding an Excel table with some data. |
You can consider widgets as constructor details for building the user interface: buttons, text, editors, galleries, and more. At the same time, there are non-visual widgets for auxiliary operations. You can manage widget properties and change widget styles, connect widgets with each other, and make other actions. To learn more about widgets, read the Widgets articles.
Now you are known that workflows are described in workflow files. To learn more about workflow files, read the next Creating and editing workflows article.