Creating a product based on the PIM module in BackOffice
- Last updated on October 16, 2023
- •
- 16 minutes to read
In this tutorial, you will create a product in the Product Information Management (PIM) module, edit the product options, and connect designs and mockups. Then, you will add a product in Shopify, define SKUs and connect the product in the PIM module to a Shopify product. Finally, you will test the connection - you can go through the ordering process as a customer.
Video tutorial
The following video summarizes this article. Feel free to watch it in addition to reading the text below.
Prerequisites
Creating a product in the Product Information Management module includes connections to some designs. You can read about designs in the Designs articles. You can create designs in Adobe Photoshop or Adobe InDesign. See the Creating templates in Adobe software articles to create designs.
If you want to provide visualization for a product, you can use mockups. Read the Mockups articles to create them and the Manipulating mockups article to manage them.
For this tutorial, your Shopify store must have preinstalled BackOffice. To get more information about the Shopify integration, read the Introduction to Shopify article.
Creating a product
A product in the PIM module is an internal representation of products in an e-commerce storefront. The products have a lot of properties defining interactions with designs, mockups, and a storefront. For more details about product properties, refer to Creating products. A product is also a unit, where you can check all the information about interactions between assets and links with storefront products. Let's create a product!
To start, log in to BackOffice. To go to the PIM Module products, navigate to Option based. This section is dedicated to option-based products and other instruments for them. Then, select the Products tab to see a list of all the products. To create a new product, click Create new.
These tabs represent product properties - each one is responsible for different functions. To define general information about a product, select the General tab. To give a product name, input a name in the Name box. The Name text box is obligatory to fill in. In this example, the product name is Brochure. This is an internal product name in BackOffice - customers can't see this name in the storefront. The next section is a description - write it in the Description box. This textbox is optional. Then, select a workflow and a pipeline in the Personalization workflow list box and the Processing pipeline list box. Click Save to save the information.
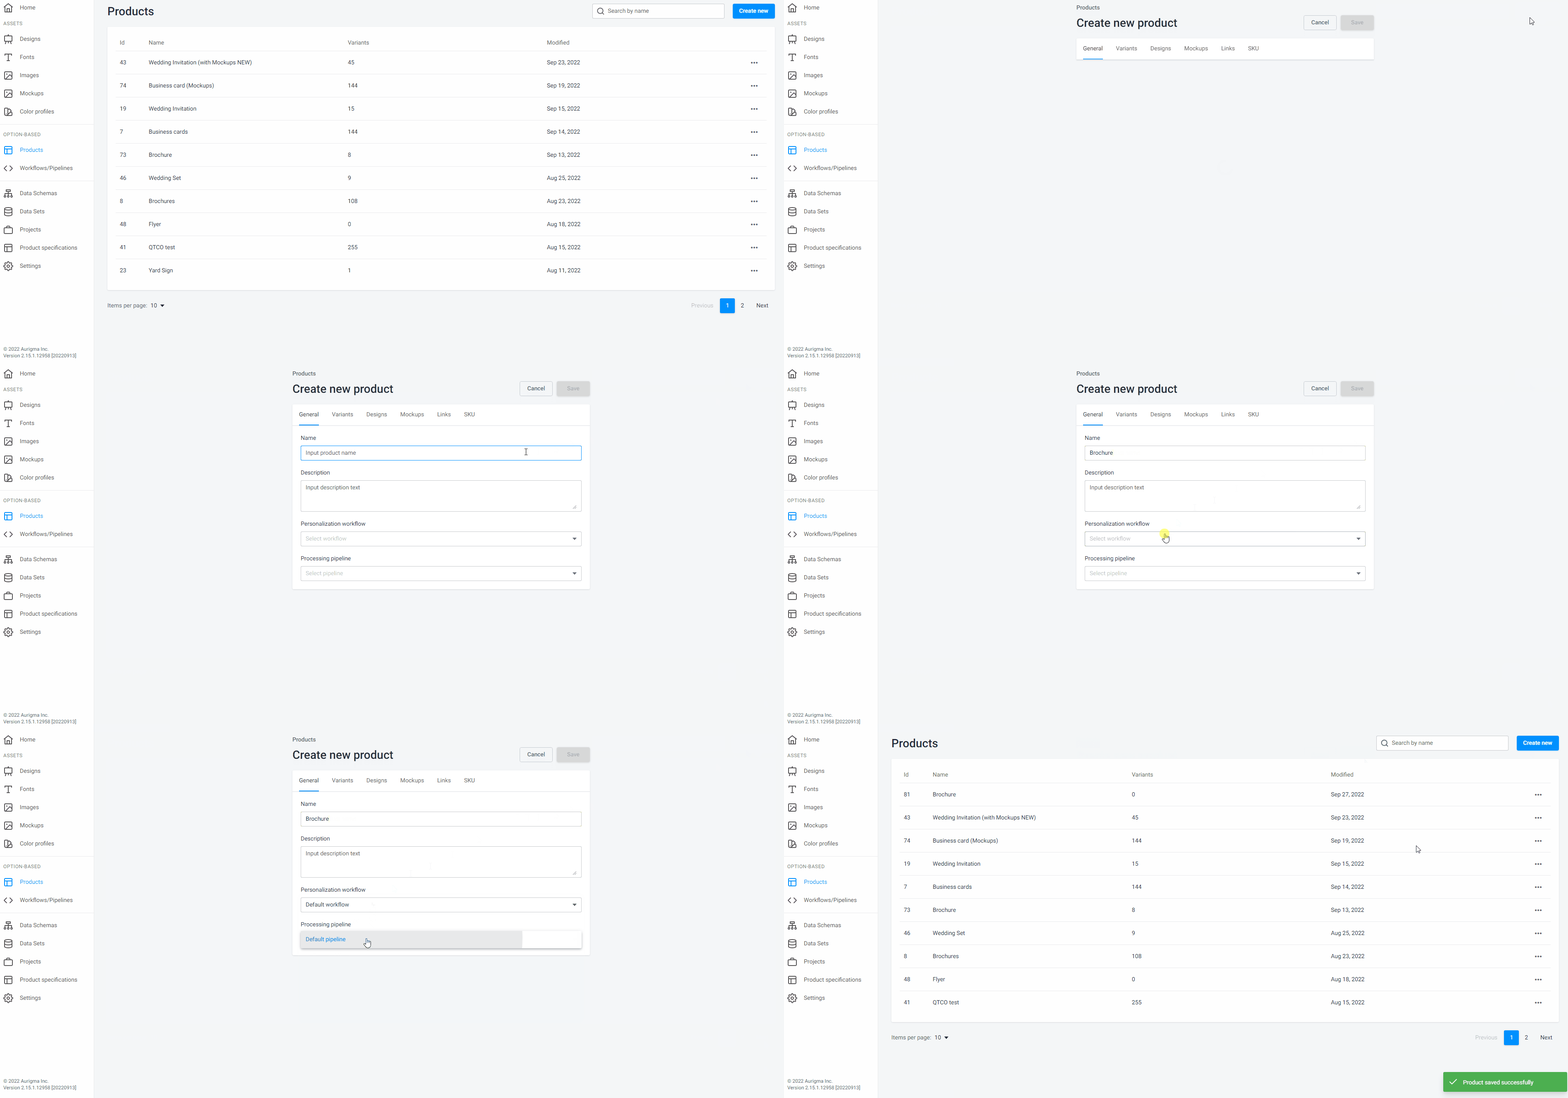
After the product is created, let's add options and values to make variants of this product.
Editing options
A product in the PIM module assumes variation - a customer can select some preinstalled details while personalizing products. It works by options and values, which you can add to a product. This is what allows a product to have variants: a customer can select size, styles, and so on. Options define a product, as an option can be a size, style, orientation, etc. Values define the options. For example, the option is Size and its values are 8.5 x 11 and 11 x 17.
The combination of all values creates variants. To learn more details about editing options and values, read the Editing the product section.
To do so, go to the product list, select the product you need, then click the ellipsis and select Edit. To create options and values, select the Variants tab. To add a new option, click Edit options. Fill in an option name and the values in the text box. You can separate values by clicking Enter.
In our example, the first option is Size, and its values are 8.5 x 11and11 x 17`.
The brochure has several surfaces, so let's add the next option - Form and its values: Bi-form and Z-form.
The third option - Style - has only one value: Real Estate. The last option is Paper stock, and its values are Regular and Premium.
The Allows multiple value selection checkbox defines whether all the values will be selected at the same time or separately in product links. You can read about this checkbox in the Editing the product article. You will learn how these checkboxes impact the creation of a link to a storefront product in the Product link article.
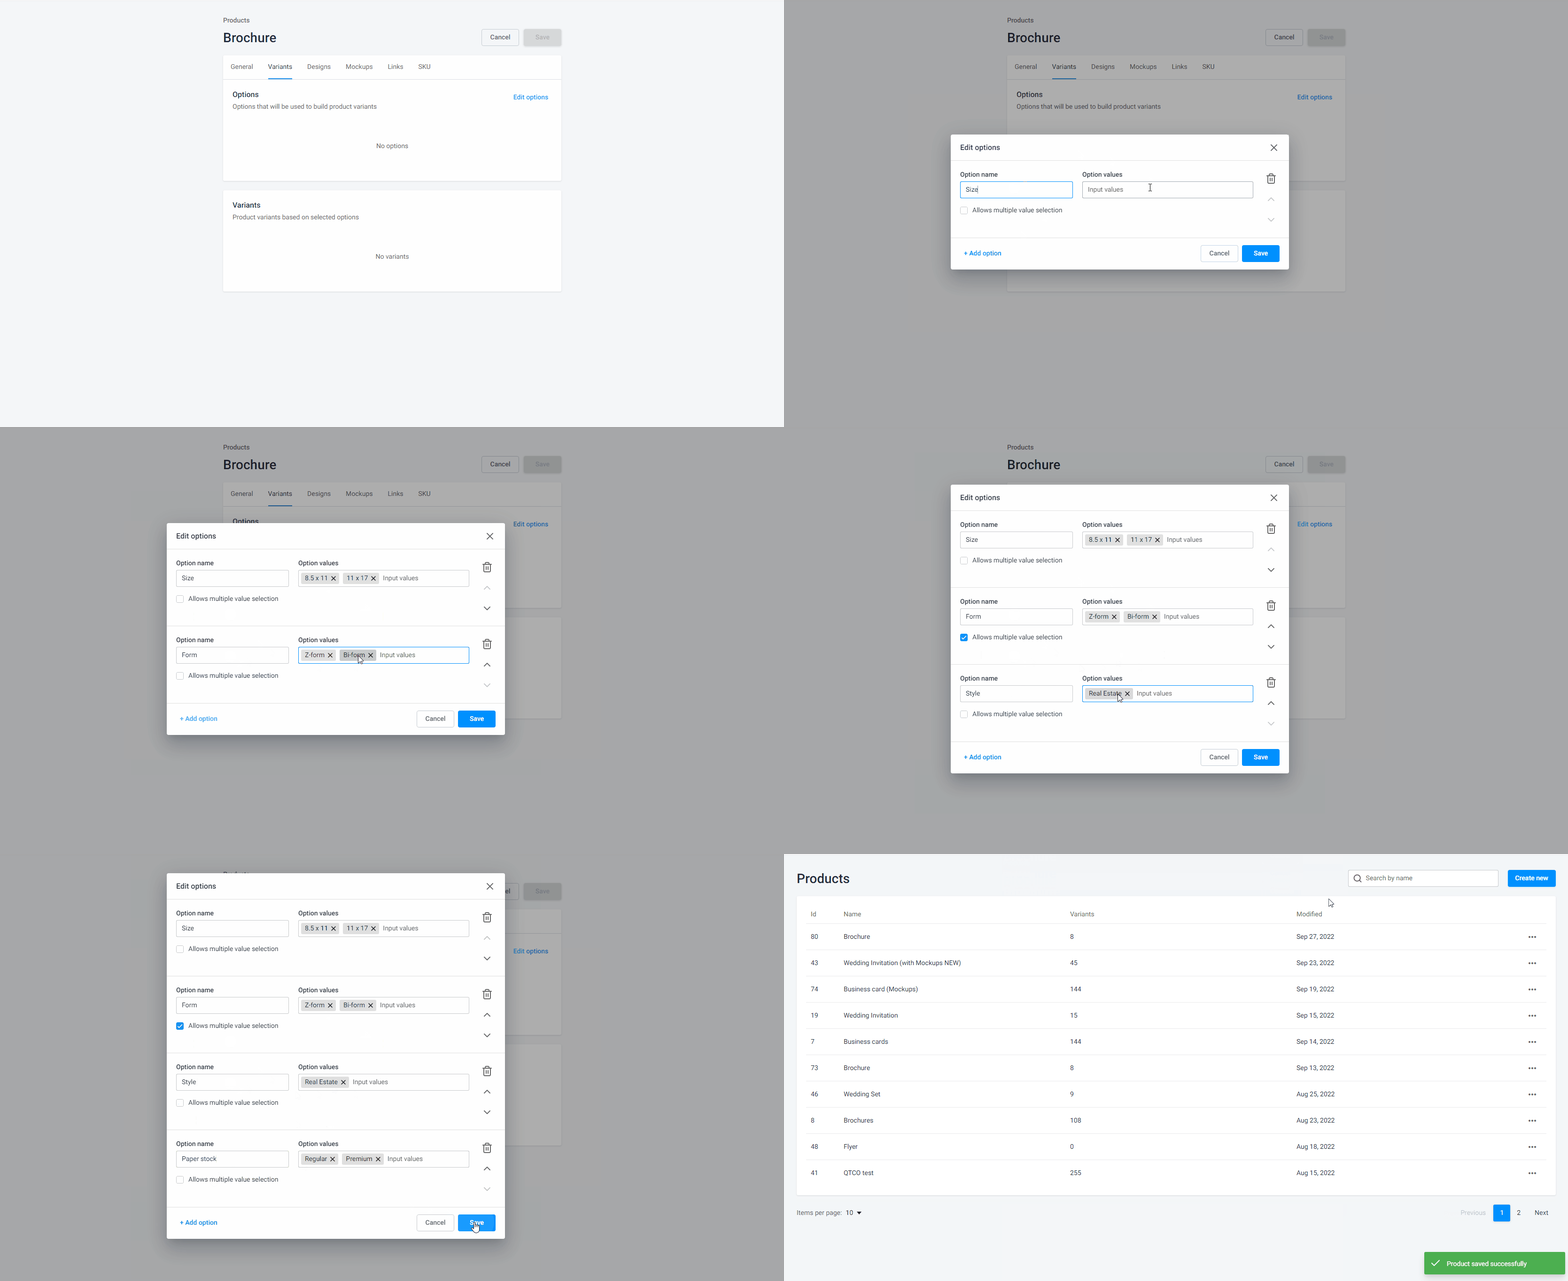
To save all options and their values, click Save.
As a result, you can see the Variants box below. These are all the combinations of all the values - variants. Now you can connect a design to each variant.
Connecting designs to a product
A design in the PIM module is a concept of a product. Before working with a design, you can read the Designs article about manipulating the designs in Customer's Canvas.
Creating a connection between designs and a product allows a customer to personalize a product in the Design Editor step: edit texts, upload images, and so on.
To connect designs, navigate to Assets > Designs. For this example, there are four designs, which cover all eight variants from the previous step. The first design is Bi-fold, and its size is 11 x 17. To make a connection, right-click an item and select Connections.
Click Add product and select a product. Click Select.
In a new dialog box, you can see options and values list boxes. Add the first option and values, then click Add option.
Add the options and select the values you need to use with this design. In this example, they will be:
the Size option is
11 x 17the Fold option is
Bi-foldthe Style option is
Real Estate,the Paper stock options are
RegularandPremium
You can add several designs to one product, selecting different options and values for each design.
To save settings, click Apply.
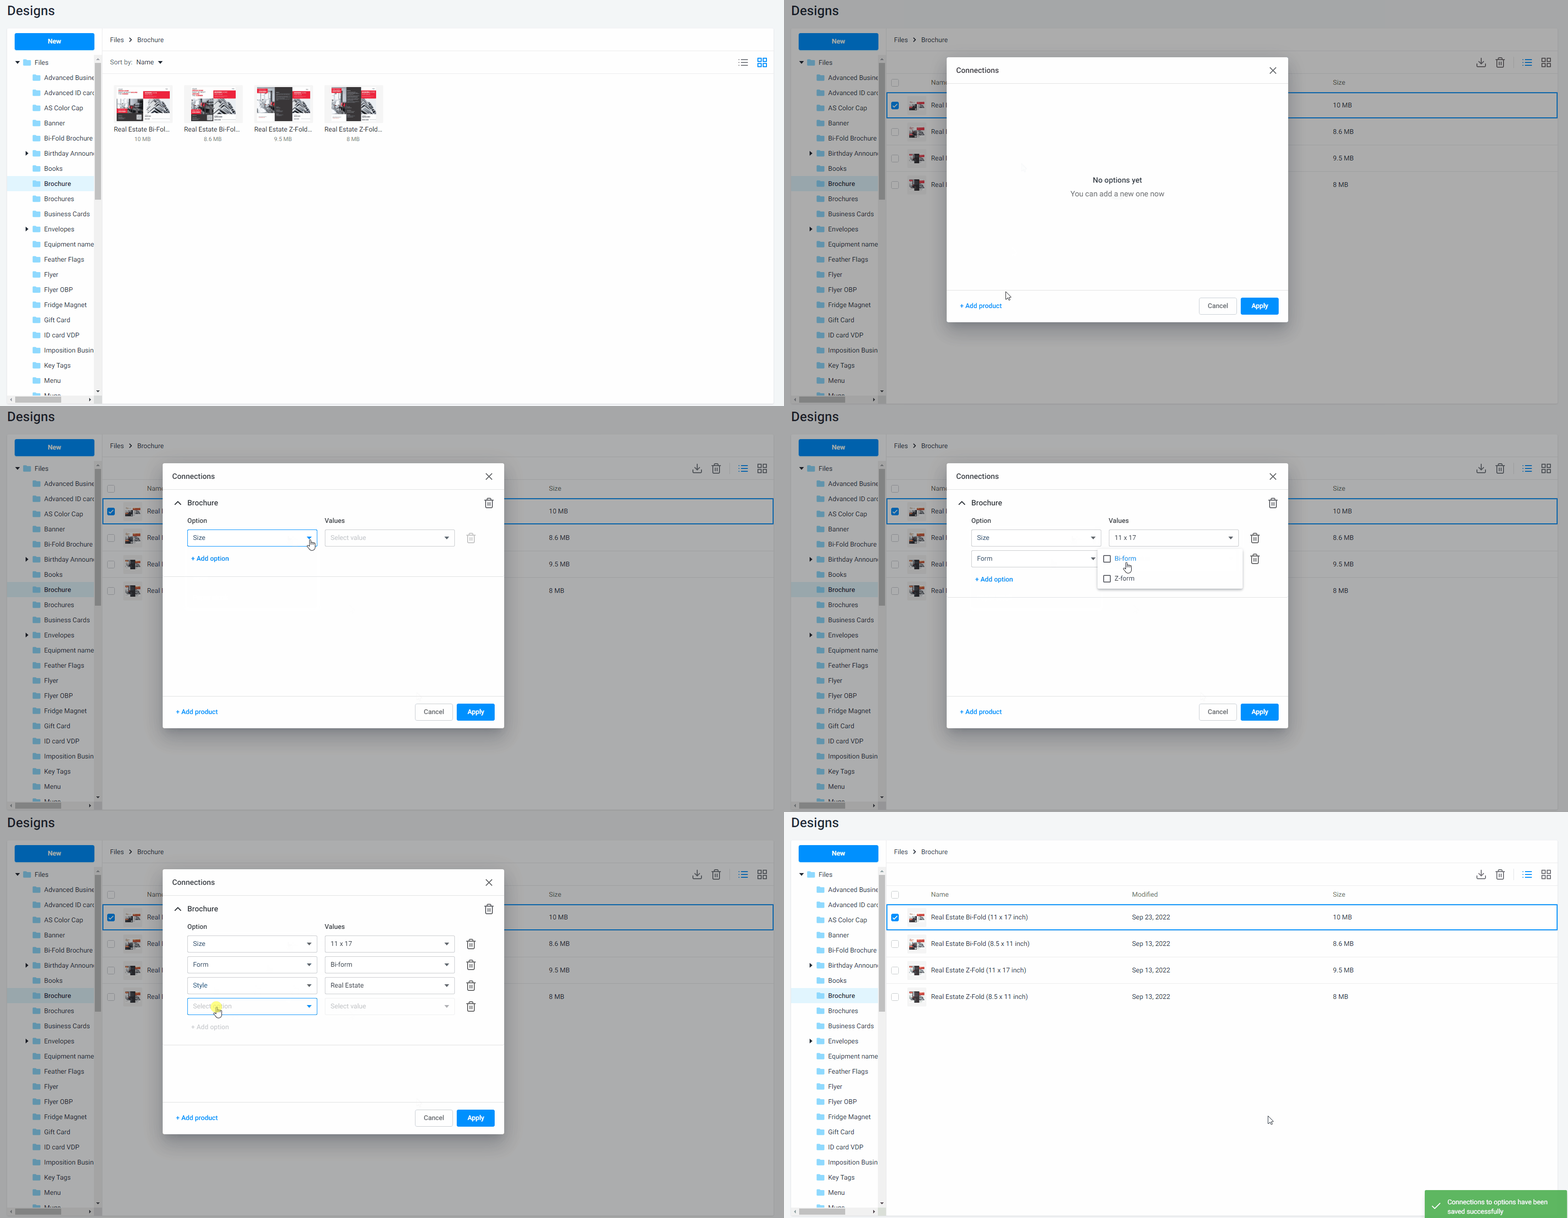
In the same way, you can connect other designs to a product. In this example, there are four designs to cover all product variants.
So, if all designs are connected, you can add the visualization to product designs by connecting some mockups to a product.
Connecting mockups to a product
Mockups are used for visualization of a product. The PIM module supports three mockup types: Thumbnail, Editor, and Preview.
You can see a thumbnail mockup in the Variant Selector step - the first personalization step. This mockup type displays a product miniature image in a product list.
The Editor mockup visualizes the product inside the Design Editor when a user personalizes the design. This mockup type appears in the second personalization step - the Editor step.
If you want more realistic visualization, use a Preview mockup. At the Approval step, this mockup type displays a design, for example, in an interior or on a real item like a t-shirt.
The Connecting assets to products article explains more about mockup types in the PIM module.
To connect a mockup to a product, go to Assets > Mockups. For example, the first mockup is a bi-fold mockup, its size is 8.5 x 11, and it's for the first product page. Right-click the mockup and select Connections.
In this dialog box, select the product you need. After selecting a product, a new dialog box appears, where you can edit the usage of this mockup.
Firstly, select the Mockup type:
Thumbnail mockup is used as a product representation while personalizing a product with options and values.
Editor mockup will be located inside Design Editor, while a customer personalizes a design.
Preview mockup shows the personalization result. It can be photorealistic image to display a design on some surfaces like a t-shirt, garments and so on.
The Apply to pages text box defines the side of a design, if it's double-sided. You can input a page number. In the example, this is 1 - the front side.
Select the options and values you need to add. For this mockup, these are the Size option with the value 8.5 x 11, the Form option and the value Bi-form, the Style option and the Real Estate value, and the Paper stock option and both available values. To save the settings, click Apply.
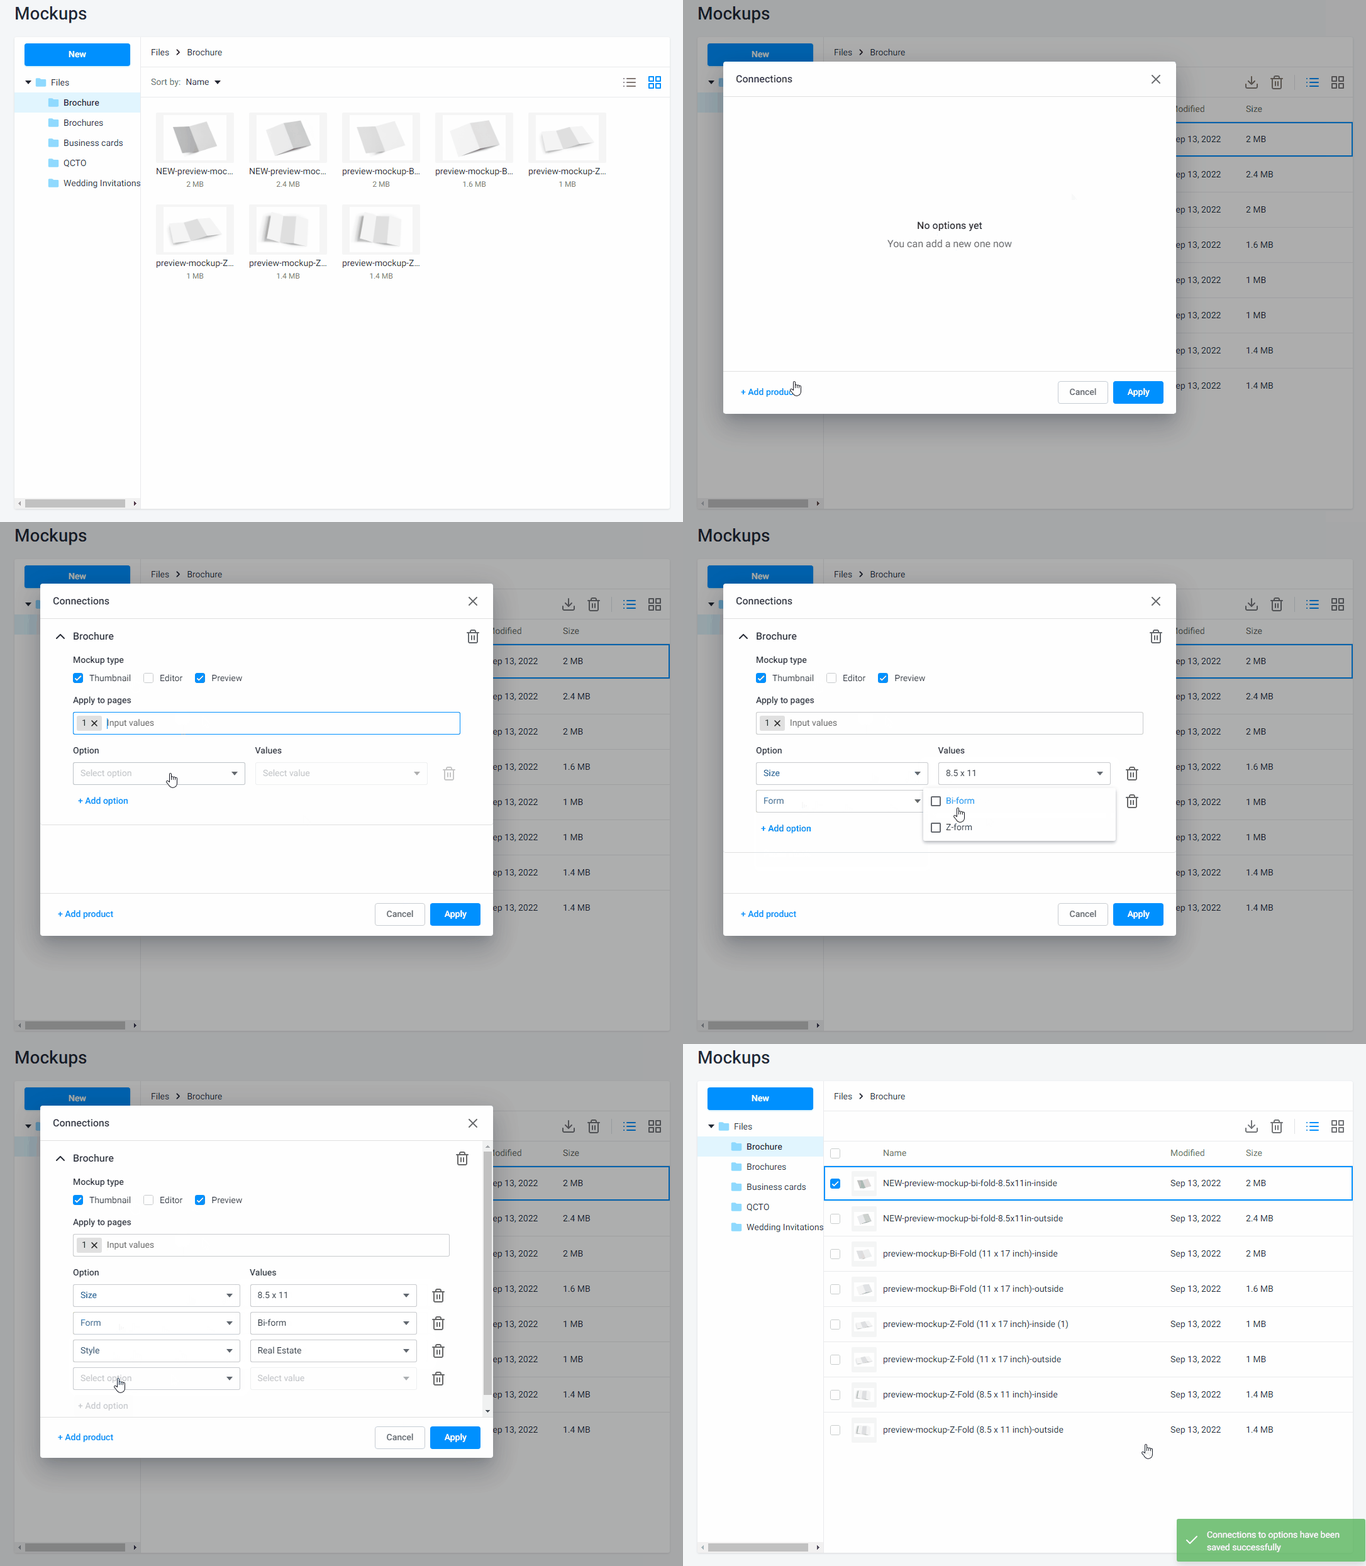
To connect other mockups to a product, select a new mockup, right-click the item and select Connection. In this example, the idea is to cover all product variants with mockups. There are eight mockups for this purpose.
As a result, all mockups and designs are connected to a product. Let's test these connections in the product.
Testing the connections
Now that all the designs and mockups are connected to a product, you can test these connections. You can check that all the variants are associated with the correct designs and mockups.
To do this, go back to the product, click the ellipsis, and select Edit. To check designs, click the Designs tab and select all the design options. In the Designs box, you can see all the designs connected to product variants.
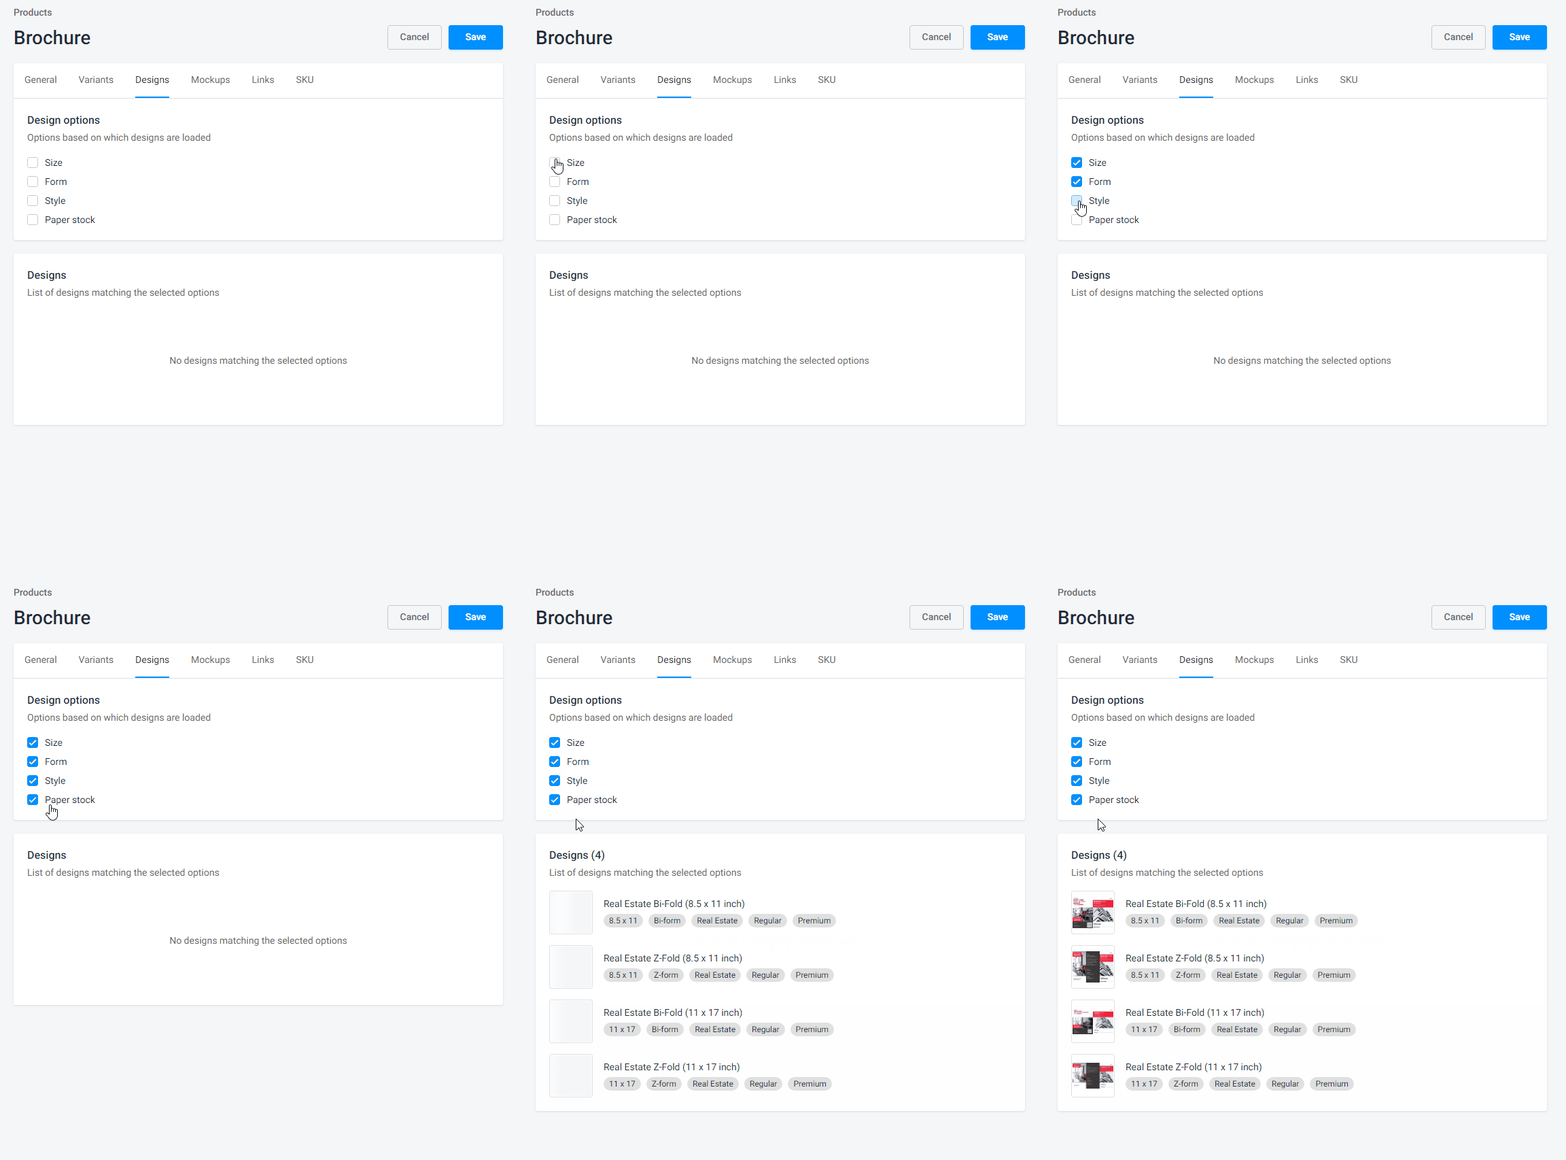
Now that the designs are successfully connected, let's do the same with mockups.
To check mockups, go to the Mockups tab and select all the mockup options. As a result, you can see all eight connected mockups.
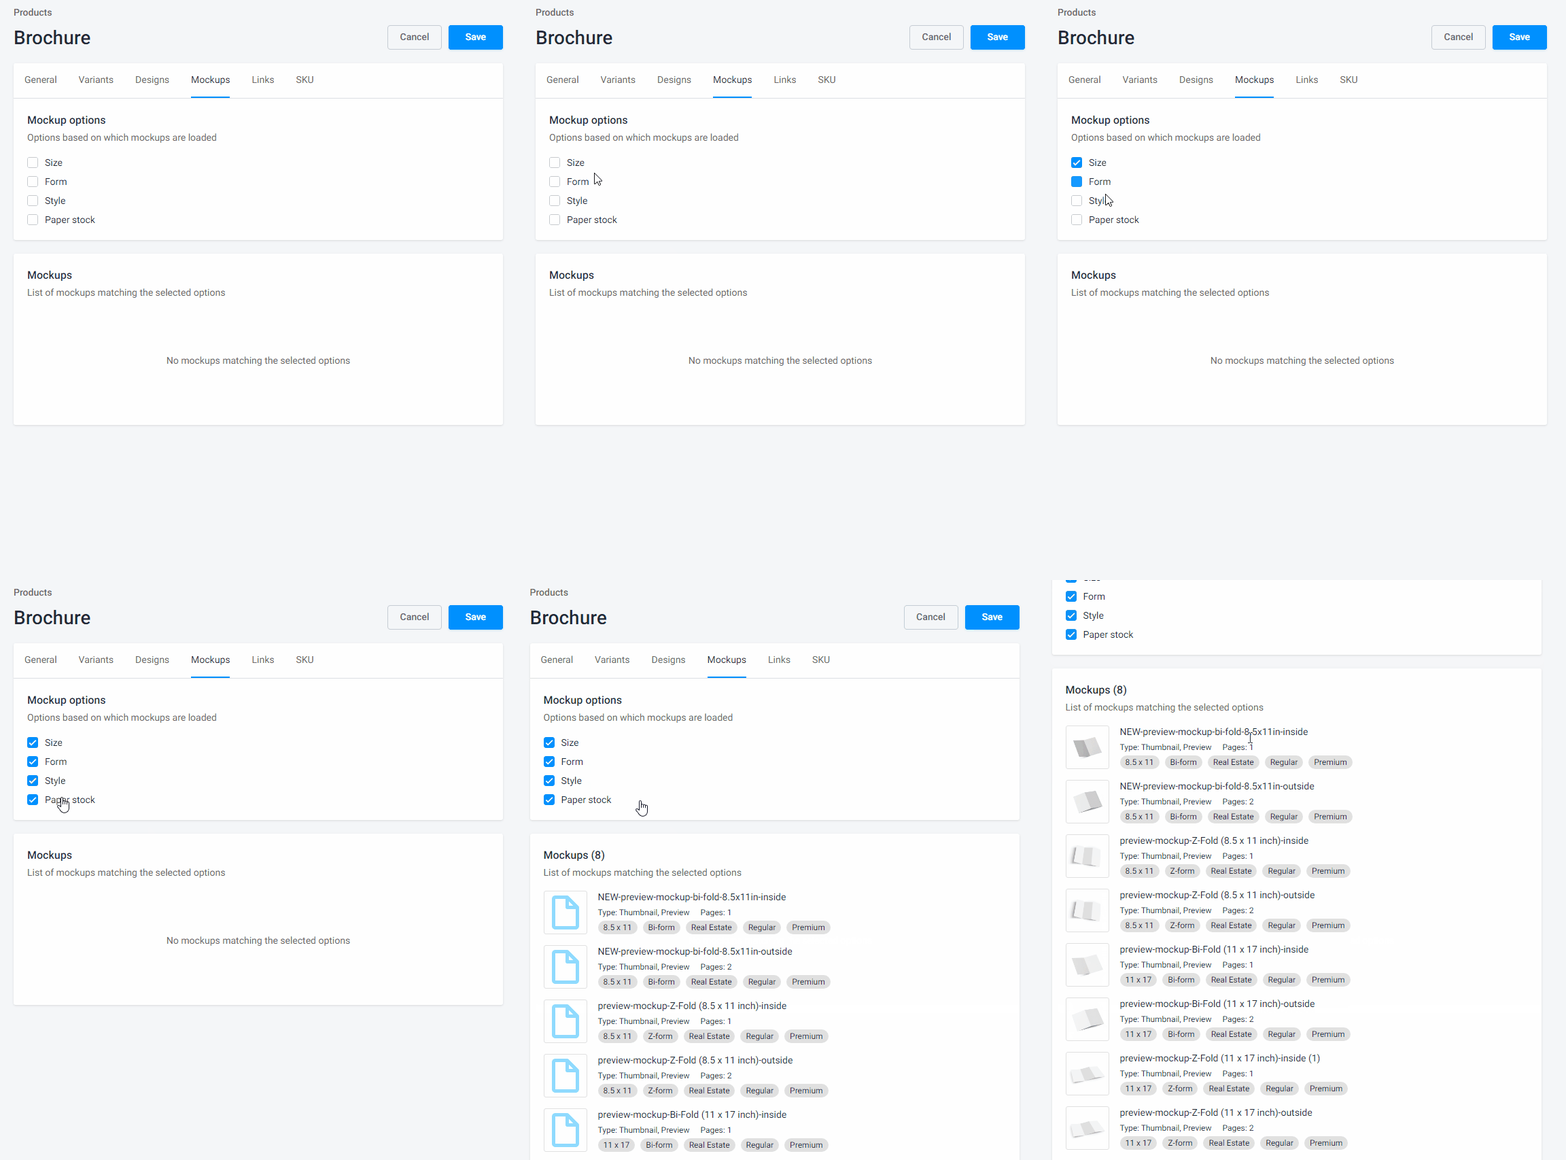
Now that designs and mockups are available in the product, you can add a storefront Shopify product.
Creating a product in Shopify
The inner product in BackOffice is almost ready. The next step is to create a storefront product in Shopify. This is a product that is available for customers, which is all the information added to the product will be on a storefront: title, media files, and so on.
To create a new Shopify product, go to your Shopify account and select Products in the admin panel.
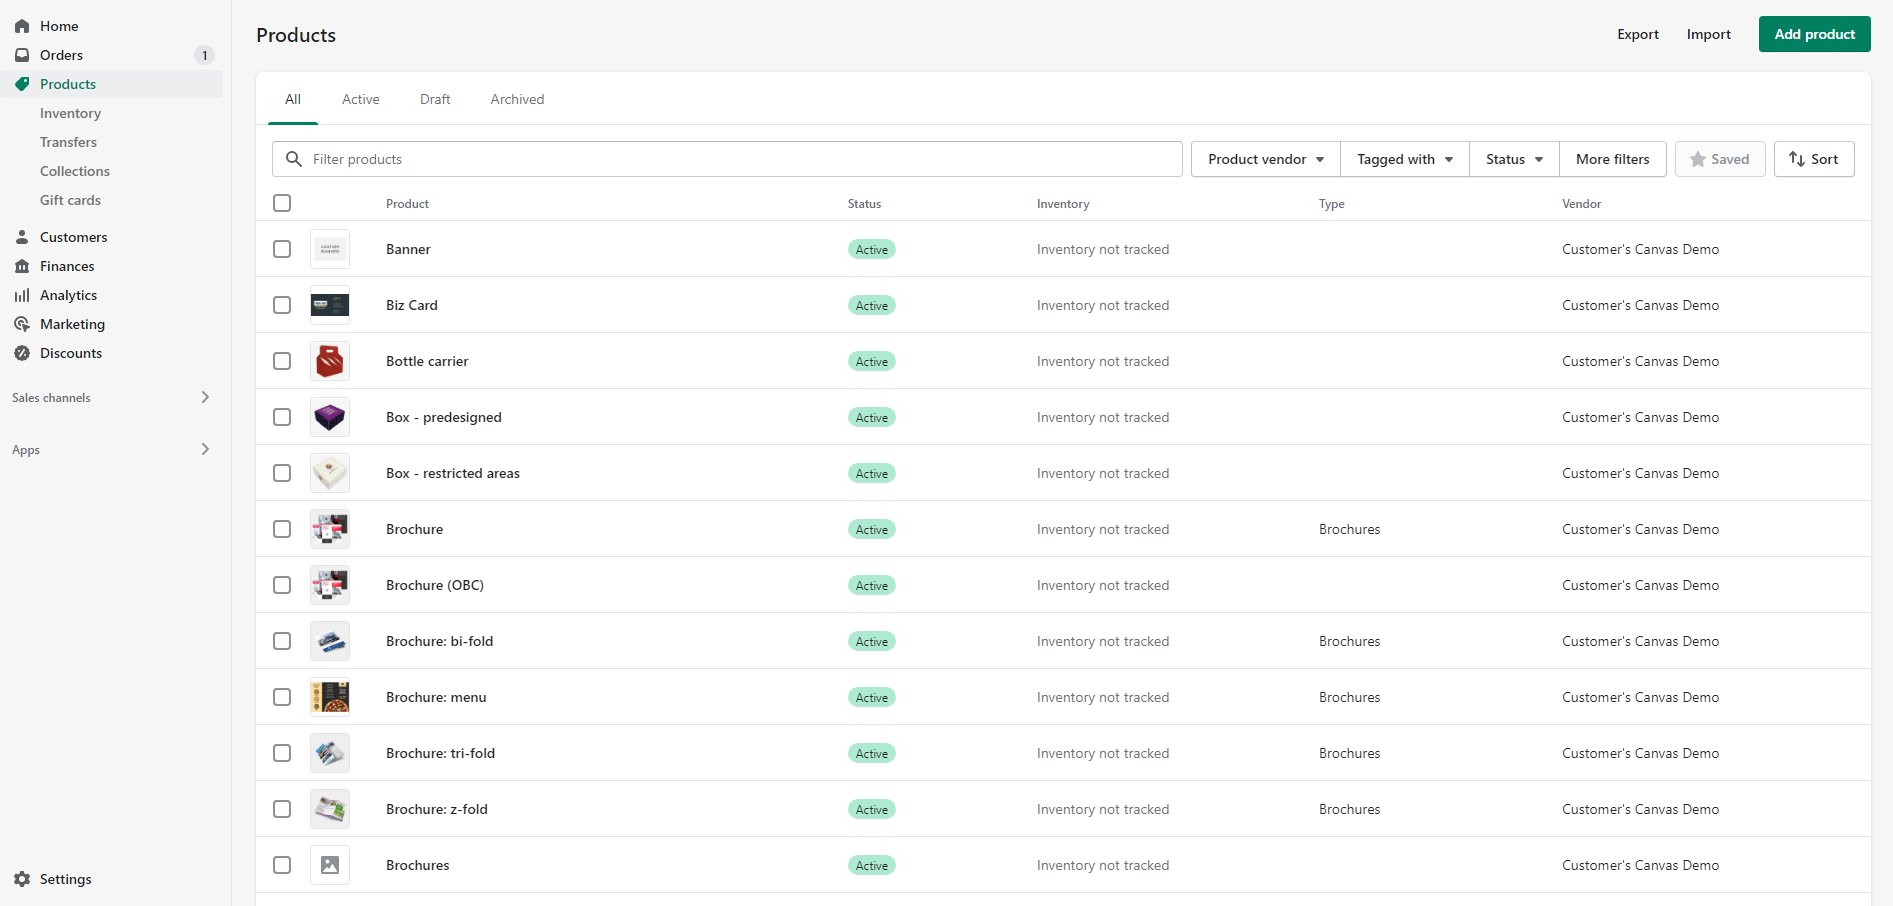
Here you can see all the products you have in the storefront now. To create a new one, click Add product. On the product creation page, fill in a product name. This is a storefront product name, and it will be located below a thumbnail product image in a storefront. In this example, the product name is Real Estate Brochure.
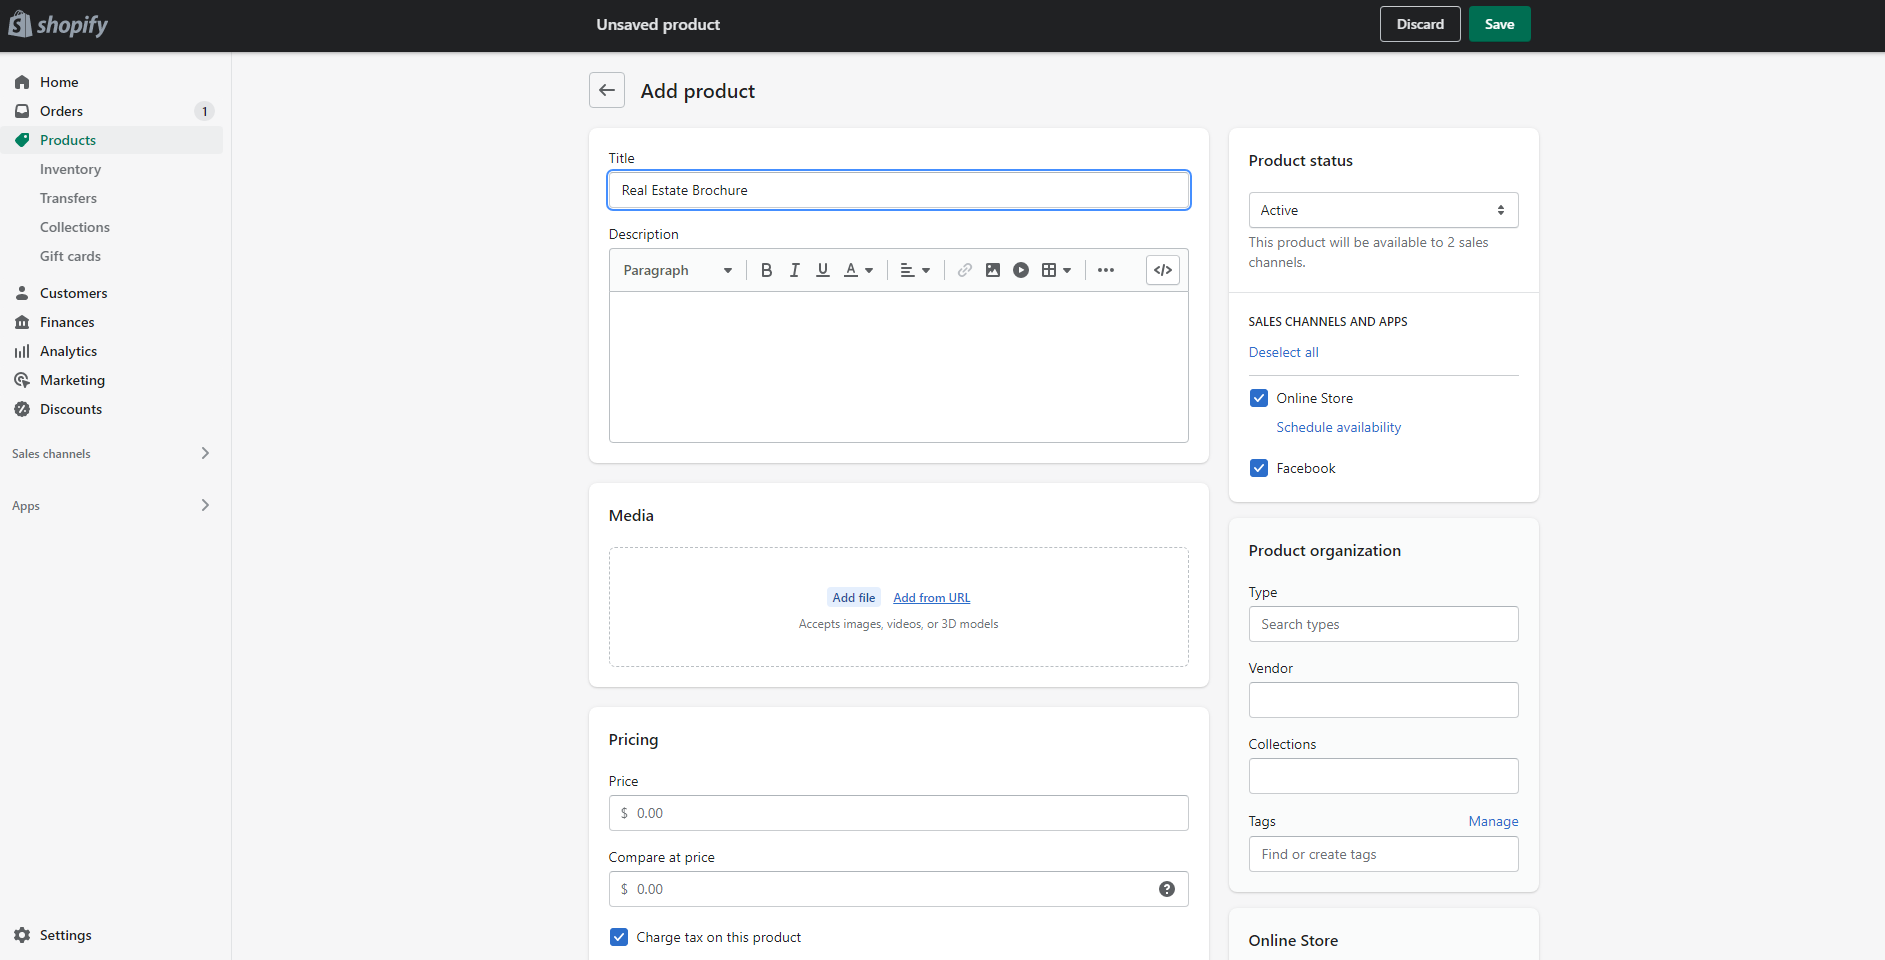
To save the changes, click Save.
Now that you have created the storefront product, you can connect a BackOffice product to this storefront product.
Connecting a product in BackOffice to a product in a Shopify storefront
Connecting a product in BackOffice to a Shopify product allows you to add all the settings such as designs, mockups, options, and values, to a storefront product. It works via a Product Link. This is a special product property, where you can select what options and values will be in a real storefront product.
To do so, navigate to Products, select a product, click the ellipsis, and select Edit. Once you are inside the product, select the Links tab. There you can make all manipulations with links: create, edit, or delete. To create a product link, click Add links.
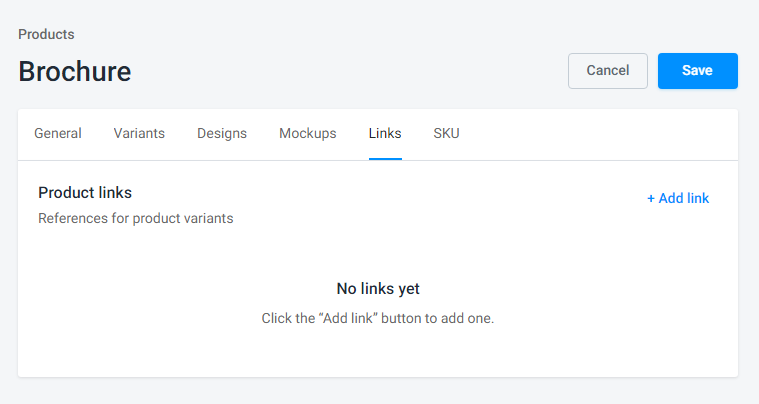
In the new dialog box, input a product name in the Name text box. For example, Brochure. This is an internal link name, not a storefront product. Customers don't see this name.
In the Storefront list box, select a storefront, and then select a product in your e-commerce system in the Storefront Product list box.
The next step is selecting the option values for each option. The next checkboxes define options and values in a Shopify storefront product:
The Include checkboxes allow you to add the option to a product. If you don't select this checkbox, a storefront product won't display this option at all.
The Preselected checkboxes are in the options, where at the product creation step you've selected the Allow multiple selection checkbox. If you select this checkbox for all the values, a product will be filtered by both. As a result, a customer can select them at the same time. If you don't select any values at all, a product will contain them but won't be filtered by them. In this example, it is the Form option and the
Z-foldandB-foldvalues.The Default button is a result of the absence of the Allow multiple selection checkbox. A product will be filtered by the value, selected as a Default. In this product, these options are Size and Paper stock.
Click Apply to finish the settings.
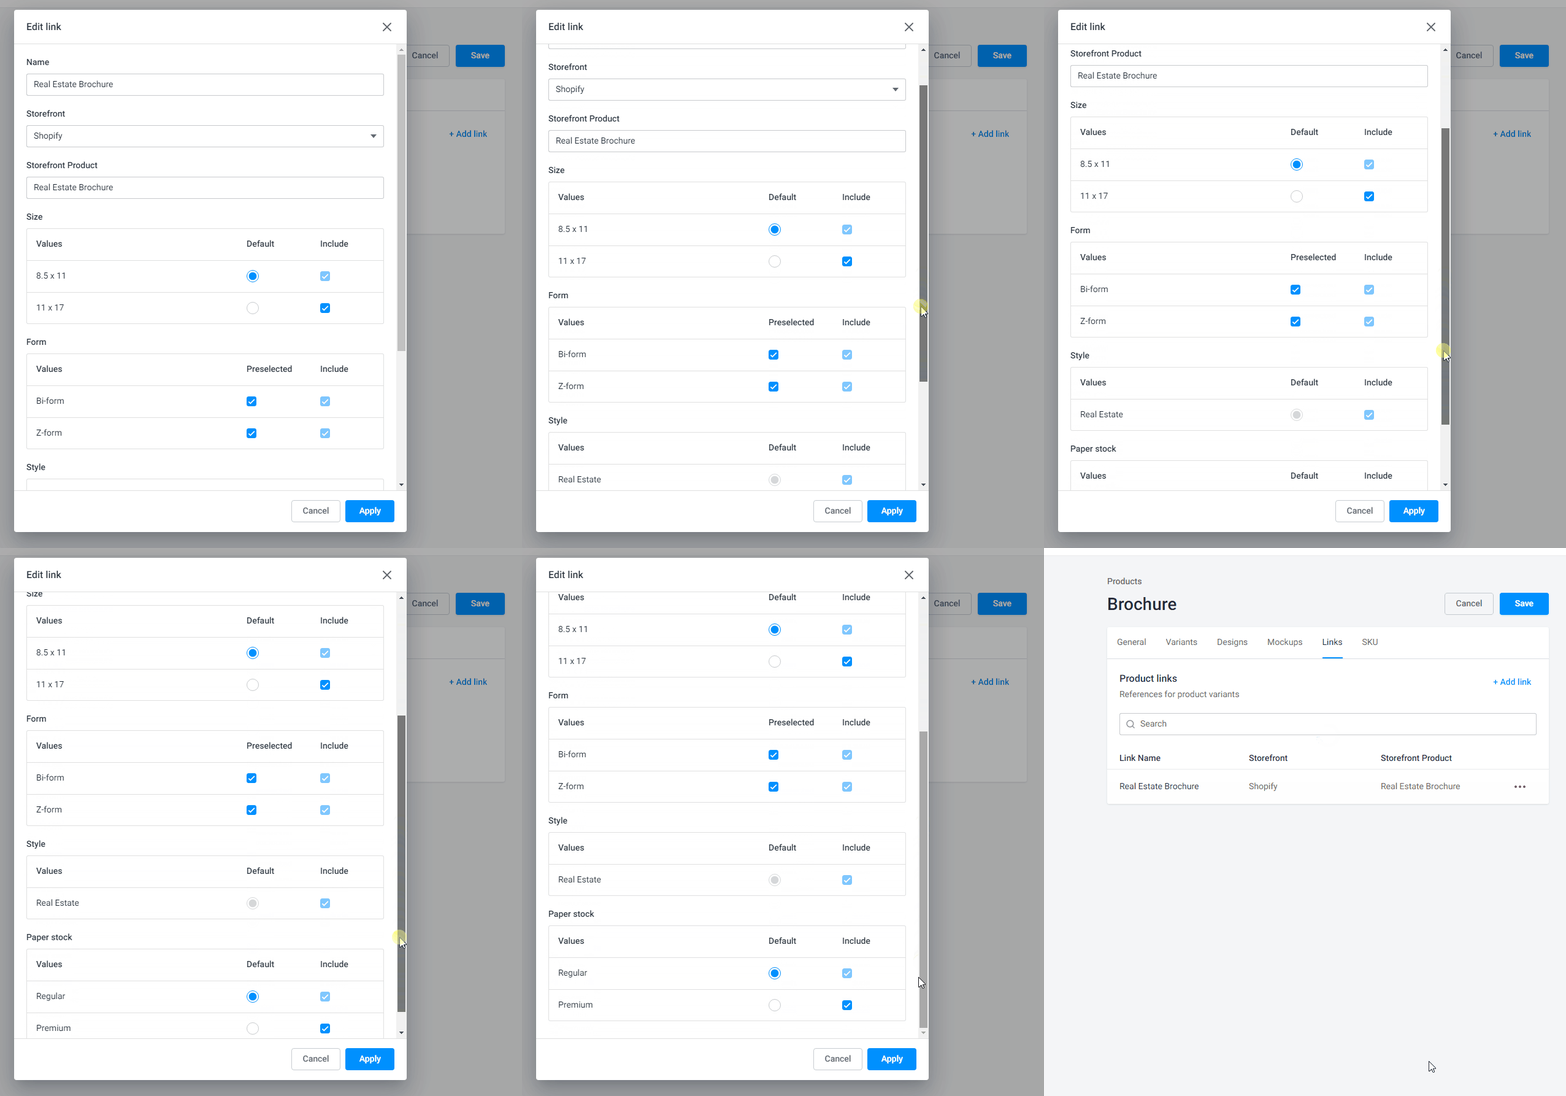
To test a product link, click the ellipsis and select Preview. You can see all the steps of product customization.
Adding SKU in a Shopify product
A stock keeping unit (SKU) is a special number that allows you to add a product to a cart in an e-commerce system. To know more about defining SKU, you can read the Defining and adding SKU article.
In this example, the Orientation option and the Style option don't affect the price. On the other hand, the Size option, the Paper stock option, and the Fold option define the price. So, prescribe the SKU for the set of variants, which contain these values:
8.5 x 11/Z-form/Regular-18.5 x 11/Z-form/Regular-28.5 x 11/Bi-form/Regular-38.5 x 11/Bi-form/Premium-411 x 17/Z-form/Regular-511 x 17/Z-form/Premium-611 x 17/Bi-form/Regular-711 x 17/Bi-form/Premium-8
Each variant has its own set of values, which is each variant has its own SKU. Now it's necessary to add SKUs for the Shopify product.
To do this, go to Admin Panel, select Products, and then open the product. On a product page, select the Options checkbox and activate the menu set. Text boxes for an option name and values will appear.
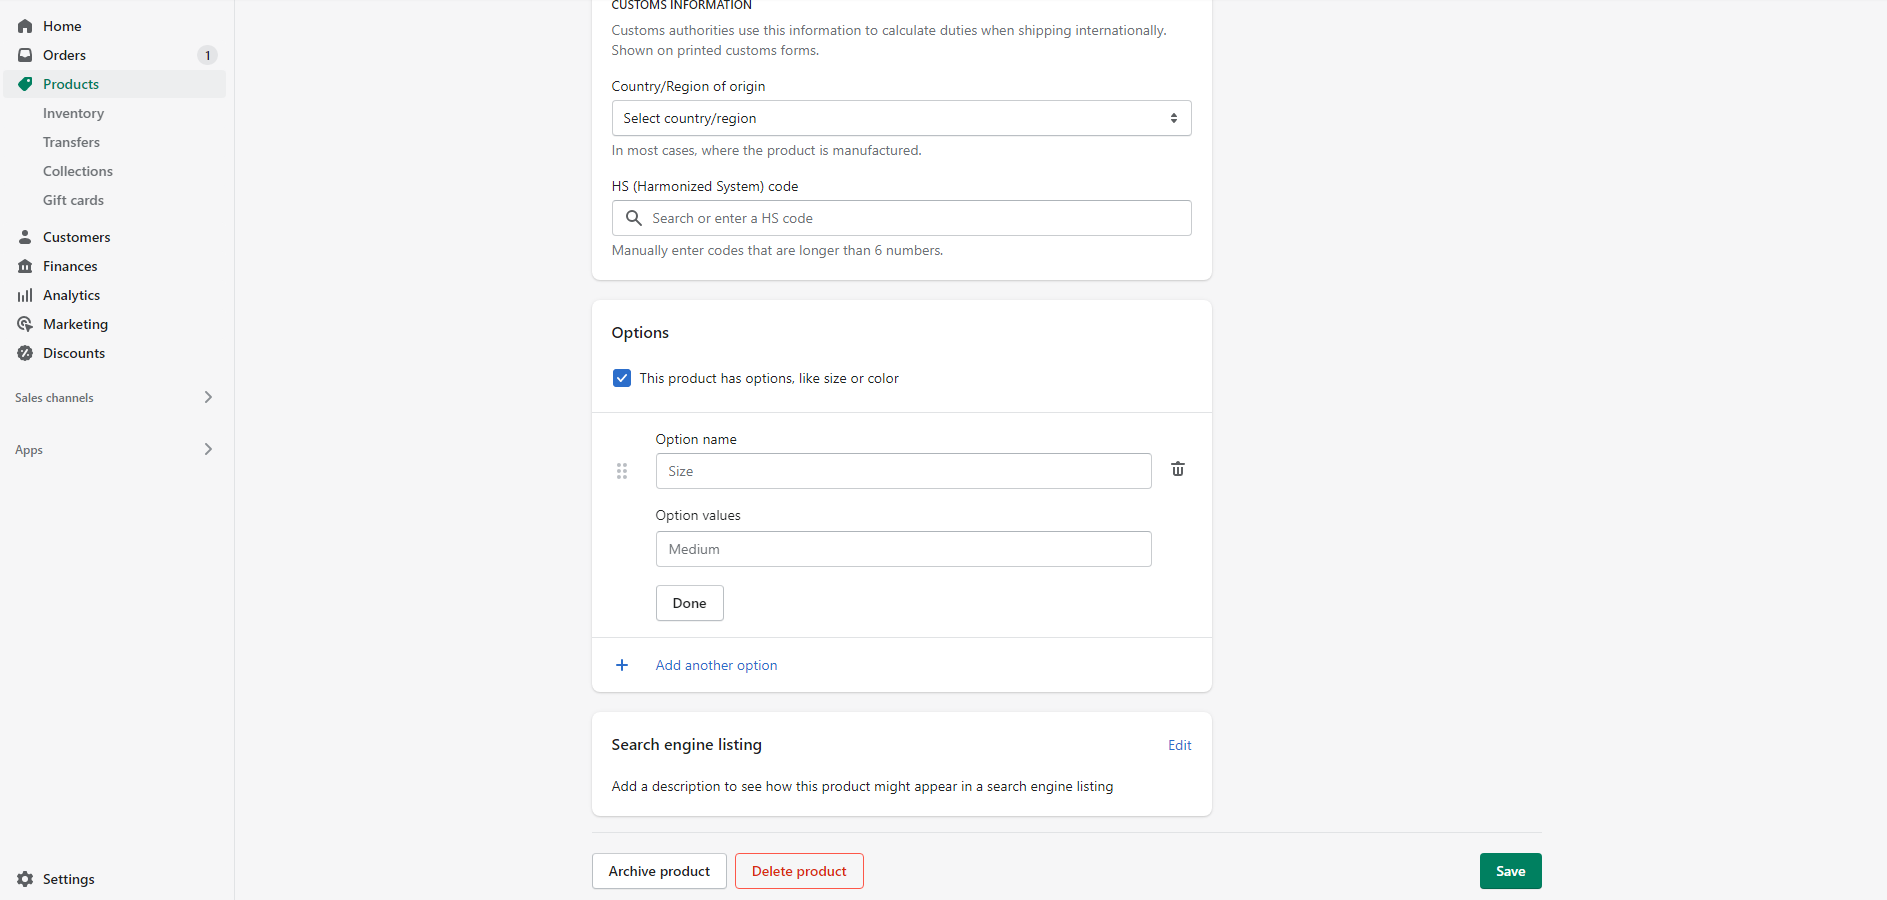
To define the option, input an option name in the Option name text box. You can input the same option name as in BackOffice. In the Option Values, input values. In this example, the first option is Size, and the values are 8.5 x 11 and 11 x 17.
Finally, click Done. To add a new option, click Add another option. You can add only three options.
You can add the following options in the same way. The next option is Form and its values are Z-form and Bi-form. The last one is Paper stock, and the values are Regular and Premium.
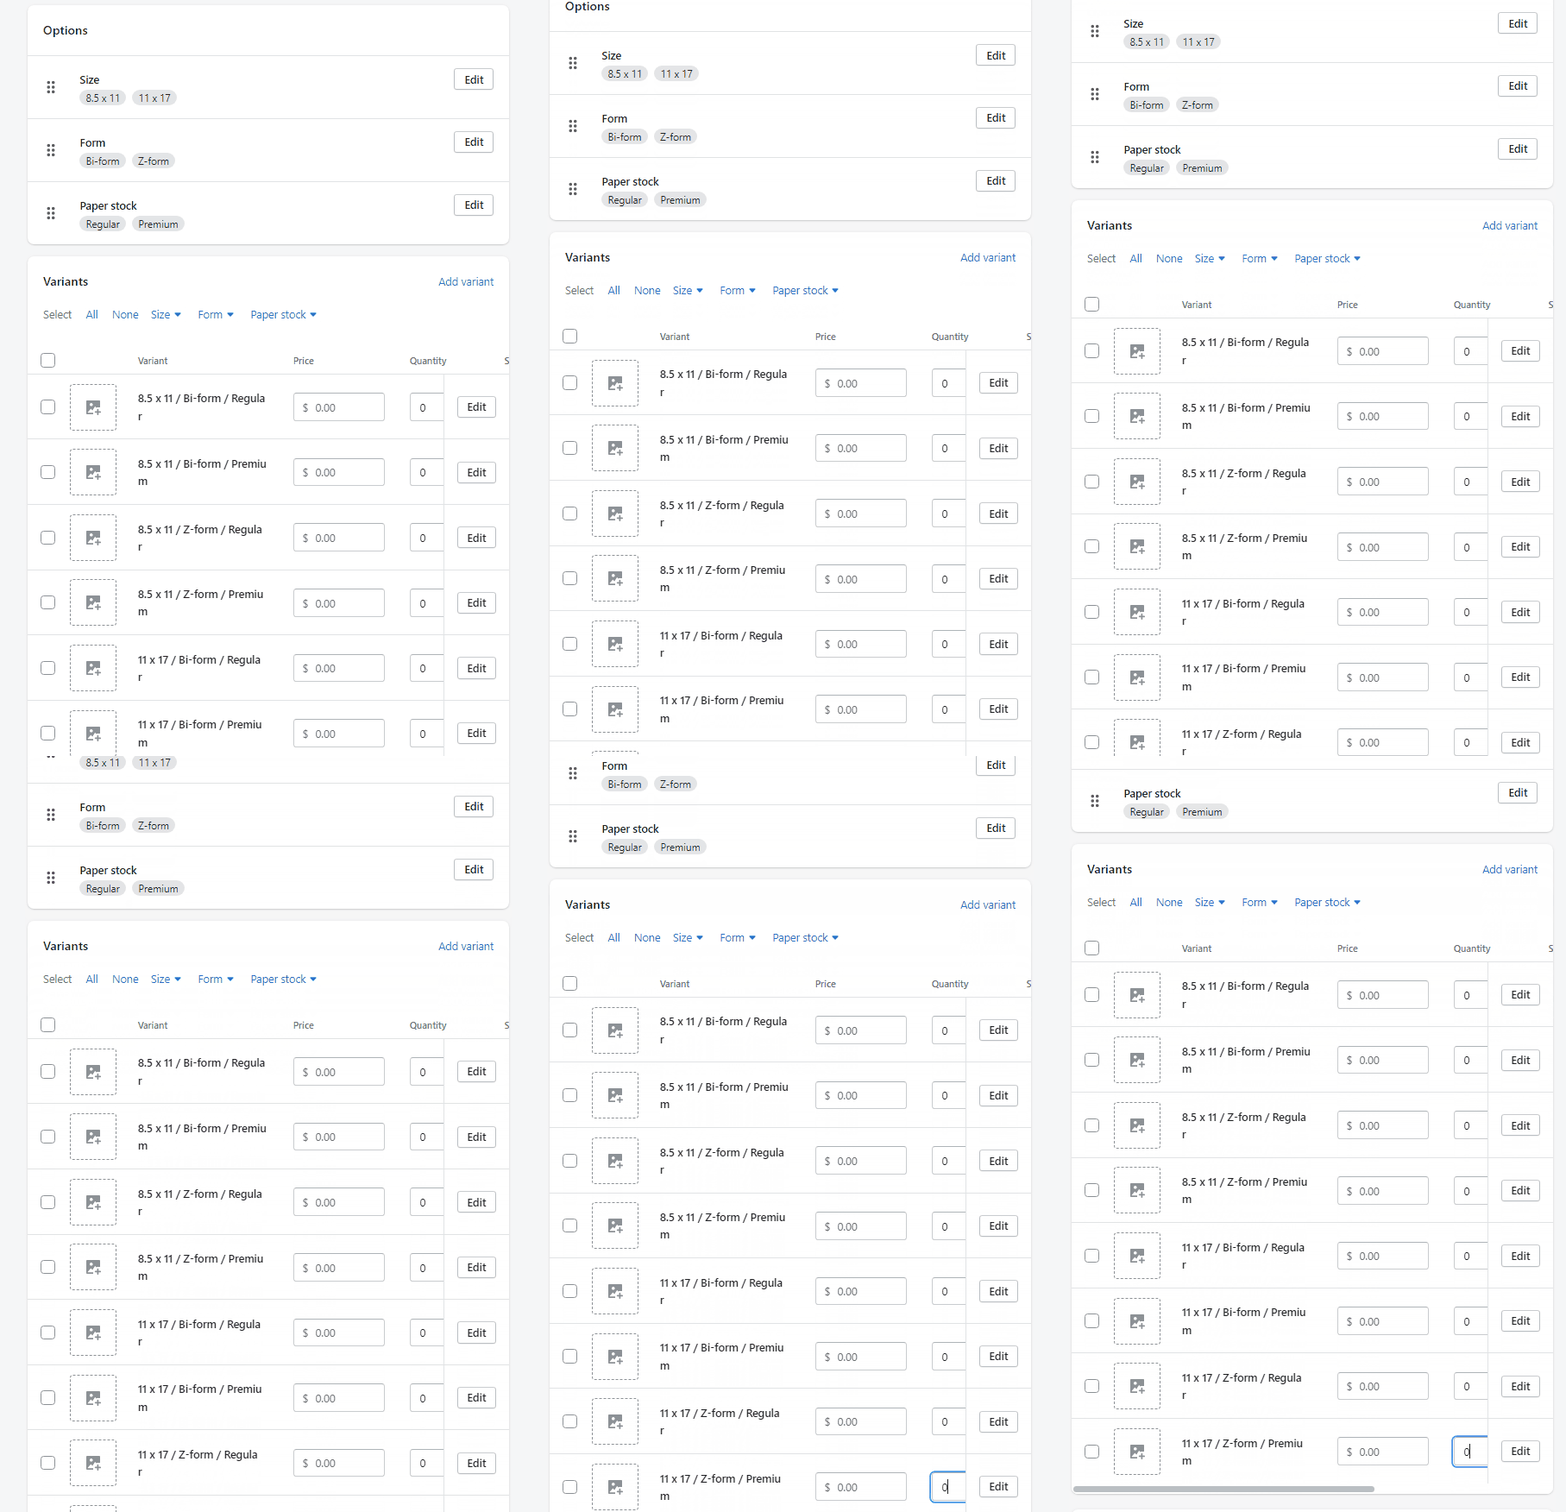
After editing options, the Variants strings will appear. Now, there are eight variants. Let's add the price in the Price text box - and then the Quantity text box for each variant. This parameter allows a customer to select a product in a storefront, otherwise a product is Out of stock.
The last parameter is SKU. Add different SKUs for each variant. This parameter must be different for every variant.
As a result, each variant has its own SKU, price, and quantity.
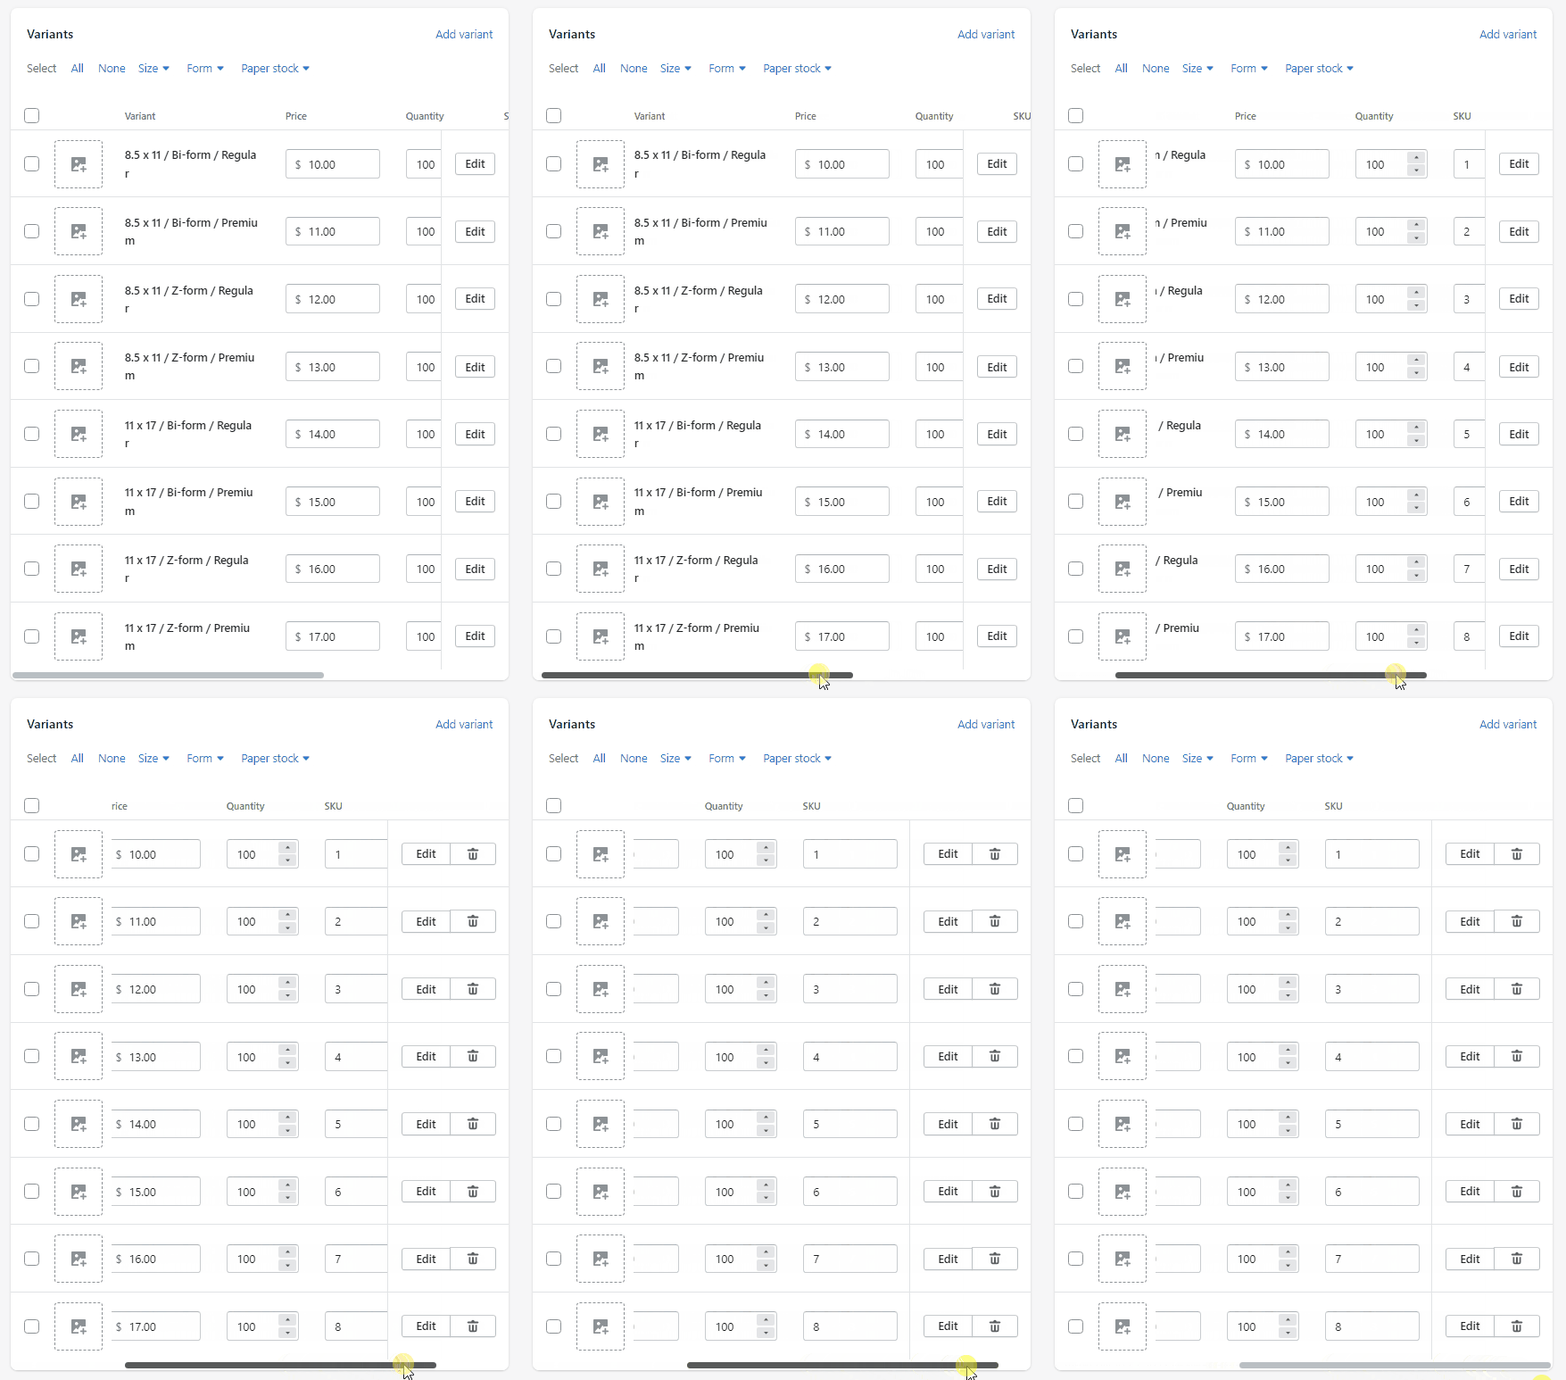
Now that the SKUs in a Shopify product are defined, you need to add the same SKU meanings to a BackOffice product.
Editing SKU in a BackOffice product
The SKUs in a Shopify product have been added. Now it's necessary to add the same parameters to a product in BackOffice.
To return to products, go to BackOffice and click Option-based. In the Products list, select the product you've edited. For editing, click the ellipsis and select Edit. To edit SKUs, click the SKU tab in product tabs. Here you can see all the product variants, and each variant has an option defining the price.
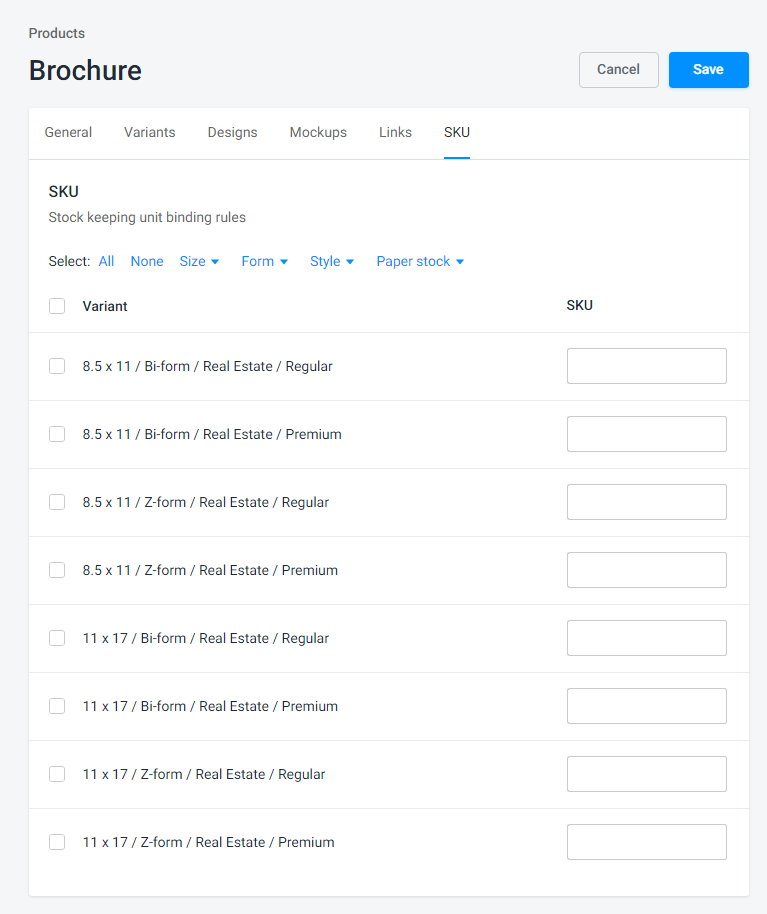
The purpose is to add the same SKUs in the Shopify product from the previous step, this storefront product is connected to the product by a product link.
To edit an SKU, you can select several options and add the same SKU for some variants at the same time. For this, click the option you need and select the values. In this example, there are eight SKUs to input. The first variant is:
8.5 x 11/Z-form/Regularand the SKU is1.
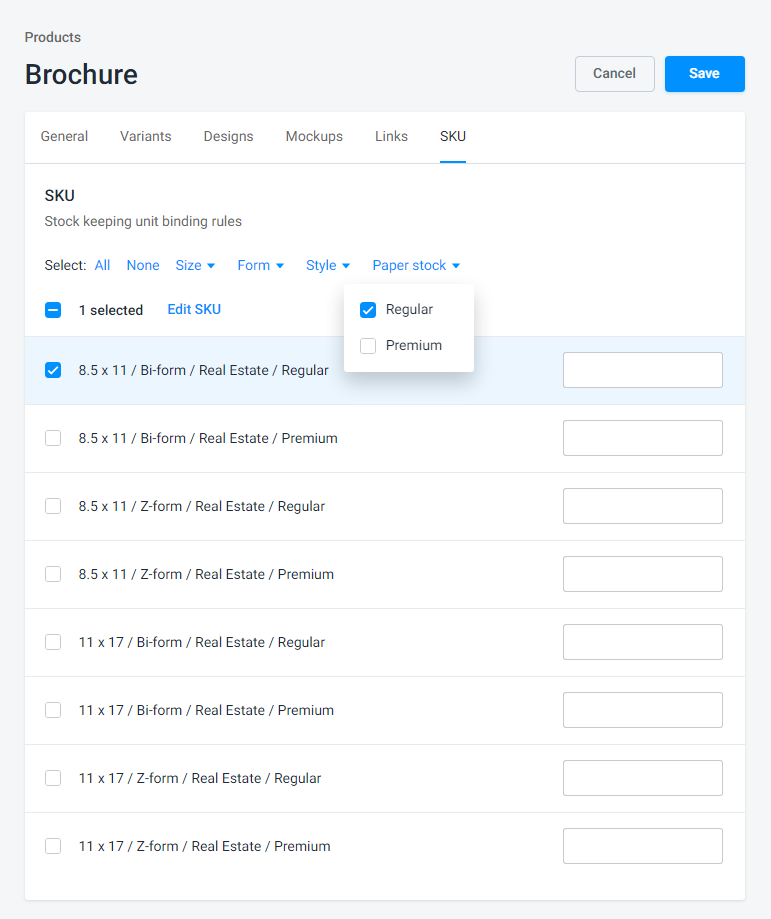
The values are selected and the variant is found. To add an SKU to the variant, click Edit SKU and input a value.
In a new dialog box, input 1 and click Apply. This SKU is applied to the variant.
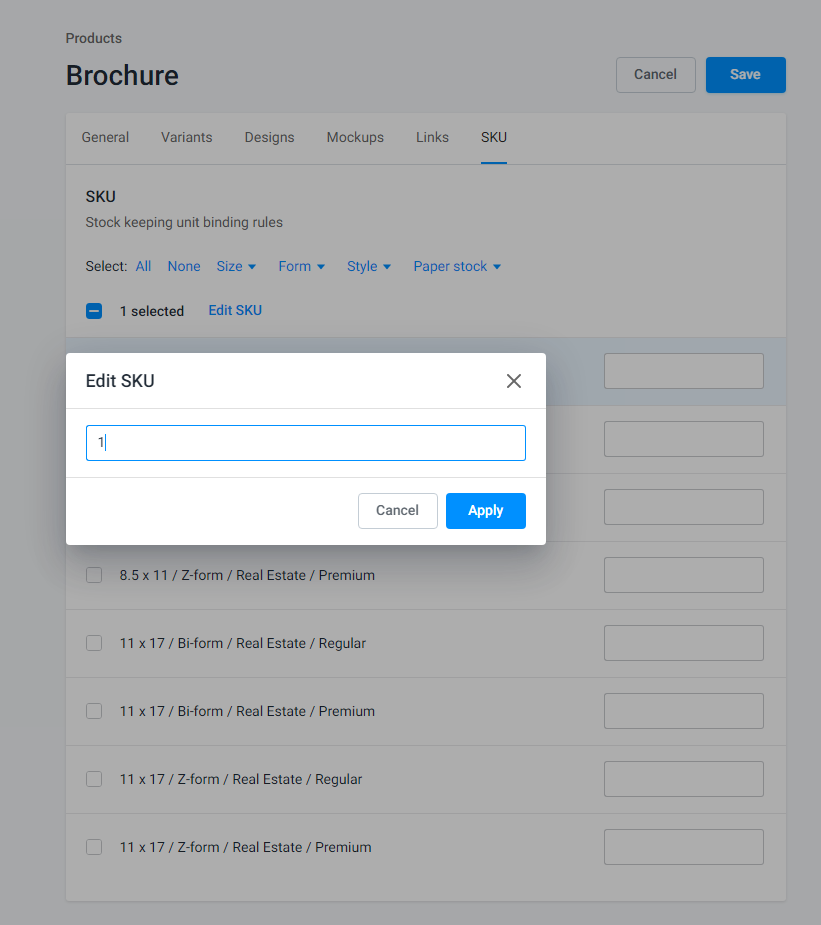
This approach allows you to add the same SKU to several variants. In this example, the SKU is added to the first variant.
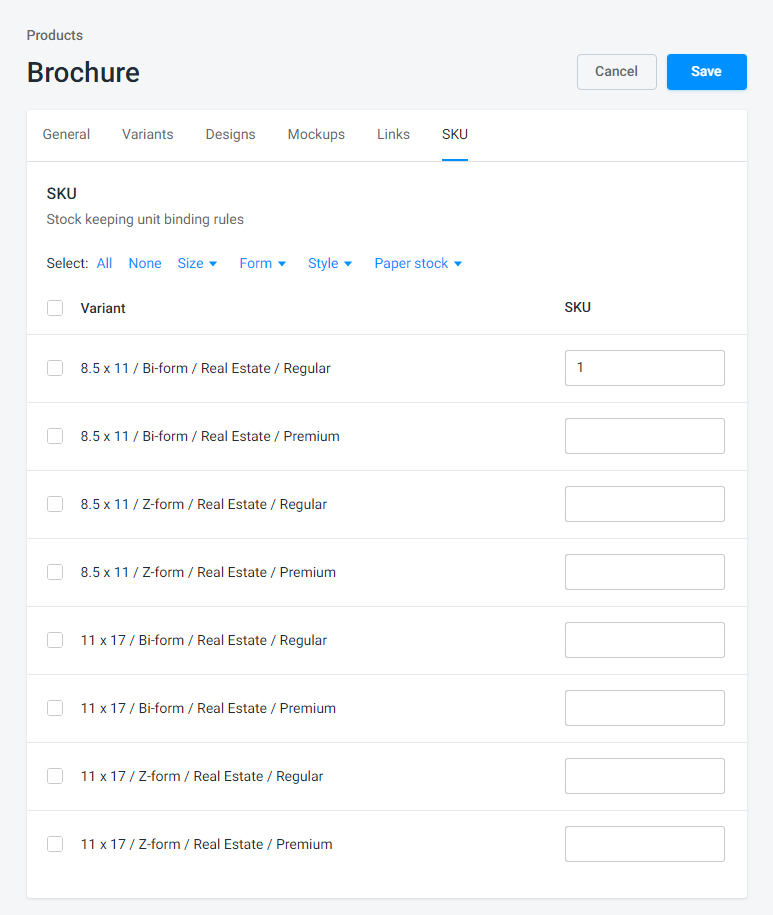
To add the other SKUs, repeat these actions but select the other values for each variant. If you don't have so many variants, you can add SKUs just inputting them in a text box.
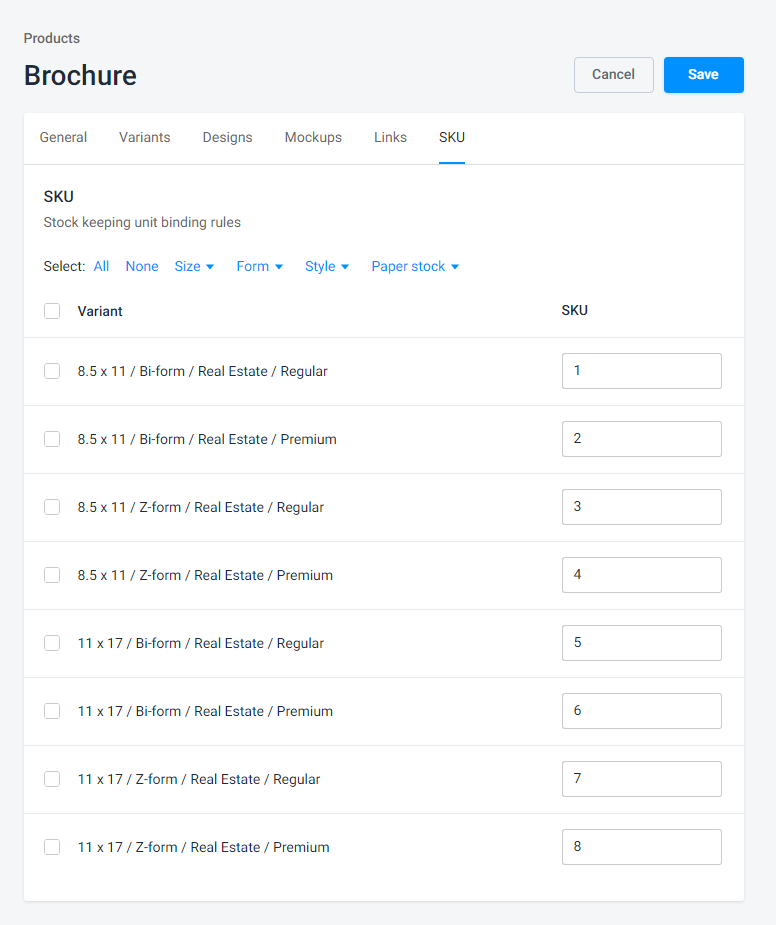
To save the result, click Save.
The product is almost ready. Now you can add more visualization to a storefront product adding media files.
Adding media and collections in a Shopify product
If you add media files to a storefront product, it will give a better understanding of a product for a customer. Moreover, these images can function as advertising images.
To add these images, go to the admin panel, click Product, and select the product you have created.
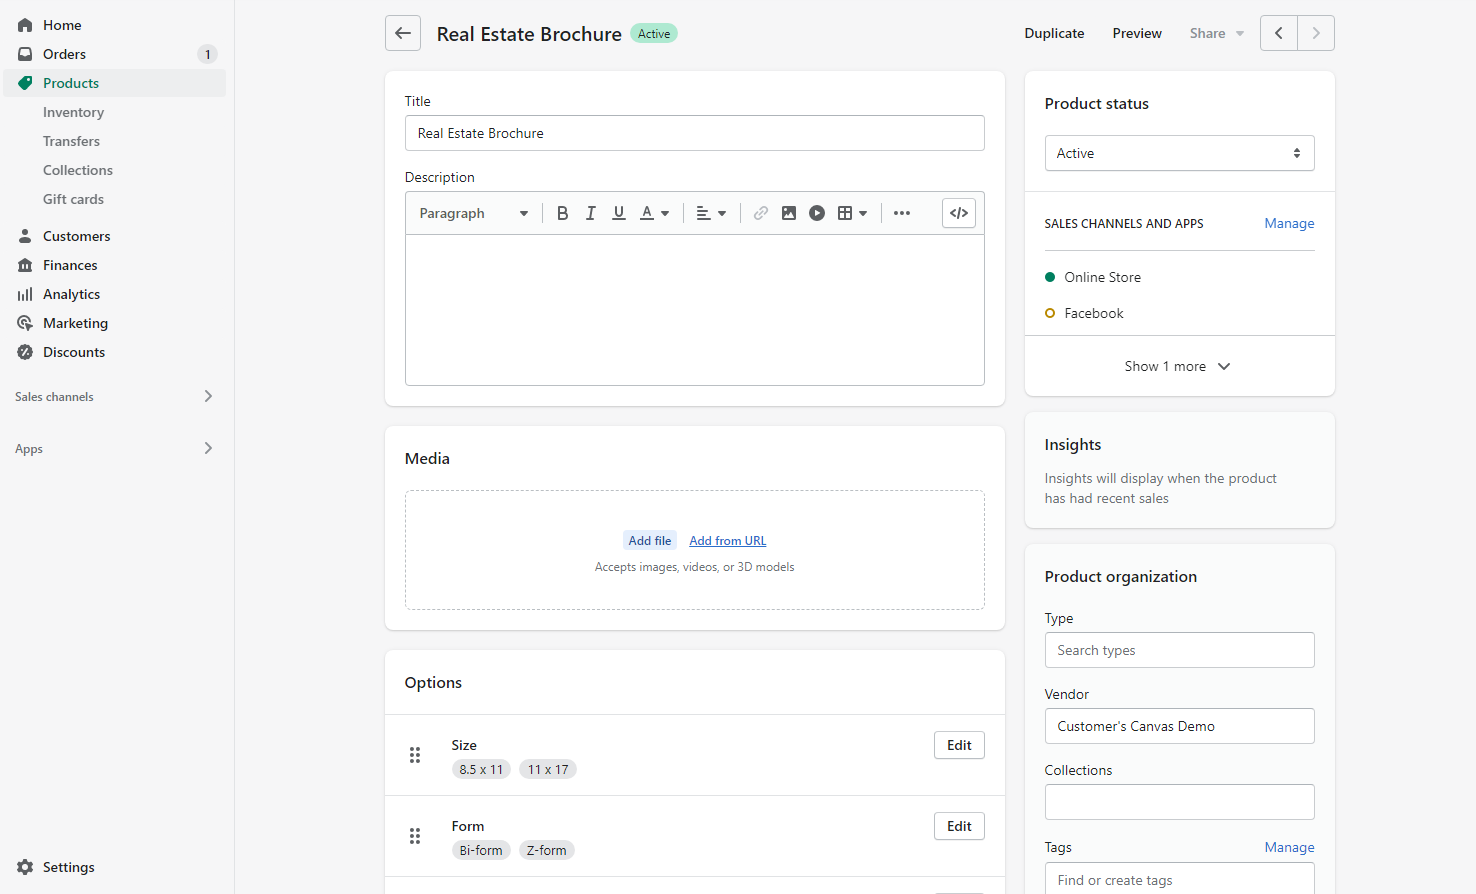
In the product page, upload or drag-and-drop images in the Media section. The first file will be added as the main product image. The other images will be displayed in slides. You can add some media by the Add from URL link. It may be videos or images added by a link.

A product can be added in some categories. In Shopify, these categories are Collections. Shopify allows you to add a product in several collections at the same time, but in this example the product will be added in the Option based product. To save the changes, click Save.
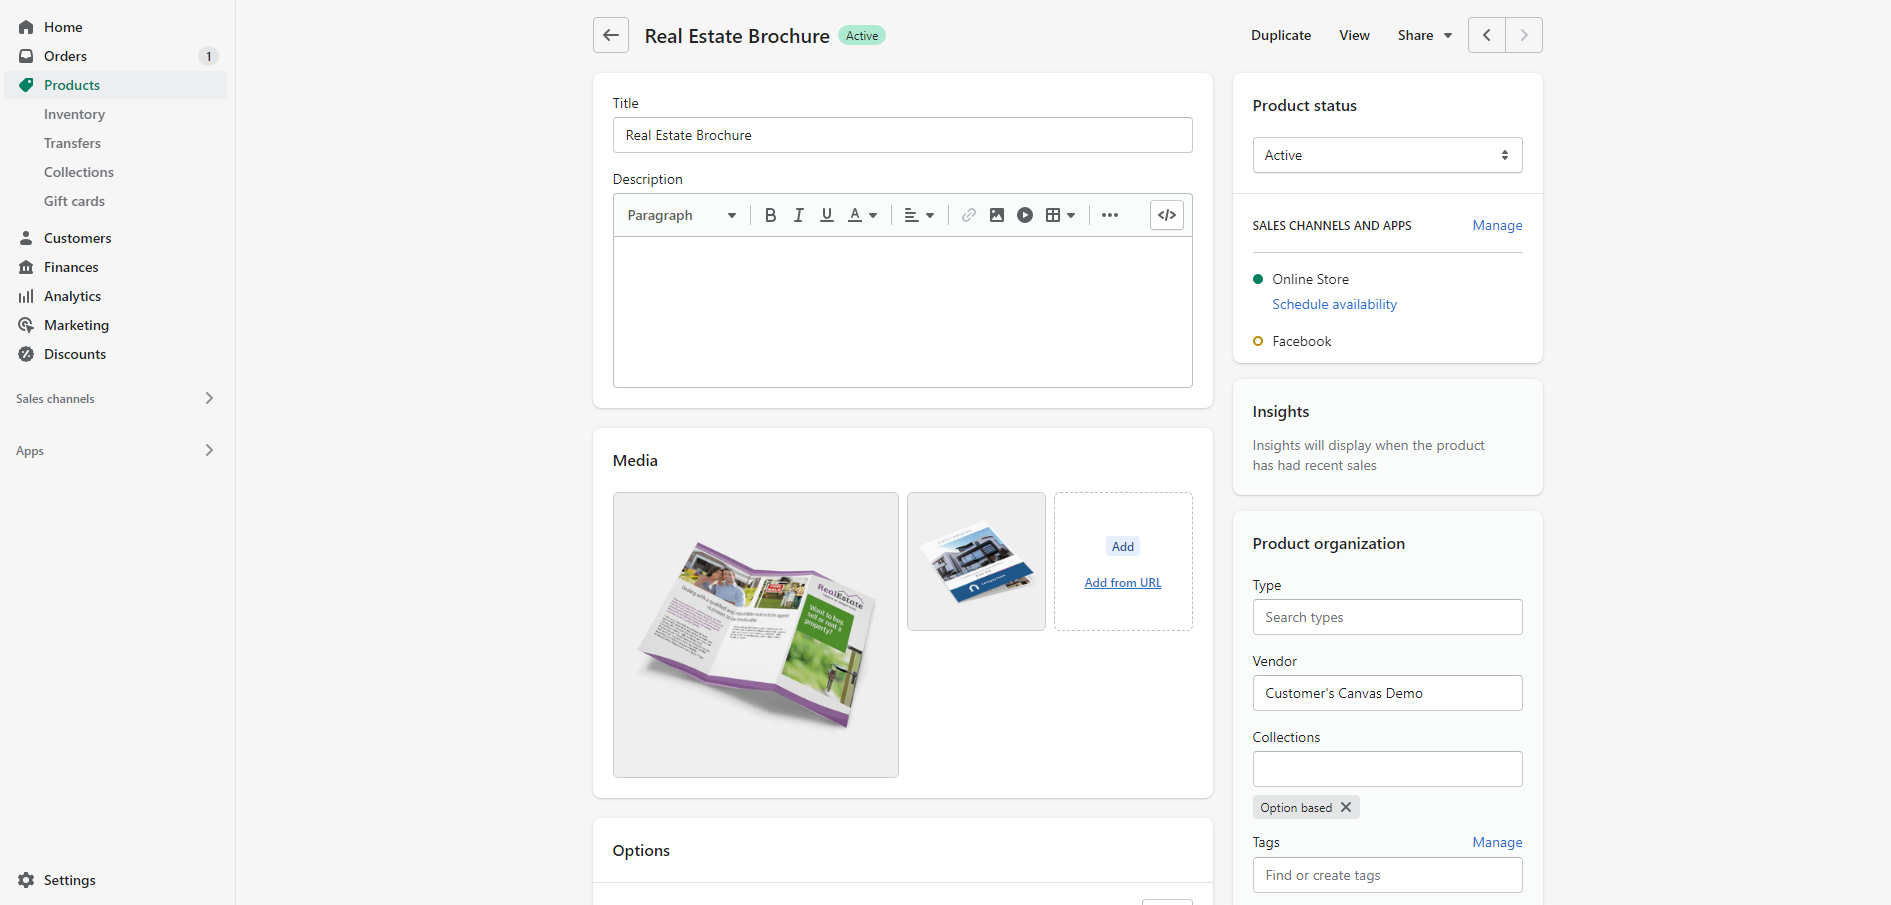
Finally, a product is ready! Now you can test all steps of the ordering process as a customer.
Testing a product in a storefront
Let's check all the ordering steps to make sure that all the settings work correctly. It can help you ensure that all the settings work properly.
To do this, let's go through the process as a customer. Go to a storefront and select the collection where the product is located.
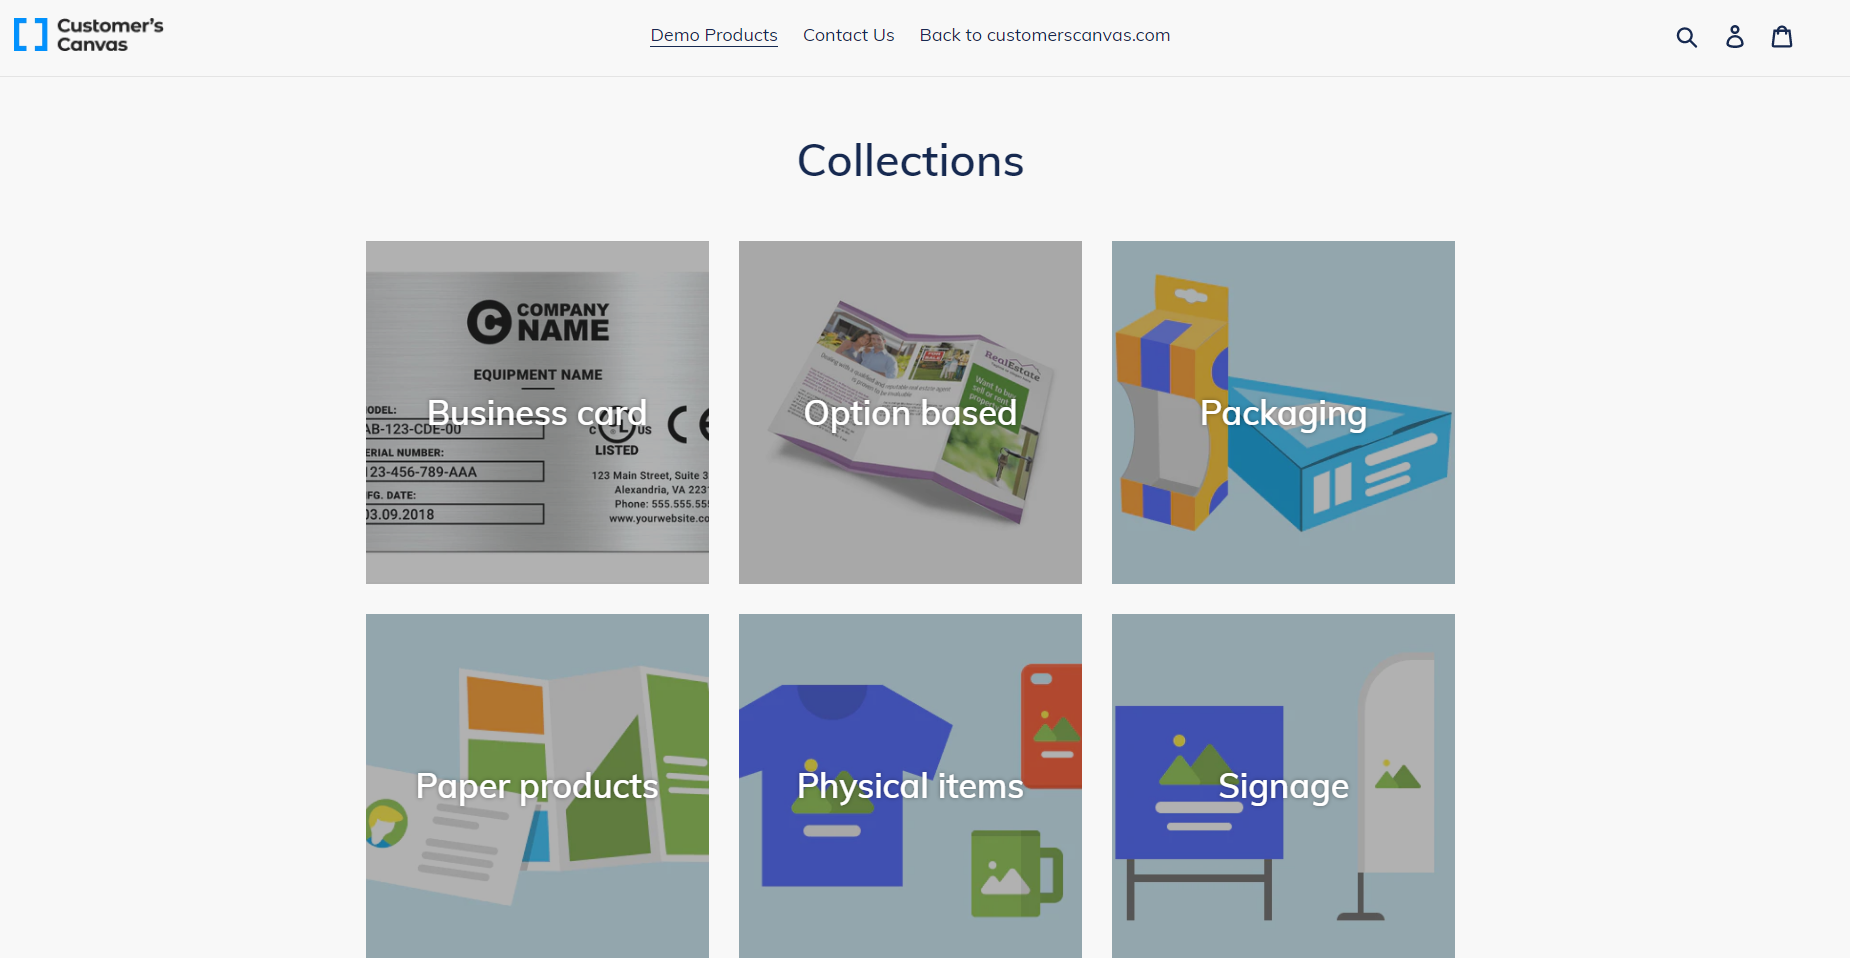
Go to the Option based collection to find the product.
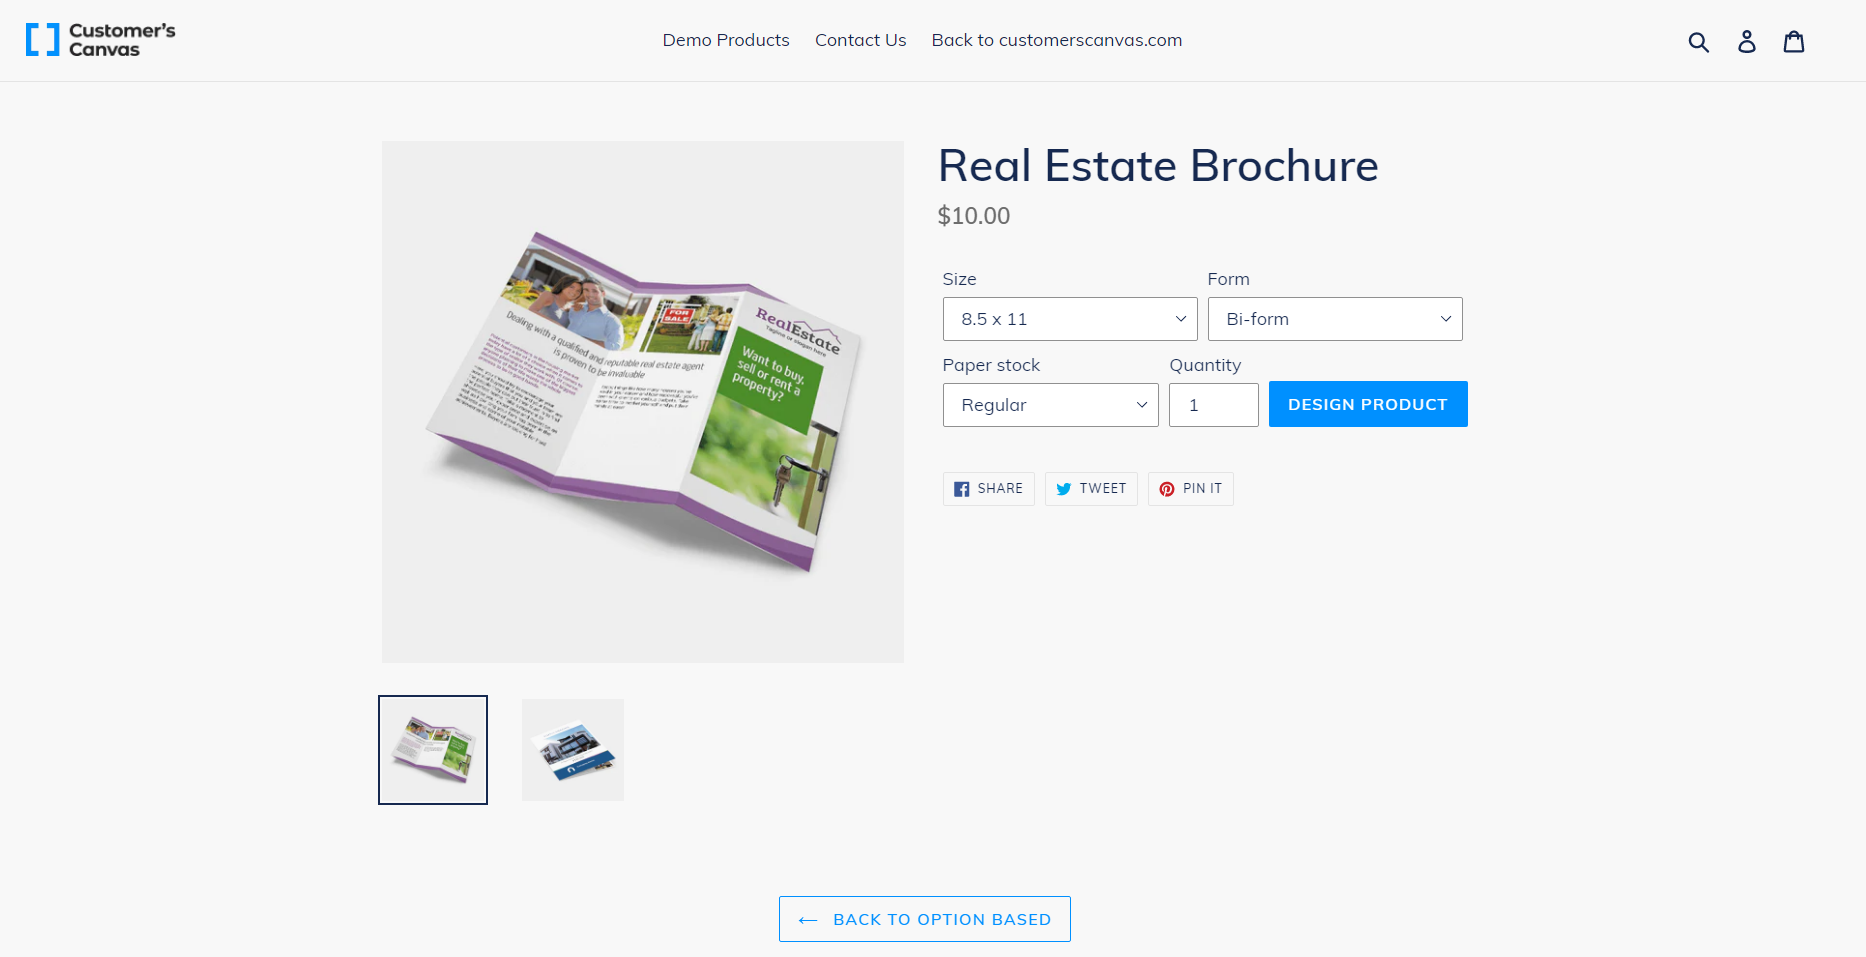
There you can make sure that all the media files are visible and in the right order.
The default option has the values that are added as the first values in the options section in the editor of a Shopify product page. So, click Design product to go to the first personalization step. This step is the Variant selector step. Here you can check the connection of all designs and thumbnail mockups.
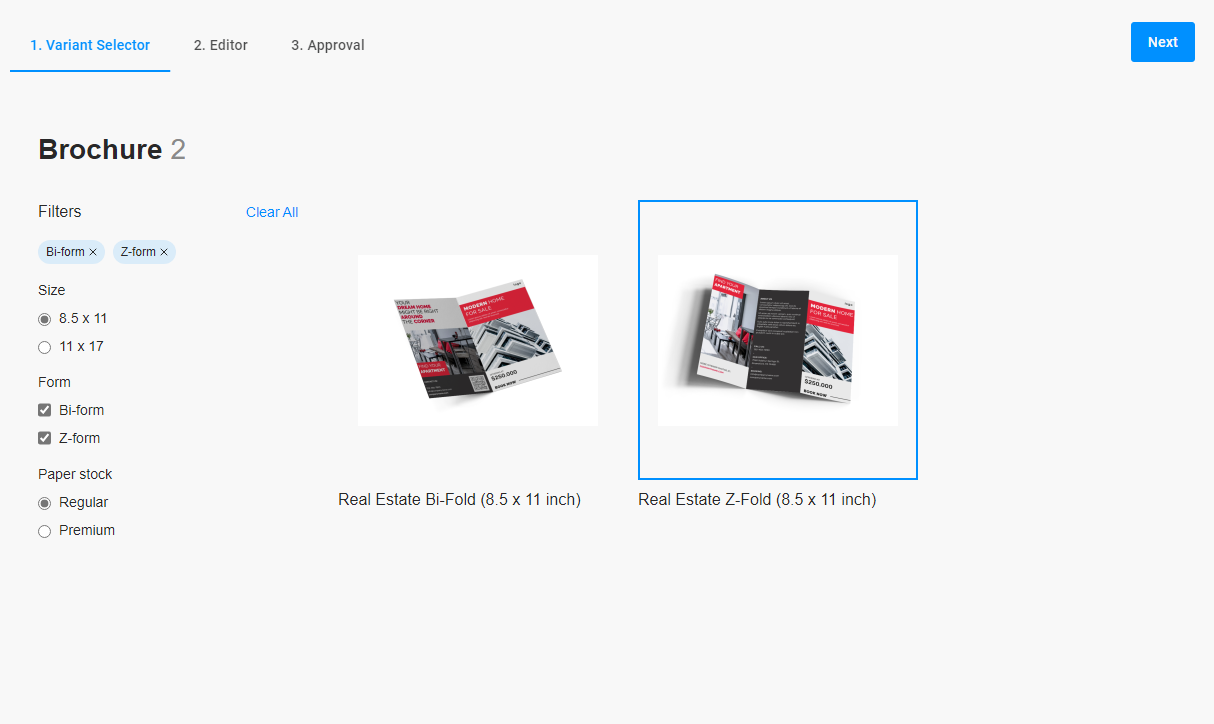
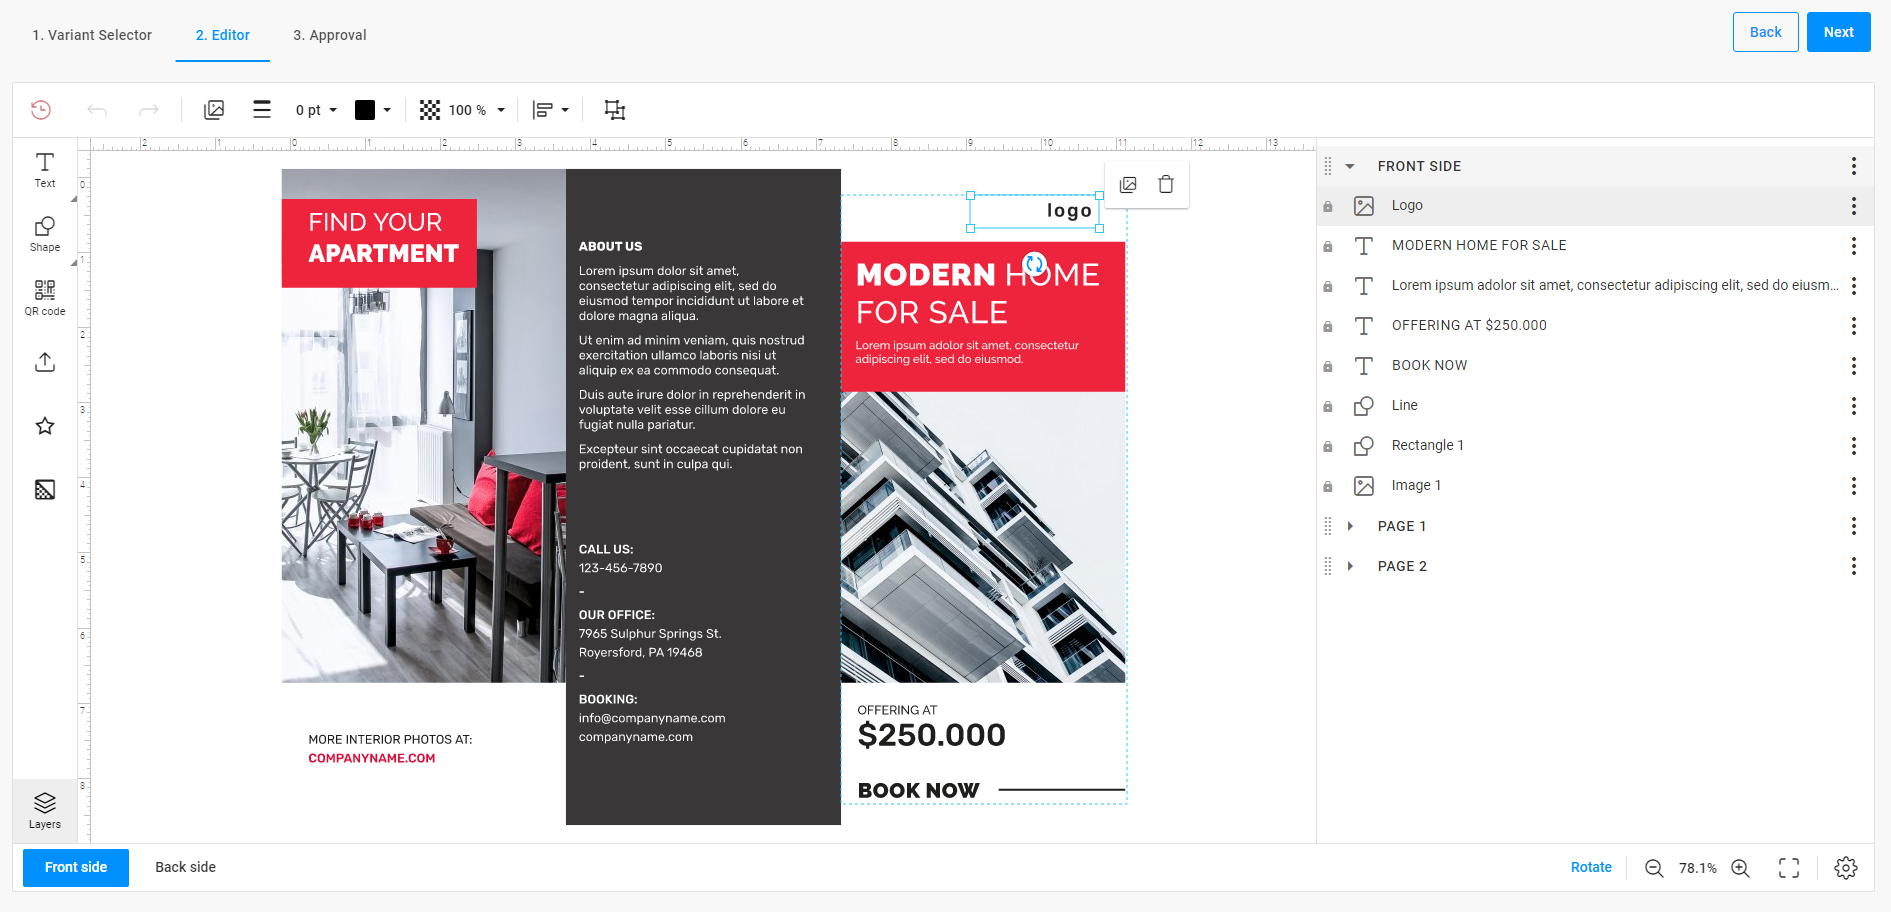
If everything is working properly, select a variant and go to the next step - the Editor step. At this step, you can personalize a product. Check that all the product sides are available. Here you can input your own text or upload images.
If you have finished the personalization, go to the last step - the Preview step. Here you can see the result of your personalization.
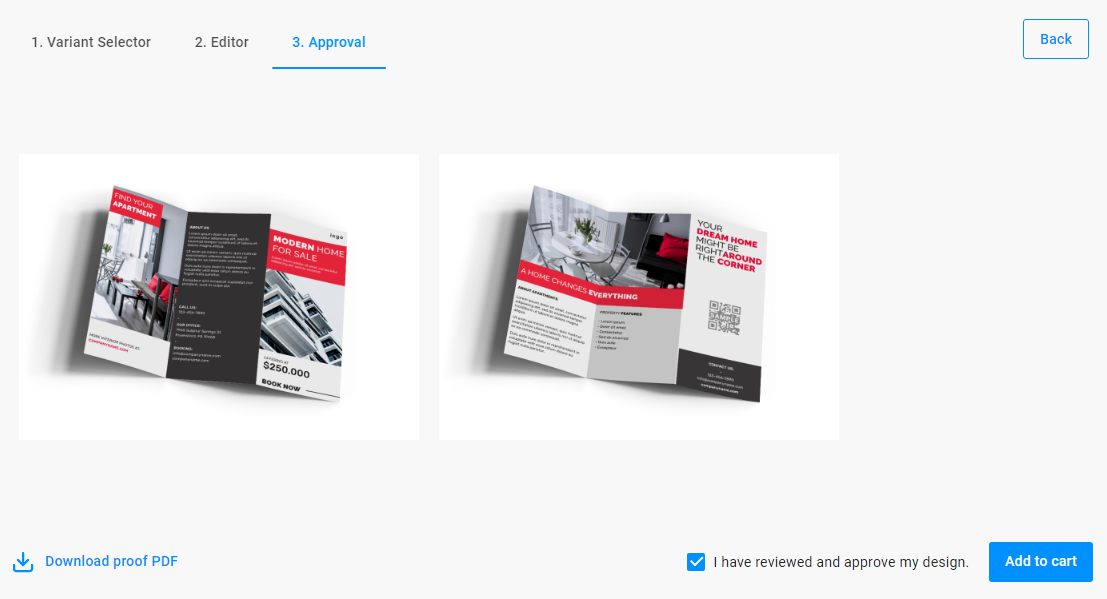
This is the last ordering step, where you can see the customized design. It visualizes the product by using preview mockup. Check that everything is correct, and that all mockups are displayed. Then, click the approval checkbox, and click Add to cart.