Images
- Last updated on August 28, 2024
- •
- 2 minutes to read
The Template Editor allows users to add graphic elements to the design, such as photos, logos, icons, décor, and patterns. These elements usually should not be edited by end-users except for the application of standard manipulations, like moving or resizing.
In this article, let's look at various scenarios for working with graphic elements.
Adding images
You can add images to the design in three ways:
- Drag and drop an image from your computer to the canvas.
- Open the system window Open file and select an image. To do so, press Shift+M.
- Use the Image tool. You can activate this tool either from the toolbar or using the M hotkey.

The Image tool allows you both to select an image from your collection in Assets/Images and upload a user's image.
| Image collection | Uploads |
|---|---|
 |
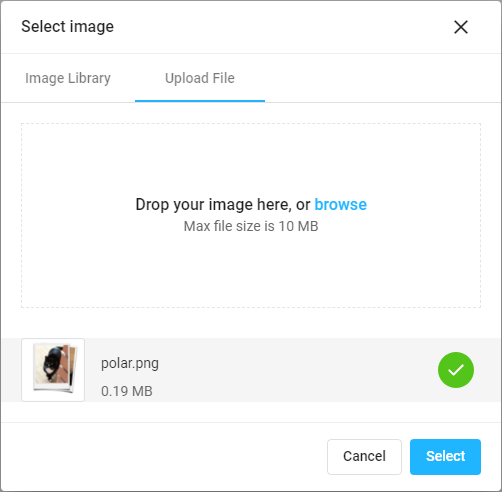 |
In the Image library, you can browse the tree and select an image.
In the Upload file tab, click browse, or just drag an image in one of the following formats:
- JPEG, PNG, TIFF, BMP, GIF - as raster images.
- PDF, AI - as vector images.
- SVG - as a Shape, as long as it comprises a single-color path.
- PSD - as a group object.
Important
If a PSD file has text elements, you must first upload the necessary fonts to Customer's Canvas.
The upload progress can be tracked in the status bar in the lower-left corner.

When the element is uploaded, it appears in the editor, and you can start working with it.
Editing image items
The basic operations on image items are the same as what you can do with other items:
Quality meter
If you upload a raster image, the Template Editor checks its resolution. If you start stretching it, the resolution starts to change, and if it drops below 300 dpi, the Template Editor will display a warning. You can see the resolution on the tooltip, which is displayed when you hover over the warning icon.

Important
To ensure good print quality, upload graphics with a high resolution.
If the image consists only of vector elements, for example, PDF, upscale does not affect the print quality. In this case, the warning does not work for them. Try to use vector images whenever possible.
Now that we know how to work with images, let's see how to create placeholders for images that should be edited by end-users.