

Photoshop templates
Customer's Canvas can import templates from PSD files. As a result, it converts them to the internal JSON-based .st format. In most scenarios, you should not deal with .st files directly, so it is probably easier to think of it more as "opening" PSD files in the Design Editor.
The internal Customer's Canvas format does not have all the available PSD features and vice versa. When creating PSD templates, it is important to keep all Customer's Canvas capabilities and conventions in mind. Often after you receive a PSD file from your designer, you will have to edit and preprocess it before importing it to Customer's Canvas. This article explains how to do this.
Valid PSD Templates
You cannot feed an arbitrary PSD file to Customer's Canvas. However, what sort of PSD files can you open?
The Design Editor works with multi-layer PSD files containing images, texts, shapes, and smart layers. The color format should be either RGB, CMYK, or Grayscale. It should not contain fancy layer effects - you should flatten them whenever possible.
Text layers may contain the following font settings:
- Font name and size
- Style: bold, italic, faux bold, faux italic, etc.
- Color
- Tracking (character spacing) and leading (spacing between base lines)
And the following paragraph settings:
- Alignment
- First line indent, left indent, and right indent
- Space before and space after
Other parameters are ignored.
Customer's Canvas supports both Point and Paragraph text layers. These text layers can be vertical or horizontal oriented. In Point Text, you always have a single position which specifies where the text is located (depending on the selected alignment mode, which defines the left, center, or right position of the layer), while Paragraph Text defines boundaries. If the text exceeds this box, it is cropped.
It is important to remember that if a user edits a Point Text layer, it is possible to break it into multiple lines by pressing Enter. If you want to limit a user to a single line of text, use Paragraph Text layers with a height equal to the font size.
In addition to text layers, you may add paths for curved texts.
Now let us try to create a PSD template that is compatible with Customer's Canvas.
Tutorial: the First Template
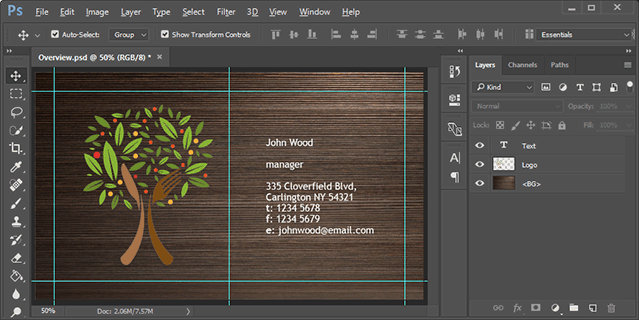
Let's imagine that we want to create a template for a business card. It is comprised of three elements: a background image, a multiline text box, and a logo. Of course, the real business card template would consist of more elements (such as separate fields for a company name, a person's name, etc.), but to keep it simple, let us start with a single text layer.
If we are going to print our business cards with the 300 DPI resolution and the business card's size is 3x5 inches, let us use a background image with dimensions of 900x1500 pixels. Open this image in Photoshop.
Next, let us create a text layer. To create a Point Text layer, click Type Tool on the Tools panel, and then click where you want to place a text. Type some sample text so that the users know what kind of data they are expected to enter.
To insert a logo, just find a sample logo and insert it as an image layer.
As a result, you should get something like this:
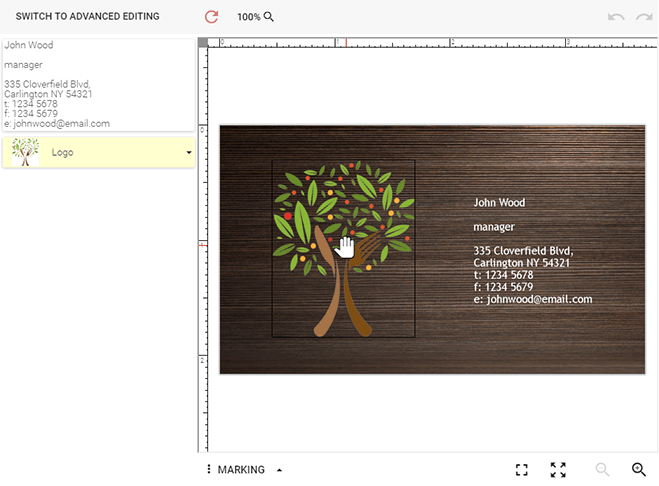
To open the template in the Design Editor, put it into the \assets\designs\ folder and initialize a product using the template name. You should see something like this:
You may want to manage the template's behavior in the web-to-print designer, for example, by locking a layer position (preventing a user from moving it) but allowing the text string to be edited. Formatting in Photoshop is not flexible enough for this. That is why we have created a system of so-called markers - special symbols which you add to a layer name, used by the Design Editor to manage permissions for each element. You can find details on a syntax of the markers and a complete list of them in the marker reference topic.
So, as the last step of this tutorial, let us configure the template to disallow changing the background and the text position. This exercise gives you an idea of how to work with the markers.
To mark the background as a non-editable image, double-click the appropriate layer name in Photoshop and add <LC><OID_f> to it. There is no difference in what position you place the marker - in the beginning of the name, in the end, or somewhere inside a line. Moreover, you may leave only the marker if you like.
You can lock the text position in a similar way. Double-click the text layer name and add the <MAMH_f> and <MAMV_f> markers to disallow moving the text horizontally and vertically.
As a result, the list of layer names looks as follows:

Now if you upload the modified template to the server, you see that the background disappears from the list of editable objects and the text position is fixed.
Preparing Templates from Existing PSD Files
It is easy to keep PSD files compatible with Customer's Canvas when you create them from scratch. However, what if you already have a number of PSD files created by a designer before they become aware of the way the systems work together? If you load those files in the Design Editor, they might not look as you would expect.
Here is a list of the most common interactions with PSD files and guidelines on how to address them.
Rendering of Proof Images Fails with Exception
Photoshop CC 2020 introduced the Enhanced Warp Tool. If you have designed a 3D preview mockup, you most likely applied the warp transform to smart objects. However, Customer's Canvas cannot read transforms created by this tool.
Solution: Avoid using the warp transform in Photoshop CC 2020.
PSD File Fails to Open
There may be several reasons for this, but it most likely has something to do with an unusual color space or extra channels. Customer's Canvas works with RGB, CMYK or Grayscale images, and the color depth should be 8 bits per channel.
Solution: Convert your image to RGB or CMYK and remove all the extra channels. If you still have problems loading this file, please send it to our tech team.
Invisible Layers Are Visible
The Design Editor ignores the Visible flag of a layer.
Solution: It is highly recommended to remove all unused layers to reduce the PSD file size and increase performance, but if you feel that the layer must be kept in a template, you can use the <VNP> and <VNS> markers.
Layer Options Are Ignored
Customer's Canvas ignores layer options such as Lock, Fill, Opacity, etc.
Solution: You should avoid using those options. Try to flatten layers with such options into an image layer. Also, you may create an alpha channel using a Layer Mask. To do this, right-click a mask on the Layers tab, and then click Apply Layer Mask.
No Visual Effects
Customer's Canvas cannot read visual effect information (glow, satin, etc.).
Solution for fixed layers: Turn visual effects into separate image layers. To do this, right-click in the Layers view, and then click Create layer.
Adjustment, Effect, and Fill Layers Are Ignored
Customer's Canvas supports raster (image) layers, vector shapes, smart objects, and text layers.
Solution: Apply or flatten all those layers before importing a template to Customer's Canvas.
Certain Font/Paragraph Settings Are not Applied
Customer's Canvas reads only the following font parameters:
- Font name and size
- Style: bold, italic, faux bold, faux italic, etc.
- Color
- Tracking (character spacing) and leading (spacing between base lines)
And the following paragraph settings:
- Alignment
- First line indent, left indent, and right indent
- Space before and space after
Template Loads up Too Slow
This happens if the template has many layers, especially image layers. It is a good idea to optimize templates before you import them into Customer's Canvas.
Solution: First, it is highly recommended that you merge all non-editable layers together. For example, if you create a template for employees of a specific corporation, you can merge the background, a company name, and a logo together. If some of the non-editable layers should have a higher z-order than the editable ones, you may merge them into a separate layer, but the general rule is to minimize a number of layers because they are loaded as a separate image.
Invisible layers should be removed, or at least, the appropriate markers should be set.
At last, review your image layers and check whether they are larger than the visible area. If only 10% of the layer is visible, there is no need to load the entire layer. Crop the unnecessary part.
As for text layers, consider using a single multiline text layer (Point Text) instead of multiple single lines. In most cases, it is more user-friendly to fill a single text block, and the Design Editor can process these fields faster. However, disregard this advice if you really need to split the layers, for example, if you pre-fill some fields from a database.
Anything Else?
If your PSD file is still displaying incorrectly, please contact our tech team and send it to us. We will check out what is wrong with this file and suggest a solution.