

Embossed and debossed mockups
Customer's Canvas allows you to create mockups with the engraving effect on a surface. For example, it may be text or graphics on a product.
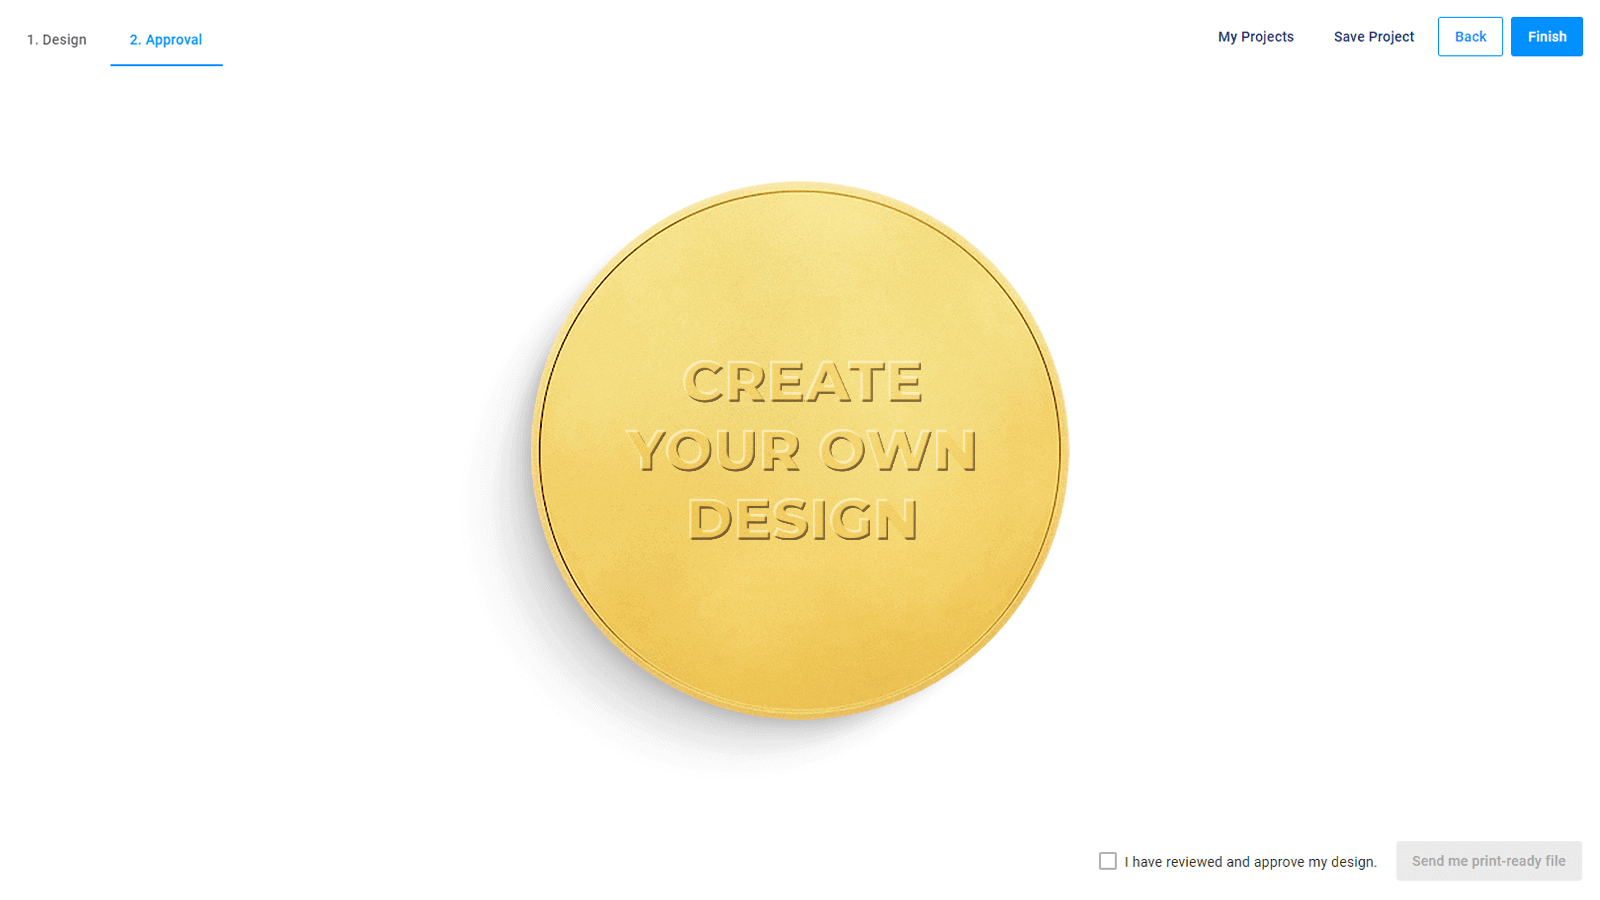
Let's see an example. This is the medal product, and this mockup displays embossed text.
The following mockup represents text and graphics.
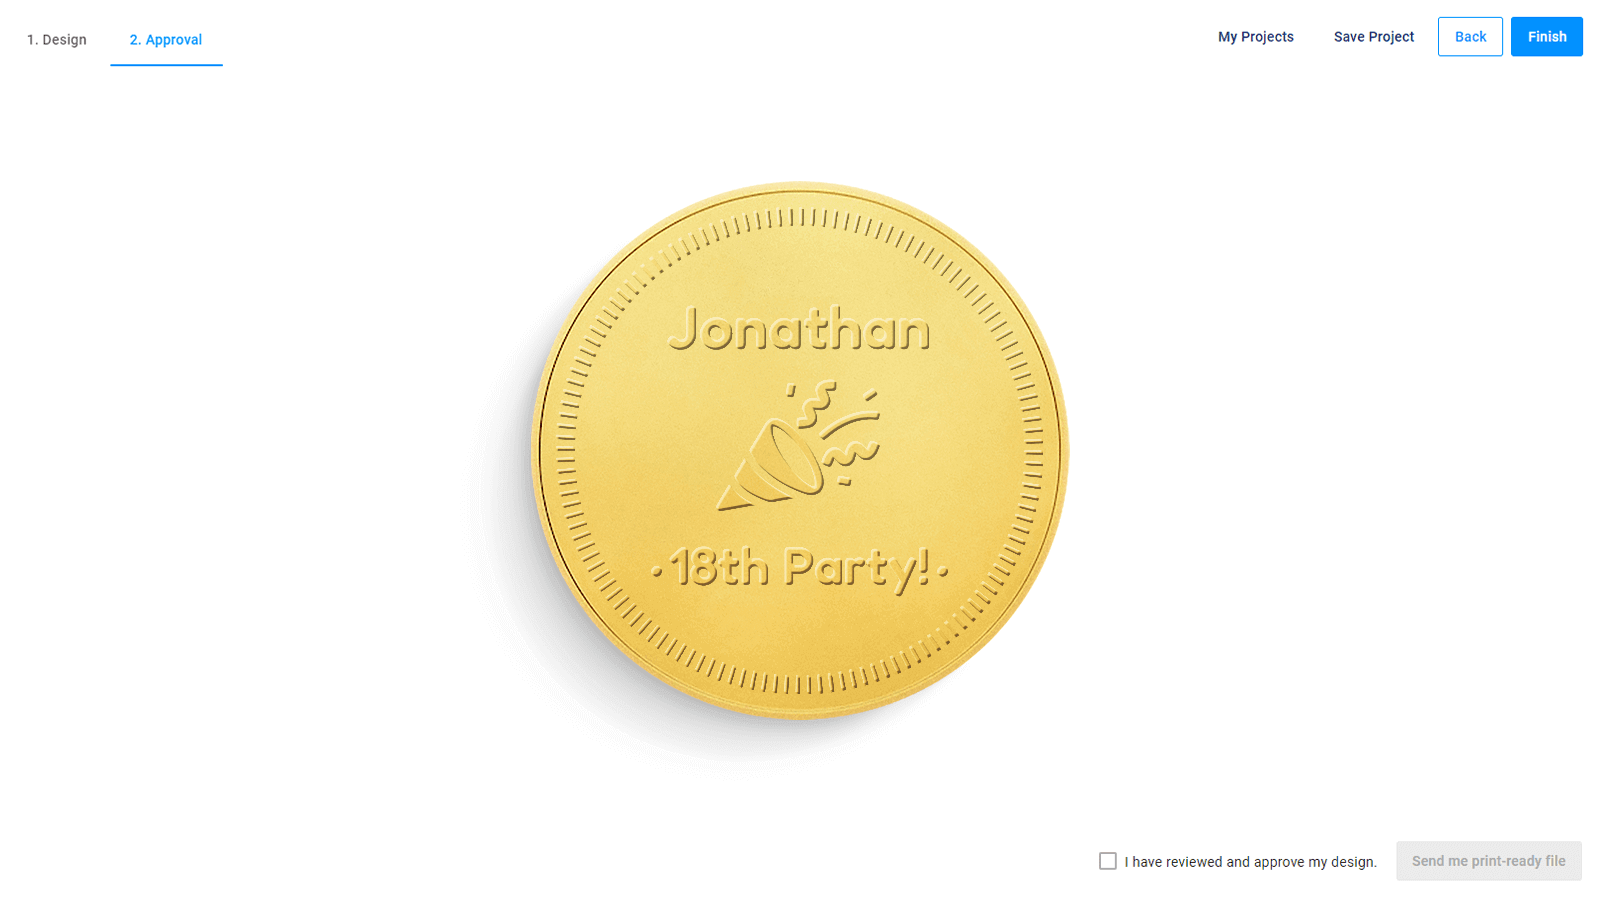
In this article, you will learn how to create such mockups in Photoshop and how to set them in BackOffice.
Creating mockups
The PIM module supports only PSD mockups created in Photoshop. The mockups for the PIM module may consist of overlays, substrates, and a smart object. Read more about the mockup anatomy of the PIM Module in the concept article.
In this example, the mockup is a medal. The image size is 1000 x 1000 pixels. The file contains the following layers.
| Layer | Size | Blending mode | Opacity |
|---|---|---|---|
Background | 1000 x 1000 | Normal | 100% |
Shadow | 730 x 730 | Normal | 50% |
Medal | 731 x 731 | Normal | 100% |
Design | 730 x 730 | Hard Light | 100% |
This is how these layers look in Photoshop.
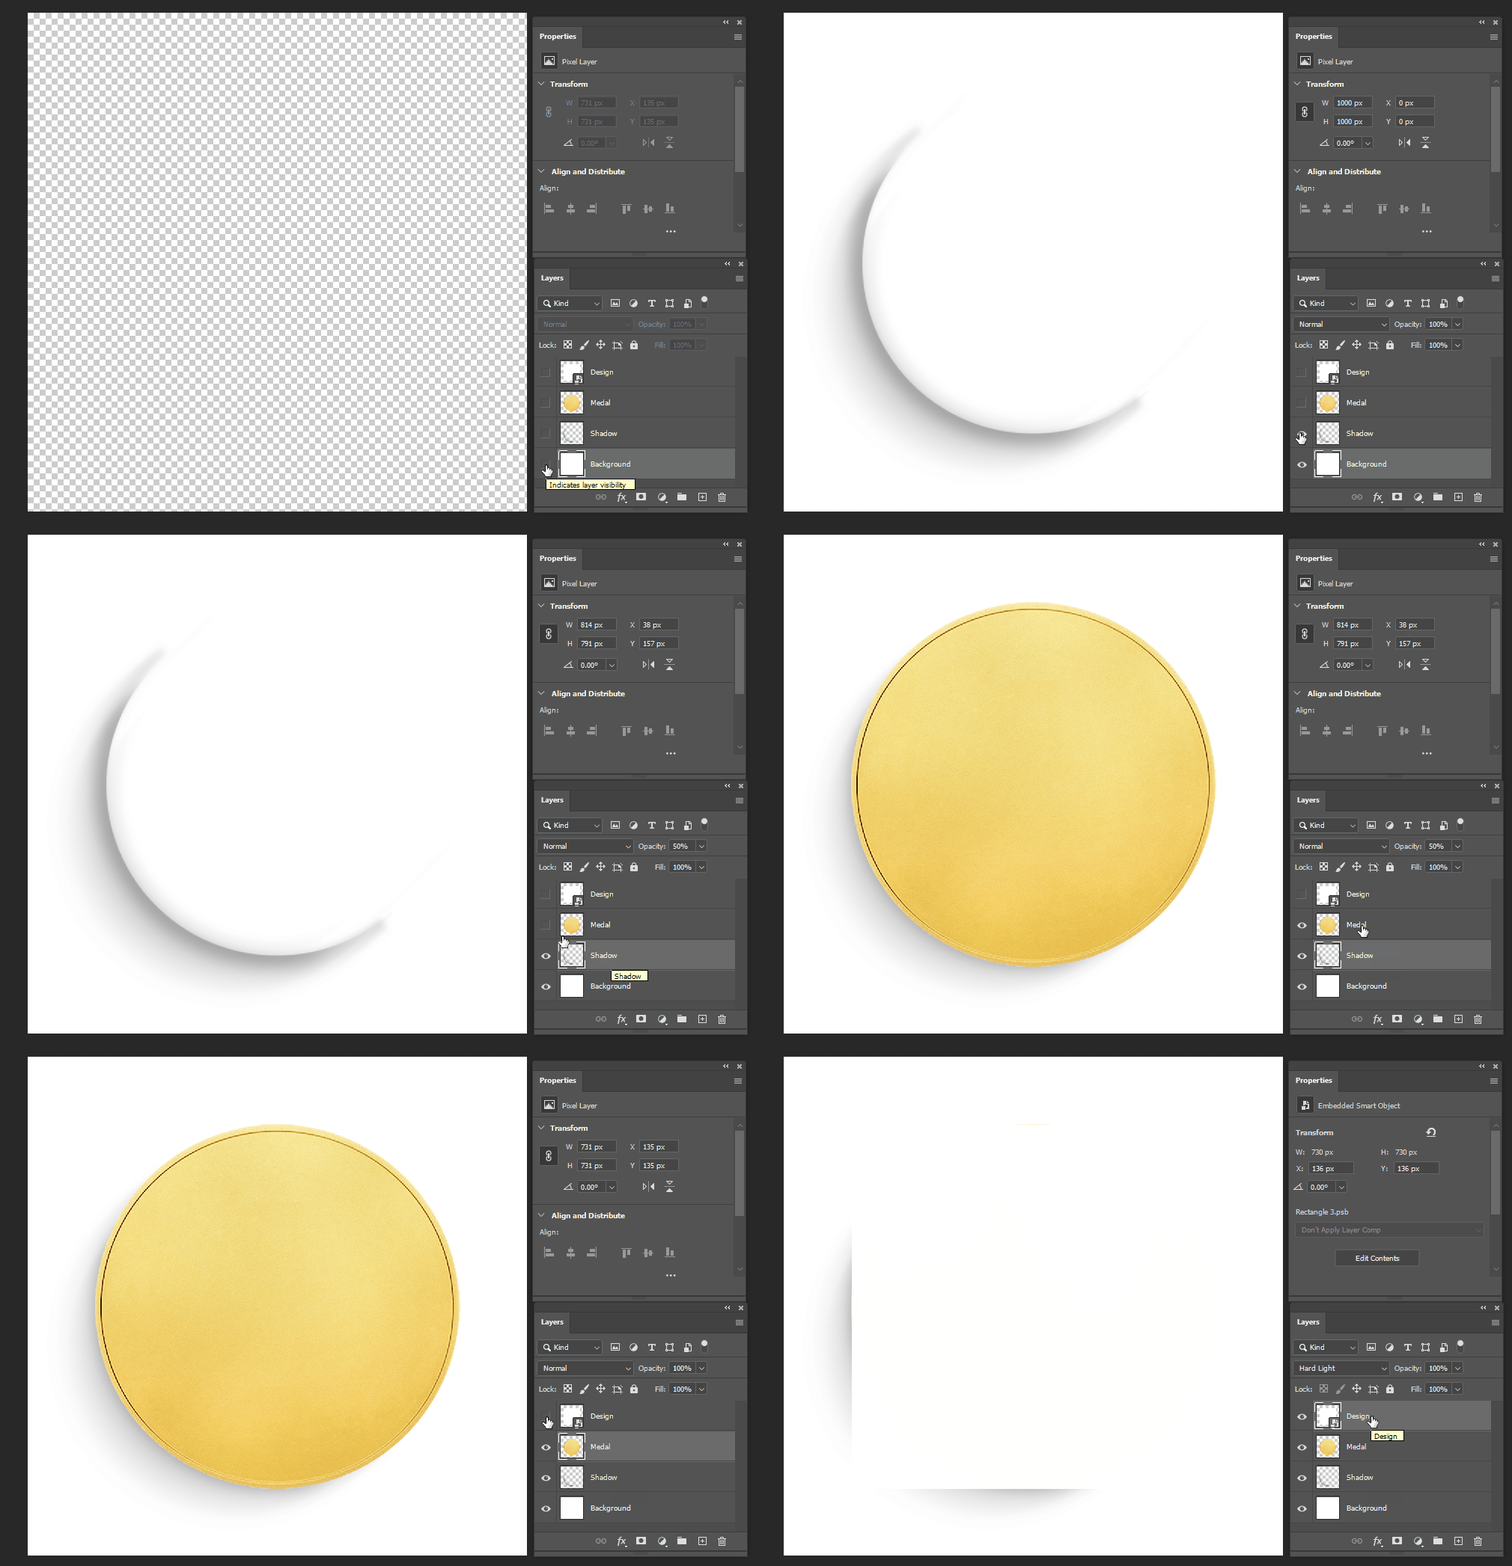
It's necessary to apply the Hard Light blending mode to the Design layer, which is a smart object. This blending mode creates the embossed and debossed effects. You can add more smart object layers with different blending modes to reach the effect you need.
Mockups in BackOffice
In BackOffice, you need to define mockup properties for the embossed and debossed effects.
To define them, right-click a mockup file and select Properties. In a new dialog box, select the Fields tab. To add new fields, click Add > Custom field. New text boxes appear. The following keys and values provide these effects.
Keys must be defined exactly as in the table below.
| Key | Value | Description |
|---|---|---|
| Effect | Emboss or Deboss | The name of the effect to be applied |
| Effect Angle | From 0 to 360. If the value is incorrect or missing, the default value 135 will be applied | The angle defining the direction of embossing or debossing, in degrees |
| Effect Depth | 0 and higher. If the value is missing, the default value 5 will be applied | This effect shows the embossing and debossing depth, in points |
| Effect Strength | From 0 to 100. If the value is incorrect or missing, the default value 35 will be applied | This effect displays the embossing or debossing strength, in percent |
In this example, the following keys and values are used for creating the debossed mockup for a medal.

Design file
Let's consider what design you need to create an engraving effect.
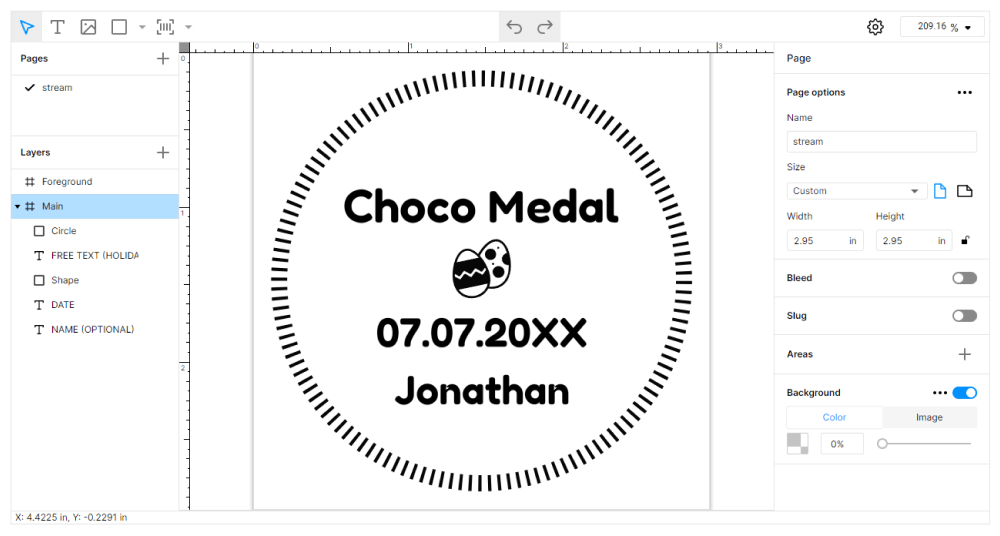
A design file for embossed mockups requires only shapes, texts, or vector graphics in black color to work correctly. The simpler an item is, the more precise embossed or debossed effects are.
In the following example, the physical design size is 2.95 x 2.95 inches. It consists of transparent layers with graphics and text.
Connecting mockups to a product
Embossed and debossed mockups can be thumbnail or preview mockups in a product. This is how the connection for an embossed mockup looks like.

To learn more about the connection, read the Connecting assets to products article.
Result
To check the results, you can go through all the personalization steps as a customer and see how the mockup and design look at different stages.
Let's see how these mockups look as a thumbnail at the Variant Selector step. Here, you can see the mockups and select the product variant you need.
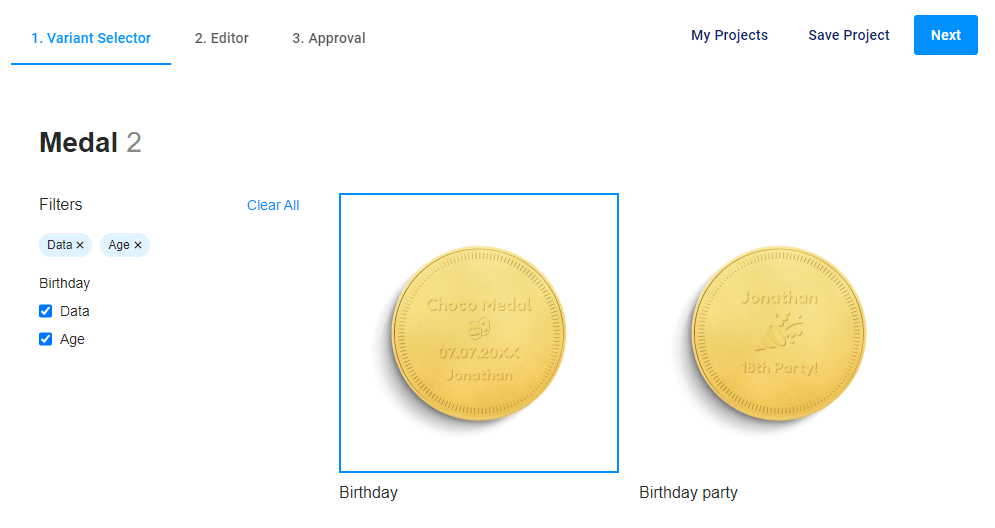
This is how the Medal product looks at the Approval step.