
Configuring project statuses
Project statuses represent the stages of a project's lifecycle in the BackOffice. They help you track whether an order is in progress, completed, or requires attention. Each status has a unique color that appears in the interface, making it simple to identify a project's state at a glance.
You can rely on the default workflow described below, or customize it to fit your needs.
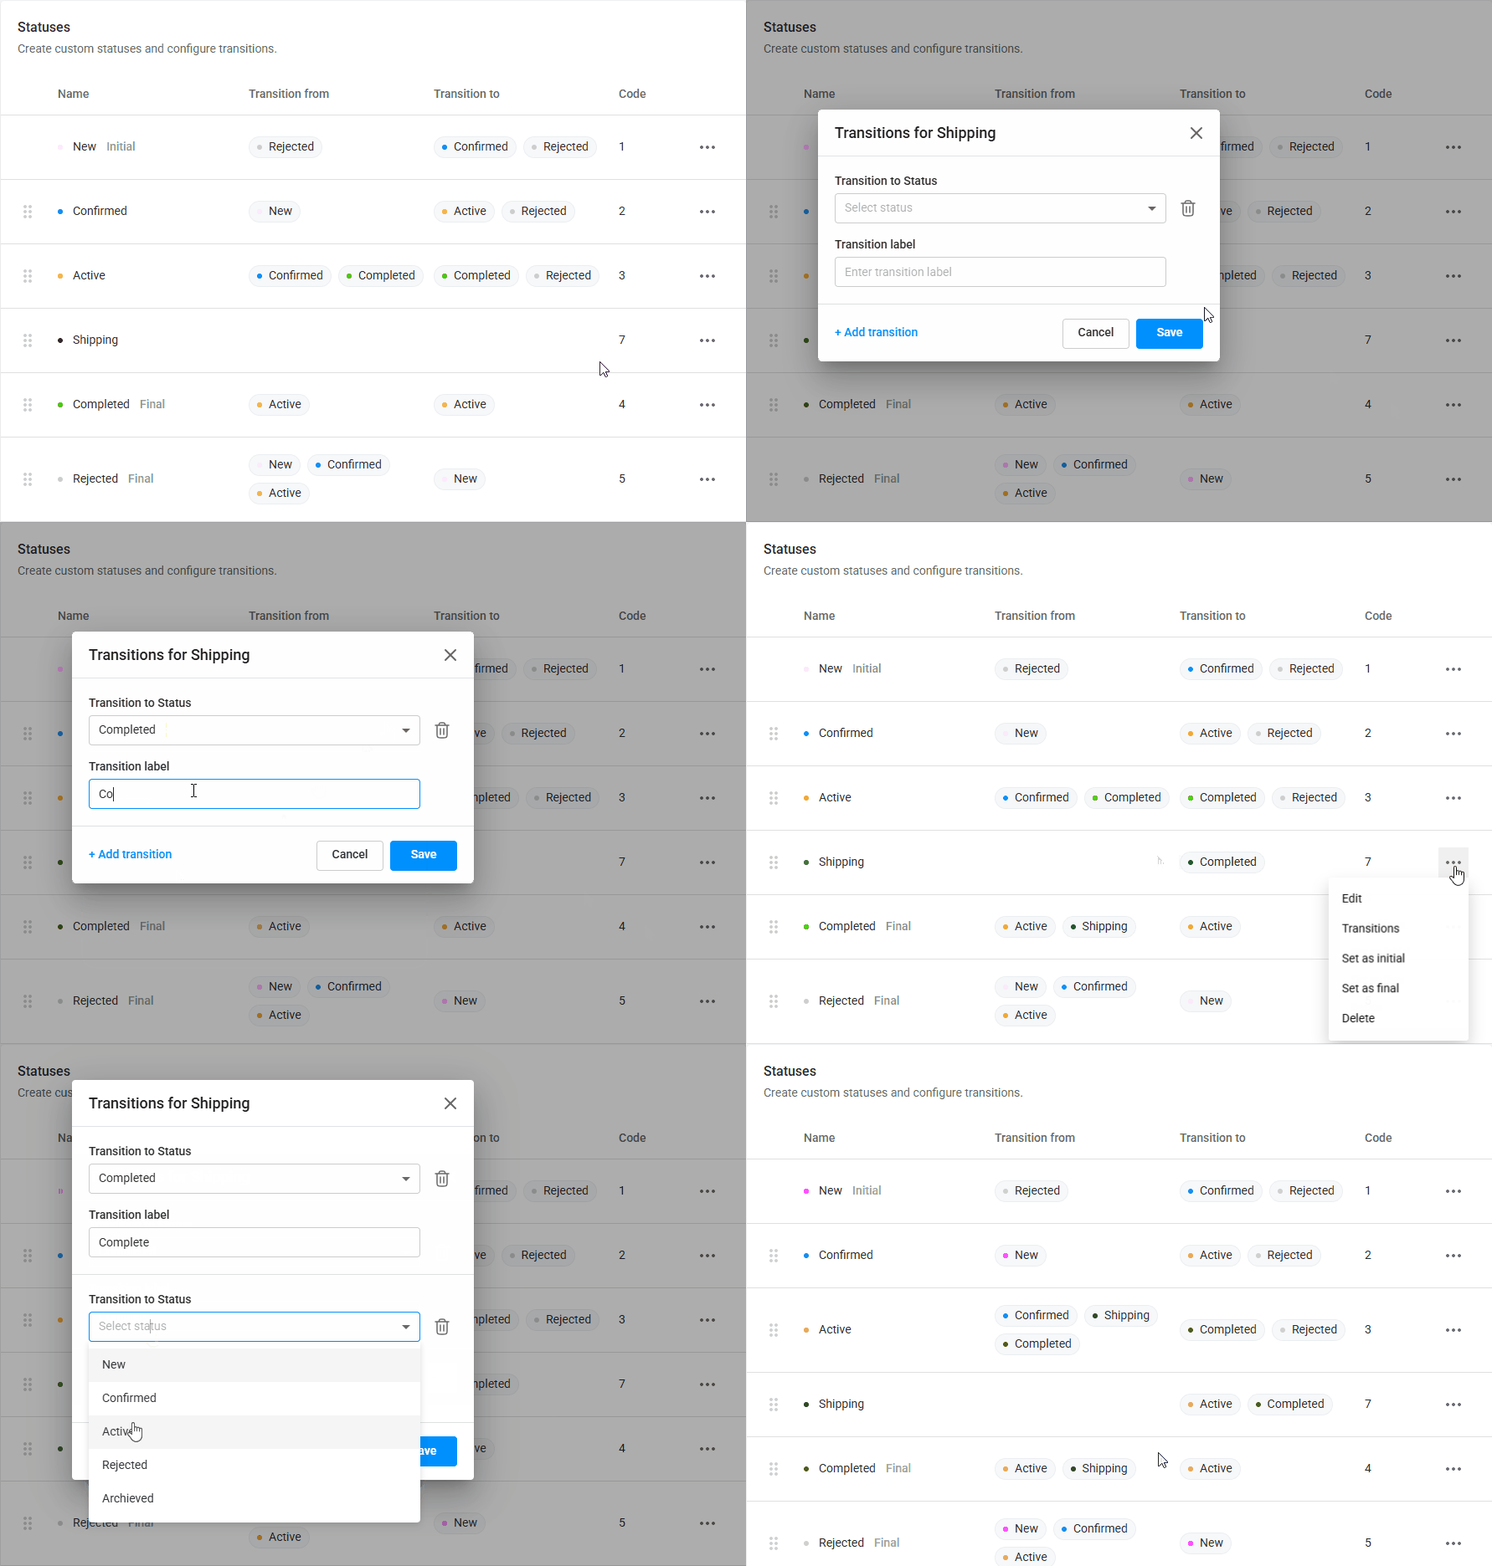
To manage project statuses, select Projects > Statuses. The Statuses table displays the configured statuses, showing status names with their color representation and incoming and outgoing transitions.
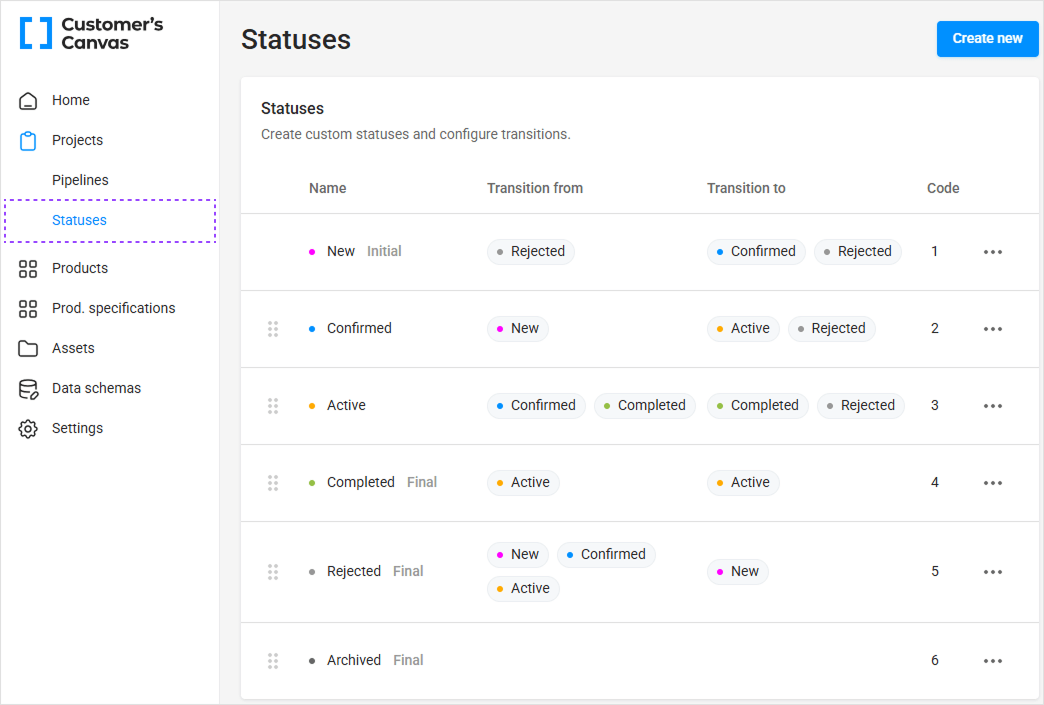
Default project statuses
Out of the box, the system provides the following statuses:
| Status | Type | Description |
|---|---|---|
| New | Initial | The starting point for every project. |
| Confirmed | Intermediate | The project has been accepted. |
| Active | Intermediate | Work is in progress. |
| Completed | Final | The project is finished successfully. |
| Rejected | Final | The project was canceled or declined. |
| Archived | Final | The project is closed and stored for reference. |
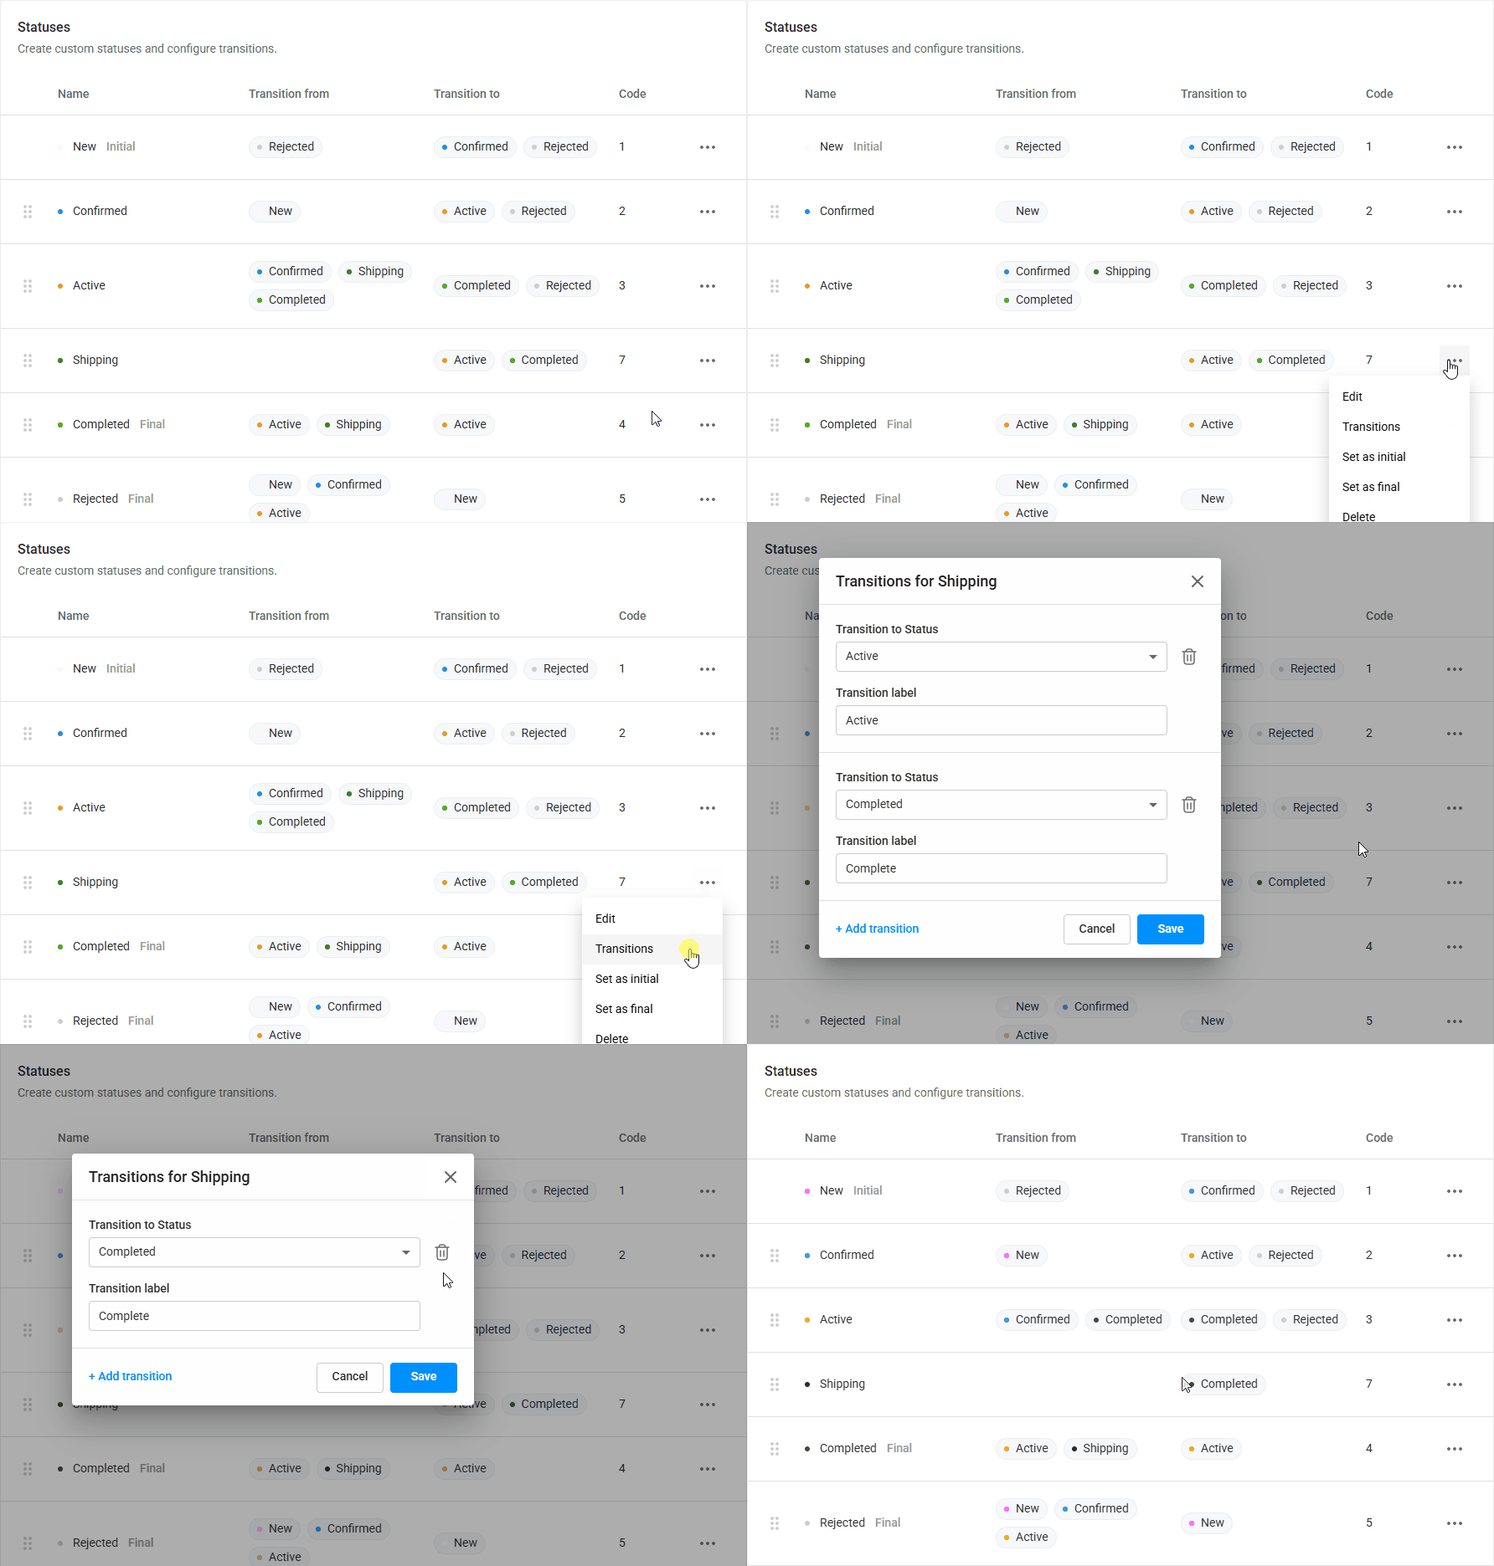
The default workflow is visualized below:
If needed, extend this workflow with additional statuses, such as Shipping, or simplify it to a New > Active > Closed chain. The following sections describe how to configure the workflow.
Status types
Every workflow must contain exactly one initial status and at least one final status.
- Initial status: The entry point for all new projects. Only one initial status can exist at a time. The status list marks it with an Initial tag.
- Final status: Represents a terminal state, such as Completed or Rejected. Multiple final statuses are allowed. The status list marks them with a Final tag.
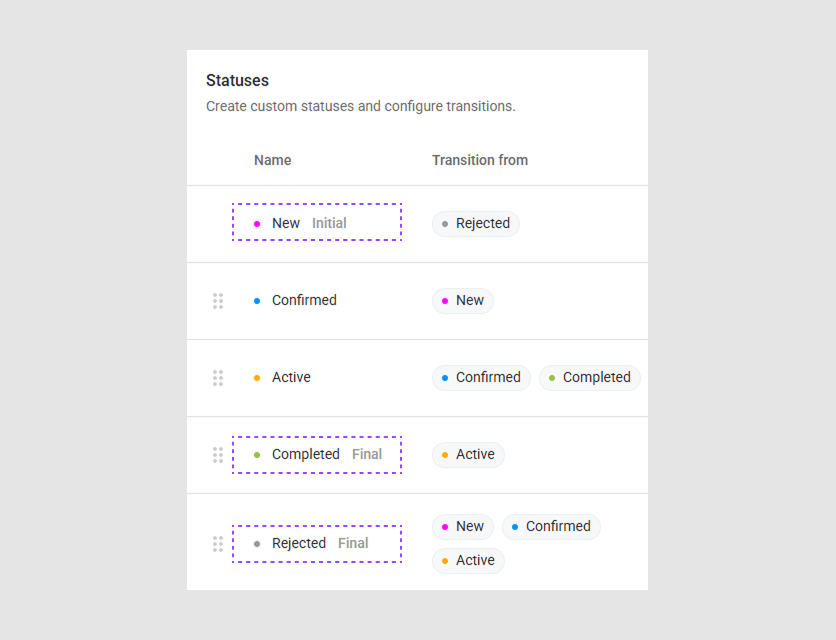
The system requires at least one initial and one final status at all times. You cannot delete the only initial or the only final status without first creating a replacement.
Manage project statuses
Create a status
To add a custom status to the workflow:
-
On the Statuses tab, select Create new.
-
In the Create new status form, enter the following information:
- Name: The display name.
- Code: A unique numeric identifier.
- Color: A HEX color code or use the color picker to choose a color. The color dot appears next to the status name in all project lists.

-
Select Save.
-
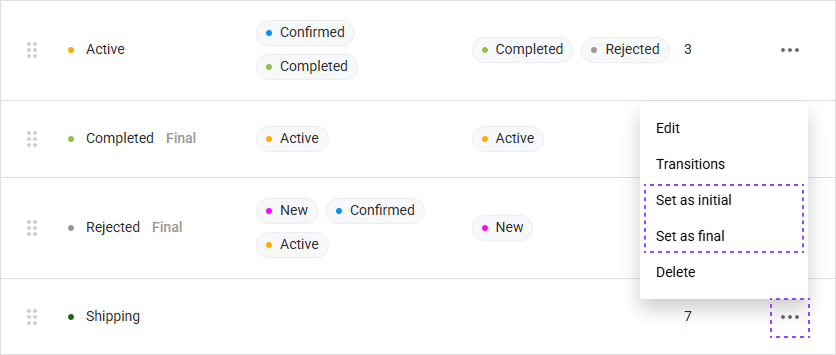
In the status table, select the dots (...) at the end of the row, then select a type:
- Set as initial: For the entry point of new projects. If another status is already marked as initial, the system swaps the designation.
- Set as final: For terminal states.
Use the drag control at the beginning of the row to move the status up or down the list.
The system validates the following:
- The status code and name must be unique.
- The color must be a valid HEX value.
- Only one initial status is allowed.
- At least one final status must exist.
Edit a status
To modify an existing status:
- In the status table, select the dots (...) at the end of the row, then select Edit.
- In the Edit status form, update the fields as needed. Change the name, color, or code as needed.
- Select Save to apply the changes, or Cancel to discard them.

All validation rules that apply to new statuses also apply when editing.
Delete a status
To remove a status from the workflow:
- In the status table, select the dots (...) at the end of the row, then select Delete.
- If the status is used in any transitions, a warning appears. Confirm the deletion to proceed. All transitions that reference this status as incoming and outgoing are removed automatically.
Special cases
Deleting the initial status: If you delete the status currently marked as initial, the system prompts you to select a different status to become the new initial status. You must designate a replacement before the system completes the deletion.
Deleting the only remaining status: You cannot delete the last status in the system. At least one status must remain.
Manage transitions
Transitions define the allowed paths between statuses. They control which status changes are available to users when they update a project.
Add a transition
To create a new transition rule:
- In the status table, select the dots (...) at the end of the row, then select Transitions.
- In the Transitions for a status form:
- Transition to Status: Select the target status from the dropdown. You can select any status, including final statuses.
- Transition label (optional): Enter a display name for the action. If you leave it blank, the system uses a default label.
- Select Save.
If you need more transitions for a status, select Add transition and fill out the form.
After saving, the transition appears in the status list for both the incoming and outgoing statuses.
The system does not allow duplicate transitions. A combination of the same From and To statuses can exist only once.
Delete a transition
To remove a transition:
- In the status table, select the dots (...) at the end of the row, then select Transitions.
- Select the trash can icon.
The system deletes the transition immediately without further confirmation.