

Imposition
Imposition is the process of arranging multiple copies of a design on a single sheet, commonly used for printing multiple business cards, labels, or stickers on one page.
Creating Imposition Templates
To create an imposition template in Adobe Photoshop:
- Create a new document with the final sheet size (e.g., 8.5" x 11" for letter)
- Add placeholder rectangles where each design copy will be placed
- Convert each placeholder to a Smart Object
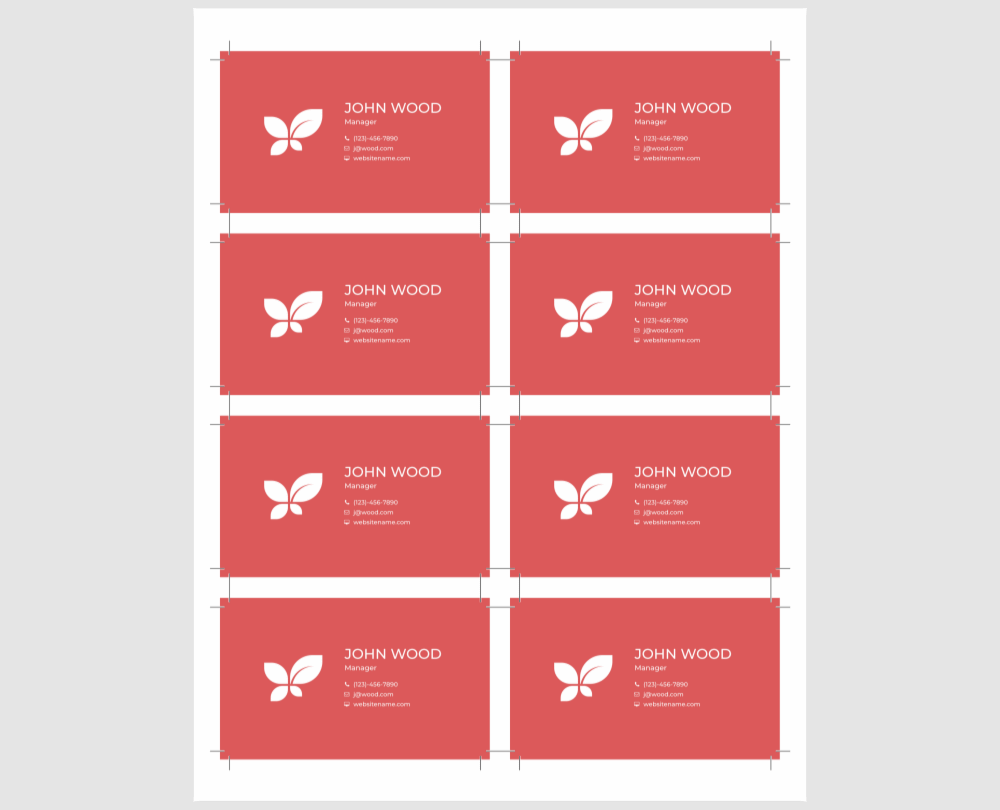
The produce-imposition task will automatically place the rendered design into each smart object placeholder, creating multiple copies on the sheet.
Consider the newer populate-psd-template task, which supports vector masks and renders not only placeholders but also other design elements, addressing the limitations of produce-imposition. To migrate, change the task name and replace parameters starting with "interpolation..." with those beginning with "output...".
The Imposition Flow
This example describes how you can render the personalized design with imposition, i.e. copying an artwork multiple times on a larger sheet.
To produce imposition, it is necessary to prepare a template in Adobe Photoshop, where smart objects will be placeholders for inserting graphics.
First, let's split our goal into simple operations from getting a design from the project to cleaning up the pipeline and updating the project.
These operations are performed using the following tasks:
Artifacts are conveyed between these tasks as follows:

In this example, it is assumed that you have placed a bc-8up-letter.psd template in the Images > imposition folder. For reference, you can download and unzip this template.
{
    "tasks": [
        {
            "description": "Extract design from project",
            "name": "extract",
            "type": "extract-project-design",
            "parameters": {},
            "outputArtifacts": [
                "design"
            ]
        },
        {
            "description": "Render design",
            "name": "render-vdp-hires",
            "maxAutoRetryCount": 0,
            "type": "render-vdp-hires",
            "inputArtifacts": [
                "design"
            ],
            "parameters": {
                "hiResOutputDpi": 300,
                "hiResOutputFileFormat": "pdf",
                "hiResOutputColorSpace": "cmyk",
                "hiResOutputRgbColorProfileName": "",
                "hiResOutputCmykColorProfileName": "Coated FOGRA39 (ISO 12647-2:2004)",
                "hiResOutputGrayscaleColorProfileName": "",
                "hiResOutputToSeparateFiles": false,
                "hiResOutputChannelContainersToSeparateFiles": false,
                "hiResOutputChannelContainersRenderEmptyPage": true,
                "hiResOutputCompression": "Jpeg",
                "hiResOutputJpegCompressionQuality": 80,
                "hiResOutputFlipMode": "0",
                "hiResOutputPdfAuthor": "",
                "hiResOutputPdfCreator": "",
                "hiResOutputPdfKeywords": "",
                "hiResOutputPdfSubject": "",
                "hiResOutputPdfTitle": "",
                "hiResOutputInStringPlaceholderHintsEnabled": false
            },
            "outputArtifacts": [
                "hires-design"
            ]
        },
        {
            "description": "Draw crop marks",
            "name": "draw-crop-marks",
            "type": "draw-crop-marks",
            "inputArtifacts": [
                "hires-design"
            ],
            "parameters": {
                "drawCropMarkCropSizeHorizontal": 20,
                "drawCropMarkCropSizeVertical": 20,
                "drawCropMarkBlackCropLineWidth": 1,
                "drawCropMarkText": " "
            },
            "outputArtifacts": [
                "design-with-crop-marks"
            ]
        },
        {
            "description": "Imposition",
            "name": "produce-imposition",
            "type": "produce-imposition",
            "inputArtifacts": [
                "design-with-crop-marks"
            ],
            "parameters": {
                "impositionRenderDpi": 300,
                "impositionTemplateFolder": "/imposition",
                "impositionTemplateName": "bc-8up-letter.psd",
                "impositionRenderFormat": "Pdf",
                "impositionRenderSeparateFiles": false,
                "impositionRenderJpegCompressionQuality": 90
            },
            "outputArtifacts": [
                "imposed-design*"
            ]
        },
        {
            "description": "Finalize",
            "name": "finalize",
            "type": "finalize",
            "finalArtifacts": [
                "imposed-design*"
            ]
        }
    ]
}
For more details, refer to the tutorial How to create pipelines.