

Configure variables in the Design Editor
Variables are design elements whose content is replaced with real data (a customer name, a QR code, a photo) before a print-ready PDF is generated. Use them when you prepare a template for variable data printing rather than a final artwork. For details, see Variables.
This guide shows how to let your users add variables to a template in the Design Editor, and how to read these variables from your application so that you can pass matching values to personalized rendering.
Choose how users add variables
| If you want to… | Use |
|---|---|
| Give users a fixed set of variable elements (for example, name and QR code) | Toolbox buttons |
| Let users mark any element as a variable and choose or create a name | Set as variable button |
Let users insert {{Name}} placeholders into text | Set as variable button in text mode |
You can also add variables to a template beforehand, using the <VAR> marker or the Template Editor in Customer's Canvas Hub. This guide does not cover that option.
Insert variables through the Toolbox
Add a "Variables" button group to the Toolbox with nested buttons that insert specific variables. This works well when the list of variables is limited (for example, a QR code, a name, and a URL) and you don't expect your users to invent their own variables.
You can use the approach described in the Custom Design Elements section of the Toolbox article. The key point is to define a button with an itemConfig object, where you specify the element name and set the isVariable property to true.
The following example adds a button group with two nested buttons. The first one inserts a text element that is a variable named CustomerName, and the second one inserts a QR code that is a variable named Url:
{
   "widgets": {
      "Toolbox": {
         "buttons": [{
            "translationKey": "Variables",
            "translationKeyTitle": "Insert a variable",
            "iconClass": "cc-icon-variables",
            "buttons": [
               {
                  "translationKey": "Customer Name",
                  "action": "Text",
                  "itemConfig": {
                     "name": "CustomerName",
                     "isVariable": true,
                     "text": "<John>",
                     "textPermissions": {
                        "allowChangeText": false
                     }
                  }
               },
               {
                  "translationKey": "QR Code",
                  "translationKeyTitle": "Add URL as QR Code",
                  "action": "CustomBarcode",
                  "itemConfig": {
                     "name": "Url",
                     "isVariable": true,
                     "barcodeContent": {
                        "barcodeFormat": "QR_CODE",
                        "barcodeSubType": "Url",
                        "url": "example.com"
                     },
                     "barcodePermissions": {
                        "allowChangeBarcodeContent": false
                     },
                     "location": {
                        "originX": "center",
                        "originY": "center",
                        "x": "50%",
                        "y": "62%"
                     },
                     "width": "33%"
                  }
               }
            ]
         }]
      }
   }
}
The buttons appear in the Toolbox:
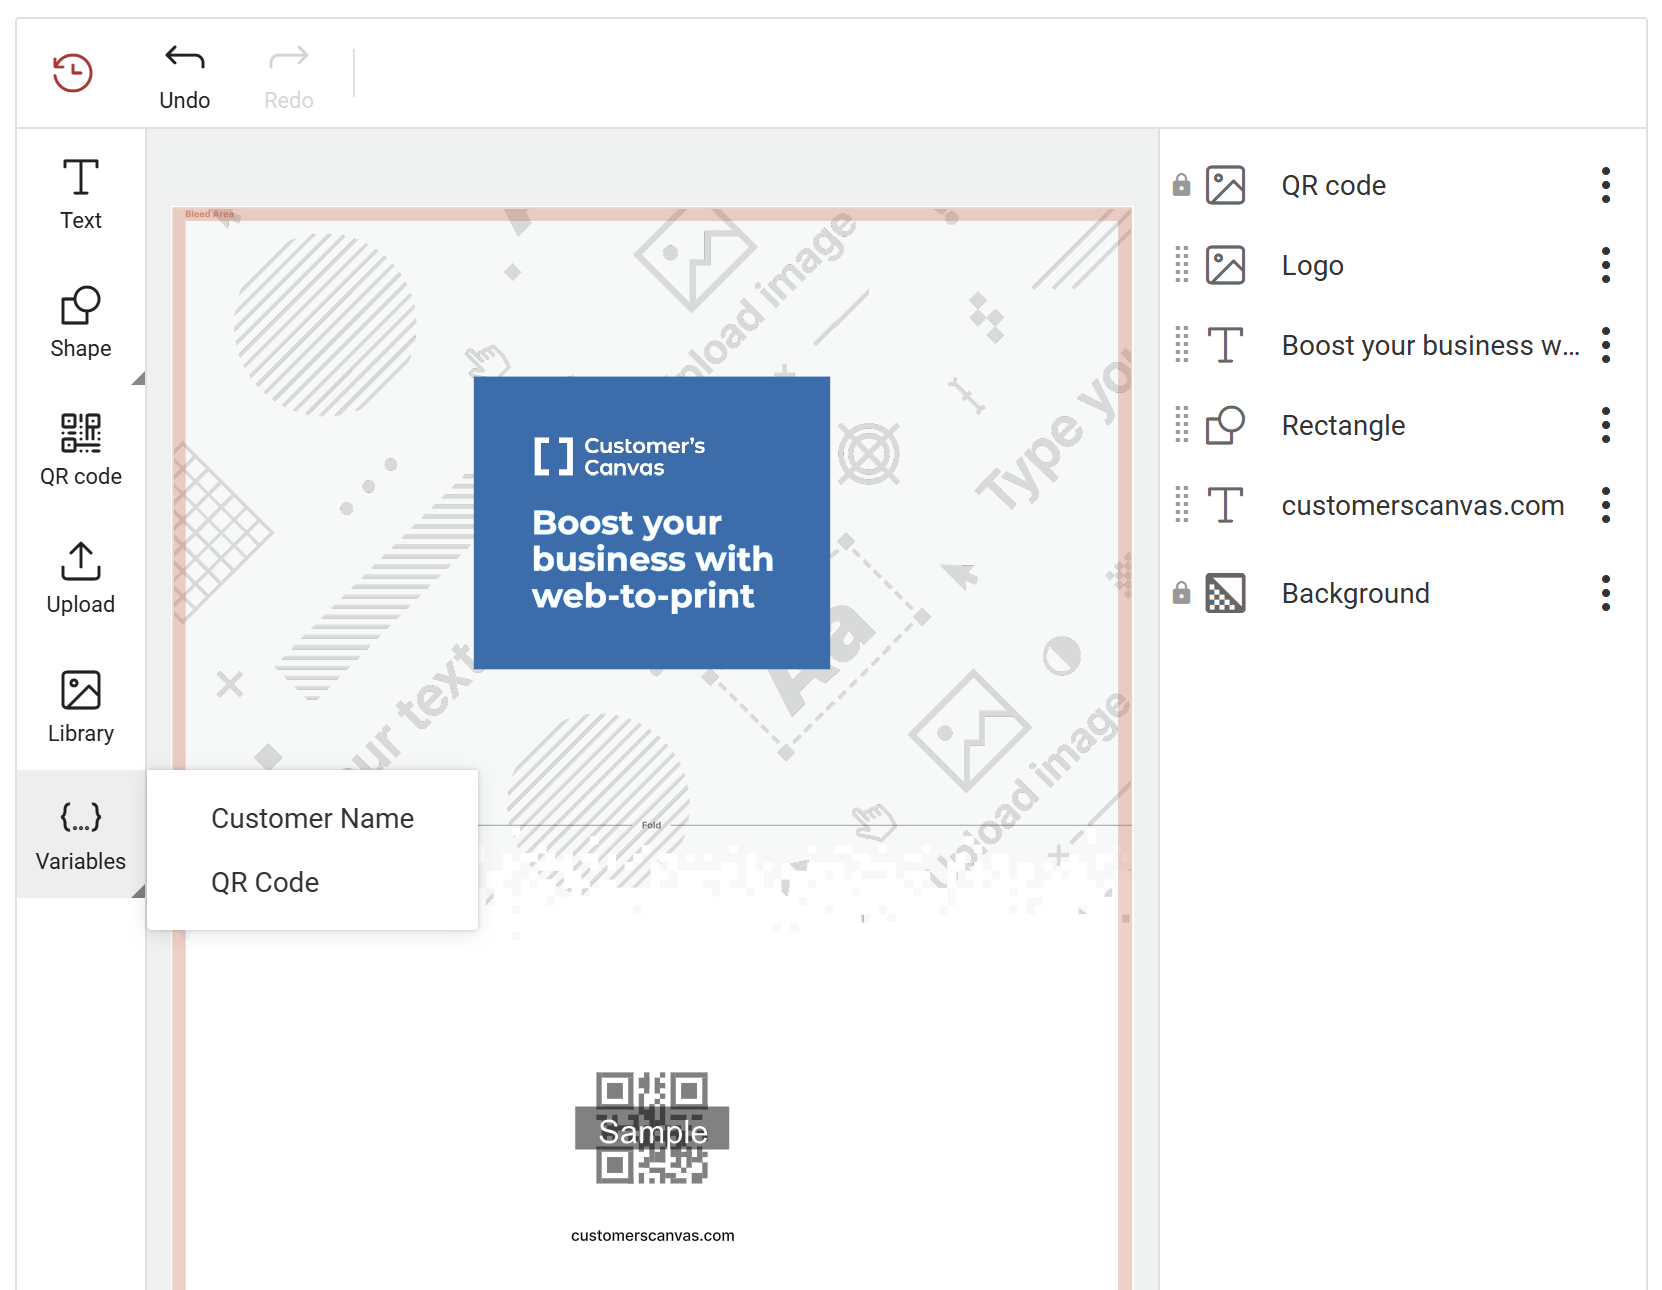
We recommend that you prevent users from editing the content of a variable. In the example above, this is done with the textPermissions.allowChangeText and barcodePermissions.allowChangeBarcodeContent properties set to false. The content of such an element is a placeholder that will be replaced with real data, so if users change it, they may be confused about what will appear in the final design.
When the user clicks one of these buttons, the element is added to the canvas and becomes a variable. When you call getVariableItems() (see Read variable names from the editor), the list will include CustomerName and Url.
The same approach works for images (the CustomImage action) and image placeholders (the CustomPlaceholder action). See the Toolbox article for all supported element types and their properties.
Make variables through the editor
To enable or disable the Set as variable button, use the widgets.TopToolbar.variablesButtonEnabled configuration parameter (in clientConfig.json or in the editor configuration you pass to the loadEditor() method):
{
   "widgets": {
      "TopToolbar": {
         "variablesButtonEnabled": true
      }
   }
}
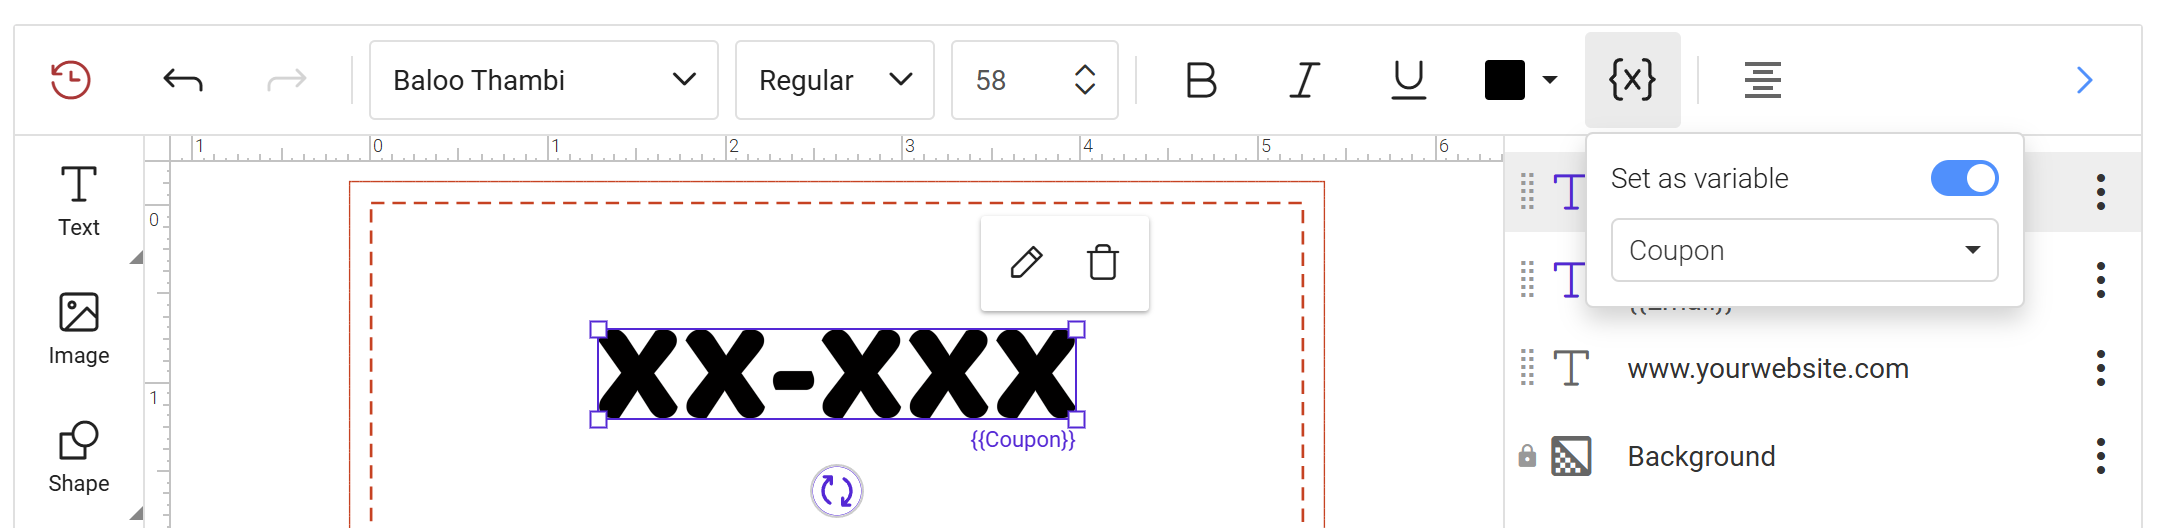
The Set as variable button appears in the top toolbar.

To mark an element as a variable:
- Select the element.
- Click Set as variable.
- Choose a variable name from the list or type a new one.
The selection frame changes its color to purple, and the variable name is displayed under the element (if it is large enough).
After you save the design, the variable appears in the list returned by getVariableItems().
Add InString variables through the editor
To add an InString variable, type {{MyVariable}} inside a text block. However, this requires users to:
- Know the available variables.
- Use double curly brackets (for example,
{MyVariable}or[[MyVariable]]won't be recognized). - Avoid applying formatting in the middle of a variable name.
To make this easier, users can use the same Set as variable button in text editing mode.
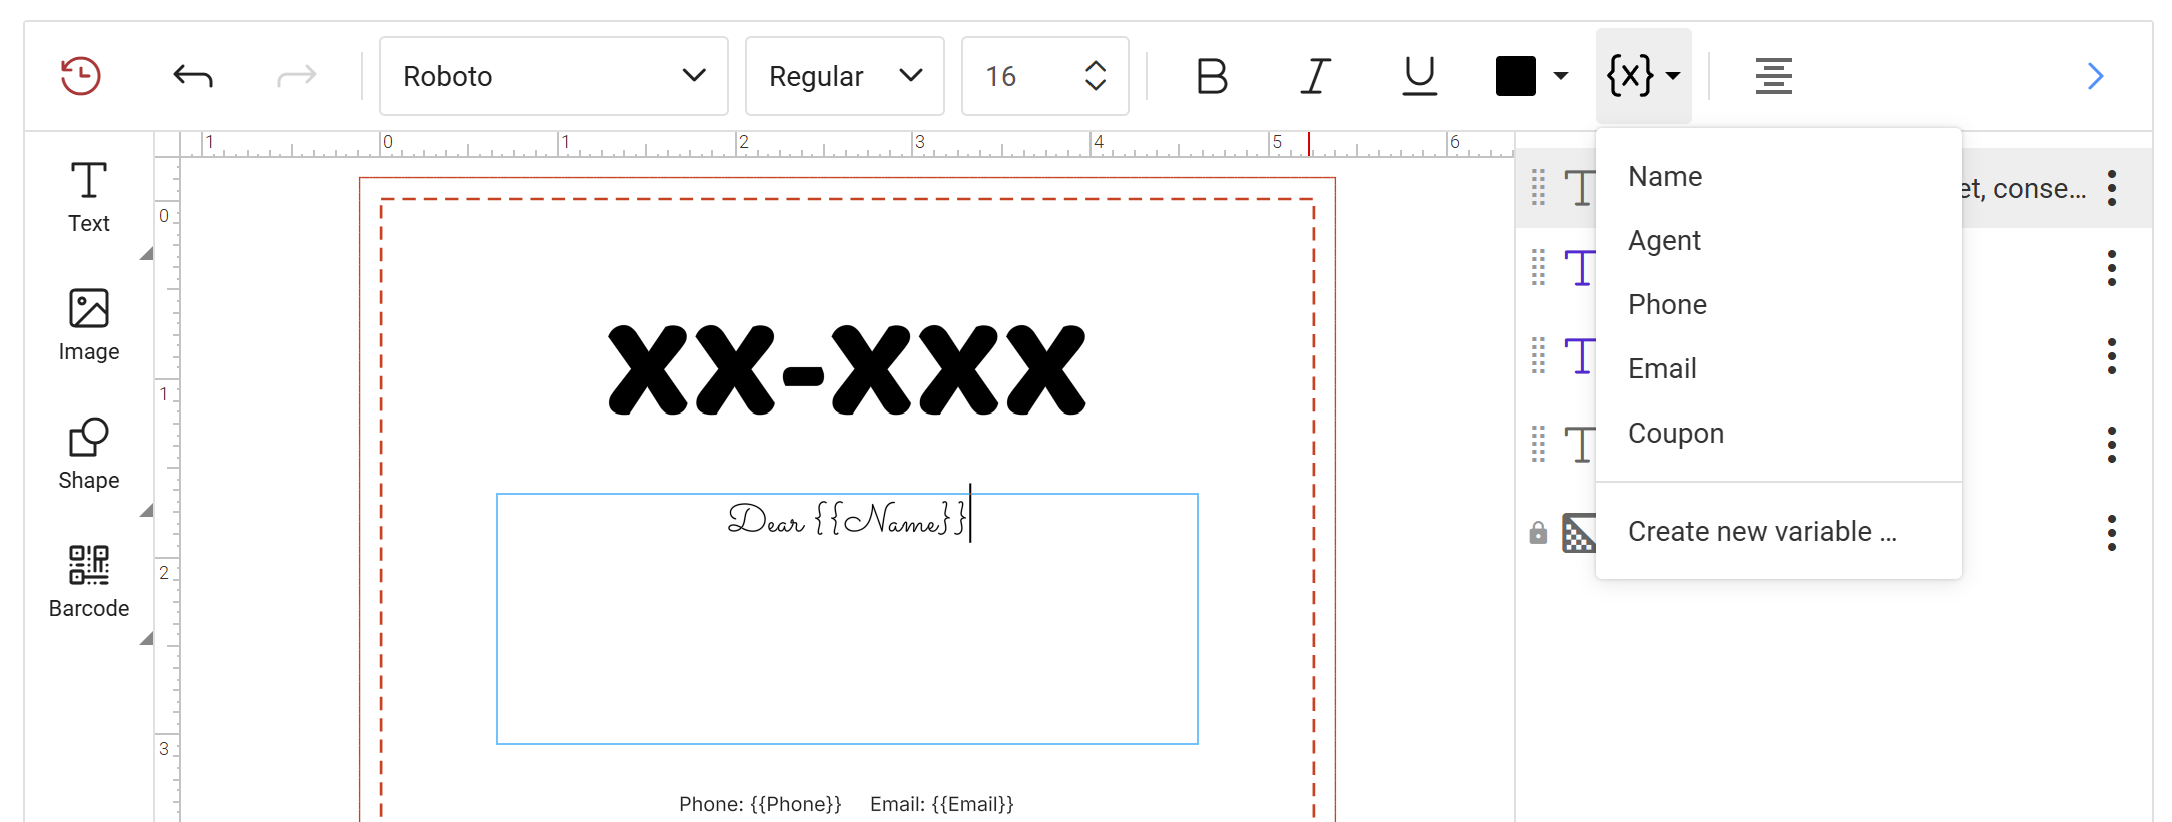
In text editing mode, the dropdown menu looks a bit different for this button. The user sees a list of available variables and when they choose it, this variable is automatically inserted into the text.
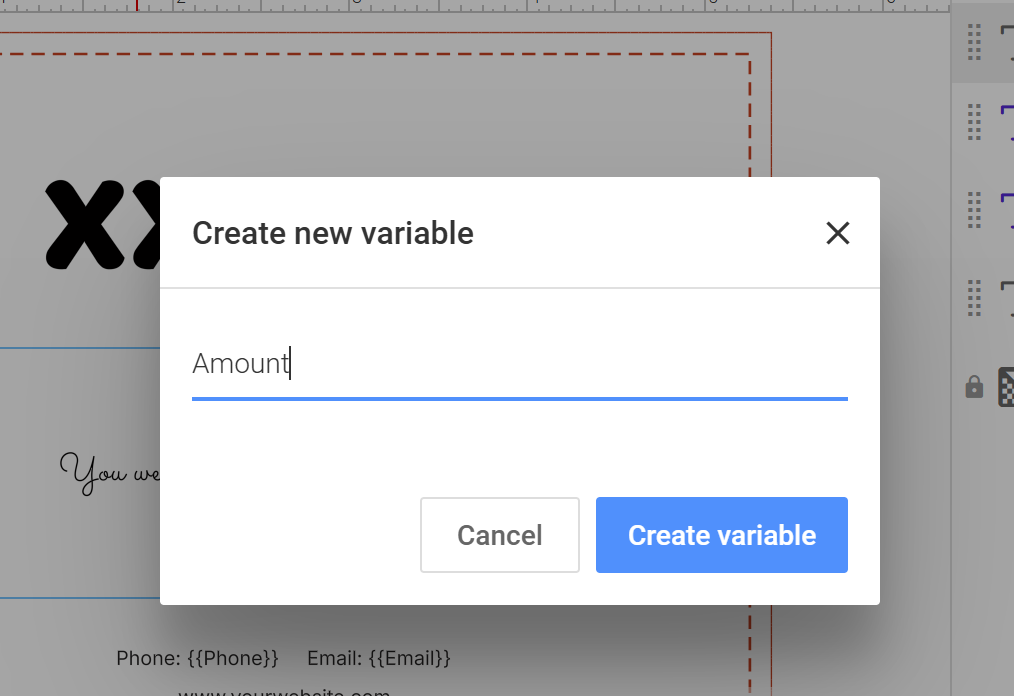
If a user chooses the Create new variable... menu item, a dialog appears where they can type a new variable name.
Set up a list of available variables
When a template already includes some variables or a user creates new ones, these variables become available in a list of variables. However, what if you would like to pre-configure some standard variables which are not in a template yet?
To pre-configure variables, use the variableTokens configuration option. It is located at the top level and accepts an array of variable descriptions:
{
   "variableTokens": [
      { "title": "First name", "token": "{{FirstName}}" },
      { "title": "Last name", "token": "{{LastName}}" }
   ],
   "widgets": {
      "TopToolbar": {
         "variablesButtonEnabled": true
      }
   }
}
Here, the title is a display name the user sees in the dropdown list and token is the text inserted as an InString variable.
Read variable names from the editor
Once the user finishes customizing a template, you can use the API to get the list of variables it contains. You need this list to map variables to the data entries from your application (for example, when your customers upload a CSV file or you map fields to CRM database queries).
To get the variables from the editor:
const product = await editor.getProduct();
const variables = await product.getVariableItems();

variables.forEach(item => console.log(item.name, item.type, item.value));
getVariableItems() returns an array of IVariable objects with the name, value, and type properties. The type is Text, Image, ImagePlaceholder, Barcode, BarcodePlaceholder, or InString for InString/interpolation placeholders. If the design contains no variables, the array is empty.
If you save the state file, you can also use the GET /api/users/{userId}/states/{stateId}/variables endpoint.
If you are using Design Editor along with Customer's Canvas Hub, use the appropriate endpoint from the Design Atoms API service.
Use the returned name values to map variables to the data entries from your application. For InString variables, the name is the text between {{ and }}, including spaces. See more about variable name handling in Design Editor at Variable names and data entries.
Once you set up a mapping, use the API to populate templates with data (either single data entries or variable data sets), as described in Personalized rendering.
If you are using Design Editor along with Customer's Canvas Hub, use the Design Atoms API endpoints for variable data printing.
Next steps
- Personalized rendering: populate a template with data and get a print-ready PDF.
- Toolbox: configure other custom design elements and button groups.
- Variables: learn more about the kinds of variables and how their names are handled.