- Introduction
- What's New?
- Features
- Getting Started
- Integration with E-commerce
- Integration with Remote Asset Sources
- Printable Files and Proof Images
- Configuring Products
- Creating Product Templates
- User Interface
- Configuration Files
- API
- Visual Proofing Tool
- Variable Data Printing
- System Requirements
- Troubleshooting
- Licensing
- Copyright Notices
You’re viewing outdated documentation. View the latest Customer’s Canvas On-Premises documentation.
Compiling Customer's Canvas from Source Code
Applies to: Customer's Canvas On-Premises; Design Editor 4.4.25, 4.x (may differ) · Archived documentation
You can request the Customer's Canvas source code if you purchased the on-premises version. The Customer's Canvas source code is a Visual Studio solution designed for Visual Studio 2017.
Prerequisites
- Download and install Microsoft Visual C++ 2017 Redistributable Package (x64).
- Download and install Microsoft .NET Framework 4.6.2 or higher.
- Download Visual Studio 2017 and install it with the ASP.NET and web development workload enabled.
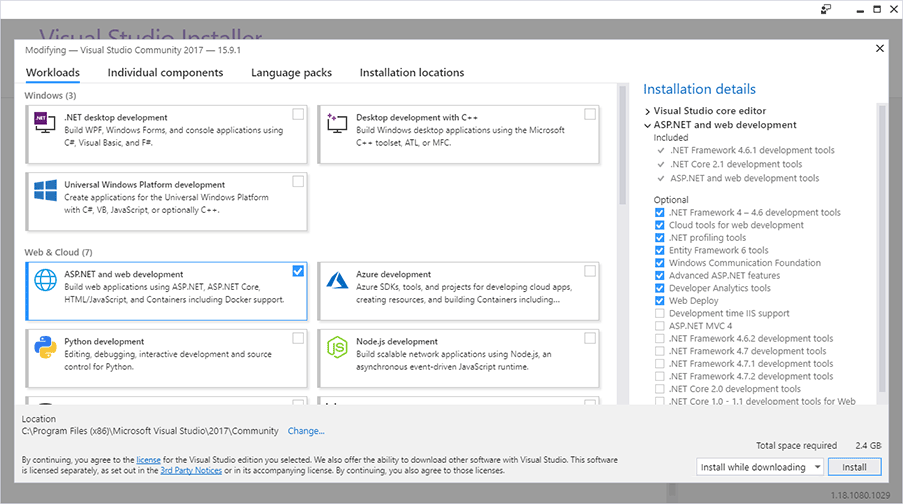
- Download and install TypeScript 2.4.0 for Visual Studio. Note that you may obtain compilation errors if you install a different version of TypeScript.
- Download and install node.js 8.11.3 (x64) or higher.
Compiling the Application
To build the solution:
- Extract the
CustomersCanvasSrc.ziparchive to your file system. - Open
\src\CustomersCanvas.slnin Visual Studio. - Navigate to Tools > Options > Projects and Solutions > Web Package Management > External Web Tools and move
$(PATH)above the.\node_modules\.bininternal path.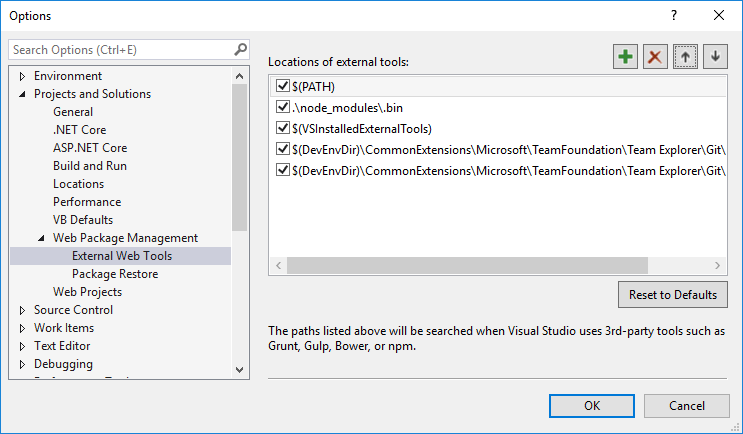
- Install npm packages: in Solution Explorer, right-click
package.jsonin the SimplePolygraphy project and click Restore Packages.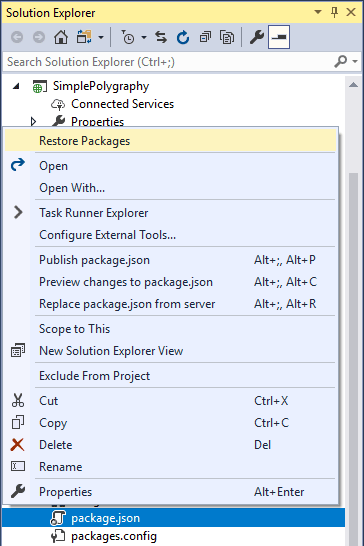
- Next, select Release on the Solution Configurations menu and Any CPU in Solution Platforms.
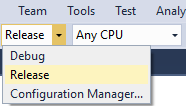
- Build the solution: press Ctrl+Shift+B or click Build > Build Solution on the menu.
- Copy your license file (
Aurigma.GraphicsMill.lic) to the\src\SimplePolygraphy\bin\folder or use an alternative way of registering your license keys. - Include the license file in the project; this way the license file will be sent to the server when the project is published. To include the file in the project, perform the following steps:
- Click the Show All Files icon in the Solution Explorer.
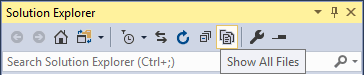
- Open the
\bin\folder, findAurigma.GraphicsMill.lic, right-click it, and then click Include In Project.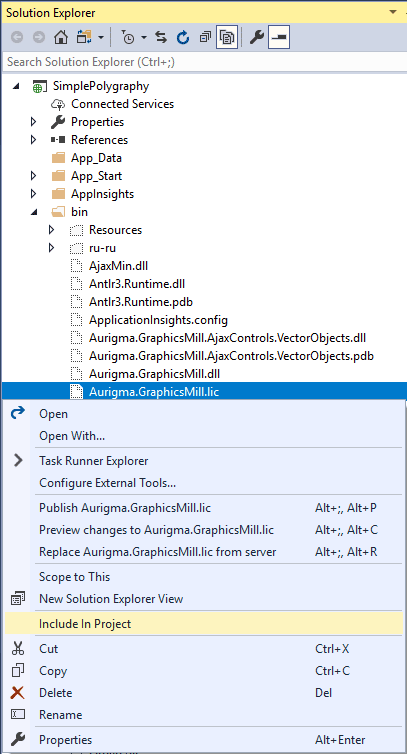
- Click the Show All Files icon in the Solution Explorer.
- Set SimplePolygraphy as a startup project: right-click SimplePolygraphy in Solution Explorer and click Set as StartUp Project.
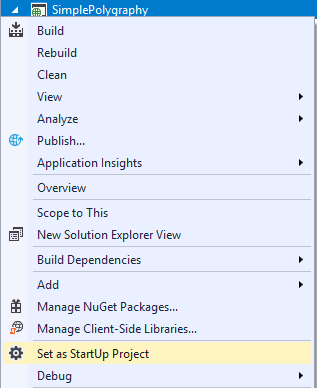
- Start the project: press Ctrl+F5 or click Debug > Start Without Debugging on the menu. In your browser, you should see a page containing an image carousel allowing you to select a product and the web-to-print designer.
If you run Visual Studio as an administrator, you can deploy this application: right-click SimplePolygraphy in Solution Explorer and click Publish. You can find more information on the deployment in the Deploying Customer's Canvas to Windows Servers topic.
If you face a compilation problem, refer to the Troubleshooting topic for a solution.