- Introduction
- What's New?
- Features
- Getting Started
- Integration with E-commerce
- Integration with Remote Asset Sources
- Printable Files and Proof Images
- Configuring Products
- Creating Product Templates
- User Interface
- Simple and Advanced Web-to-Print Editor Modes
- Using the Image Gallery
- The Asset Manager
- The Image Editor
- Rich Text Editor
- Customizing the User Interface
- Customizing Widgets on a Per-page Basis
- Customizing the Toolbox
- Markings
- The Preflight Check
- Integration with Facebook and Instagram
- Localization of Customer's Canvas
- The Product Loading Screen
- Themes
- Watermarks
- Configuration Files
- API
- Visual Proofing Tool
- Variable Data Printing
- System Requirements
- Troubleshooting
- Licensing
- Copyright Notices
The Asset Manager
Applies to: Customer's Canvas On-Premises; Design Editor 4.4.25, 4.x (may differ) · Archived documentation
Customer's Canvas provides two widgets for selecting images: Image Gallery and Asset Manager. The first widget allows your users to add images from Facebook and Instagram, whereas the Asset Manager allows them to add images from remote servers, Depositphotos, and Google Drive through API or direct URLs. Both widgets allow for selecting assets from the public and user galleries.
This topic dwells on the Asset Manager and supported asset sources. The Image Gallery is described in the corresponding topic.
The Asset Manager Overview
The Asset Manager appears when your users add new images to a product or replace previously added images. The following screenshot illustrates the user interface of this widget.
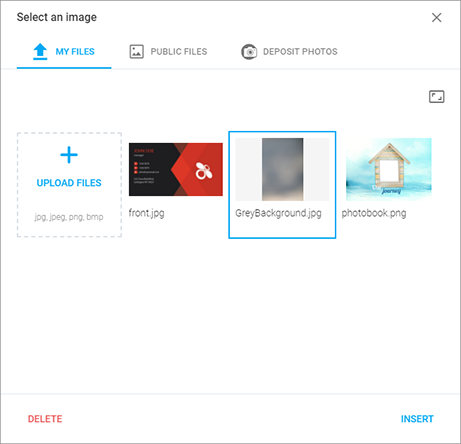
An asset source appears on a single tab of the Asset Manager. Different asset sources may have different controls in their toolbars that enable searching, sorting, filtering and more. For example, the My Files tab has only the Change view button, which allows your users to choose between the Fill and Fit preview modes. You can disable the toolbar on a tab by using the toolbarEnabled property. If you want to hide asset names, set assetNameEnabled to false.
Configuring the Asset Manager
There are two ways to enable the Asset Manager in Customer's Canvas:
- Set the defaultAssetSelectWidget property to "AssetManager".
json
{ "defaultAssetSelectWidget": "AssetManager" } - Define the AssetManager button in Toolbox.buttons.
json
{
    "widgets": {
        "Toolbox": {
            "buttons": [{
                "type": "AssetManager",
                "action": "Image",
                "translationKey": "Toolbox.IMAGE",
                "translationKeyTitle": "Toolbox.TITLE_ADD_IMAGE",
                "iconClass": "cc-icon-add-image"
            }]
        }
    }
}
You need to specify these items in ~\Configuration\clientConfig.json. defaultAssetSelectWidget enables either "AssetManager" or "GalleryDialog" globally in the editor, whereas the button in the Toolbox launches the Asset Manager for only adding new images to the canvas.
Also, you need to specify properties of your asset sources in the following objects:
- assetSources - defines properties of your sources.
- AssetManager.tabs - configures the tabs of this widget.
Moreover, such remote sources as Google Drive may require additional parameters of HTTP requests. You can define them in the ~\Configuration\AssetSourcesConfig.json file.
Now, let us see how you can configure the following asset sources in this widget:
The Private Gallery
To enable the private user gallery, you need to specify a source of the PrivateSource type and a list of allowed extensions. Your users are allowed to upload images of the listed types only. These images are uploaded to the ~\UserDataFolder\<userId>\images\ folder.
{
    "assetSources": {
        "My files": {
            "type": "PrivateSource",
            "allowedExtensions": [ "jpg", "jpeg", "png" ]
        }
    },
    "widgets": {
        "AssetManager": {
            "tabs": [{
                "name": "My files",
                "assetSourceInstance": "My files",
                "iconClassName": "cc-icon-uploadable"
            }]
        }
    }
}
The complete list of supported extentions is ["jpg", "jpeg", "png", "bmp", "gif", "tiff", "svg", "pdf"]. Note that the Asset Manager uploads SVG and PDF images in the raster format.
The Public Gallery
You can organize public assets in ~\PublicGalleryFolder\ on your server. This is the default folder, but you can specify another storage in ~/Configuration/AppSettings.config as follows:
<appSettings>
    <add key="PublicGalleryFolder" value="~/NewPublicGalleryFolder" />
</appSettings>
To enable the public gallery in the Asset Manager, you need to specify a source of the PublicSource type and a list of allowed extensions.
{
    "assetSources": {
        "Public Gallery": {
            "type": "PublicSource",
            "allowedExtensions": [ "jpg", "jpeg", "png", "gif", "svg" ]
        }
    },
    "widgets": {
        "AssetManager": {
            "tabs": [{
                "name": "Public files",
                "assetSourceInstance": "Public Gallery",
                "iconClassName": "cc-icon-add-image"
            }]
        }
    }
}
The Asset Manager supports the following extentions: "jpg", "jpeg", "png", "bmp", "gif", "tiff", "svg", "pdf". Note that SVG and PDF images are added in the raster format.
When you design a product and have a set of stock images prepared for such products, you may want to configure your public gallery on a per-product basis. In this case, you can list subfolders containing these images in the rootCategory object.
{
    "assetSources": {
        "Public Gallery": {
            "type": "PublicSource",
            "allowedExtensions": [ "jpg", "jpeg", "png", "gif", "svg" ],
            "rootCategory": {
                "name": "Logos",
                "categories": [
                    {
                        "name": "photos",
                        "categories": [{ "name": "buildings" }]
                    },
                    {
                        "name":  "shapes"
                    }
                ]
            }
        }
    }
}
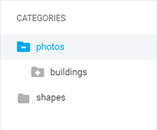
This configuration hides all folders in the source except for the specified subfolders in the Logos folder. As a result, you can see the following category tree.
Images Through Direct URLs
The Asset Manager allows you to define images through direct URLs in MemorySource. Here, you need to specify links to both preview and source for every asset. The previews are low-resolution images that only appear in the gallery, whereas the sources appear on the canvas and are used for product rendering. You can define MemorySource as follows:
{
    "assetSources": {
        "External urls": {
            "type": "MemorySource",
            "rootCategory": {
                "assets": [
                    {
                        "title": "Black Cat",
                        "preview": "http://example.com/images/preview/cat2.jpg",
                        "source": "http://example.com/images/cat2.jpg"
                    },
                    {
                        "title": "White Cat",
                        "preview": "http://example.com/images/preview/cat44.jpg",
                        "source": "http://example.com/images/cat44.jpg"
                    }
                ]
            }
        }
    },
    "widgets": {
        "AssetManager": {
            "tabs": [{
                "name": "Gallery on external urls",
                "assetSourceInstance": "External urls",
                "iconClassName": "cc-icon-add-image"
            }]
        }
    }
}
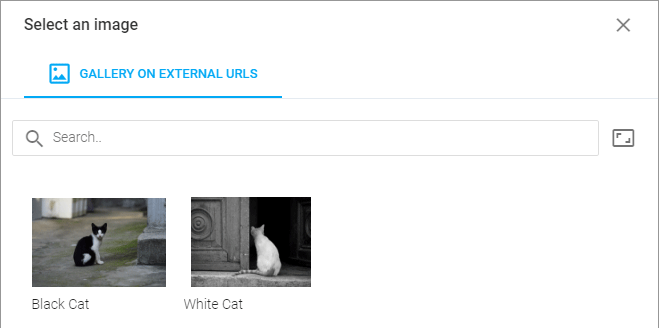
As a result, the Asset Manager displays a tab with two images.
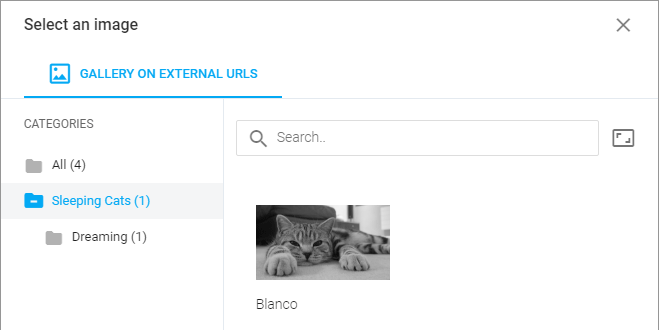
You may want to group images into categories. In this case, include a categories array in the definition of your asset source. You can organize any category tree in the following way.
{
  "assetSources": {
    "External urls": {
      "type": "MemorySource",
      "rootCategory": {
        "assets": [
          {
            "title": "Black Cat",
            "preview": "http://example.com/images/preview/cat2.jpg",
            "source": "http://example.com/images/cat2.jpg"
          },
          {
            "title": "White Cat",
            "preview": "http://example.com/images/preview/cat44.jpg",
            "source": "http://example.com/images/cat44.jpg"
          }
        ],
        "categories": [
          {
            "name": "Sleeping Cats",
            "assets": [
              {
                "title": "Blanco",
                "preview": "http://example.com/images/preview/cat37.jpg",
                "source": "http://example.com/images/cat37.jpg"
              }
            ],
            "categories": [
              {
                "name": "Dreaming",
                "assets": [
                  {
                    "title": "Gato",
                    "preview": "http://example.com/images/preview/cat121.jpg",
                    "source": "http://example.com/images/cat121.jpg"
                  }
                ]
              }
            ]
          }
        ]
      }
    }
  }
}
The Google Drive Source
Before enabling Google Drive images, you need to integrate your Google Drive account with Customer's Canvas and run the Google Drive web service.
You can set up the Asset Manager in the clientConfig.json file. This method configures an Asset Manager tab to display images from your Google Drive user account. For a service account, you need to pass such a configuration to loadEditor() at runtime. For example, you can specify a Google Drive source as follows:
{
    "assetSources": {
        "[source]Google Drive": {
            "type": "RemoteSource",
            "url": "https://example.com:3124/",
            "fileSortTypes": [
              {
                  "asc": "createdTime",
                  "title": {
                      "en": "Creation time",
                      "de": "Erstellungszeit"
                  }
              },
              {
                  "asc": "starred",
                  "title": {
                      "en": "Starred",
                      "de": "Markiert"
                  }
              }
            ],
            "requestParams": {
                "allowedItemOwnership": "all"
            }
        }
    },
    "widgets": {
        "AssetManager": {
            "tabs": [{
                "name": "Google Drive",
                  "assetSourceInstance": "[source]Google Drive",
                  "controls": { "assetNameEnabled": false }
            }]
        }
    }
}
Here, the RemoteSource type corresponds to such external sources as Google Drive. This asset source needs you to specify a URL of your API web service routed over HTTPS. For Google Drive, this property refers to the address where you set up the Google Drive web service.
In requestParams, you can specify allowedItemOwnership (either personal, shared, or all images). For service accounts, you can also specify a token generated by the getToken() method and corpora. The corpora property can be either user or domain. The first value allows you to browse images from a user's space. The domain value allows for browsing images shared with your corporate domain.
You can restrict access to images by specifying a subfolder name in the subfolder property. Alternatively, you can specify rootId, for example:
"rootId": "1hSCzgd25tVIB0pGI7EiEdrUVn5bfH2w0"You can retrieve rootId through Google Drive APIs or right from the address bar of your browser.
fileSortTypes defines how your users can sort their images in the Asset Manager's gallery. You can specify the following options:
- createdTime
- folder
- modifiedByMeTime
- modifiedTime
- name
- name_natural
- quotaBytesUsed
- recency
- sharedWithMeTime
- starred
- viewedByMeTime
You need to define a title for a sorting option. To sort images in the ascending order, set one of the options to the asc key. To enable the descending order, set an option with the desc modifier to the desc key, for example, "desc": "createdTime desc".
To sort folders in the navigation tree, use the folderSortType property. For example, "folderSortType": "name_natural" results in the tree sorted by name, taking into account shared and personal folders.
The result of the previous example may look as follows:
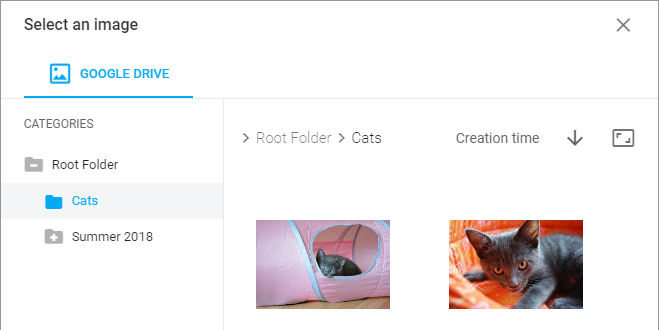
On this tab, your users can navigate through the folder tree and breadcrumbs.
Customer's Canvas does not require secret keys to render proof images. However, to render hi-res output files, you should specify hi-res secret keys for remote sources in the ~\Configuration\AssetSourcesConfig.json file. This file looks as follows:
{
    "[source]Google Drive": {
        "type": "RemoteSource",
        "hiResSecret": {
            "httpHeader": "X-GoogleDriveAPIKey",
            "secret": "UniqueSecurityKey"
        }
    }
}
In this file, object names (like "[source]Google Drive") correspond to the same names of asset sources in clientConfig.json. Here, httpHeader is a parameter of your request payload. To render the Google Drive images, you need to pass the X-GoogleDriveAPIKey parameter. The value of the secret property corresponds to the ApiSecurityKey value specified in the Web.config file when setting up the Google Drive web service.
The Depositphotos Source
To browse images from Depositphotos, you need to define the DepositPhotos source. This source requires an apiKey provided by a manager after registering with Depositphotos to work through their API.
{
    "assetSources": {
        "[source]Deposit Photos": {
            "type": "DepositPhotos",
            "apiKey": "xxxxxxxxxxxxxxxxxxxxxxxxxxxxxxxxxxxxxxxx",
            "size": "L"
        }
    },
    "widgets": {
        "AssetManager": {
            "tabs": [{
                "name": "Deposit Photos",
                "assetSourceInstance": "[source]Deposit Photos",
                "iconClassName": "cc-icon-deposit-photos"
            }]
        }
    }
}
Here, the size property specifies the size of images returned by the Depositphotos API. The following sizes are available:
- XL - the highest resolution uploaded by the contributor, say 6000x4000 pixels. This is the default value.
- L - the large size when the longest side is reduced to 2000 px at 300 DPI.
- M - the medium size when the longest side is reduced to 1000 px at 300 DPI.
- S - the small size when the longest side is reduced to 500 px at 72 DPI.
The previous example enables the Deposit Photos tab in the Asset Manager.
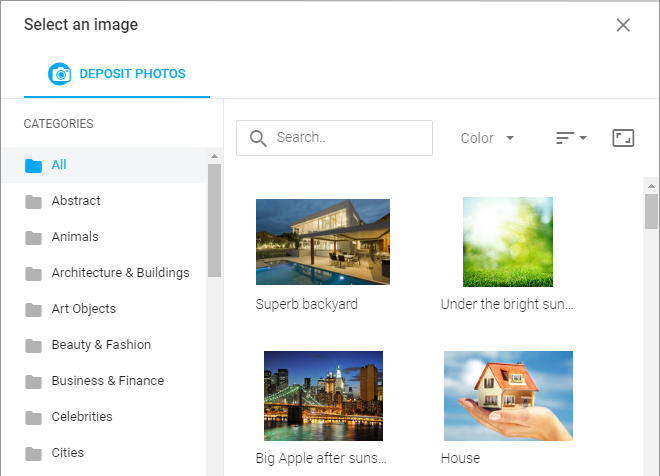
On this tab, your users can sort images by time, sales, or other options and filter images by color themes. The Depositphotos API provides these options automatically. If you want, you can hide the toolbar through the ITabConfig interface.
Integration with Depositphotos
Adding images from DepositPhotos differs from other sources. Thus, the Asset Manager only shows previews of hi-res images uploaded by contributors. The previews have a watermark. After your users have added such images to their products, they have to purchase them. The total price, which your users confirm at checkout, will include the price of the added photos.
The procedure of replacing the previews with purchased images can be reduced to the following three steps:
- Authorization on Depositphotos
- Purchase of images
- Replacement of images
These steps should be implemented by a system that includes the Customer's Canvas editor. For details, you can refer to the Depositphotos Assets topic.