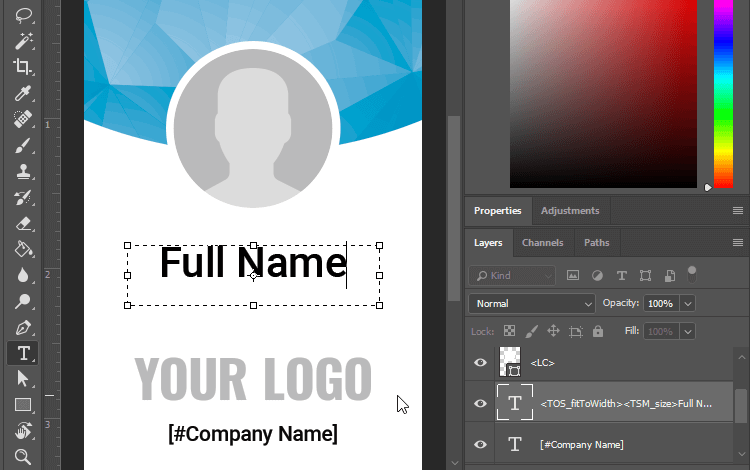
Today we are introducing the addition of copyfitting to our feature set. Now you can rest assured that, regardless of the entered text’s size, it will remain within the specified zone and will look as if it was specially customized for the zone’s size.
Copyfitting can be used in 3 different modes, depending on your design needs.
1) Fit to width
In this mode, the text is not transferred to a new line once it reaches the boundaries of the text layer, but rather scaled down to fit it.

2) Fit to width scale
Once the text reaches the boundaries of the layer, this mode shrinks it horizontally

or vertically.

3) Fit to box
This mode allows the text to be wrapped in rows, but when the end of the bounding box is reached, it will scale down proportionally.

How can you enable the copyfitting feature on the text layer?
We’ve added two new markers to Customer’s Canvas, both of which are responsible for copyfitting. TOS (Text Overflow Strategy) is a marker that dictates the behavior of the text when a text layer overflows. TSM (Text Shrink Mode) is a marker responsible for the method of reducing the text. By combining these two markers, you can achieve different modes of copyfitting for the text in your project.
When creating a design template in InDesign or Photoshop, simply add these markers to the name of a text layer that you wish to enable the copyfitting feature for. For example, you want the text to shrink as it reaches a layer’s boundaries without it moving to a new line. To do this, add the following combination of markers to the layer name: <TOS_fitToWidth> <TSM_size>
You may create a bounded text layer, both for rich and plain texts.

Next, load the PSD file into the Customer's Canvas Editor and allow your customers to personalize the text area without risking mistakes based on how the text can be entered into the frame.
For more information on setting up this feature correctly, see the documentation section.
To enable the copyfitting feature for your project, you will need to update Customer’s Canvas to v.4.2.7.


