- Introduction
- What's New?
- Features
- Upgrading the Design Editor
- Breaking Changes in 6.0
- Getting Started
- Integration with E-commerce
- Integration with Remote Asset Sources
- Printable Files and Proof Images
- Configuring Products
- Creating Product Templates
- Creating and Editing Templates in Customer's Canvas
- Elements for Creating Designs in Customer's Canvas
- Supported Markers
- Setting Markers Outside of Templates
- Defining Marker Shortcuts
- Text Elements in Customer's Canvas
- Image Placeholders
- Specifying the Image Source Folder
- Stroke and Shadow Effects in Customer's Canvas
- In-String Placeholders and Text Validation
- Text Wrapping in Customer's Canvas
- Barcode Placeholders
- Copyfitting
- Restricting Editing Designs to Certain Regions
- Product Themes
- Product Layouts
- Group Elements in Customer's Canvas
- Photoshop Templates
- Overview of Creating Templates in Photoshop
- Non-rectangular Image Placeholders
- Using Smart Objects in PSD Templates
- Placeholders with Frames
- Point and Paragraph Text
- Stroke and Shadow Text Effects
- Curved Text
- Multi-Column Text
- Typographic Designs
- Setting up Fields with Predefined Values
- Text Wrapping
- 3D Preview Mockups
- Sample PSD Files
- InDesign Templates
- User Interface
- Configuration Files
- APIs
- Add-ons
- System Requirements
- Troubleshooting
- Migrating Your Applications
- Licensing
- Copyright Notices
Typographic Designs
Applies to: Customer's Canvas On-Premises; Design Editor 6.15.0, 6.x (may differ) · Archived documentation
These days, print designs consisting of words depicted with multiple font styles are extremely popular. The size, colors, and spacing between the design elements make as much sense as the actual words and their meaning. The following image shows how such print templates may appear.
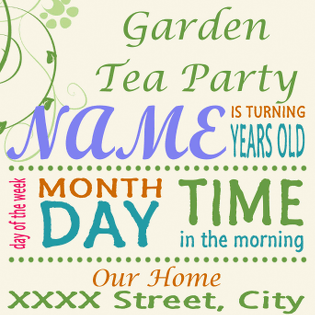
This class of designs is called typographic design, and they are very sensitive to lengths of text strings used in them. If a user changes a text element length while personalizing the template, it may offset the design layout.

The <AST> marker is specially designed to prevent such troubles in typographic designs. Plain text layers marked with <AST> never change their length and height, no matter what text a user types in the layer. The entered text is automatically resized to fill the original bounding box.
Let us mark text layers in the design with the <AST> marker. The result looks as follows:
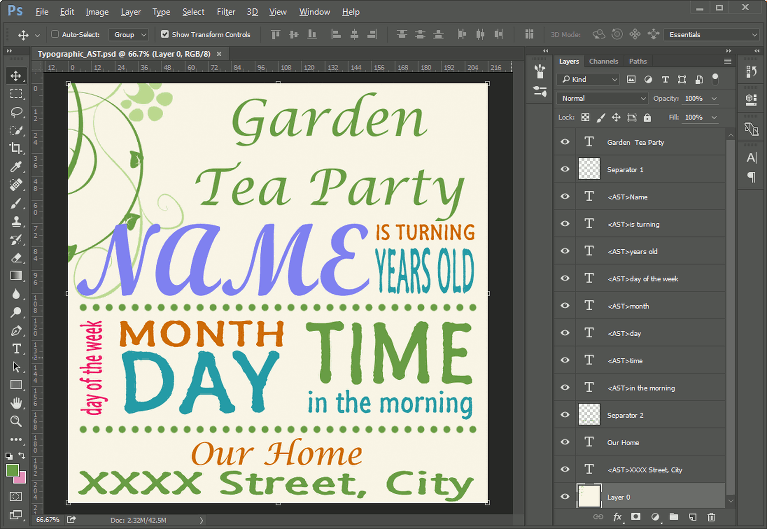
Now, let us customize this design in the web-to-print editor. As you can see, the design looks consistent now - it is customized but the layout is preserved.